Ming Aralia Leaves Turning Yellow

Ming Aralia Leaves Turning Yellow

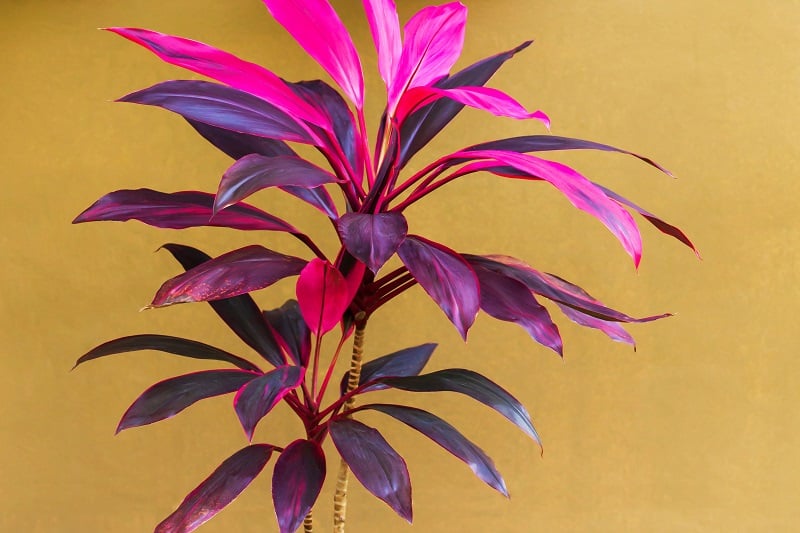
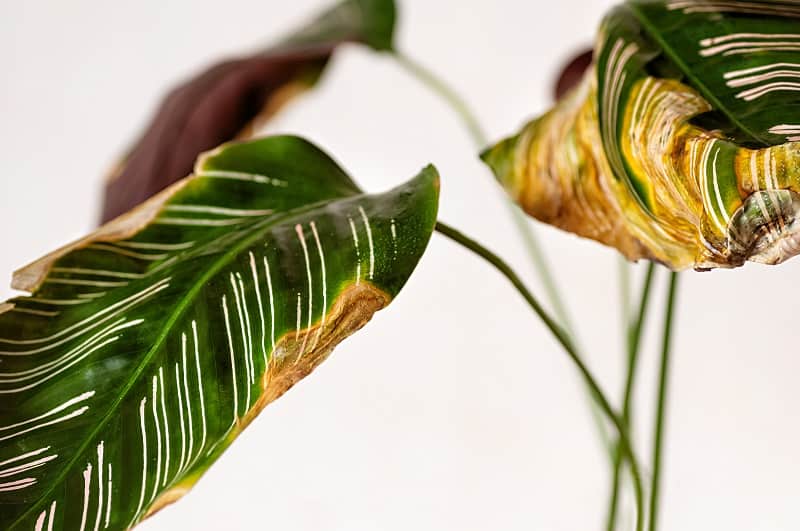
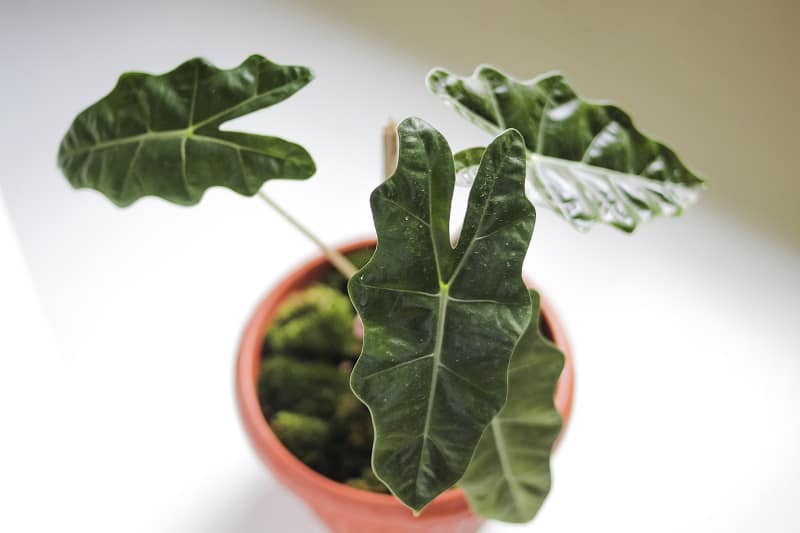
Ming aralia plants, scientific name Polyscias fruticosa, are highly adaptable as indoor plants. These perennial evergreen shrubs and dwarf trees can grow up to seven feet tall if properly cultivated. They are native to India and Polynesia, and can be great bonsai pieces with stunning foliage, especially if pruned well. Unfortunately, they also suffer from disorders or conditions that cause their leaves to turn yellow.  

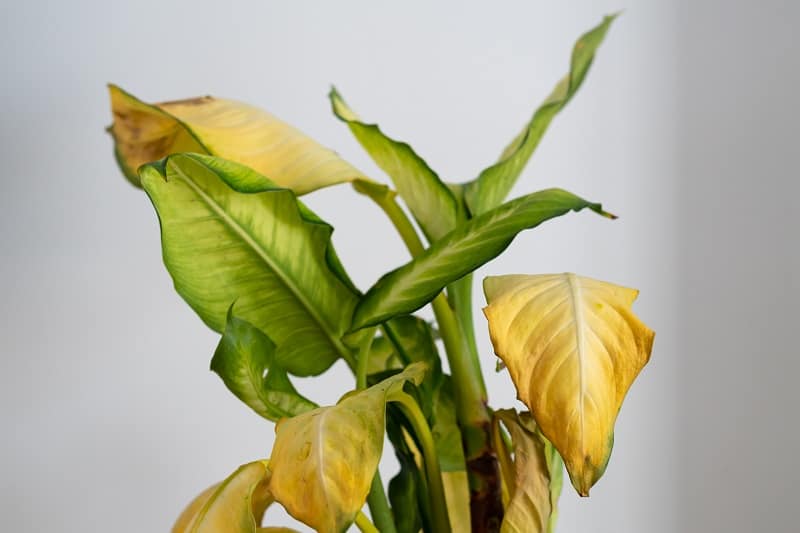
Ming aralia leaves turning yellow: What are the reasons?

Overwatering 

Ming aralia leaves could turn yellow if they receive too much water.  These plants do not like standing water or excess moisture as it provides a favorable place for bacterial and fungal growth. Since the roots are soaked with the excess moisture in the soil, they won’t be able to absorb oxygen and nutrients. Root rot could set in as the roots become suffocated with excess moisture. 

How to treat the problem:

Plants have varying water requirements depending on the temperature, growth stage, soil type, humidity and environment. Do not water the plants every few days; only water when the top two inches of soil are dry. Be sure to check the soil’s dryness before watering and change the soil mix if it is too compact. See to it that there are drainage holes in the pots so that excess water can drain out. 

Insufficient water 

Ming aralia plants can withstand a certain level of drought without damage, but this does not mean they can survive without water for long periods. Without water the soil dries out and the plant’s roots cannot absorb moisture or essential nutrients. Underwatering thus causes water stress and the leaves eventually turn yellow and become wilted. 

How to treat the problem:

To check if your plants are receiving enough water, place a pencil or stick into the potting soil and see if it comes out clean or coated with moist soil. If it comes out clean, the plants need to be watered. You can also check the moisture level by pushing your finger into the potting soil. 

Temperature changes 

These plants thrive in temperatures around 60 degrees Fahrenheit and are sensitive to temperature changes. Temperatures that are too high or too low cause their leaves to turn yellow. Placing them near air conditioners or radiators could also cause discoloration, and if you put them near window sills with cold drafts,the leaves may also turn yellow. 

How to treat the problem:

Do not place the plants near air conditioners or radiators and see to it that cold drafts cannot pass through the window during wintertime. If the plants are already affected by temperature fluctuations, try to change their location and provide more comfortable temperature conditions. Fertilizing can help alleviate leaf discoloration caused by temperature changes. 
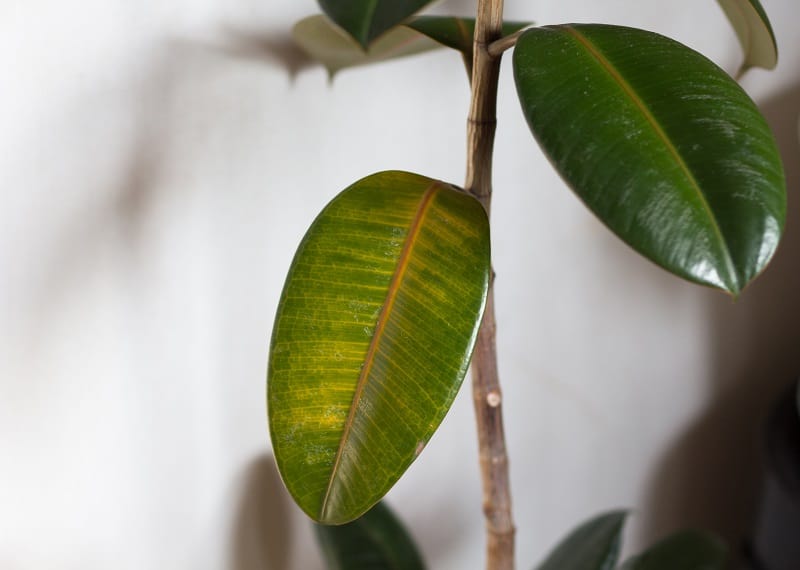
Insufficient light 

Yellowing Ming aralia leaves could also be due to insufficient light. These plants thrive in areas with a lot of light, although they prefer not to be in direct sunlight. The leaves may turn brown or yellow if they are exposed to full sun, as it causes sunburn. 

Without ample light, plants cannot make food, or chlorophyll, which is responsible for the green pigment of leaves. With insufficient light the leaves will turn yellow as the amount of chlorophyll is reduced. Less chlorophyll means less food production, and the plants will shed their older leaves to save energy. These older leaves will turn yellow and eventually fall off. 

How to treat the problem:

Place your Ming aralia plants in a spot where they are exposed to at least three to six hours of sunlight a day. Provide shade for them during the hottest parts of the day and see to it that they are not placed in areas with direct sunlight. 

High soil pH 

Ming aralia plants thrive in slightly acidic soil with a pH of 6 to 6.5. High, or alkaline, soil pH is not ideal for acid-loving plants and also renders the soil’s nutrients unavailable. This could lead to yellowing leaves because of nutrient deficiency. 

How to treat the problem:

Use a soil pH tester to check the pH levels and correct the pH if too acidic or alkaline. Squeeze some drops of lemon juice on the soil to lower the pH. Aluminum sulfate and sulfur can also reduce the pH levels. 

Nutrient deficiency 

Ming aralia leaves can also turn yellow due to nutrient deficiency.  These nutrients include iron, nitrogen, manganese and zinc. 

A lack of iron results in chlorosis, or the loss of the normal green color of the leaves, and without nitrogen plants cannot produce chlorophyll, resulting in pale, yellow leaves. 

How to treat the problem:

Provide the right soil mix for your plants so they can absorb essential nutrients. Consider other factors before fertilizing the plants, and to combat iron deficiency use chelated iron or ferrous sulfate via foliar application. 

Insect infestation 

Another reason Ming aralia leaves turn yellow is the presence of insects or pests. Mealybugs, aphids and spider mites could invade the plants and suck the juices from their leaves. This weakens the plants and results in yellowing leaves. 

How to treat the problem:

To eradicate pests, spray detergent or insecticidal soap onto the plants. Other effective options include neem oil or alcohol mixed with water. 

Conclusion 

Ming aralia plants are perennial evergreens ideal for indoors. These tropical plants have stunning foliage, but are also prone to yellowing leaves. The reasons could be overwatering, underwatering, insufficient sunlight, nutrient deficiency, high soil pH or insect infestation. 

Image: istockphoto.com / Kattiyaearn

Lavender Turning Yellow

Lavender Turning Yellow

Lavender comprises 47 known species of flowering plants of the mint family Lamiaceae. These plants are native to the Old World and the Canary Islands, although they are now widely cultivated across Europe, the Mediterranean, Southwest Asia and Southeast India. They are cultivated as ornamental plants, culinary herbs and for the extraction of essential oils. These perennials bloom from June to August but, like most plants, they are also prone to infections and conditions that cause yellowing leaves. 

Lavender turning yellow: What are the reasons?

Nutrient-rich soil 

Yellowing lavender could be due to a soil mix that is too high in nitrogen. These plants do best in low to medium fertility potting soil. If the soil contains too much nitrogen from manure or enriched compost, the lavender tends to turn yellow and bear fewer flowers.

To fix this, adjust the soil before planting. Lavender thrives in a well-draining soil mix that ideally contains at least one-third horticultural sand or grit and two-thirds ordinary potting soil, which is available at garden centers. The sandy mix recreates the sandy soil type that lavender is accustomed to in countries like Portugal, Spain and France. 

If the plants are placed in a low to medium fertility soil mix, they will bear more flowers, the foliage will be greener, and they will produce a stronger aroma. If your lavender plants have yellow leaves, it may take a few weeks for them to recover when transferred to a new potting mix. Just be patient, as they will eventually regain their green hue. 

Overfertilization

Lavender thrives in low to medium fertility soils, which is why they do not require additional fertilizers. However, some plant owners tend to fertilize their plants  regardless. This results in yellowing leaves, fewer blooms, a less intense aroma and an untidy appearance. 

To fix this, adjust the new soil and use horticultural sand or grit to create a more porous mix for good drainage and root respiration. 

Root rot due to overwatering 

Lavender could also turn yellow due to root rot, which results from overwatering the plants. If you are watering too frequently, or if the soil is slow draining or the pots do not have drainage holes, root rot will likely develop. Lavender in pots usually just needs a good soak once every two to three weeks. If you are watering more than this, you are probably overwatering. 

Lavender is a heat-tolerant plant that prefers its soil to dry out between watering. Soil that is always moist promotes fungal diseases like root rot, causing the leaves to turn yellow or brown, and possibly also droopy. Make sure to add a generous portion of sand or grit before you plant the lavender to ensure proper soil drainage. 

To fix the root rot problem, remove the affected plant from the soil and snip off the rotten roots with a sterile pair of pruners. Leave the healthy and normal roots. Replant the lavender in a fresh potting mix with plenty of sand or grit, and allow it to dry out for two weeks. The plants should be placed in a shady location away from rainfall to allow the roots and soil to dry out. 

After the two week period, water your plant once every two or three weeks until the fall. Avoid watering the plants during winter as they are in a state of dormancy. 

If detected early, root rot can be managed and the plants can recover accordingly. 

Stress due to inappropriate pots 

Lavender turning yellow could be attributed to stress in lavender planted in inappropriate, or too-small, pots. Plants become root bound if planted in pots of the wrong size. To fix this, plant your lavender in pots at least 12 to 16 inches across. 

With the right size pot, the plants will have enough space to establish themselves, while the soil will have ample moisture and nutrient access. To avoid the onset of root rot, the pots should also have adequate drainage and should not stand in stagnant water. 

Soil pH  

Lavender plants prefer soil that is neutral or alkaline, although they can tolerate mild soil acidity. If they are planted in an acidic soil mix, they may have a hard time absorbing nutrients, and this may cause yellow leaves and stunted growth. 

To fix the problem, avoid using acidic compost and plant the lavender in normal potting soil. Add at least a tablespoon of horticultural lime or a half-cup of wood ash to make sure the soil mix is within the correct range. If you suspect that the soil is too acidic, remove the plants at once and replant them in new soil with lime to allow them to recover. 

Conclusion 

Lavender plants are drought-resistant perennials grown for their essential oils and as culinary herbs. They can suffer from yellowing leaves if their soil is too rich in nutrients or if they are over-fertilized. The leaves may also yellow due to root rot from overwatering, or due to the soil’s pH levels. 

Image: istockphoto.com / blueenayim

Emerald Cedars Turning Yellow

Emerald Cedars Turning Yellow

A yellowing emerald cedar is most probably stressed due to an environmental factor that is affecting its general health. The first step in fixing the problem is correctly identifying the cause of the discoloration.

The most common causes of emerald cedars turning yellow are diseases, soil type, pests, drought, root desiccation, leftover twine, overwatering, overfeeding and high temperatures.

In this article, we will discuss the different causes of yellowing emerald cedars and how to remedy each one.

Why is my emerald cedar turning yellow?

Fungal diseases

These usually go hand in hand with other causes of yellowing, because pathogens like to attack plants when they are at their most vulnerable.

If you suspect a fungal problem with your emerald cedar and you can see spots on the foliage in the summer, it is best to remove all the affected branches to stop the spread as soon as possible. If, even after removing the contaminated branches, the problem persists, you might need to use an antifungal spray to bring the infection under control.

Soil type

If you got your plant from a nursery and you plan on planting it outdoors, it is normal for the plant to go through a period of adjustment because the soil it is used to may be drastically different to the soil in your garden. This change in the plant’s living conditions is enough to cause it stress.

It is also not advisable to plant the emerald cedar in soil that is too compact, such as that with a high clay content, and adding organic material on top of the soil will help younger roots develop better.

Emerald cedars like their soil to be a bit moist but not soggy, so you should use well-draining soil that does not retain too much moisture.

Pests

A common pest that attacks emerald cedars is the aphid. These insects suck the sap from the plant and feed on it. The more they feed on the plant, the more damaged the area will become, leading to yellowing of the foliage.

Aphids may be hard to spot with the naked eye, so you really need to examine the plant closely to find these tiny insects, which can be brown, black, green or even orange in color.

You can get rid of aphids by blasting them off with the spray nozzle on your garden hose, or you can use a spray designed specifically for eradicating aphids.

Another insect that attacks emerald cedars is the crawler mite. These are either yellow, brown or red and can be spotted in webbing in the tree’s branches.

You can use an insecticidal soap to get rid of these insects, or blast them off using your garden hose.

A small infestation of either insect does not have a large impact on the emerald cedar, but it can damage the plant aesthetically.

Root desiccation

Root desiccation happens when the roots of the plant dry out and discourage the growth of new roots. This usually happens to the plant during transport, and can lead to the yellowing or browning of the plant. Plants that were grown in burlap are more at risk of root desiccation than those planted in containers, because almost all of their original root system is shed upon excavation.

You can avoid this from happening by watering the plant extensively when it is still growing and adjusting to its new living conditions. Watering is very important,especially in the warmer months in places where the weather is dry. Emerald cedars are more appreciative of deep watering twice a week than of light watering every day.

Leftover twine

When you take an emerald cedar home, before planting it in the ground, check the stem and the roots in case there is any rope or twine left on it that might not break down in the soil. When rope or twine is not removed completely, it might cut into the plant as it grows larger. This may cause yellowing and, if not resolved in time, the plant can even die.

Burlap that has been treated with copper sulphate can also cause stunted growth if it is not removed before planting. Copper sulphate prevents new roots from growing so it is not ideal to keep on the plant after planting.

Overwatering

When you overwater your emerald cedar it can cause the roots of the plant to drown and die. Plant roots need to be able to dry out between watering so that the roots can get access to oxygen. When the roots die, they become susceptible to opportunistic fungi and bacteria, which can cause a condition known as root rot. The rot moves up from the roots to the plant’s stem and foliage, turning them yellow and brown, and could possibly kill the entire plant.

You can avoid overwatering your emerald cedar by making sure you plant it in well-draining soil that does not retain too much water. Adjust your watering schedule depending on the season and the weather. Water the plant more frequently during the summer or whenever the weather is hot, and water less frequently during the winter.

Overfeeding

If you fertilize your emerald cedar too much or too often, it can lead to damaged roots and yellowing leaves.

Fertilize the plant three times during its growing period and refrain from fertilizing during the summer, as this is when the plant goes into dormancy.

If you have little to no experience of handling fertilizer, do some research first, or hire a professional to do the job for you.

High temperature

The foliage of the emerald cedar can turn yellow or brown if exposed to the extreme heat of the summer sun or warm winds. This does not really do much damage to the plant’s overall health, but it can affect the aesthetic of the plant. If the yellow or brown foliage is bothering you, just prune off the damaged parts.

Conclusion

A yellowing emerald cedar is suffering stress caused by an environmental factor. You can fix this problem by identifying what exactly is causing the stress in the first place. The faster you identify the cause, the sooner your plant will be able to recover.

The most common causes of yellowing emerald cedar are diseases, soil type, pests, drought, root desiccation, leftover twine, overwatering, overfeeding and high temperatures.

Image: istockphoto.com / Elmar Langle

Green Onions Turning Yellow

Green Onions Turning Yellow

Green onions are also called scallions or spring onions. They are a vegetable species of the genus Allium. These plants have a milder taste than regular onions, and their close relatives are shallots, chives, leeks, Chinese onions and garlic. Their leaves are used raw or cooked, and they are available year-round. Like most plants, they are also prone to disorders that may cause them to yellow.

Common causes for green onions turning yellow 

Overwatering or underwatering 

Green onion plants thrive in soil that has consistent moisture, which means they should be properly and regularly watered. If you notice the leaves turning yellow, it could mean that you are over- or underwatering them. To figure out whether a watering issue is the culprit, push your finger into the soil up to the second knuckle.  If you feel that the soil is too soggy or too dry, the cause of the yellowing leaves is probably poor watering techniques. 

What to do:

Water the green onions with at least one inch of water weekly. See to it that the plants are evenly watered to prevent sogginess on any one particular part. You may also apply a layer of mulch to even out the soil’s moisture. Ideally, you should have a meter reader to determine whether you are watering the plants correctly.

Pests 

Green onions may also turn yellow due to the presence of pests. 

Common pests that could cause yellow leaves in green onions include:

  • Onion maggots 

These are common onion pests and, if not controlled, they could cause great damage to your crop. The larvae feed on the roots and bulbs and may also burrow into the shoots and leaves. 

To eradicate these pests, use natural biological predators to reduce chemical residue in your plants. Predaceous ground beetles and Steinernema feltiae parasitic nematodes can significantly eradicate pests like onion maggots. Rotate the crops in your garden bed after harvesting the green onions and wait for the temperature to reach at least 95 degrees Fahrenheit before sowing the plants.

  • Harmful nematodes 

These nematodes are damaging to green onions and cause yellowing and wilting leaves. They live in the soil and could also result in stunted or deformed growth. 

Check your crop history: you may have planted leeks, chives or lettuce that can be carriers of harmful nematodes. After an infestation, refrain from planting those crops for at least three years. Sanitize garden equipment to stop the spread of pests and clean materials thoroughly that have direct contact with the soil. 

Diseases  

Yellowing of green onions could also be due to fungal diseases, such as the following:

  • Pink root 

This soil-borne fungal disease, which also affects garlic, targets the roots of plants. Roots and bulbs become discolored, and it may also affect the color of the leaves. The tips of leaves may appear wilted and roots may turn pink, red or purple. The disease will eventually result in stunted growth and low yields. 

What to do:

Rotate the crops to reduce the occurrence of the disease. This will also prevent the spread of the disease to other plants. Opt for disease-resistant green onion varieties to ensure healthy onions and a fuss-free harvest. Fumigation is also very useful to manage a fungal outbreak in your garden. 

  • Downy mildew 

This fungal disease usually starts as harmless yellow spots on the leaves. However, once the yellowing begins, it becomes difficult to stop the spread of the disease. Leaves may start to dampen and bend, and the bulbs, stalks and flowers become watery. 

What to do:

Avoid sprinkler irrigation and do not water from above the plants. Ensure that there is no moisture or water on the leaves and upper plant parts, and that the soil is well-draining. Apply the three-year rotation rule to reduce the number of fungi in the soil. Make sure that your bulbs and seeds are from healthy, mature plants, which means the mother plant does not have diseases.

  • Bulb rot 

This fungal disease is characterized by rotting bulbs and yellowing, wilting leaves. The bulbs darken and become watery, and eventually decay. The plants also tend to have stunted growth. 

What to do:

Remove and dispose of the infected plants to avoid the spread of the disease.

Conclusion 

Green onions, also known as scallions or spring onions, may suffer from discoloration due to various causes. Green onions turning yellow may be due to inefficient watering techniques, fungal diseases, or pests such as onion maggots. 

Image: istockphoto.com / ma-no

Sunflower Leaves Turning Yellow

Sunflower Leaves Turning Yellow

Sunflower plants – scientific name Helianthus annuus – have large, daisy-like flowers that come in yellow, red, orange, brown and maroon. The most common variety is bright yellow-colored, with brown centers that have heads filled with seeds. These plants are heliotropic, turning their flowers to follow the sun’s movement across the sky from east to west, and returning to their original east-facing position again at night. As with other plants, sunflowers can also suffer from conditions that cause yellowing leaves. 

Sunflower leaves turning yellow: Common reasons 

Fungal rot or downy mildew  

Fungal rot is a common reason for yellowing leaves, especially if the plants are sitting in very wet soil. This may be caused by chronic overwatering or poor drainage. The wet conditions make the plant susceptible to certain fungi, such as Fusarium, Pythium, Rhizoctonia and Phytophthora, which cause stem, root or crown rot, as well as vascular wilts. 

If your sunflower plants are affected by fungal rot, the leaves will appear dull and yellow, while the roots may become black, brown or decayed. You need to remove and dispose of the affected plants at once to avoid any spread to other plants.

Downy mildew could also cause discoloration on sunflower plants. This fungus thrives in wet soil and needs high humidity to germinate. It is usually found in over-watered seedlings with insufficient space between one another. This overcrowding creates a microclimate ideal for the fungus. Fuzz may also be present on the underside of the leaves, which could be gray, purple or brownish. 

Treatments include mefenoxam, mancozeb or copper sprays. However, these options will only work during the early stages of the fungal infection. 

Nutrient deficiencies 

Yellowing sunflower leaves could also be due to nutrient deficiencies. If they are nitrogen-deficient, the leaves will turn yellow but remain green near the veins. If the leaves turn yellow and also develop purple or red discoloration, the plants likely lack phosphorus. 

To fix this issue, check your soil’s pH and fertility before you add fertilizers, as other problems may also exist. If the plants are extremely yellowed, provide a dose of 10-10-10 fertilizer but be sure to test the soil first and adjust accordingly. 

Pests 

Pests like spider mites and aphids could cause yellowing leaves in sunflower plants. Spider mites suck the juice from plant tissue, which weakens the plants and causes yellowing leaves. Some plants may also manifest red or brown discoloration. These pests are best terminated with the use of sulfur sprays, insecticidal soaps and horticultural oils. 

Aphids are soft-bodied insects which, like spider mites, also suck the sap of plant tissue. They feed in clusters on the undersides of leaves, which can cause curled, distorted and yellowed leaves. These pests produce a sticky fluid called honeydew which attracts ants and sooty mold colonies. To eradicate them, spray them with jets of water, or use horticultural oils or insecticidal soaps. 

Being rootbound 

Sunflowers also tend to develop discoloration if they are rootbound. The roots may become matted and tangled, and growth may become stunted. In this case, you should transfer some of the plants to other planters so they will flourish and retain their green leaves.

Interesting facts about sunflowers 

Sunflower plants comprise nearly 70 species of the Aster family. They are native to North and South America, and some species are cultivated as ornamentals. The Jerusalem artichoke variety is cultivated for its edible underground tubers. These annual herbs have hairy stems and can grow from three to 15 feet, with flower heads reaching from three to 12 inches in width.  

The disk flowers are usually yellow, purple or brown, while the petal-like ray flowers are yellow. These plants have economic and ornamental uses; their leaves can be used as fodder while the flowers produce a yellow dye and the seeds contain oil and are used for food. Sunflower oil is widely used, while sunflower oil cake is ideal for stock and poultry feeding. Sunflower seeds can be eaten dried or roasted and may be ground into nut butter.

Conclusion

Sunflower plants are annual herbs that are heliotropic because they follow the sun’s movement. These well-known flowering plants may experience yellowing leaves due to fungal rot or downy mildew, as well as due to nutrient deficiencies, rootbound issues or pests.

Image: istockphoto.com / Clearphoto

Hoya Plant Leaves Turning Yellow

Hoya Plant Leaves Turning Yellow

Hoya leaves turn yellow when there is an environmental factor causing the plant stress. You can narrow down the exact cause of the discoloration by closely examining the plant’s growing conditions and the pattern of the yellowing.

The most common causes of yellowing hoya leaves are overwatering, underwatering, incorrect soil type, temperature changes, pests, too much or not enough light, and transplant stress.

In this article, we discuss the different causes of yellowing hoya plant leaves and how to remedy each one.

Why are my hoya plant leaves turning yellow?

Overwatering

Overwatering is the most common cause of yellowing hoya leaves. Both excessive water and poorly draining potting medium can contribute to the problem.

It is not the water that harms the plant, but the fact that the plant’s roots are unable to receive oxygen because they are waterlogged. Plant roots need access to oxygen to remain healthy and survive.

When the roots are compromised, they also lose their ability to absorb nutrients from the soil. The result is chlorosis, whereby the plant’s ability to make food for itself is hindered. With the loss of its chlorophyll, the plant’s leaves will turn yellow. The leaves nearest the base of the plant are the first to change color. They will also become swollen and limp, and will be soft and mushy to the touch.

When a hoya plant’s leaves have turned yellow from overwatering, it is usually a sign that the problem is serious and you will need to act fast to salvage the plant.

You can check the hoya’s roots to gauge how serious the situation is. Uproot the plant and wash off any soil. If there are parts of the roots that are brown or black, that means the plant has root rot. Cut off the rotten roots, air-dry the plant, and repot it using new, well-draining soil, in a pot that has drainage holes at the bottom.

The frequency with which you water your hoya is also something to consider. You only really need to water the plant if the top two inches of the soil are dry to the touch. If the top two inches are still moist, wait a day or two before checking the soil again.

Hoya plants are epiphytic by nature, meaning they attach themselves to trees or other plants and do not actually live in soil in their natural environment. They use the trees to reach the forest canopy and do not really need much water to survive. This makes it easier to overwater the plant than to underwater it. It also means the plant will be okay if left to dry for a while between watering.

Make sure you use a pot that is not too big for the plant so that the soil does not retain more water than necessary. If the pot has a drip tray, make sure to empty it once the pot has been given ample time to drain. Use well-draining soil rather than compacted soil such as clay.

Underwatering

Hoya plants are more prone to overwatering than to underwatering, but that does not mean underwatering does not happen. If you neglect your hoya plant to the point where the soil has dried up, the leaves will turn yellow and become crisp.

When you see a hoya plant with yellow leaves, underwatering is not at the top of the list of causes, so make sure you rule out the more common causes before considering this.

If the plant is underwatered, the entire plant will look dehydrated and the soil should be bone dry. The youngest and oldest foliage are the most susceptible to damage.

It is very easy to remedy an underwatered hoya plant. Simply flush the soil in the pot until you can see the excess water flowing out of the drainage holes.

Soil type

Using the wrong kind of soil can also cause the hoya’s leaves to turn yellow. As mentioned above, a dense, compacted soil retains too much water, resulting in the same conditions as overwatering.

If you use a well-draining soil mix that allows excess water to flow through it easily, the chances of overwatering the plant decrease dramatically.

You can buy succulent or cactus soil mix from a store or make it yourself. Just mix one part of normal potting soil to one part compost to one part perlite.

Make sure you choose a pot that is only a little bigger than the plant’s last pot so that the roots are snug enough, without giving them too much space.

Too much light

Hoya plants take advantage of the gaps in the rainforest canopy to get their required daily light. Since this is what the plant has adapted to in its natural habitat, it makes sense to try and replicate this in your home by bringing in bright, indirect light. A west or east and south-facing window will work just fine for the hoya.

When your hoya gets too much light, the leaves’ color will fade and become yellow and even brown. There might even be scorch marks on the leaves, leaving brown tips and edges.

This happens because the chloroplasts in the leaf tissue will reconfigure and reduce due to too much light. When the plant detects too much light, it thinks it needs fewer chloroplasts because of the concentration of light it is getting.

You may need to relocate your plant if the spot it is in suddenly has more light than normal, such as during the spring and summer.

Not enough light

When the hoya plant does not get enough light, the leaves do not immediately turn yellow. In fact, the leaves of the hoya plant become even more green as the plant compensates and tries to absorb as much light as it can.

The leaves will start to turn yellow when the plant decides to prioritize its top, younger leaves with its limited resources. The older leaves at the bottom are let go in order to prolong the life of the plant.

Hoya plants grow much slower in poor light, and the water in the soil will also evaporate at a slower pace.

It is very easy to correct a light deficiency for your hoya plant: simply transfer it to a location where it can get the light it needs.

Temperature changes

Hoya plants cannot survive in temperatures below 50 degrees Fahrenheit. Even if you bring your plant indoors for the winter, placing it near a door or window where cold drafts can reach it could still affect the plant negatively. This can cause the leaves to turn yellow, affecting the youngest and oldest leaves first.

Hoya plants are much more tolerant of high temperatures and can survive temperatures up to 95 degrees Fahrenheit, but they do not do well in the presence of warm drafts. The warm air reduces the humidity around the plant and dries it out, hence the yellowing of the leaves.

You can keep your plant safe from temperature extremes by using a thermometer to monitor the temperature in and around your home. Make sure you also check that there are no cold or warm drafts passing through the plant’s location.

Pests

The pests commonly found on hoya plants are those that feed on the plant’s sap. This plant is fairly resistant to these insects, but if the plant is weakened and compromised, the pests take advantage of the situation.

The most common pests for hoya plants are scale insects, aphids, mealybugs, thrips and spider mites.

When they feed on the hoya’s leaves, they leave spots that coalesce to form yellow splotches. In a large infestation, entire leaves can turn yellow.

The best way to prevent a pest infestation is to regularly check the plant for pests. Catching an infestation early is key to preventing further damage to the plant.

Make sure you separate the infested plant from your other plants so that the pests cannot spread.

You can remove the insects by blasting them with the spray nozzle of your garden hose, or you can use neem oil. Wipe the leaves with neem oil on a cotton ball once a week for a month to make sure all the insects are dead.

Transplant stress

When you take the hoya home from the nursery, it is normal for some of its leaves to turn yellow. This is because the plant is still trying to adjust to its new surroundings.

When a plant is grown in a nursery, it has the best living conditions. When you take the plant out of its comfort zone and into a place where almost every aspect of its life is different, it will become stressed.

The only thing you can do in this situation is simulate the plant’s natural habitat as best you can so that its transition to its new home is as smooth as possible. Eventually, the plant will adapt to its new surroundings and make a complete recovery.

Conclusion

When a  hoya plant’s leaves turn yellow, it is an indication of stress: an environmental factor is causing the plant’s leaves to discolor. Inspecting the plant’s leaves, soil and living conditions will help you determine what exactly is the cause of the problem.

The most common causes of hoya plant leaves yellowing are overwatering, underwatering, incorrect soil type, temperature changes, pests, too much or not enough light, and transplant stress.

Image: istockphoto.com / MilenaKatzer

Creeping Jenny Turning Yellow

Creeping Jenny Turning Yellow

Creeping Jenny plants are evergreen perennials of the Primulaceae family. Common names include moneywort, herb twopence and twopenny grass. These low-growing plants are popular ground covers that thrive in rock gardens, around ponds, between stepping stones, or as container plants. However, like other plants, they can also be prone to yellowing leaves. 

Creeping Jenny turning yellow: What are the reasons?

Sun stress 

The leaves of your plants could be turning yellow because of sun stress. While these plants thrive in sunny spots, too much sun could stress them and result in sunburn. Keep the plants in the shade during the afternoon when the sun is at its hottest. You could also grow the plants in partial shade the whole year round or use a shade net to avoid wilting. 

Fungal diseases 

Yellowing creeping Jenny could also be due to fungal diseases like Southern blight. The first signs are wilting and yellowing of the bottom leaves, and it is characterized by a webby substance between the leaves and stems. This webby substance is called hyphae, which comprise the roots of the fungus. The fungus decomposes the plants’ stems, and they are more susceptible when weakened by excess moisture, physical damage or too much shade. 

There is no treatment for Southern blight, but you can prevent its growth. Avoid overwatering the plants, keeping the soil wet but not soggy. See to it that the soil has good drainage and, if it is waterlogged, add some gritty sand. If the plants are already infected, dispose of them properly and dig up the soil to bury the fungus and its remnants.  

Other diseases that affect creeping Jenny plants:

1.Botrytis blight 

This fungal disease is prevalent during rainy weather and is manifested by brown discolorations with silver-gray spores on the dead plant tissue. The massive spores look like dust coming out of the plants. The ideal treatment is liquid copper fungicide and proper preventive measures.

2. Phyllosticta leaf spot 

Your plants likely have this disease if you notice brown or tan spots with dark edges on the leaves. It is caused by the fungal pathogen Phyllosticta minima and, as the disease progresses, holes become evident as a result of the dried-up, discolored spots. It is ideally treated with liquid copper fungicides.

3. Rhizoctonia crown infection  

This fungal disease is characterized by sudden and permanent wilting along with the complete collapse of the leaves and petioles. To protect your plants from this disease, keep your garden clean and dispose of dead leaves at once. If your plants are already infected, dispose of the infected leaves and replace the soil with fresh soil. Disinfect the tools you used to clear the infected areas. 

Creeping Jenny care

Creeping Jenny is an invasive plant, although the Auria variety may not be as invasive. This variety also turns yellow when exposed to full sun. Although you may plant them in containers, these plants can grow like wildfire and may reach the lawn or garden. This lovely ornamental can quickly take over a spot, but if the soil is on the drier side it will impede some of its growth. 

These plants thrive in full sun to partial shade, and the leaves will have a different color according to their level of sun exposure. If exposed to full sun the leaves may turn golden yellow, and if in partial shade they may be a chartreuse green. In very hot climates, the afternoon sun could cause the leaves to blanch. 

Creeping Jenny plants prefer moist, well-draining soil, so make sure to water them regularly. Do not allow the soil to dry out. These plants can survive a cold winter and will recover quickly in spring. 

Once the plants are established, they should be lightly fertilized with a 10-10-10 solution during the early spring. Make sure to trim the dead stems of your plants before the start of winter so that they start to grow back by spring. 

Conclusion 

Creeping Jenny is a cold-hardy plant also popularly called moneywort, twopence grass and herb twopence. These perennials with small, yellow flowers can suffer conditions that cause yellowing leaves. Possible causes include sun stress, fungal diseases like Southern blight, or natural causes, especially if exposed to full sun. 

Image: istockphoto.com / AKIsPalette

Plum Tree Leaves Turning Yellow

Plum Tree Leaves Turning Yellow

Plum trees comprise a diverse group of species from the genus Prunus, family Rosaceae. They are of medium size and, without pruning, can reach up to 39 feet tall and spread across 33 feet. These trees blossom in different months depending on the country, and their edible fruits are related to peaches and cherries. Unfortunately, as with all plants, they also suffer from diseases and conditions that cause yellowing leaves. 

Plum tree leaves turning yellow: Common reasons

Lack of water 

If you notice your plum tree leaves turning yellow for no apparent reason, it could be that you are not watering the tree enough. This can happen with automatic irrigation systems. If you do not check them regularly, the drippers may become blocked resulting in insufficient water for the trees. 

Check the irrigation systems regularly and make sure they are in good working condition. While these trees have moderate water needs, they should not be planted in waterlogged areas. They prefer moist soil, but make sure it is fast-draining so the water does not get trapped in the soil, which could lead to root rot. 

Nutritional deficiencies 

Plum tree leaves turning yellow could also be attributed to nutritional deficiencies. If the trees lack nutrients such as iron, manganese, magnesium or zinc, the leaves usually turn yellow. Certain fertilizers could also cause foliage to become thick and yellowed. Trees grown in poorly-draining soil with high alkalinity also tend to suffer from nutrient deficiencies. 

Trees with iron deficiency will exhibit dying leaf edges. Manganese deficiency only targets older foliage, although young foliage may not be spared if the deficiency becomes severe. The leaves may not only turn yellow, but could also drop off prematurely.

To correct an iron deficiency, apply iron spray to the soil, preferably before new growth. Give four or five sprays for a couple of days to treat the leaves so that they become green again. See to it that the water used for the iron fertilizer is distilled so that the pH is more or less seven, which is neutral. Add a wetting agent to the iron fertilizer so the iron can penetrate the leaf’s surface. 

Use fertilizers with chelated iron if your trees suffer from nutrient deficiencies. Sulfur should also be applied to the ground just outside the tree drip line. This increases the acidity of the soil so the nutrients become more accessible for the trees. 

Other nutrient deficiencies that could contribute to yellowing leaves may include boron, nitrogen, potassium or phosphorus. Aside from commercial fertilizers, you can also treat the soil with organic fertilizers like composted manure and yard waste. Foliar applications made of seaweed extract or fish emulsion may also be used.  

Diseases 

Certain fruit tree diseases may afflict plum trees, resulting in their leaves turning yellow. These include the apple mosaic virus as well as other viral diseases. Bacterial leaf spot or shot hole disease could also afflict your trees and cause leaf drop. Cold and wet weather can aggravate certain diseases. 

To solve this problem, treat the diseases with a copper fungicide. However, it cannot be used during the growing season due to phototoxicity. 

Fungal diseases like Armillaria root, crown root and Verticillium wilt  may also cause problems. Sanitize by raking and disposing of infected plants. Post-harvest, apply a mixture of copper sulfate and lime. 

Pests 

Plum leaves turning yellow may be due to spider mites or an aphid infestation. Aphids excrete honeydew, which creates a sooty mold. A strong spray of water should be enough to reduce the pest population. Oil sprays are also ideal to treat plum trees.

Can yellow leaves turn green again?

Yellowed leaves are unlikely to turn green again unless caused by a nutritional deficiency. Most plant owners agree that it is rare for yellowed leaves to turn green again, so a good option is to remove the yellowed leaves and dispose of them appropriately. 

Conclusion 

As with all plants, plum trees can be prone to yellowing leaves for a number of reasons. These include underwatering, diseases, pests or nutritional deficiencies. 

Image: istockphoto.com / Funtay


Lantana Leaves Turning Yellow

Lantana Leaves Turning Yellow

Lantana – scientific name Lantana camara, of the family Verbena – comprises 150 species of perennial flowering plants. Native to the tropical regions of the Americas and Africa, their dainty flowers enjoy an extended bloom time. They also thrive in the Australian-Pacific regions and in the southern and northeastern parts of India. Unfortunately, they also suffer their share of conditions that may cause their leaves to turn yellow. 

Lantana leaves turning yellow: What are the causes?

Premature dormancy 

One of the reasons Lantana leaves turn yellow could be premature dormancy. The plants may go dormant at the first chill or frost, even though it is not yet winter. The yellowing leaves could be the plant’s reaction to the first signs of winter, although that is not necessarily the case. If the days warm up again, the plant’s leaves may stop yellowing.  

Lantana plants are perennial plants that thrive in warm, frost-free climates. They are extremely drought-tolerant but unable to tolerate cold weather and may die if exposed to frost.  

Incorrect cultural care 

Yellowing lantana leaves could also be due to improper cultural care. These plants thrive in warm weather and well-draining soil, so if these elements are not present, the plants will not grow well. 

Fortunately, treating yellow leaves due to improper care is entirely possible. Place them in a bright spot where they can soak up the sun, and ensure they are planted in suitable soil. 

Diseases such as Botrytis blight 

Another cause for yellowing lantana leaves is a disease called Botrytis blight, or gray mold. This fungal disease, prevalent in regions with high humidity, also affects the buds, flowers, and bulbs of plants. The extent of its severity is highly dependent on weather conditions and cultural practices.  

Cut off the affected parts of the plant. If this does not work and the remaining leaves continue to turn yellow, dig up the plant and dispose of it at once. This will prevent the spread of the disease to other plants in your garden.

Other diseases that could affect your lantana and cause yellowing leaves include powdery mildew and sooty mold. 

Natural variegation 

Lantana leaves may be yellow simply due to variegation. Some plants feature variegation in their foliage. This is not a cause for alarm; the variegation is just part of the plant’s aesthetic beauty. 

Insects 

The presence of insects like lace bugs and aphids could be detrimental to your lantana plants. These critters live on the undersides of leaves, helping them to go unnoticed at first. However, you will eventually notice them as they come in swarms. Lace bugs are grayish, at least ⅛ inch in length, and have a lacy-looking shield. 

Eradicate these pests using Malathion, Sevin or neem oil. Repeat the spraying process around seven to 10 days apart. 

Overwatering 

Lantana leaves could also turn yellow due to overwatering or incorrect watering practices. These plants do not like moist soil and too much water could drown the roots. 

Over-fertilization 

Spoiling your plants with fertilizers will do them more harm than good.  Fertilizer burn could eventually lead to yellowing and dropping of foliage. If you are using herbicides, do not let the spray drift onto the foliage of other plants. Pelletized weed killers can also aggravate the problem; if you notice that pellets have fallen on the ground above the root system, damage may occur. 

Conclusion 

Lantana plants are drought-resistant and popular for their brightly colored flowers and extended bloom time. They also suffer from diseases and conditions that cause yellowing leaves. Causes may include overwatering, pests, premature dormancy, over-fertilization, variegation, or disease.

Image: istockphoto.com / Maksudur Rahman Rahat

Lilac Leaves Turning Yellow

Lilac Leaves Turning Yellow

Yellowing lilac leaves are indicative of an environmental factor causing the plant stress. The key to fixing the problem is correctly identifying the cause of the discoloration.

The most common causes of yellowing lilac leaves are overwatering, underwatering, iron deficiency, diseases and pests.

In this article, we will discuss the different causes of yellowing lilac leaves and how to remedy each one.

Why are my lilac leaves turning yellow?

Overwatering

The most common cause of yellowing lilac leaves is overwatering. When you overwater your lilac bush, the leaves will turn yellow, brown and then fall off until the whole plant eventually dies.

Overwatering damages your plant by suffocating and drowning its roots with all the excess water. Plant roots need to dry out between watering in order to take in oxygen. Air needs to be able to pass through the soil and between the roots for the plant to breathe properly. If the soil around your plant’s roots is too compact and retains water too well, the roots will stand for too long in the soggy soil. They will drown, die, and your plant will suffer root rot. Root rot happens when the dead parts of the root become susceptible to bacterial and fungal diseases. The rot climbs up the stem and into the leaves, which is what causes them to turn yellow.

Check whether your plant is being overwatered by removing it from the soil and looking for brown or black roots. These roots are dead and probably have rot. Cut them off using a sterile knife or scissors. Then, lay the plant on a tray lined with dry tissue and let it air dry. After the plant’s roots have dried, replant it in a new pot with drainage holes, using well-draining soil.

You can avoid overwatering by making sure you use soil that is well-draining, and a pot that has drainage holes at the bottom. This allows any excess water to pass through easily instead of staying in the pot.

You should also know when to water your plant. There is no set number of days between watering, because this is dependent on the weather and the season. You might need to water your plants more frequently during the summer and less frequently during the winter.

Check the soil around the plant by pressing your finger into the top two inches of soil. If it feels dry, you can water the plant. If the soil still feels moist, wait one or two days and check the soil again.

Underwatering

Inadequate watering can also cause the leaves on your lilac bush to turn yellow. Lack of water can dry out your plant, turning its leaves yellow and brown until they fall off. Plants need water to transport nutrients and minerals from the soil into the plant. So, not only is the plant lacking moisture, but it also cannot get the nutrients it needs to grow properly.

Make sure you water your lilac plant regularly. Check whether the soil is dry and, if so, flush it with water until the excess water flows through the drainage holes at the bottom of the pot. In the hotter months, you may need to water the plant more frequently, while in the colder months, you may need to water it less.

Iron deficiency

Chlorosis is caused by a lack of iron in the soil around the plant, or alkaline soil that keeps the plant from taking up any iron. Plants need their soil to be slightly acidic so that iron can be transported from the soil into the plant. If there is no iron uptake, eventually the leaves will become yellow with green veins.

You can treat chlorosis by topdressing the soil around the plant with iron sulfate to help lower the soil pH until it is around 7.0. Water the soil well after applying the recommended dose. Remember that this solution is temporary and you will need to reapply the iron sulfate every couple of years.

Disease

There are many diseases that can infect your lilac plant. Some fungal diseases can cause yellowing or browning of the leaves and even leaf drop. These diseases may be difficult to catch in the early stages, especially in mature, more established plants.

Botrytis blight, also called gray mold, causes yellowing of lilac leaves with a distinctive gray spore on them.

Another disease that affects lilacs is verticillium wilt. This is a fungal disease that attacks the plant’s vascular system and can also cause the leaves to turn yellow and brown. Another sign that your plant has verticillium wilt is if the wood under the bark is discolored.

You can avoid these diseases by cleaning up any fallen leaves and other debris from around the plant and disposing of them properly. You should also prune off infected leaves and branches. Try not to water the plant from above, because the splashing of water can cause the spores to reach other plants, thus spreading the infection.

Pests

The two most common pests that attack lilac plants are nematodes and scale insects. These pests cause the foliage of the lilac to turn yellow.

Nematodes live in the soil around the plant and feed on its roots. Because the roots are compromised, the plant is unable to take up water and nutrients effectively. They may not do enough damage to kill the plant, but they can definitely impact the growth and vigor of the plant. The best way to treat nematodes is to provide the plant with correct and adequate care.

The oystershell scale insect is a type of armored scale insect usually found in the plant’s bark and leaves. They feed on the plant using their straw-like mouth. A small infestation is manageable for the lilac plant, but the bigger it gets, the more symptoms appear.

You can eradicate scale insects using natural enemies or pesticides. You can also use horticultural oil to kill them.

Conclusion

The leaves on your lilac plant will turn yellow if there is an environmental factor causing it stress. You will need to identify the exact cause of the discoloration in order to fix it quickly.

The most common causes of yellowing lilac leaves are overwatering, underwatering, iron deficiency, diseases and pests.

The closer you are able to simulate the plant’s natural habitat, the better the plant’s growth will be.

Image: istockphoto.com / Ilona5555

Ponytail Palm Leaves Turning Yellow

Ponytail Palm Leaves Turning Yellow

Ponytail palms, with the scientific name Beaucarnea recurvata, belong to the family Asparagaceae. Also called elephant’s foot, the species is native to most states of Eastern Mexico but is now confined to the state of Veracruz. Neither palms nor trees, these are succulents with bulbous trunks and long, hair-like leaves that grow like a ponytail from the top of the trunk. These plants are cold-hardy and can tolerate temperatures as low as 15 degrees Fahrenheit, but are still prone to conditions such as yellowing leaves. 

Ponytail palm leaves turning yellow: What are the common reasons?

The reasons ponytail palm leaves turn yellow are overwatering or over-application of fertilizers. 

Overwatering can be resolved by providing proper drainage for your plants. When the plants are overwatered, their roots tend to get soaked in stagnant water. This could lead to root rot, and eventually, the leaves will turn yellow and may become wilted if the condition is not dealt with at once. 

Over-fertilization can be fixed by repotting the plants in fresh and well-draining soil. Add standard fertilizers in the correct portions. 

Fungal diseases indicative of overwatering 

Ponytail palm root and stem rot are fungal diseases caused by overwatering. Ponytail palms thrive in well-drained soil, and if they are constantly wet and have excess moisture they will become susceptible to fungal diseases. 

Signs of root and stem rot:

  • Slow or stunted growth
  • Wilted, yellow leaves 
  • Discolored, mushy roots 
  • Squishy or soft caudex or stem

How to save your ponytail palm from fungal diseases:

It is usually impossible to restore your infected plants unless the disease is not yet in an advanced stage. If you manage to detect it early, withholding water and ensuring good soil drainage may be enough to revive the plant.

If the rot or fungal infection is already advanced, you need to remove the plant from the pot and cut off the affected plant parts with a clean, sharp knife. Repot the plant in a new container with well-draining soil and with drainage holes. 

Indications of a dehydrated ponytail palm

Ponytail palms are drought-resistant but they cannot live months without water. Dehydrated plants show the following signs:

  • The leaves are droopy, brown and starting to curl. 
  • The trunk is wrinkled.

 How to revive a dehydrated ponytail palm:

Place your potted ponytail palm in a sink. Fill it with cold water and leave the plant in the sink for at least 45 minutes to allow the soil to soak up the water through the hole at the bottom of the pot. The caudex or stem will be able to absorb a good amount of moisture if at least three inches of soil are soaked.

Next, remove the pot from the sink and leave it indoors for a while to drain off any standing water. Finally, replace your plant on its saucer in its usual spot in the house.

Ponytail palm care 

Ponytail palms thrive in dry soil, and it is ideal for them to get root bound before repotting. When repotting these plants, use a pot about an inch or two wider than the one previously used. Using a pot any larger than that is not recommended as they may get too much water at once and this could damage the plant’s health. 

These plants only need to be fertilized two to three times a year; more than that could result in brown leaf tips. 

Conclusion 

Ponytail palms are drought-resistant plants that prefer bright indoor light or sunny areas if grown outdoors. These succulents can tolerate high temperatures, but can still be prone to yellowing leaves. Yellowing ponytail palm leaves may be attributed to overwatering or incorrect watering techniques. It could also be due to fungal infections such as palm rot and stem rot.

Image: istockphoto.com / RenataKa

Cordyline Leaves Turning Yellow

Cordyline Leaves Turning Yellow

Cordyline plants, with scientific name Cordyline fruticosa, are evergreen flowering plants of the family Asparagaceae. Also known as ti, they are common decorative plants ideal for both indoors and outdoors. They are native to New Zealand, Southeast Asia and Papua New Guinea. These plants have leathery, spear-like leaves and come in various colors including red, yellow, white, purple, green and purplish-red, but certain conditions may also cause their leaves to turn yellow. 

Cordyline leaves turning yellow: Common reasons 

Incorrect watering technique or poor water quality 

Cordyline leaves could turn yellow and drop off if you are not watering them enough or are overwatering them. Too much water or excess moisture around the roots could drown them and may result in root rot. 

Check the moistness of the soil with your fingers before watering to ensure you are watering the plants properly. See to it that the soil is moist but not waterlogged, and also check that it is draining effectively.  

Poor water quality could also result in leaf discoloration such as yellowing leaves. This usually happens if you use tap water for the plants. Let this sit for a while to dissipate excess salts, or use bottled or distilled water. Rainwater is also an ideal choice and works wonders on plants. 

Fungal diseases such as Fusarium leaf spot 

Cordyline leaves could turn yellow due to fungal diseases like Fusarium leaf spot. This disease specifically targets the younger leaves, and also causes both stem rot and root rot. The roots will appear waterlogged and will become black. 

To fix the problem, destroy the affected plants. Keep the leaves dry to prevent infection and water the plants just enough. Make sure the soil has good drainage so that excess water does not remain stagnant in the soil. 

Fluctuating temperatures or too much sunlight

Cordyline leaves could also turn yellow due to rapid temperature fluctuations. Do not place the plants near too much heat or too much sun. Abrupt changes or a rise in temperature could turn the leaves yellow. There is no cure for this; just allow the affected leaves to fall off. 

Exposure to too much sunlight can result in sunburn, manifesting as yellowing leaves, and can harm the plants. This usually happens when you suddenly transfer your plants from indoors to outdoors.  

See to it that the plants get abundant indirect sunlight so they can still get the benefits of light, such as more vivid leaf colors. If you wish to move the plants outdoors, acclimatize them slowly to the new conditions. 

The plants could be pot-bound 

If you notice rootlets appearing on the top of the soil, it could be that the plants are pot-bound. Remove the plants from the planters and inspect the root ball. If the root ball looks congested and fills the pot, it means the plant needs more space. Cordyline plants prefer a lot of root space to survive. 

If you are confronted with this issue, consider transferring the plants to a garden setting so the roots can spread further.

It could be natural shedding

Your plants may just be shedding their older leaves naturally, which results in the yellowing of the older leaves. Cordyline plants tend to grow tall and, in the process, lose their older leaves. This is a natural shedding process, so you do not have to worry about it. 

Cordyline plant care

Cordyline plants are sensitive to fluoride, which is present in almost everyone’s water supply. Consider bottled or rainwater for your watering needs.  

Make sure that the plants are not placed in areas with direct sunlight, although these plants do also need bright light. The green-leaved variety tends to tolerate direct light, while those with colored leaves may prefer bright indirect or filtered sunlight. 

These plants need a rich, well-draining soil mix with a pH of at least 6 to 6.5. 

Always make sure that the soil is continuously moist for your ti plants. Water the soil once it starts to feel dry, and reduce watering during the winter. 

Apply fertilizers during the spring, preferably with slow-release pellets.  You may feed the plants weekly during their growing season. Use a liquid 20-20-20 fertilizer at half-strength, but do not fertilize during the winter. 

Cordyline or ti plants can thrive in areas where the temperature is above 62 degrees Fahrenheit. They prefer high humidity. Place your plants away from windows or cold drafts. If you notice ongoing leaf drop, raise both the humidity and the temperature. 

Conclusion 

Cordyline or ti plants are great outdoor and indoor plants because of their colorful foliage. However, they are also prone to conditions that cause yellowing leaves. Cordyline leaves may turn yellow due to underwatering, overwatering or fungal diseases like Fusarium leaf rot. It could also be due to being pot-bound, or fluctuating temperatures and too much sunlight.

Image: istockphoto.com / Tanes Ngamsom

Dogwood Leaves Turning Yellow

Dogwood Leaves Turning Yellow

Dogwood leaves turn yellow when there is an environmental factor causing the tree stress. If even one aspect is lacking, the tree can succumb to this stress. You can improve the lifespan and overall health of the tree by correctly and quickly identifying the stressor and fixing it.

The most common causes of dogwood tree leaves turning yellow are insects and diseases, leaf scorch, and chlorosis.

In this article, we will discuss these causes of dogwood leaf yellowing and how to remedy each one.

Why are my dogwood tree’s leaves turning yellow?

Insects and diseases

When a dogwood tree is stressed for any reason, it becomes more susceptible to pathogens and pests. The more insects or diseases invade the tree, the more it will deteriorate and ultimately succumb to its invaders.

The most common insects that attack and damage dogwood trees are dogwood club-gall midges, dogwood borers and twig borers.

Diseases that affect dogwood trees include spot anthracnose and powdery mildew. Both these diseases are caused by fungi. They infect dogwood trees that are not properly cared for or are in living conditions that are not ideal.

Leaf scorch

Dogwood leaf scorch is one of the most common problems growers encounter with this plant. This is indicative of a tree that is suffering water stress. A dogwood tree that does not get enough water will have dry leaves with yellowing or browning edges. The leaves will completely dry out and fall off one by one. 

You can prevent water stress and leaf scorch by keeping the tree well irrigated. This is important because dogwood trees have shallow roots so they are easily affected by drought. Younger trees are more fragile while older, more established dogwood trees can withstand drought better.

Chlorosis

Chlorosis is a condition in which plants and trees are unable to absorb the nutrients and minerals they need to make chlorophyll. Less chlorophyll means the plant is unable to perform photosynthesis properly, compromising its ability to nourish itself and remain healthy. The leaves on the tree will turn yellow and its growth will become stunted.

Several factors may contribute to chlorosis. These include nutrient deficiencies, structural damage to roots, compacted soil, poor drainage, too much organic matter, pests, and even herbicide use.

Chlorosis damages dogwood trees by further stressing the tree, depleting its energy stores, turning the leaves yellow, stunting the growth and making it susceptible to both disease and pests.

What does a dogwood tree with chlorosis look like?

The most obvious sign of chlorosis is the yellowing of leaves, but keep in mind this can also be caused by conditions other than chlorosis. 

The most common deficiency to cause chlorosis is iron deficiency. Iron chlorosis is interveinal, meaning that the leaf yellowing happens in the leaf tissue between the veins, while the leaf veins remain green. This kind of leaf discoloration is directly attributed to an iron deficiency.

How does a dogwood tree become iron deficient?

You may think that the reason for iron deficiency is that the soil has been depleted of iron, but this is rarely the case. The problem in iron chlorosis is more often the tree’s inability to absorb iron from the soil despite there being plenty of iron available. This happens when the soil pH is too high.

Soil pH is important in determining the availability of nutrients to the tree. If the soil is too acidic or too alkaline, this can affect the solubility of the nutrients in the water. If the nutrients are not soluble in water, the tree’s roots will not be able to take them up.

Iron, specifically, is not soluble when the soil is too alkaline, making it impossible for the dogwood tree’s roots to absorb it, leading to iron deficiency and chlorosis.

Are there other nutrient deficiencies that can cause yellowing leaves in dogwood trees?

A lack of potassium can appear as yellowing of leaves, as well as the curling and scorching of the leaves’ edges.

Magnesium deficiency can also affect the tissue between the veins of each leaf. It will turn the leaves more orange than yellow.

A lack of nitrogen affects older leaves more than younger leaves. This is because a tree will instinctively choose to save the remainder of its depleting resources, such as nitrogen, for its younger leaves to support new growth. This causes the more mature leaves to turn yellow or even brown, and then fall off.

Manganese, sulfur and zinc deficiencies in dogwood trees also result in leaf yellowing and chlorosis. 

Can chlorosis be treated?

Yes, chlorosis can be treated, but these measures are often temporary and need to be repeated every so often to keep the tree healthy. This is because it is very difficult to permanently maintain a specific pH in a large area of ground. Water will move through the soil when it is watered or rained on, frequently washing away considerable amounts of nutrients.

The best advice when growing trees and dealing with possible chlorosis is to try to prevent it from happening in the first place. If the dogwood is native to your part of the country, you should have no problem growing it with the pH of your soil, since that is probably the pH the tree has adapted to.

If you still get yellowing of leaves due to chlorosis, you can apply elemental sulfur to the soil around the tree to help lower the pH. You can also add chelated iron to the soil if the reason for the deficiency is iron depletion and not the soil’s pH. You can try injecting the tree trunks directly with iron sulfate, but make sure you do your research on how to properly go about this process. Lastly, you can try to increase the iron in the tree by spraying the leaves with chelated iron or iron sulfate.

Hiring a professional to check your soil’s pH and having them choose the appropriate treatment for your situation is probably best.

Conclusion

Dogwood tree leaves turn yellow when there is an environmental factor causing the tree stress. The yellowing can be an indication of a condition that is not so serious, but it can also be caused by something that could potentially affect the overall health of the tree. Identifying the exact cause of the discoloration can be tricky since yellowing leaves are a broad symptom, but once you figure it out, managing the problem becomes easier.

The most common causes of yellowing dogwood leaves are insects and disease, leaf scorch, and chlorosis.

Image: istockphoto.com / RussieseO

Delphinium Leaves Turning Yellow

Delphinium Leaves Turning Yellow

Delphiniums are perennial flowering plants of the family Ranunculaceae. These plants are native to tropical Africa and the Northern Hemisphere and bear flowers from late spring to late summer. They comprise about 300 species and are popular for their spikes of colorful flowers that come in shades of pink, blue, white and purple.  Unfortunately, they are also prone to diseases and conditions that cause yellowing leaves. 

Delphinium leaves turning yellow: What are the reasons?

Overwatering 

Delphinium leaves may turn yellow because you are overwatering them. The leaves may not become droopy, but the roots are drowning in moisture which could lead to root rot and plant death. 

In this case, refrain from watering the plants and evaluate the conditions. Observe the plants over the next few days for signs of improvement or worsening. 

Insufficient fertilization 

Delphiniums are considered heavy feeders, so they need regular fertilization at certain stages of their plant and flower development. If they are underfed with nutrients, their leaves will tend to turn yellow. You need to know how frequently your plants need feeding and the last time they were fertilized before you feed delphiniums with yellowed leaves. Plants in pots or planters generally need more feeding than those planted in the ground. 

Too much or too little sunlight

Delphinium leaves may turn yellow as an indication of too much or too little sunlight. Delphiniums thrive best in sunny spots and prefer moist and fertile soil. Make sure the plants are exposed to some sun for a few hours, but be mindful not to overdo it. Too much sunlight could lead to yellowing leaves. Place the plants in an area with a cool shade if the sun gets too hot. 

Nutrient deficiencies 

Delphiniums in a highly alkaline and nutrient-deficient soil may have yellowing leaves. Plants growing in alkaline soil tend to be iron-deficient, since they absorb iron best when the soil pH is between 5 and 6.5. Nutrient deficiencies such as manganese and zinc can also cause chlorosis, or yellowing of leaves. 

By observing which leaves are affected first, you can determine which nutrient deficiency is causing the chlorosis. The younger leaves turn yellow first in case of iron deficiency, while older leaves are affected first if it is a manganese or zinc deficiency.

Diseases 

Delphinium leaves may also turn yellow due to diseases such as bacterial bud rot, crown rot or stem rot. These are fungal infections characterized by stunted growth and blackened stem bases around cracks and wounds. The pathogens causing these diseases are Erwinia carotovora and Erwinia chrysanthemi. Destroy all infected plants at once and avoid overhead irrigation. 

Powdery mildew may also be the culprit; symptoms include dry, white and mealy fungal growth on the upper areas of leaves. The leaves may turn yellow and die from the base of the stem upward. Be sure to apply fungicides and destroy plant debris at the end of the season. 

Aside from the reasons mentioned above, other factors that may play a role could be soil conditions or pests. Check the soil using a soil test kit to ascertain any issues that need addressing. The presence of pests in the plants could also trigger the yellowing of leaves; pests suck the sap of plants causing them to become weak and susceptible to diseases. 

The leaf yellowing may also happen as plants prepare for dormancy or when they complete their flowering period. There is nothing to worry about in this case, as it is part of a plant’s natural life cycle. What you can do is remove affected flowers and foliage to breathe new life into the plants.

Drying winds and humidity may also cause yellowing leaves, as can transplant shock. In case of the latter, the plants should be able to adjust after a few weeks. 

Conclusion 

Delphinium leaves turning yellow could be due to a number of reasons, including overwatering, too much or too little sunlight, or nutrient deficiencies. It could also be due to pest infestation,  lack of fertilization, or diseases such as crown rot or bacterial bud rot.

Image: istockphoto.com / Suprabhat Dutta

Aquatic Plants Turning Yellow

Aquatic Plants Turning Yellow

Aquatic plants turning yellow is usually a sign that certain factors required for their survival are compromised. This causes plant stress, resulting in discoloration.

The most common causes of yellowing in aquatic plants are transplanted stress, lack of light, aging, water quality, and nutrient deficiency.

In this article, we will discuss the different reasons your aquatic plants may be turning yellow and how to remedy each one.

Why are my aquatic plants turning yellow?

Transplant stress

Like all plants, aquatic plants also need time to acclimatize to their new surroundings. It requires a delicate balance to accurately simulate an aquatic plant’s natural habitat, so it should come as no surprise that these plants react as they do when placed in a new aquarium.

Try to create conditions as close as possible to the plants’ ideal habitat, and they should recover in no time.

Lack of light

Aquatic plants, just like terrestrial plants, need plenty of light to conduct photosynthesis properly. Yellowing could be due to insufficient time under the light, or a light source that does not have the right intensity for the plant. If a plant is unable to perform photosynthesis, it will not be able to make its own food, so it will not grow healthily and will eventually die. Thus, aquatic plants should be provided with around six to eight hours of light daily, be it natural sunlight or with the help of a grow light.

Aging

Another reason your aquatic plants may be turning yellow is if they are getting old. Older aquatic plants will eventually lose their ability to absorb the nutrients they need to survive, and thus turn yellow. The longer they go on without these nutrients, the faster they will rot and die. If you have any aging plants in your aquarium, remove them completely or cut off the yellow leaves. These rotting plants may change the quality of the water in your aquarium if left there for longer than necessary.

Water quality

Another reason aquatic plants turn yellow is water quality and the environment in the aquarium. You should do extensive research regarding the plants you own and any plants you plan to add in the future. Know the pH, water temperature and any other requirements they might need in order to thrive. This way you can mix and match aquatic plant species that live well together in roughly the same type of environment.

Nutrient deficiency

Aquatic plants can also turn yellow due to a lack of one or several nutrients. Like all other forms of life, these plants also need the right balance of nutrients to be healthy and live a long life. Yellowing is only one of the many problems that can result from a lack of nutrients.

You can tell that your plant has a nutrient deficiency by observing its leaves closely. It can be tricky to tell the symptoms of nutrient deficiency apart, because many of them resemble one another, especially in the eyes of a new plant owner. Pay close attention to the color of the plant’s leaves to make it easier to figure out what it needs.

Here are some things to watch out for when trying to establish which nutrient your plant is missing:

  1. Older leaves turning yellow with green veins is a sign of iron deficiency.
  2. Older leaves turning yellow and dying is a sign of nitrogen deficiency that is just starting.
  3. Aquatic plant leaves with yellowing edges and holes in them are indicative of potassium deficiency.
  4. Older leaves that are lighter in color with dark-colored veins may mean your plant has a magnesium deficiency.
  5. New leaves or growth that becomes pale and twisted could mean a calcium deficiency.
  6. Older leaves turning yellow with dead patches is probably due to a phosphate deficiency.
  7. Leaves that grow smaller than normal and turn yellow probably indicate a serious and urgent nitrogen deficiency.

How do you help your aquatic plants recover from a nutrient deficiency and keep them from turning yellow?

If the cause of the yellowing is a nutrient deficiency, you need to make sure that they receive the deficient nutrient by making it readily available in their water. 

There are also other factors to consider to keep your aquatic plants happy:

Carbon dioxide

Plants need carbon dioxide in order to grow. Some people use supplemental carbon dioxide to help improve their aquatic plants’ growth rate, size and color. You can also do this by using carbon supplements in tablet or liquid form.

Water quality

Each plant has different requirements when it comes to their water, but most aquatic plants need a pH between 6.5 and 7.

Aquatic plants like their water temperature between 75 and 80 degrees Fahrenheit. The water in the tank also needs to be changed 10% if you do it every week, and 25% if you change it fortnightly.

Proper circulation is important to aquatic plant health. It helps prevent the growth of algae and keeps organic waste from accumulating on the leaves.

Light

The type of plants you want and the height of your tank will help determine the amount of light your aquatic plants will need. There are species that need more light than others. You should take these into consideration, especially since water can make it difficult for light to reach the plants. If you feel that the sunlight that reaches your aquarium is too weak, you may have to install a grow light, especially for a tank that is taller than normal.

Aquatic plants prefer full-spectrum light, so choose a light designed for plants, such as an LED.

Aquatic plants need six to eight hours of uninterrupted light daily in order to grow properly. Remember that keeping a weak light on for longer than eight hours is not going to make up for what a sufficient light is able to provide. Make sure you follow a night and day pattern as the plants would experience in nature. Nowadays, grow lights can be hooked up to a digital timer so that you do not have to remember when to turn the lights off and on.

Lastly, always check the glass covers on your tank to make sure they are clean, so that the light can pass through strongly and consistently.

Substrate

Aquatic plants like to be planted in coarse sand or fine-to-medium gravel, but it is always best to do your research and know what kind of medium your plants need. You can mix and match the different grades to get the textures that your plants require.

Try to avoid using sand that is too fine because it can be too compact and affect the breathability of the medium. Gravel that is too coarse, on the other hand, can be loose and unable to anchor the plant properly.

Try not to use carbonate-based substrates such as crushed oyster or dolomite, because they can increase the tank water’s alkalinity and be unsafe for the plants and animals in the tank.

Nutrients

Aquatic plants need nutrients and minerals such as iron, magnesium, potassium, calcium, phosphorus and nitrogen. Phosphorus and nitrogen can be provided by the fish waste and uneaten fish food, but this might not be enough and you may need to add these minerals regularly.

Aquatic plants absorb nutrients through their leaves and roots. You can mix in an iron-rich clay, like laterite, to help the roots absorb nutrients more effectively.

You can provide these important nutrients with tablets specifically formulated for aquatic plants. Tablets meant for houseplants may not benefit your aquatic plants as much.

Conclusion

Yellowing aquatic plants is a sign of stress due to an environmental factor. You need to identify the factor that is causing this change in color before your plants become more damaged.

The most common causes of yellowing aquatic plants are transplant stress, lack of light, aging, water quality and nutrient deficiency.

Aquatic plants are very different from houseplants in terms of their requirements for growth. Make sure you do plenty of research and try to simulate their natural habitat as best you can in your tank.

Image: istockphoto.com / TT

Beet Leaves Turning Yellow

Beet Leaves Turning Yellow

Beet plants – scientific name Beta vulgaris – are cool-season vegetable crops that can be grown anywhere. Although popular as root crops, all the plant parts are edible, with the red root beets being the more common variety. Mature beet plants are 12 to 18 inches tall and 18 to 24 inches wide, and prefer loamy soil. Just like other plants, these crops also suffer from diseases and conditions that cause yellowing leaves. 

Common reasons for beet leaves turning yellow 

Beet leaves could turn yellow because of certain diseases, such as Verticillium wilt, beet mosaic virus, black root rot or Cercospora leaf spot.  

1. Verticillium wilt

Verticillium wilt is caused by soil-borne fungi that invade the roots of the plants. These fungi enter the sap pathways, resulting in the weakening and premature death of the beet plants. 

The leaves change from yellow to brown and start to droop. This disease is prevalent in cool spring temperatures, and could also spread to other plant parts such as the stems. 

Treatment for Verticillium wilt: 

Remove any plants affected by this fungal disease. Prune the infected leaves and branches and dispose of the affected parts at once. Do not compost the infected plants, and disinfect your pruning equipment afterwards. 

You can also use fungicides or seek the help of professionals to fumigate the soil. If you are in an area with warm weather, you can use plastic-covered soil to discourage the growth of fungi. 

How to prevent Verticillium wilt:

Avoid planting the same crop in your garden for several years in a row. Ideally, you should wait for at least four years before you plant the same crop again. Be sure to remove the weeds and plant debris affected by the fungus so that it does not spread to other plants in the garden. Do not overwater your beet plants, as this creates a conducive environment for fungal growth. 

2. Beet mosaic virus 

This virus is usually spread by pests like aphids, whiteflies, leafhoppers and cucumber beetles. The younger leaves will develop yellow or white mottling and some leaves will have discolored rings before eventually falling off. 

Treatment for beet mosaic virus: 

There is no treatment for this virus. Once the plants are infected you cannot control it and should dispose of the affected plants. 

How to prevent beet mosaic virus:

Check for the presence of pests on your plants and, if present, identify the type of pest. Use pest traps to exterminate them, or you can make a dish soap solution and spray it on the plants. You can also release natural pest predators like ladybugs into your garden. Use spot treatment options that are organic and non-toxic, such as neem oil, and consider planting the beets in late spring, as virus-carrying pests usually do not surface at this time of year.

Should the virus start to spread through the garden, prevent reoccurrence by cleaning the garden area during the fall season. Be sure to remove any residue or plant cuttings. Avoid planting your crop until the disease is eliminated, and never use fungicides as these cannot treat viral diseases. 

3. Black root rot 

Beet leaves turning yellow could also be due to black root rot. The leaves will start drooping and growth will be stunted. The condition causes problems with the root system and lateral roots become dry, shriveled and black. The leaves and beet bulbs become inedible.  

Treatment and prevention of black root rot:

Black root rot is ideally treated with fungicides. 

Some prevention measures include the following:

  • Provide proper drainage for your beet plants. 
  • Establish a regular watering schedule. 
  • Always check the soil before watering. 
  • Be sure to aerate the soil to provide better oxygen flow. 

4. Cercospora leaf spot 

This disease is caused by the fungus Cercospora beticola, and is prevalent during late summer when the humidity and temperature  are high. It is characterized by small, circular, brown spots on the beet leaves. The spots may turn gray and, in severe cases, the disease will spread from the outside leaves and the plant will not grow properly as the roots will also be affected. 

Treatment for Cercospora leaf spot:

Remove infected leaves and dispose of them properly. Use fungicides to treat the disease; try to use multiple types as some strains are resistant to certain fungicides.

How to prevent Cercospora leaf spot: 

Remove weeds and plant debris from around infected plants, because the disease can survive in the soil for two years. This will avoid further spread of the disease to other parts of your garden. Treat seeds with hot water or fungicides before you plant them and avoid getting moisture on the leaves through overhead irrigation as this can encourage growth of the fungus. 

Water the plants during the daytime when the leaves are dry, and improve the air circulation in your garden to discourage fungal growth. 

5. Pests on your beet plants 

Beet leaves turning yellow could also be due to the presence of pests such as aphids. These insects suck on the sap or juice of plant tissue, causing the plants to weaken and the leaf color to change from bright green to a sickly yellow. To control these pests, use insecticidal soaps or spray your plants with a water hose. 

Conclusion 

Yellowing beet leaves could be attributed to fungal or viral diseases such as Verticillium wilt, beet mosaic virus, black root rot or Cercospora leaf spot. It could also be due to pests in your garden, such as aphids, which feed on the sap of plant tissue. 

Image: istockphoto.com / Imladris01

Wisteria Leaves Turning Yellow

Wisteria Leaves Turning Yellow

Wisteria is a flowering plant of the legume family Fabaceae, which includes ten species of vine. These plants are native to Korea, Japan, China, southern Canada and the eastern United States. They are fast-growing and are considered invasive. They bloom in spring and produce clusters of fragrant, lilac-colored flowers, but also suffer their share of conditions that cause yellowing leaves. 

Wisteria leaves turning yellow: What are the reasons?

Normal yellowing due to seasonal changes 

Wisteria plants, specifically the Japanese and Chinese wisteria varieties, are deciduous, woody vines commonly grown in the USA. When the young leaves appear in springtime, they are naturally yellow and will remain so for a few weeks. The leaves will eventually turn deep green as the season progresses. 

Wisteria leaves will also turn yellow when cool weather arrives in fall and leaflets may drop off the plants. This is normal as winter approaches. Yellow leaves early in spring and older leaves turning yellow during fall are natural occurrences and reflect seasonal changes, so there is nothing to worry about at all. 

Fungal infections

Wisteria leaves turning yellow could be attributed to fungal infections. Powdery mildew causes yellowish mottling during summer when the weather is warm. This fungal disease is caused by species of fungi of the order Erysiphales. 

Cankers are a fungal disorder that causes leaves to turn yellow and wilt. The branches may also develop dark, soft spots.

To treat these disorders, you need to prune all the affected plant parts. Sterilize the pruning blades in rubbing alcohol between cuts to avoid spreading the infection. Water the plants with a soaker hose or drip irrigation to keep the foliage dry and clear plant debris from under the plants.  

Insects or pests 

Wisteria plants attract pests like aphids and scale insects which suck on the sap or juice of the plant, resulting in yellowing leaves.  Aphids are soft-bodied, yellowish-white pests that produce a sticky fluid called honeydew. Scale insects are hard-bodied pests that resemble raised and dark spots on stems and leaves. They damage the foliage and cause leaves to turn yellow and fall off. 

To exterminate these pests, spray the affected plant parts with insecticidal soaps, neem oil or horticultural oils. 

Viruses 

Wisteria leaves may also turn yellow due to plant viruses like the tobacco mosaic virus. This viral infection causes yellow streaks or spots on the leaves, although they may look healthy. Viral infections usually do not do significant damage, but you should provide your plants with consistent moisture if they are affected, to prevent further stress. Make sure the plants get about one inch of water weekly. 

Iron deficiency 

Another reason wisteria leaves turn yellow is due to iron deficiency in the soil. The roots cannot absorb nutrients if iron is deficient, and if the soil pH is alkaline as opposed to the neutral to slightly acidic soil that these plants prefer. 

To fix the issue, use a soil test kit to check the soil’s nutrient content and amend with the addition of compost or peat. 

Poor drainage 

Yellowing wisteria leaves could be due to poor drainage. Excess moisture from overly soggy soil spells danger for wisteria plants and the leaves will turn yellow and fall off. 

Fix this problem by checking the drainage of your garden or planters and hold off watering until you can achieve the necessary porosity. 

Wisteria plant care 

  1. During springtime, apply a layer of compost under the soil and at least a two-inch layer of mulch to control weeds and retain moisture. 
  2. Provide phosphorus to aid with flowering. 
  3. Make sure to water the plants if there is less than one inch of rain each week.  
  4. Cut back the rampant shoots every two weeks during summer to encourage more blooms. 
  5. Plant wisteria during the spring or fall while they are dormant. 
  6. It is ideal to buy established plants or start from cuttings, but they can also be grown from seed, although it may take a few years for them to mature and produce flowers.

Conclusion 

Wisteria plants are popular for their fragrant, lilac-colored flowers but, like most plants, they also suffer their share of disorders that cause yellowing leaves. This could be due to fungal or viral infections, seasonal changes, iron deficiency, pests, or poor drainage. 

Image: istockphoto.com / allou

White Eggplant Turning Yellow

White Eggplant Turning Yellow

White eggplants, with the scientific name Solanum melongena, are grown worldwide for their edible fruits. They have pure white or cream-colored skin and their flesh is creamy white, less acidic and less bitter than the purple variety. The fruits are also smaller than purple eggplants; they are about three to six inches long and egg- or pear-shaped. These plants contain nutrients including potassium and vitamins A, C and B. They are also prone to diseases and conditions that cause yellowing leaves or fruits. 

Common causes of white eggplant turning yellow 

The fruits are overripe

White eggplants may turn yellow because they have been left too long and have become overripe. The flesh becomes mushy and bitter once they become too ripe, while the skin becomes glossy.

To solve this issue, you should know the right time to harvest the fruits. Pick them before their skin turns yellow, using pruning shears or a sharp knife, and keep a short stub of stem attached. 

Pest infestation 

Pests like flea beetles could invade and feed on white eggplants. They destroy foliage and seedlings, causing leaves and fruits to turn yellow. 

To exterminate these pests, spray the affected plants with insecticidal soap solution or a solution of rubbing alcohol and water. 

Sunburn 

If you are in an area with high temperatures, the plants may become sunburned from too much exposure to sunlight. To spare your plants from turning yellow, cover them with a garden cloth. If you keep them in containers, place them in a shady spot during the hottest time of the day. 

Fungal growth or viruses

Fruits and leaves of white eggplants tend to turn yellow if they have a fungal infection like Verticillium wilt or early blight. Viruses, transmitted by pests, could also cause yellow circles or spots. 

Prune the plants and apply fungicide to ward off fungal infections. See to it that there is proper air circulation around the plants to discourage fungal growth, and practise crop rotation. Viral infections are usually incurable, and you need to destroy and dispose of the infected plants at once to avoid any spread of infection to other plants. 

Irregular watering 

White eggplants could also turn yellow due to irregular watering.  Plants that do not get enough water may become stressed and start wilting and yellowing.  

To solve the problem, apply at least two to four inches of organic mulch and water the plants regularly, ideally in the morning. 

Nitrogen deficiency 

A nitrogen deficiency in the soil could be the cause of your white eggplants turning yellow. To check for this, you need to do a soil test. A balanced fertilizer, such as a 10-10-10, should correct it. 

If the soil pH is too high or too low, the plants may not be able to utilize the nitrogen, so the soil pH should be tested along with nutrient levels. 

White eggplant care 

White eggplants are cold-sensitive, so before you plant them outdoors make sure that the soil is warm and there is no danger of frost. Plant the eggplants where there is full sun and good drainage to discourage fungal growth. Plant them at least 24 to 36 inches apart for good air circulation and for sufficient sunlight to reach all the foliage. Be sure to water them weekly and prune them regularly to increase fruit production. 

Can you eat eggplant that has turned yellow?

Yes, you can eat eggplants if they have turned yellow, as the fruits are edible regardless of color. However, those that are yellow because they are overripe may not have the best taste compared with those picked at the peak of ripeness. 

Why is my eggplant turning white?

White eggplant leaves turning white, or with white powdery spots, may have powdery mildew, which is a fungal disease. The white spots will gradually spread over most areas of the leaves and stems. Affected leaves may become distorted, turn yellow, die and fall off, exposing the fruits to sunburn.

Conclusion 

White eggplants are pear- or egg-shaped, and usually have tougher skin and less bitter flesh than the purple variety. If your white eggplant is turning yellow, it could be due to overripening or sunburn, as well as pest infestation, fungal or viral infections, or nitrogen deficiency. 

Image: istockphoto.com / kornyeyeva

Calathea Leaves Turning Yellow

Calathea Leaves Turning Yellow

Calathea leaves turn yellow when there is an environmental factor causing the plant stress. If the plant’s preferred growing conditions are not met, it will show its displeasure through a change in color. It is up to you to figure out what specifically is causing the discoloration so that you can fix it.

The most common causes of yellowing calathea leaves are aging, pests, drafts, overfeeding, transplant stress, temperature changes, insufficient or excess light, low humidity, underwatering and overwatering.

Why are the leaves on my calathea plant turning yellow?

Aging

Not all reasons for yellowing calathea leaves are sinister. It is completely normal for a calathea plant’s lower leaves to turn yellow and even brown as they grow older. This is because the plant wants to focus its resources on growing new leaves. It will choose to cut off the older leaves from resources so they die and fall off. You can help the leaf turnover by removing these old leaves while pruning the plant.

Since this is a normal part of the plant’s life cycle, there is nothing to fix and no need for you to worry. As long as the rest of the plant is vibrant and healthy and only the lower leaves are yellowing, you are doing a great job with your plant.

Repotting stress

Repotting a plant that has outgrown its pot is necessary, and can cause your plant to go through a considerable amount of stress. Give your plant enough time to get used to the change and it should be able to recover.

The good thing is that calathea plants are fine with being a bit rootbound, so you only really need to repot the plant every two years or so. The best way to know if your calathea needs repotting is if the plant needs to be watered more than twice a week now.

Disease

One of the most common diseases that can infect your calathea plant is the fusarium fungus. This disease causes your plant’s leaves to turn yellow and its stem to turn brown. You can use a copper fungicide to clear the disease up, but you can also just wash the old soil from the plant’s roots, throw away the soil, clean and sterilize the pot, and repot the plant using new soil.

Another disease, which is more serious than the fusarium, is the Cucumber Mosaic virus. It may not kill your plant but it does spread easily to other plants. It causes yellow streaks to appear on the leaves. Make sure you separate the infected plant from the other healthy plants as soon as possible. Dispose of the plant and the soil properly so the disease cannot spread, and make sure you wash and sterilize the pot before reusing it.

Pests

Calathea plants can get infested by scale insects, mealybugs and aphids, but the pests they are most prone to are spider mites. All of these insects feed on the plant and can cause stunted and yellowing foliage.

Spider mites are drawn towards calathea plants that are dry, so their presence can also be indicative of your plant being underwatered. 

You can discourage spider mites from living on your calathea by misting the plant. You can also just remove the spider mites from the plant by spraying them with water once a week. Neem oil can also be used to kill these insects. Apply the oil on the leaves using a cotton ball once a week for a month to make sure all of the pests have been killed.

Drafts

If you keep your calathea plant inside the house and you cannot figure out what could possibly be turning its leaves yellow, you may need to check if there are drafts passing through the area where the plant is located. Maybe the plant is directly under an air conditioner, or maybe it is placed near a radiator. Having cold or hot air constantly blown toward it is not good for the plant and can cause its leaves to turn yellow due to stress.

Overfeeding

Calathea plants do not need to be fertilized often, which is why it is easy to make the mistake of overfeeding them. Too much fertilizer can cause the leaves to turn yellow, as well as a host of other issues.

You can still fertilize your calathea, but only do it once a month using a balanced fertilizer at half-strength.

You need to keep in mind that fertilizer is not a cure-all for ailing plants. Fertilizer is ideally used on plants that are healthy and actively growing. If you notice your calathea turning yellow after feeding, you have probably given it too much, so increase the dilution next time or simply reduce the frequency of feeding.

You can also keep the fertilizer from turning the plant yellow by flushing the soil with water to remove excess fertilizer that has built up in the soil. Flushing is done by letting clean water run through all of the soil for about two minutes until you can see the excess water flowing through the drainage holes at the bottom of the pot. Do this every few months, and it should count as watering, so do not water the soil again until after it has dried.

Temperature changes

Temperature extremes that are either lower than 62 degrees Fahrenheit or higher than 81 degrees Fahrenheit can both cause yellowing of calathea plant leaves. The changes in temperature stress the plant.

Calatheas can be tricky to keep happy during the winter, because even if you try to protect them from the cold using radiators or heaters, they do not do well near those heat sources either.

Transplant stress

Like most plants, calatheas also go through a period of stress when they are relocated to a new place. This is especially common for plants that are taken home from a nursery where the plant was grown in the most ideal conditions. It is difficult to replicate the conditions of a greenhouse in your home, so the plant has to adapt to new temperatures, humidities, light sources and watering schedules than those it has been used to.

There is nothing wrong with your plant; all you need to do is give it time to adjust to its new surroundings and it will recover soon enough. Make sure you provide it with conditions that are as close as possible to its natural habitat.

Insufficient or excess light

Both too much and not enough light can cause yellow leaves on your calathea. These plants require eight hours of indirect light everyday. The most ideal placement for the plant is next to an east-facing window, but you can still place it in a west or south-facing window as long as there is a curtain to somewhat diffuse the light. You can also just move the plant further away from the window so it does not get hit by light too much. 

Low humidity

Calatheas are tropical plants, which means they like conditions with high humidity. This does not mean they will die in low humidity, but they will definitely be stressed, hence the yellowing leaves.

In the wild, calathea live in 90% humidity, but they can live in 50 to 70% humidity as houseplants.

You can help your plant by raising the humidity in your home with a humidifier. This is best for situations where you are growing multiple calathea plants, because it is an industrial solution for keeping humidity high. If you only have one or two calathea, there are easier ways to raise the humidity.

You can easily raise the humidity around your calathea by keeping it close to other tropical plants. Make sure there is still sufficient air flow between each plant. One of the downsides of this method is always making sure none of the plants gets infested with pests, because they will be able to spread quickly.

You can also increase the humidity for your calathea by placing trays with water near your plant, or placing the pot onto the tray but raising it using pebbles so that it does not touch the water. You can even use seashells to catch water so they can act as reservoirs.

One of the easiest ways to raise humidity is to mist the plant several times a day. Make sure the plant has good airflow around it because if it does not, and you keep misting it, fungal problems may arise.

Underwatering

The calathea plant can also become stressed if you allow its soil to become dry for long periods, leading to yellow leaves. The plant’s leaves do not always show when they are thirsty, so the more reliable way to tell if the plant needs watering is to check the soil. If the top few inches of soil are dry to the touch, you should water it.

Overwatering

Another common cause of yellowing calathea leaves is overwatering. Yes, the calathea is a tropical plant and it likes its soil moist, but you should never make the plant stand in soggy soil. If the plant is in soggy soil, the roots will drown and die. Dead roots are susceptible to root rot, which can travel up the roots and reach the stem and leaves, resulting in yellow leaves.

You can avoid overwatering by establishing a watering schedule suitable for the plant, using well-draining soil that does not retain water for too long, and using a pot that has drainage holes at the bottom so that excess water can easily drain out.

Conclusion

Calathea plant leaves turn yellow when there is an environmental factor causing stress to the plant. You need to be able to identify what this stressor is so that you can fix the problem as soon as possible.

The most common causes of yellowing calathea leaves are aging, pests, drafts, overfeeding, transplant stress, temperature changes, insufficient or excess light, low humidity, underwatering and overwatering.

Image: istockphoto.com / Elena Grishina

Hellebore Leaves Turning Yellow

Hellebore Leaves Turning Yellow

Hellebore leaves turn yellow when the plant is stressed by an environmental factor. Inspecting the plant and its living conditions to figure out the exact cause of the discoloration is key to fixing the problem.

The most common causes of yellowing hellebore leaves are light issues, soil type, overwatering, underwatering, temperature changes, overfeeding, pests and disease.

In this article, we will discuss the different causes of yellowing hellebore leaves and how to remedy each one.

Why are my hellebore leaves turning yellow?

Overwatering

Hellebore plants like their soil to be somewhat moist, but that does not mean you can get away with overwatering them. If you let the plant sit in soggy soil for long periods of time, its roots will not be able to take in oxygen and they will drown. The dead roots will become more susceptible to pathogens, such as opportunistic fungi and bacteria. This condition is called root rot.

Root rot happens when the infection in the roots moves up to the plant’s stem and leaves. The plant’s leaves will turn yellow, then brown, and fall off. If you are not able to catch the root rot in its early stages, you might not be able to salvage the plant at all.

If you are able to catch the rot in its early stages, you may be able to save the plant. Take it out of the pot and wash the soil from the roots. If there are any brown and black rotten roots, cut them off using sterile scissors. Let the plant air dry on a tray lined with a paper towel. When the roots have dried up, you can replant it in a pot with drainage holes at the bottom, using well-draining soil.

The best way to avoid overwatering is to know when to water the plant. You can do this by checking the soil: If the top two inches are dry to the touch you can water the plant, but if the top two inches of soil are still wet, check the soil again after one or two days.

Underwatering

Hellebore leaves can also turn yellow when the plant does not get enough water. Like all plants, hellebore needs water for the moisture that it gives the plant as well as to transport essential minerals and nutrients from the soil to the plant. If the plant does not get water for long periods of time, it will choose to sacrifice its older leaves close to the base by withholding resources from them. This is to focus the plant’s limited resources on the younger leaves at the top of the plant. The leaves near the base will turn yellow, then brown, become brittle and eventually fall off.

You can remedy an underwatered hellebore plant by establishing a regular watering schedule. If you touch the soil and it feels dry, water it until all of the soil in the pot has been soaked and the excess water is flowing out of the drainage holes at the bottom. Making sure all the soil is wet is important, so that all the roots can get water.

Light issues

Hellebore plants like to be in partial shade, and if they are placed under direct sunlight for long periods of time, their leaves will turn yellow and even brown due to leaf scorch. They should be placed in a spot where there are trees that will provide them with shade.

If you place the plant indoors, do not place it in an area that gets too much light. If you have no choice, try placing a curtain to diffuse the light and avoid sun damage.

If the plant does not get enough light, on the other hand, the leaves will also turn pale and yellow. During the colder months when sunlight is sparse, you can buy a grow light to help the plant get its required amount of light.

Soil type

Hellebores thrive in soil that has plenty of organic matter and drains water well. Well-draining soil eliminates excess water much more effectively than compact soil such as clay. This helps avoid overwatering by letting the excess water flow to the bottom of the pot and out of the drainage holes so that the soil can dry out better between watering and get aerated.

Hellebores also like their soil to be alkaline, so if the soil on your plants is acidic, try adding lime to neutralize the soil or make it more alkaline.

Temperature changes

Hellebores can tolerate high temperatures fine, but they will need to be taken indoors during the winter because they do not do well in the cold or harsh winds. The low temperatures can cause their leaves to turn yellow.

When the plant is indoors for the winter, make sure there are no hot or cold drafts passing through the area where the plant is located. The warm and cold air constantly hitting the plant will also have a negative effect on it.

Overfeeding

You can give your plant fertilizer in the spring and early fall to encourage growth. You do not need to fertilize it in the winter, because you might overfeed it which can also have a negative effect.

You can try to flush excess fertilizer from the soil by letting water flow through the soil and out of the drainage holes.

Pests and disease

Hellebores are normally tolerant of pests, but can be susceptible to aphids feeding on the sap of their leaves. You can remove the infestation by pruning the affected foliage or by using neem oil. Apply the neem oil to the leaves using a cotton ball. Treat the plant once a week for a month to make sure all the aphids have been killed.

Leaf spot and downy mildew are the most common fungal diseases that infect hellebores. You can use a fungicide to remove these infections.

Make sure you keep the infected plant separate from your other healthy plants, so the pests and disease do not spread.

Conclusion

Hellebore leaves turn yellow when an environmental factor is causing the plant stress. The key to fixing the problem is correctly identifying the cause of the discoloration.

The most common causes of yellowing hellebore leaves are light issues, soil type, overwatering, underwatering, temperature changes, overfeeding, pests and disease.

Image: istockphoto.com / Claudia Cooper

Clusia Leaves Turning Yellow

Clusia Leaves Turning Yellow

Clusia leaves turn yellow when there is an environmental factor or a change in the plant’s living conditions that is causing it stress. Inspecting the plant and its leaves thoroughly will help to correctly determine the exact cause of the discoloration.

The most common causes of yellowing clusia leaves are overwatering, underwatering, insufficient light, temperature changes, low humidity, disease and pests.

In this article, we will discuss the different causes of yellowing clusia leaves and how to remedy each.

Why are my clusia leaves turning yellow?

Overwatering

The clusia plant is able to survive relatively long periods with no water, which makes them prone to overwatering.

Eager newbie plant owners can be a little too enthusiastic when they first start caring for their plants. The clusia plant likes its soil moist, but does not tolerate soggy soil.

When the plant’s soil is constantly wet, its roots will drown and die. Plant roots need to dry out in between watering for them to have access to oxygen. Without oxygen, they will die.

If you suspect that your clusia plant is overwatered, take it out of the pot and wash off the soil to have a better look at the roots. If there are any brown or black roots, this means the plant has root rot. This happens when the roots have drowned and died and become susceptible to bacteria and fungi. The pathogens help spread the rot upwards toward the plant’s stem and leaves, resulting in yellowing. The leaves will become soft and limp and will eventually fall off. If the symptoms of overwatering can already be seen on the plant’s leaves, that usually means it is too late to salvage the plant.

If you were able to catch the root rot in its early stages, you can try to save the plant by cutting off the brown or black roots using sterile scissors. Then let the plant air dry on a tray lined with a paper towel. When the roots have dried, you can replant it using new, well-draining soil, in a pot that has drainage holes at the bottom.

The key to avoiding overwatering is knowing when to water the plant. Clusia plants only need to be watered when the top two inches of the soil are dry to the touch. If you touch the soil and the top two inches are still moist, wait one or two days and check the soil again.

Underwatering

Even though the clusia plant is more prone to overwatering, this does not mean it is impossible to underwater it. As mentioned above, they like their topsoil to be a bit moist but not soggy.

If you neglect your clusia plant and forget to water it, the plant will dry out and the leaves will turn yellow and then brown. This is because the plant needs water not only for its own moisture, but also to effectively transport nutrients and minerals from the soil into the plant. The older leaves at the bottom will be the first to turn yellow in an underwatered plant, because the plant will choose to focus its remaining resources on the younger leaves at the top.

Fortunately, it is very simple to rehabilitate an underwatered clusia plant. Just water it generously until all of the soil in its pot is soaked and the excess water starts to flow out of the drainage holes in the bottom of the pot. Soaking all of the soil is important, so that all the roots get their share of the moisture.

Light issues

Clusia plants need bright, indirect light to thrive. They are able to survive in the outdoors under direct sunlight, but if they get too much they can get scorched. The leaves turn yellow and get brown tips and edges due to a loss of chloroplasts, because the plant thinks it does not need them due to the concentrated light it is receiving.

On the other hand, if the clusia plant is unable to get enough light, the leaves will become very green. This is because the plant will compensate by creating more chloroplasts to absorb as much as possible of the limited light available. They will eventually become paler and limper the longer they are kept away from a good light source.

If you plan on keeping the plant indoors, place it near a west-facing window in the warmer months and move it to a south-facing window during the colder months to maximize the available lighting when the weather is gloomy.

Temperature changes

Clusia plants prefer to be between 58 and 85 degrees Fahrenheit. If you keep the plant in temperatures lower than 58 degrees Fahrenheit, it will become unhappy and lose color in its leaves.

Temperatures higher than 85 degrees Fahrenheit can also lead to yellow and brown leaves, and even leaf drop.

Room temperature is not the only factor you need to watch out for; drafts can also affect the plant. When choosing a location for your clusia plant, make sure there are no cold or warm drafts passing through, because this can also cause yellowing leaves.

Low humidity

Clusia plants do best in medium to high humidity. When the plant is kept in a place with low humidity, the leaves can turn yellow or brown and start to curl. As long as you can keep the humidity above 40%, the plant should be fine.

You can increase the humidity around the plant by placing a humidity tray near the plant or by misting the plant once in a while.

Disease and pests

Clusia plants are quite resilient against infections, but they can become very susceptible to opportunistic fungi and bacteria when they are severely compromised, such as when they have root rot.

The most common pests that infest clusia plants are spider mites, mealybugs, aphids and scale insects. You can remove these by spraying them off with your garden hose. Make sure you separate the infested plant so that the pests do not spread to your healthy plants.

Conclusion

Clusia leaves turn yellow because of environmental factors that cause the plant stress. Correctly identifying the cause of the discoloration is the first step in fixing the problem.

The most common causes of yellowing clusia leaves are overwatering, underwatering, insufficient light, temperature changes, overfeeding, low humidity, disease and pests.

Image: istockphoto.com / Felipe Cruz

Rosemary Leaves Turning Yellow

Rosemary Leaves Turning Yellow

Rosemary plants, of the mint family Lamiaceae, are fragrant evergreen herbs used as culinary condiments and for their health benefits. Native to the Mediterranean, these plants have fibrous root systems and prefer hot climates with intense sunlight. Like most plants, they also suffer from certain conditions that cause yellowing leaves. 

Rosemary leaves turning yellow: Common reasons

Nutrient deficiency or excess nitrogen

Rosemary plants may develop yellow leaves because they lack certain nutrients like iron, zinc, nitrogen or manganese. It is likely an iron deficiency if the yellowing starts on the young leaves and spreads to the older ones. However, if the first leaves to turn yellow are the oldest ones, it could be a nitrogen, manganese or zinc deficiency. 

To fix the issue, add fertilizer at least monthly or every two months during the growing period, but not more than twice during winter dormancy. Water-soluble fertilizers with micronutrients are ideal; just mix one teaspoon of fertilizer with one gallon of water. 

Inversely, yellowing rosemary leaves could also be attributed to a soil enriched with manure that is high in nitrogen, or because of too many fertilizers. Rosemary plants thrive in sandy or stony soil and have adapted themselves to these conditions. Excess nitrogen can cause the leaves of the plants to become yellow. 

Other signs of nitrogen stress, aside from yellowing leaves, include weaker-smelling and tasting leaves, and more abundant foliage but with fewer flowers. Studies attest that rosemary planted with more perlite or sand, along with lower levels of fertilizer, produce more oils in the leaves and have increased aroma and flavor. 

Planting rosemary in a sandy soil mix that is fast-draining recreates their native soil type and allows good drainage while creating a low-to-medium nutrient environment that is ideal for these plants. 

Root rot and water problems

Rosemary leaves turning yellow could also be attributed to root rot and water problems. Rosemary thrives in well-draining soil and too much water could trigger root rot. Check your plant’s roots by removing it carefully from the pot and exposing the roots.  

If you notice that the roots are black and slimy, this indicates root rot; healthy ones are white and firm. You can still save your plant if only a few roots are affected, by cutting back on watering and increasing drainage. 

To resolve yellowing leaves due to water sensitivity: 

  • Cut watering back to once every two weeks. 
  • If the soil is slow-draining, improve it with sand or grit. 
  • Transfer the plants to pots with good drainage. 
  • Move the plants to an open area of the garden for more air flow. 

Rosemary plants that are already established may only require watering once every two weeks with a generous soak. This encourages the roots to establish well and to make sure that the plants are resilient to drought conditions.

Spider mite infestation

Another reason rosemary leaves turn yellow is the presence of pests like spider mites. They feed by sucking the plants’ sap or juice, which weakens the plants. If left untreated, they could eventually kill the plants.

To treat the problem, wash down the plants with a forceful spray of water and use neem oil to keep the spider mites away. Make sure that the plants do not get too dry between watering to avoid attracting spider mites. 

Insufficient light 

Rosemary plants thrive when exposed to full sun for around six to eight hours daily, while indoor ones need plenty of supplemental light.  If these plants do not get sufficient light, the leaves will start to turn yellow. 

To fix this, place the plants in a sunny, south-facing or west-facing window where there is enough sunlight. Indoor plants should have a grow light or standard fluorescent lighting. Position the light at least six inches above the rosemary and leave it on for about 14 hours a day.  It is ideal to use a timer to automate the light switch. 

Conclusion

Rosemary plants are evergreen and fragrant with needle-like leaves. They are cold-hardy plants, but also suffer from disorders such as yellowing leaves. This could be due to nutrient deficiency or nitrogen toxicity, as well as watering problems, spider mite infestation or insufficient light.

Image: istockphoto.com / Ivannag82

Honeysuckle Leaves Turning Yellow

Honeysuckle Leaves Turning Yellow

Yellowing of honeysuckle leaves is a sign that the plant is suffering stress caused by an environmental factor. The first step to recovery is correctly identifying the source of the leaf discoloration.

The most common causes of honeysuckle leaf yellowing are chlorosis, canker disease, leaf blight, underwatering, leaf scorch, scale insects and insufficient light.

In this article, we will discuss the different causes of yellowing honeysuckle leaves and how to remedy each one.

Why are my honeysuckle leaves turning yellow?

Chlorosis

Chlorosis is the yellowing of leaves on a plant, often caused by a nutrient deficiency. The most likely culprit in this situation is a lack of nitrogen. Plants need nitrogen for growth and a lack of this element causes a yellowing of leaves on the honeysuckle vine. The leaves will look faded and spotted, and then turn yellow and wilt. The longer the chlorosis is left unchecked, the more deficient the plant becomes, resulting in stunted growth and die-back.

The symptoms of chlorosis mirror a lot of those seen in underwatering, so if you know that you are diligent in watering your plant yet it still has these symptoms, then chlorosis is the likely cause.

Treat nitrogen deficiency by sticking to a feeding schedule. Use fertilizer that is organic and slow-release so that the vine does not get too much nitrogen either. The rate at which the plant receives nitrogen should be just right.

Canker disease

Canker disease is caused by a fungus which can affect honeysuckle. It causes the leaves of the plant to turn yellow and brown. You may also see black spots appear on the leaves before they finally wilt and fall off. If left untreated, canker disease will spread to other parts of the vine and the plant will die. You can control the disease by cutting off the affected parts of the vine.

Leaf blight

Leaf blight, caused by the fungus Insolibasidium deformans, is a disease that affects honeysuckle vines. If your plant has this disease you will notice curling and crinkling of young leaves in the spring. The leaves will turn yellow and brown, with brown lesions and yellow edges. There will also be spore-producing structures on the underside of the leaf, called basidia. If your plant is healthy, leaf blight does not really pose a huge threat to its overall well-being.

You can control leaf blight by cutting off and destroying the infected leaves and branches of the vine. Remove any fallen debris from the soil around the plant as well, since it might be carrying the fungus. You can apply fungicide with copper and mancozeb every spring to prevent severe cases of leaf blight.

Leaf scorch

Leaf scorch is another cause of yellowing honeysuckle leaves. It happens when the plant is exposed to too much sun. Certain mineral deficiencies can also cause leaf scorch, as can salt and boron toxicities.

Symptoms of leaf scorch include yellowing and browning of the leaves along their tips and margins. The leaves may curl up and drop early. However, leaf scorch does not mean your plant is going to die, especially if it is relatively healthy to begin with. As long as you keep the plant in good living conditions, it should be able to control or prevent leaf scorch.

Scale insects

Scale insect infestations can be hard to detect, but one of the most telling signs is the yellowing of your honeysuckle leaves. These pests can also leave white rings when you rub the bark or foliage. Other symptoms of scale insect infestation include die-back, premature leaf drop, and mold buildup caused by the honeydew that the scale insects secrete.

Scale insects suck the sap from the tissue of the leaves, which weakens the plant and makes it susceptible to all kinds of pathogens.

You can prevent scale insect infestation by making sure you do not over-fertilize, and by avoiding any damage to the plant to keep it healthy. Give the plant water when it needs it and make sure it gets enough sunlight.

To control a scale insect infestation, cut off any infested parts of the plant and treat it with neem oil or insecticidal soap. Try not to use chemical insecticides unless the infestations have become too severe and are affecting the plant’s overall health.

Drought

Another cause of yellowing honeysuckle leaves is drought. The natural habitat of honeysuckle is woodlands, which have soil rich in organic material. They are constantly surrounded by decomposing leaves that retain soil moisture very well. They also make the soil porous, so that any excess water is able to drain away easily.

Honeysuckle planted too close to a wall or fence can suffer from drought because the structure keeps rain or moisture of any kind from reaching the plant’s soil.

If the soil that you use is too sandy and stony, it may not retain moisture very well because it drains too quickly. As mentioned above, honeysuckle likes its soil to be moisture retentive, but not to the point that the soil is soggy, as soggy soil causes plant roots to rot.

If the base of the honeysuckle is in the sun, this can also dry out the soil. Keep the base of the plant in the shade to keep the roots cool and able to retain moisture. The vines are fine being kept in the sun, as this encourages flowering.

Protect your honeysuckle from drought by watering it regularly in the warmer months. Soak the plant’s roots generously once a week to encourage them to establish; this will help the plant even more against drought in the future. Simulate the honeysuckle’s natural habitat by adding an inch of mulch around the base of the plant. This will help conserve the moisture in the soil and add nutrients to help the plant recover.

Insufficient light

Honeysuckle likes its roots to be in the shade but its vines in the sun. Sunlight helps promote flowering, and being a vine makes it easy for the plant to seek out light sources by literally growing toward them. If you place the entire plant in the shade, the plant will not die, but it can cause the leaves to turn yellow and drop off.

Place the plant in an area where its base can get shade while the rest of the plant gets ample sunlight so that it can bloom properly.

Conclusion

Honeysuckle leaves turn yellow when there is an environmental factor negatively affecting the plant and causing it stress. You need to be able to identify the precise reason your honeysuckle’s leaves are turning yellow in order to solve the problem.

The most common causes of honeysuckle leaf yellowing are chlorosis, canker disease, leaf blight, underwatering, leaf scorch, scale insects and insufficient light.

Image: istockphoto.com / krblokhin

Newly Planted Trees Leaves Turning Yellow

Newly Planted Trees Leaves Turning Yellow

Your newly planted trees need constant and regular watering to grow healthily and for their root systems to establish. It takes more or less two years for newly planted trees to establish themselves. An indication that they are established is when the root spread is equivalent to the spread of the above-ground canopy. Newly planted trees are also prone to infections and conditions that cause yellowing leaves. 

Newly planted trees’ leaves turning yellow: What are the reasons?

It could be due to transplant shock

Yellowing of leaves on newly planted trees could be attributed to transplant shock. This is a normal occurrence as the young trees are enduring a stressful event. They are undergoing an adjustment period, which is why the leaves tend to turn yellow and may look wilted. 

If your trees are experiencing transplant shock:

  • Avoid overwatering or underwatering the newly-planted trees. 
  • Practice the “wait and see” approach. 
  • Check the newly-planted trees daily for other signs of distress. 

Transplant shock typically does not last long. It will take just a few weeks for newly planted trees to become adjusted to their new environment. Once they do, they will begin to recover and regain the natural color and health of their leaves and stems.  

It could be due to overwatering 

Newly planted trees are very sensitive since they are still adjusting and establishing their root systems. These trees need to be watered consistently, but if you water them too much, they may lose the ability to absorb the nutrients they need. When too much moisture reaches the cells at the edges of the leaves, these cells can fill until they burst, resulting in crusty brown tips on the leaves’ edges. 

To ensure that you are not overwatering your trees:

  • Always take rainfall into account. 
  • Avoid saturating the ground every time you water the trees.
  • If the situation is getting worse, hold back on watering for a few weeks and see if there are positive changes to the leaves. 

It could be due to soil conditions 

Newly planted trees may not adjust well to their new environment if they are not used to the soil. Transplant shock can be worsened by soil conditions. Soil that is too soggy hinders the absorption of oxygen into the roots, resulting in stunted root growth and root system failure. Soil conditions may also be affected by factors like over-tilling, bad fertilizers, overwatering, and too much heat. 

To fix the issue, make sure that the soil is healthy enough to grow your trees. Fertilizers may be a great help in providing the required nutrients. You should also keep in mind that correct pH levels are essential. 

It could be due to diseases

Newly planted trees turning yellow may be attributed to a disease or infestation which may already have been present when you purchased the plants. While all newly planted trees go through an adjustment period in their new environment, underlying problems such as yellowing leaves may have been there when you bought the trees from the nursery or tree center. If this is the case, you may have unknowingly introduced a disease or pest into your garden. Treat the problem at once so that it does not spread to your other plants. 

Here are some measures you can take to avoid this issue:

  • Make sure the trees come from reputable suppliers. 
  • Check that your garden is safe before planting the new trees. 
  • Look for common symptoms to ascertain the correct treatment.

Why are my newly-planted tree leaves turning brown?

Newly planted tree leaves turn brown due to over-exposure to sunlight, also known as leaf scorch. The problem may become worse due to lack of water, too much fertilizer, or damage to roots. All of these can stress the tree and make it more vulnerable to the sun’s rays.

Conclusion 

The yellowing of leaves on newly planted trees can be attributed to various factors. It could be due to transplant shock, overwatering or existing soil conditions, or diseases or pests that may have been present when you bought the trees from a nursery or tree center. 

Image: istockphoto.com / amenic181

Radish Leaves Turning Yellow

Radish Leaves Turning Yellow

There are multiple reasons that your radish leaves may be turning yellow. It can be something as benign as overwatering, or something more serious such as pests and disease. No matter what the cause, it is affecting the radish enough to cause it stress, which is why it changes color.

Other common causes of yellowing radish leaves are overcrowding, lack of light, weeds, underwatering and lack of nutrients.

In this article, we will discuss all these causes of yellowing radish leaves and also how to fix each one.

Why are my radish leaves turning yellow?

Overwatering

Most newbie gardeners make the mistake of being overzealous when it comes to watering their plants. This is a bad thing for your radish plant, and for most plants in general, and can lead the leaves on your plant to turn yellow.

If you are able to catch your overwatering early enough, the plant should be able to recover with no lasting damage, but if you have been overwatering for an extended time, it may be too late to save the plant.

Plants need time between watering for the soil to dry out so that air can circulate around their roots. If they are in soggy water for too long, the roots will drown.

Correct your watering techniques; keep the soil moist but do not make it boggy. In time, you will master just the right amount of water as well as the correct watering frequency.

Underwatering

Not giving the plant enough water can also cause its leaves to turn yellow. Radishes need to be watered lightly five times a week. Water just enough to make the soil moist, but do not make it soggy. Keeping the soil moist can be made easier by placing mulch over the soil around the radish plant. You can make your own mulch using grass clippings.

It is also easy to dry the plant out in summer, especially if you keep to the same watering schedule as during the cooler months. The soil will dry out much faster during the hotter months, so be sure to keep a constant eye on your plants.

Overcrowding

Another reason your radish leaves may be turning yellow is because the plants are crowded. You might have planted the radishes too close to one another so they end up not having enough room to thrive.

You can fix this by uprooting each plant and spacing them more apart. This way, the plants will no longer have to compete for resources such as water and nutrients.

Lack of light

Radishes need at least six hours of sunlight every day. If the plant is unable to get this required amount, its leaves will start to turn yellow.

This effect can be seen in radishes that were planted in areas with too much shade.

You can fix this problem by simply transferring the plant to another location where it can get six hours of light every day.

Weeds

Weeds are bad to have around any of your plants, because they are plants themselves and require many of the same things our plants do. If there are weeds anywhere near your radish plant, they are taking water and nutrients from the soil that should have been for the radish. The radish leaves will turn yellow and its growth can even become stunted as it is deprived of its resources.

Check the area around your radish plants and, if there are visible weeds, remove all of them.

Lack of nutrients

Nutrient deficiencies can also cause radish leaves to turn yellow. Soil that does not contain the nutrients required by the plant will severely affect it, and you will need to apply fertilizer around the plant to restore nutrients to the soil. Over time, even soil that was once rich in nutrients will become depleted if it has been planted many times.

Radish plants like sandy soil that is rich in nutrients. You can also mix compost into the soil to replenish its nutrients.

Though several nutrient deficiencies can be blamed for yellowing leaves, the most probable reason is a lack of nitrogen. Fortunately you can correct this using fertilizer – specifically one that is high in nitrogen.

Pests and diseases

There are multiple pests that can attack your radish plant. 

Leafhoppers can spread the Aster yellow virus to your plant. These insects can cause plenty of damage to your radishes in a short amount of time. The mycoplasma disease it can give your plant is a kiss of death, because there is no known treatment.

Harlequin bugs can suck the moisture from your plant’s cells and ultimately cause the plant to wilt. Yellowing leaves are a sign that the pests have already been on your plant for quite some time, and that plenty of damage has been done. Other signs of a harlequin bug infestation are white or yellow spots, dotted marks, deformed leaves and wilting.

Diseases

There are a host of fungal diseases that can cause yellow leaves on your radish plant, some of which are discussed below:

  • Club root

This disease gets its name from the large, tumor-like galls that form due to the swelling of the radishes.

This is caused by overwatering and can pose a serious threat to your radish plants.

This fungus thrives in a garden that is overwatered and has a low pH. It can survive in your soil for up to 18 years, making it very difficult to eradicate.

  • Septoria leaf spot

This disease is very common among root vegetables. It causes yellow spots on the leaves which look like water blotches with gray centers.

This disease can affect the radish plant in all stages of its life cycle. It starts its cycle in wet conditions, but spreads more effectively during the summer. It may not kill your radish plants, but it can definitely hinder their growth and further weaken the plants against other possible infections.

  • Blackleg

Yellowing radish leaves that become brittle could have Blackleg. This is a fungal infection that causes the radish under the soil to become slimy and turn black. The longer the disease is left unchecked, the higher up your plant it will travel.

Blackleg spreads from one radish plant to the next without you even suspecting anything. The leaves will curl up and turn brown and eventually the plant will die.

  • Stem rot

This disease is also caused by overwatering and soggy soil. It is also called Fusarium rot, and will cause the leaves of the plant to turn yellow with red streaks along their body.

Conclusion

Radish plants that have yellow leaves usually have a problem pertaining to a certain environmental factor that is causing them stress. You need to identify the cause of the discoloration as soon as possible in order to remedy the problem quickly.

The most common causes of yellowing radish plants are overwatering, underwatering, overcrowding, lack of light, weeds, lack of nutrients, pests and disease.

Image: istockphoto.com / Dinesh Ahir

Spinach Leaves Turning Yellow

Spinach Leaves Turning Yellow

Spinach plants are leafy green flowering plants of the family Amaranthaceae. The vegetable leaves are consumed fresh or preserved, and may be eaten cooked or raw. These annual plants are native to Central and Western Asia and can grow as tall as one foot. They are cold-hardy and can tolerate low temperatures but, like most plants, they can also suffer from yellowing leaves. 

Spinach leaves turning yellow: Common reasons 

Malnutrition 

Spinach needs to be planted in nutritionally balanced soil. To check the nutritional levels of the soil, use a soil testing kit. This will also measure the pH level and other components such as phosphorus and nitrogen. If the soil has insufficient nutrients, the leaves will tend to turn yellow.

These plants need a pH level of 6.2 to 6.8, and if your soil is too alkaline the leaves may turn yellow. Furthermore, if the spinach plants lack nitrogen, phosphorus, boron or potassium, the leaves will also turn yellow. 

To fix the problem, add compost to balance the pH and nourish the soil. To bring the pH below 7 and add more acid to the soil, you can use lime or fresh coffee grounds. 

Spinach plants are heavy feeders requiring nutrient-rich soil. All-purpose fertilizers and compost should be added before planting to ensure that the soil is nourished. 

If the plants are already established but the leaves are turning yellow, they may be lacking nitrogen. Apply a nitrogen-based fertilizer directly to the surrounding soil, or dilute it in water and apply it through watering. 

Diseases

Spinach leaves can also turn yellow due to diseases and infections. Below are just some of the common diseases that affect spinach:

1. Mosaic virus  

This is also called blight, and is a condition that starts with yellowing leaves. As it progresses the leaves curl inward, becoming thin and wrinkled with distorted growth. The infection is transmitted from one plant to another by insects like aphids, leafhoppers and cucumber beetles. There is no treatment, and you need to destroy the affected plants to prevent the spread of the disease. 

To protect your spinach plants from further infection, use insecticidal soaps and safe vegetable insecticides to prevent pests like aphids, harlequin bugs and leafhoppers.  

2. Beet curly top 

Spinach plants with this disease will manifest light green and then yellow leaves, starting with the younger leaves which become curled and deformed. The veins become purple and the texture becomes stiff and thick. Insects like leafhoppers transmit the disease in warm conditions, and you need to destroy the infected plants to avoid the spread of infection. 

Use pesticides to prevent and control pests, so that there will be less chance of the plants becoming infected with this disease.

3. Root rot 

Spinach plants that are starting to wilt with stunted, yellow leaves indicate that they are suffering from root rot, which is also called damping off. The roots become discolored and water-logged, with necrotic lesions. Older plants may die suddenly, while seeds will not germinate properly. 

Root rot is caused by fungus resulting from too much water in the soil. Avoid watering the plants too much and make sure there is proper soil drainage so that water does not stay stagnant in the soil. Use safe vegetable fungicides to treat and prevent further outbreaks and do not plant spinach in the same area repeatedly.

4. Aster yellows 

Spinach afflicted with this disease manifests yellow leaves and stunted growth. There are signs of chlorosis, or yellow leaves with green veins, and the color may change to red or purple. This disease is transferred by leafhoppers that feed on the plants and suck out the nutrients. 

There is no treatment for this infection, and the infected plants should be destroyed to prevent it spreading. Use insecticides to prevent pests and keep your gardens free of weeds to reduce the chances of reinfection.

5. Fusarium wilt 

Yellowing spinach leaves may also be an indicator of Fusarium wilt. The pathogen responsible for Fusarium wilt fungal disease is Fusarium oxysporum. The disease  usually causes the plants to become wilted and withered, starting from the base. Prune the infected plant parts, use fungicides, and do not compost infected plant materials to avoid the spread of the disease. 

6. Downy mildew 

Yellow spots and fuzzy gray material on the underside of the leaves indicates that the spinach plants have downy mildew. This name refers to several types of oomycete microbes that are obligate plant parasites. Prune the infected leaves and discard them at once to prevent the infection from spreading. 

Water the plants at the base rather than from overhead, to keep the leaves dry, since downy mildew thrives in moist conditions. Do not plant the spinach too early or too late in the growing season to avoid infection. You can also opt to plant spinach varieties that are resistant to downy mildew, such as St. Helens, Meridian and Olympia. 

Overwatering or underwatering 

Spinach plants require water to survive, and if they do not receive enough they will turn yellow, wilt, and eventually die. Similarly, watering the plants too much can also harm them and cause their leaves to turn yellow. Overwatering causes the roots to drown and become susceptible to root rot, which could be fatal if it becomes severe. 

Spinach plants should have at least 1 to 1.5 inches of water weekly. Make sure that the surrounding soil is always moist so that the plants stay sufficiently hydrated. 

Temperature changes

Spinach plants are cool weather crops; excessive heat could harm them and they may turn yellow. Sudden temperature changes from low to high temperatures could also be fatal for the plants. To limit their exposure to warmer temperatures, these plants should be planted early in the spring or during the fall. Provide some shade to keep the plants cool and apply a layer of mulch around the plants. 

If you live in a place with a warmer climate, opt for varieties that are heat resistant and tolerant, such as Olympia and Bloomsdale.

Transplant shock

When plants are transplanted, they often experience transplant shock due to the sudden change of environment and the light exposure that the roots receive. Since the plants become stressed, they may experience stunted growth and yellowing leaves. 

To reduce the effects, allow your plants to develop more before transplanting them. Give the plants at least three to four weeks of growth before eventually transplanting them. You may also use seaweed extract to reduce the impact of transplant shock. This also provides a stronger root system and faster growth.

Aging 

Spinach leaves turning yellow may also be due to the normal process of aging. Since there is no way to combat aging in plants, you can harvest the outermost leaves first, as these are the oldest and the most likely to turn yellow. 

Conclusion 

Spinach plants are cold-resistant, but also prone to certain conditions that cause yellowing leaves. This could be due to malnutrition, nutrient deficiencies, diseases such as root rot, Fusarium wilt or downy mildew, or it could be due to temperature changes or transplant shock. 

Image: istockphoto.com / SylvieBouchard


Rhubarb Leaves Turning Yellow

Rhubarb Leaves Turning Yellow

Rhubarb plants are originally from Asia but were brought to Europe and America during the 1600s. This perennial vegetable is popularly sweetened and used in tarts, jams and pies. It has tart-flavored pinkish-green stalks which are the only edible parts, since the leaves contain oxalic acid which is toxic when ingested. These plants are also prone to yellowing leaves due to certain diseases and conditions. 

Rhubarb leaves turning yellow: What are the reasons?

 Too much exposure to sunlight 

Rhubarb plants do best in cold places, so exposing them to direct sunlight or too much heat could lead to yellowing leaves. These plants can only survive in temperatures below 40 degrees Fahrenheit. If you are growing rhubarb in a humid area, make sure to protect them from intense heat. 

Place your plants in a shaded area so that they do not come into direct contact with sunlight. You can also place a screen or roll-up blinds to shade the plants from the rays of the sun.  

Irregular water supply 

Rhubarb leaves may also turn yellow due to an irregular water supply.  The plants will wither and die if not watered regularly. Be sure to maintain a regular schedule and, during dry weather, give the plants a deep soaking at least every seven to 10 days. 

Overwatering or underwatering 

Your plants could be turning yellow from overwatering or if they are in poorly draining soil. To avoid this, ensure that you provide just enough water for the plants, but not too much. 

Similarly, underwatering can also lead to yellowing leaves. To fix this, water the rhubarb at least every other day, especially if you are growing the plants in a warmer region. Water the plants only when the top inch of the soil is dry, and check for moisture with your fingers. 

Poor drainage 

Like most plants, rhubarb needs good drainage to grow healthily. If the water stays stagnant in the soil it could lead to root rot and cause yellowing leaves. Make sure to fix the drainage system of your planters so that no excess water remains in the pots. If the plants are planted outdoors, install a garden drainage system to avoid this problem. 

Fungal diseases

Another reason rhubarb leaves turn yellow is due to fungal diseases. Fungi like root and crown rot could invade the plants, causing leaves to become yellow and red, and eventually fall off. Crowns will display a brown-black decay, and large roots tend to manifest big, brown-black holes. 

Ascochyta leaf spot is a fungal disease that causes yellowish-green areas on the leaves. The leaf tissues may turn brown and die, resulting in angular spots that have white centers along with red and grayish-green zones. 

Anthracnose stalk rot is another fungal infection, resulting in wilted leaves and water-soaked lesions that turn black. The stems have a twisted appearance and eventually collapse.  

The abovementioned fungal diseases can be remedied using good sanitation practices. Remove and dispose of infected plant tissue during the summer and after the first frost. The plants should be fertilized once growth appears in the spring, with another application once the stalk harvest is complete. Fungal diseases tend to surface when plants are stressed, so always make sure to optimize your plants’ growing conditions.  

Fun facts about rhubarb

Botanical name: Rheum rhabarbarum

Sun exposure:  full and part sun

Plant type: vegetable 

Soil type: loamy 

Soil pH:  neutral, slightly alkaline 

Rhubarb plants were considered vegetables since they are members of the buckwheat family, but a New York court ruling in 1847 enlisted it as an official fruit in the USA.

Rhubarb plants are tough and cold-hardy, meaning they cannot be destroyed easily unless they are burned or aggressively uprooted. 

Conclusion

Rhubarb plants are popular as sweetened fruits added to tarts and pies. However, the leaves are toxic due to their oxalic acid. Yellowing rhubarb leaves is a common concern, and is usually due to incorrect watering. However, it could also be due to extreme heat or sunlight, or fungal diseases. 

Image: istockphoto.com / ClaraNila

Crape Myrtle Leaves Turning Yellow

Crape Myrtle Leaves Turning Yellow

Your crape myrtle leaves may turn yellow because an environmental factor is causing the plant stress. In order to fix the problem, you need to identify the cause.

The most common causes of yellowing crape myrtle leaves are Cercospora leaf spot, toxicity, bacterial leaf scorch, living conditions, pests, powdery mildew and natural yellowing.

In this article, we will discuss the different causes of yellowing crape myrtle leaves and how to remedy each one.

Why are my crape myrtle leaves turning yellow?

Cercospora leaf spot

If your crape myrtle’s leaves are turning yellow and falling off, one of the most common causes is Cercospora leaf spot. This disease is caused by the fungus Cercospora lythraceae. This disease may be hard to diagnose, because the fungus likes to attack during the autumn when the tree is naturally changing color and dropping its leaves. You may think it is just your crape myrtle being normal, but it is actually the fungus damaging your plant.

Cercospora leaf spot starts out as quarter-inch brown spots on the leaf surface, but over time the leaves will twist and distort. The spots will enlarge and turn red or yellow, and the leaves will then fall off. The spotting usually starts at the base of the plant and spreads upward towards the younger leaves.

There are cultivars of crape myrtle that are resistant to fungi. You can choose to plant those and space them out widely so that they do not get infected easily. Apply fungicide every one to two weeks when you see any spotting appear.

Toxicity

The crape myrtle’s leaves can also turn yellow due to toxicity caused by excessive herbicides, pesticides or nutrients. The foliage will turn yellow, wilt and die. The branches may die back, and the tree’s weakened state will make it susceptible to diseases and pests.

Plant the crape myrtle in well-draining soil so that the roots develop well. Use herbicide sparingly and try not to spray it on windy days, because it can make its way onto your plants and harm them.

Bacterial leaf scorch

This disease is common among shade trees and is caused by the Xylella fastidiosa bacterium. The early stages of the disease can be hard to catch because the most obvious signs are only noticeable when the infection has become serious. At this stage, the tree is often close to death and is unsalvageable. 

The first signs of leaf scorch are browning and dying leaves that will eventually drop off. It will start at the edges, turning them brown while leaving the center of the leaf green.

There are no treatments for bacterial leaf scorch, but you can still get a few years from your tree before it finally succumbs to the disease. Once leaf scorch has been diagnosed, death will occur within about five to ten years. Make sure you provide supplemental water, fertilize it in the spring, and prevent weeds and competitive plants from growing in the tree’s root zone. This lessens the stress on your tree and prolongs its life.

Living conditions

The crape myrtle is very sensitive to its living conditions. If the conditions around it vary even a little from the ideal, the plant will have problems with its foliage. Crape myrtles require a bright and sunny location, and soil that is well-draining and moist. The more established the plant, the more drought-tolerant it is, but it still needs to be watered during extended dry periods. Remove any spent flowers on the tree to encourage new blooms. Prune any dead or diseased branches in the late winter or early spring to promote new growth.

Pests

One of the most common pests of the crape myrtle is the crape myrtle aphid. These insects are very small and have a yellow-green body with back spots. Like other aphids, they pierce the leaf of the plant to consume the sap. Even with their small size, they are able to stunt the plant’s growth and distort the leaves in small infestations. Large infestations produce yellow leaves, early leaf drop and sooty mold.

You can control these insects by encouraging their natural enemies, such as ladybugs. You can also use neem oil to kill the insects on the leaves. Apply the neem oil once a week for a month to make sure all the insects have been killed.

Powdery mildew

This fungal disease causes cottony white patches to appear on the crape myrtle’s leaves. If the plant is heavily infested by the mildew, the shoots and leaves may distort and twist. It also causes bud abortion which keeps the plant from blooming. This disease occurs most commonly during April, and is not easily noticed until May or even June.

You can combat powdery mildew by providing plenty of ventilation around the plant, not allowing any water to remain on the leaves overnight, and applying fungicide on the plant once a week until the middle of summer.

Natural yellowing

Sometimes the reason for the crape myrtle’s leaves turning yellow is benign. Some species of crape myrtle have leaves that turn yellow in the autumn, so the yellow leaves on your crape myrtle may just be the true color of the plant’s leaves.

There is nothing you need to do about this except admire the variety of colors that nature is able to produce.

Conclusion

Crape myrtle leaves turn yellow due to environmental factors that cause the plant stress. You can remedy the problem by correctly identifying the cause of the discoloration.

The most common causes of yellowing crape myrtle leaves are Cercospora leaf spot, toxicity, bacterial leaf scorch, living conditions, pests, powdery mildew and natural yellowing.

Image: istockphoto.com / John M. Woodcock

Elm Tree Leaves Turning Yellow

Elm Tree Leaves Turning Yellow

Elm trees are of the flowering plant genus Ulmus, which first appeared about 20 million years ago in Central Asia. These deciduous and semi-deciduous trees consist of 35 species of forest and ornamental shade trees of the family Ulmaceae. Their wood is popular for furniture, and for constructing boats and farm buildings. Unfortunately, they also suffer their share of diseases and conditions, some of which cause yellowing leaves. 

Elm tree leaves turning yellow: Common reasons 

Disease 

Elm tree leaves turning yellow could be attributed to Dutch elm disease, which is caused by a fungal infection. The disease is spread by Hylurgopinus rufipes, or native elm bark beetles. They carry fungal spores which they release into open wounds, infecting the trees. This problem is prevalent during springtime. 

Elm yellows disease is a phytoplasma that can also cause yellow and wilted leaves. It is carried by elm leafhoppers called Scaphoideus luteolus, which pick up the disease from infected trees and transmit it to healthy ones while sucking the sap from the plant tissue. 

These fungal diseases block the plant’s system and inhibit water and nutrients from reaching plant parts. As a result, the elm trees lose their color and plant parts wilt and die. In the case of elm yellows disease, the trees may display scattered yellowing, wilted leaves and dying branches. The yellowed leaves appear after the inner plant tissue is already discolored and infected.

To fix this issue, you need to remove and destroy the whole tree, as these diseases are not treatable and transmission to other plants is very possible. You must also collect and destroy any debris from the infected trees to avoid the spread of infection.

Poor drainage or incorrect watering 

The roots of elm trees cannot breathe if the soil is too wet. They will suffocate and stop distributing water and nutrients to the other plant parts. This happens in the event of incorrect watering or poor drainage. Underwatering yields the same effects, because with scarce water the plants cannot take up nutrients, which results in yellow leaves. 

To solve this problem, make sure you use porous and well-draining soil. See to it that the planters have sufficient drainage holes and avoid planting in areas where rainwater accumulates. Compost must be incorporated into the soil to improve structure and drainage. 

To check the soil’s moisture, do the finger test by inserting your index finger a few inches into the soil. Water only when the soil feels dry, and do it thoroughly and deeply. However, if the soil is moist and cool, wait for a few days and allow the soil to dry slightly before watering again. 

Root damage or compacted roots

Yellowing elm tree leaves may also be caused by root damage from root rot and other infections. Damaged roots cannot deliver the nutrients required by the plants. When plants outgrow their planters the roots become compacted, while elm trees planted outdoors in a compacted landscape will have limited oxygen, water and nutrient movement in the soil. As a result, their leaves will turn yellow. 

To check for compacted or damaged roots, slide the plants or young elm trees carefully out of their pots. Healthy roots are whitish-yellow, while damaged ones are dark, rotten and foul-smelling. Prune unhealthy roots and gently loosen them, but if the roots are already rotten you need to dispose of them. 

Soil compaction can be improved by lawn aeration and incorporating organic matter and mulch into the planting sites. Gypsum can also improve soil compaction, especially in heavy clay soils, to help keep leaves green and healthy.

Nutrient deficiency 

Another reason elm tree leaves turn yellow could be nutrient deficiency. If your plants are deficient in nitrogen, the leaves will turn yellow or pale green. Nitrogen moves easily through soil, and unless it is regularly replaced through fertilizer applications, your plants could become deficient. 

Here are the various nutrients and symptoms of their deficiency:

  • Nitrogen deficiency manifests as general yellowing, with older and inner leaves turning yellow first. The discoloration eventually moves outward to the young leaves. 
  • Potassium deficiency manifests as leaf edges turning bright yellow, while the inner leaves remain green. The older leaves show symptoms first, with leaf edges starting to turn brown. 
  • Magnesium deficiency manifests as yellow patches between the veins of older leaves. The veins stay green as the yellowing moves from the center of the leaves, while the leaf edges turn yellow last.
  • Iron deficiency manifests as yellowing between leaf veins, but it afflicts the leaves on the top of the plant and on the branch tips first. 
  • Sulfur deficiency manifests as yellow young leaves.

To fix these issues, proper fertilization is necessary. 

Conclusion 

Elm trees are cultivated for their durable wood and are considered hardy plants. However, they are also prone to diseases and conditions that cause yellowing leaves. Elm tree leaves may turn yellow due to fungal diseases like Dutch elm and elm yellows. However, the yellowing could also be due to a nutrient deficiency, root damage, or improper watering. 

Image: istockphoto.com / Ihor Khomych

Rubber Tree Leaves Turning Yellow

Rubber Tree Leaves Turning Yellow

The rubber tree, or rubber fig – scientific name Ficus elastica – is a species of the fig genus. This evergreen tropical tree is native to eastern parts of South Asia and Southeast Asia and has become naturalized in Sri Lanka, the West Indies and Florida in the USA. It is also called rubber bush and Indian rubber tree, and can grow up to 50 feet tall. This hardy plant is easy to care for but also prone to conditions like yellowing leaves. 

Common reasons for rubber tree leaves turning yellow 

Due to incorrect watering techniques 

Rubber tree leaves tend to turn yellow because of overwatering or incorrect watering techniques. Rubber trees, or rubber fig plants, prefer being watered often and placed in a moist environment, but overwatering could lead to negative effects.

To check whether the soil is completely dry, push your fingers into the soil up to the second knuckle. If it feels dry, you need to water your rubber tree. You can also use a moisture probe or tester to determine when to water your plants. Just insert the metal prongs into the soil and a moisture level reading will be given. 

Provide enough water for your rubber tree plants, ensuring that the water flows from the drainage holes at the bottom of the planters. Discard any excess water, since these plants do not respond well to wet feet and root rot may ensue. Proper and consistent soil moisture should be maintained since erratic watering schedules could stress your plants.

Due to inadequate drainage holes

Rubber tree leaves may turn yellow if their pots do not have adequate drainage holes. In this case, the roots will sit in water that is trapped in the soil. This could lead to root rot and leaves turning yellow.  

To fix this issue, keep your plants in pots with proper drainage holes if they are kept indoors. If you intend to place your rubber tree in a decorative pot with no holes, just plant it in a slightly smaller pot with drainage holes, and then place this pot inside the large decorative pot. Do not forget to take the plant out of the decorative pot when watering it. 

Due to incorrect potting mix 

The right potting mix is essential for rubber trees to grow strong and healthy. Look for a well-draining mix that enables water to escape from the soil. Opt for a potting mix suitable for house plants, such as those used for succulents. 

Mix the potting soil with perlite to encourage aeration and to allow liquids to move easily through the soil. You can also mix in some peat moss to retain the necessary water and keep the soil moist.

Not adjusting the watering schedule with the seasons 

Rubber tree leaves could also turn yellow if you fail to adjust your watering schedule according to the changing seasons. Rubber plants need to be watered more often during the summer months when the soil dries out quickly. Wintertime requires less watering since the weather is cooler and there is less sunlight, meaning water and moisture tend to remain longer in the soil.

Due to low humidity levels 

Dry soil and low humidity can drastically affect rubber trees and may result in droopy, yellowing leaves. To fix this, mist the leaves more often to increase the humidity. 

Due to improper light

Rubber trees thrive when placed in areas with bright, indirect sunlight. It is a bad idea to expose the plants to direct sunlight, as this allows the foliage to burn. If this happens, you need to relocate the plants to another area with indirect light.

Due to pest infestation

Stressed and weakened rubber trees are easy targets for insect infestations. Spider mites and other sap-sucking bugs, like scale insects and mealybugs, drain the plants of moisture, resulting in yellowing leaflets and fronds. 

To fix the problem, spray the affected plants with insecticidal soap or insecticide. Neem oil and isopropyl rubbing alcohol are also ideal for controlling and removing pests. 

Due to natural causes 

If you notice that your rubber tree’s older leaves are yellowing but it also has new growth, the yellowing could be part of the plant’s natural cycle. The older leaves are shed, retaining more energy for the new growth. 

Conclusion 

Rubber plants are popular ornamentals and indoor plants that add aesthetic value to homes and offices. These plants tend to develop yellow leaves due to improper watering techniques or inadequate drainage holes, as well as due to low humidity levels, incorrect potting mix, or pest infestations.

Image: istockphoto.com / Tatiana Gorbunova

Orchid Stem Turning Yellow

Orchid Stem Turning Yellow

If your orchid’s stem is turning yellow, it could mean that it is getting too much light. If you move your orchid from a spot where it got a reasonable amount of light to an area where it is getting plenty of direct or full sunlight, its stem will turn yellow.

Other causes of yellowing orchid stems are overwatering, fungal infections, and nutrient deficiency.

In this article, we will discuss the causes of yellowing orchid stems, as well as other color changes that may be cause for concern.

Why is my orchid’s stem turning yellow?

Your orchid’s stem may be turning yellow because it is getting too much sunlight. Taking an orchid that has lived most of its life indoors into the harsh sunlight of the outdoors means it will start to get more direct light than it has become used to. You can remedy this by taking the orchid back to a spot where it will be more comfortable with the amount of light it is getting. 

It is also possible, if only the part of the stem near the flower is yellowing, that the spike is dying out. This usually happens after the orchid’s blooming cycle and you can just remove the yellow flower spike.

Why is my orchid’s stem turning red?

It is usually not a cause for concern if an orchid’s stem turns red. In some orchid species, the stem turns red when they are receiving an adequate amount of sunlight.

However, there are some types of orchids, like the Phalaenopsis orchid, that turn red when they get scorched by the sun. You can remedy this by moving the orchid to a different spot where it gets less direct light.

Why is my orchid’s stem turning brown?

When your orchid stem is turning brown, it could mean that the stem is nearing the end of its life and is no longer able to support the bloom on it. This is more probable if the browning of the stem appears as the blooms are falling off. In this case, you can simply remove the dried-out orchid stem.

Be aware that an orchid stem can also turn brown if it gets too much sun.

Why is my orchid’s stem turning pink?

Some varieties of orchids will have stems that turn pink when the flowers are spent. This can simply be a sign of the orchid’s blooming cycle coming to an end.

Why is my orchid’s stem turning black?

A fungal infection called black rot can cause the stem of an orchid to turn black. This will start on the leaves and can spread to other parts of the orchid, like the stem. Black rot shares the same symptoms as root rot. Both these conditions can be very difficult to remedy, especially if you were unable to catch it in its early stages. You can try to treat it with a fungicide and transplant the orchid, and see if that might work.

A blackening orchid stem is probably the most serious of all these orchid stem color changes.

Orchid flowers falling off

You should keep in mind that the only time orchid flowers should be falling off is at the end of its blooming cycle, when the orchid is in its resting phase.

There are cases where the flowers or buds fall off because of environmental changes. This can be due to a lack of humidity, pests, disease, temperature changes, lack of light or underwatering.

If your orchid’s flowers begin to fall off, try to establish which of these has caused it.

What do you do with dried orchid stems?

You should remove dried orchid stems. Cut them all the way down to the base of the orchid. This will stop the plant providing nutrients and energy to the dried stem and focus its resources on producing more root growth.

If you can see that only the flower spike has dried out, you can just cut back several nodes. Some orchids can still bloom from the same spike.

Make sure you use a sharp knife or scissors whenever you need to cut your orchid. Sterilize the cutting tool after every cut so that you do not end up infecting healthier parts of the orchid.

Will a cut orchid stem grow back?

If you cut back a flower spike only a few nodes, you will still be able to grow flowers from the same spike. If you cut the spike all the way down to the base, do not expect it to grow back.

Do not worry if the stems you cut all the way to the base no longer grow back, because the orchid will grow new spikes that will have bigger and healthier blooms.

How long does it take for an orchid to bloom?

It can take an orchid almost nine months to bloom again, but this can depend on the environment it is in. Orchids go dormant after their blooming cycle. This cycle can last between two to three months. After the flowers have been spent, the plant will gather energy for a brand new blooming cycle.

You can actually encourage your orchid to enter a blooming cycle by moving it into a colder room for several weeks. If you can successfully manipulate light and dark cycles to simulate the orchid’s ideal lighting conditions, you should be able to achieve this.

Conclusion

An orchid’s stem can turn yellow if it has been exposed to too much sunlight. This is a common occurrence among orchids that were grown in places with little direct sunlight and are suddenly transferred to an area with too much direct sunlight. You can remedy these yellowing effects by bringing the orchid back indoors, or to a spot where it has enough shade and is only exposed to indirect sunlight.

Image: istockphoto.com / Nadya So

Prayer Plant Turning Yellow

Prayer Plant Turning Yellow

A prayer plant’s leaves will turn yellow if it is under any kind of stress, which could be caused by a multitude of reasons. The most common one is overwatering. Even if prayer plants do like to be watered regularly, they do not like to sit in soggy soil for long periods of time.

Other causes of yellowing prayer plant leaves are temperature changes, poor soil drainage, insufficient humidity, iron deficiency, disease and pests.

In this article, we will discuss the different causes of yellowing prayer plant leaves and how to remedy each one.

Why is my prayer plant turning yellow?

Overwatering

The most common reason for a prayer plant turning yellow is overwatering. When considering this cause, think about how often you water your plant. Do you wait for the soil in the pot to dry before watering the plant, or do you water it everyday regardless?

Prayer plants like to have a regular watering schedule, but they do not like to stand in soggy water all the time.

Make sure you let the plant’s soil dry between watering; it is best not to water it every single day. When a plant’s roots are in wet soil all the time, they will eventually get root rot, which will cause the leaves on the plant to turn yellow.

The best way to know when to water your prayer plant is to check the soil first. Stick your finger into the soil and if the top two inches of soil are dry, you can water the plant. If the soil is still damp, wait one or two more days and check the soil again.

Temperature changes

Prayer plants come from tropical habitats. They do not do well in the cold and can die if left out in temperatures that are below freezing. Even keeping the plant in cold temperatures above freezing can cause lasting damage, and can cause the leaves on the plant to turn yellow.

These plants prefer being in temperatures higher than 55 degrees Fahrenheit.

If you are taking home a prayer plant from the nursery during the winter, make sure you take the plant into your house immediately and do not leave it in your car or outside your house.

Keep the plants away from cold drafts near windows or air conditioners, because these temperature fluctuations can also cause the leaves to turn yellow.

Poor soil drainage

Even though these plants are tropical and are normally fine with getting a hefty amount of rain, they still need their soil to be well-draining. As mentioned above, they do not like to soak in wet soil. This is because plant roots need to be dry sometimes to have access to oxygen. If they are unable to get oxygen, the roots will die and the leaves will eventually turn yellow.

Aside from using well-draining soil, you also need to keep an eye on the saucer that you keep under the plant’s pot. The water in this saucer can also cause the plant to become overwatered.

Prevent this from happening by making sure all of the excess water has drained from the pot before placing the pot back on the saucer.

Heavy potting medium can also have components that make it poor-draining. Soil that is too compact and rich tends to hold onto moisture too well and contribute to waterlogged roots.

Lastly, make sure the plant’s pot has drainage holes at the bottom. When a pot does not have drainage holes, the water will settle at the bottom of the pot and damage the roots of your plant. It also makes it difficult to determine the wetness of the soil.

Aside from making sure a pot has drainage holes, the best material to choose for a pot is clay or terracotta. These materials are more porous and allow the soil in the pot to dry much faster than in plastic or steel pots.

Insufficient humidity

Low humidity can also result in your plant developing yellow leaves. As much as we advocate not overwatering your prayer plant, you should also make sure the place where you keep the plant has perfect humidity.

In the winter, when indoor humidity can be quite low, the plant can suffer and its leaves can turn yellow and even brown.

Prayer plants like their air humidity to be between 40 and 60 percent. If you feel the humidity in your house is too low, you can buy a hydrometer to measure the relative humidity.

If your house does have low humidity, you can spray the leaves of the plant with water, run a humidifier near the plant, group your plants near one another, or use a humidity tray under your plant. You can use these options simultaneously if you want to, especially if the climate is arid. It also helps if you keep the plant in a humid room in your house, such as the bathroom or kitchen.

Iron deficiency

If you notice the younger leaves of your prayer plant coming in with a yellowish tinge, it probably has an iron deficiency.

When the plant’s soil has a pH that is too high or alkaline, the plant will be unable to absorb iron from the soil. When the plant does not get enough iron, it cannot produce chlorophyll. Chlorophyll is the pigment that makes leaves green, so when a plant is not producing it, the leaves will discolor. This will in turn affect the plant’s ability to photosynthesize.

You can remedy iron deficiency in prayer plants by applying chelated iron to the soil.

Disease and pests

One of the diseases that can affect your prayer plant is the mosaic virus. This virus causes yellow mosaic patterns to appear on the leaves of the plant. Unfortunately, this disease does not have a remedy and you are better off discarding the plant to make sure it does not affect your other plants.

Helminthosporium leaf spot is another affliction of prayer plants, in which the leaves develop tan spots with yellow halos. Get rid of the fungus by spraying the plant with a solution of a half-teaspoon baking soda per gallon of water.

Spider mites can also attack prayer plants. They feed on the foliage of the plant, causing yellow stippling to appear. Kill these pests by wiping down the plant with neem oil on a cotton ball. Do this once a week for a month to make sure all the spider mites are dead.

Conclusion

A prayer plant’s leaves will turn yellow if it is going through something that is causing it stress. This can be due to a change in its living conditions or because of an outside factor like disease or pests.

The most common cause of prayer plant leaves turning yellow is overwatering. Even though these plants are tropical, their roots still need time to dry out in order to receive oxygen.

Other causes of yellowing prayer plant leaves include temperature changes, poor soil drainage, insufficient humidity, iron deficiency, disease and pests.

Image: istockphoto.com / Olga Ostapenko

Garlic Leaves Turning Yellow

Garlic Leaves Turning Yellow

Garlic leaves turn yellow in reaction to an environmental factor that is causing the plant stress. Identifying the cause of this change in color is important, to know how to properly remedy the problem.

The most common causes of yellowing garlic leaves are cold temperatures, disease, pests, poor plant care, lack of nutrients and soil problems.

In this article, we will discuss the different causes of yellowing garlic leaves and how to remedy each one.

Why are the leaves on my garlic plant turning yellow?

Cold temperatures

The leaves of a young garlic shoot will turn yellow in cold temperatures, especially when there is frost. This can be a problem when the air temperature is below freezing, because often the frost on the ground makes the soil even colder than the air. When you see morning frost, it means there was night frost on the soil, and the tips of the garlic leaves will most likely have turned yellow due to the cold and the frost.

In the winter, protect your garlic beds from frost by mulching them. You can use straw, fine chips, peat and humus to mulch the beds. These organic materials are most ideal since you are also using them to fertilize your vegetable crop. Lay about two inches of mulch to protect the plants from frost.

In order to prepare your garlic for the winter, plant it as early as September. Mulch the beds after planting so that they survive the winter frost.

Disease and pests

Both disease and pests can also cause garlic leaves to turn yellow. It could be due to fungal disease or a host of insects. It is not that hard to determine the cause of yellowing in this case; you simply need to inspect the plant and look for the usual signs. Dig up the plant and look at the bulb. If you find any bugs or larvae, or any mechanical damage to the bloom or root system, then pests are likely to blame for the yellowing leaves.

You can narrow it down to fungal disease if you see the head of the plant begin to rot after the aerial part has dried up.

The most common diseases of garlic plants are fusarium and bacterial rot.

Fusarium causes young garlic to turn yellow. This fungal disease discolors the tops of the leaves first, followed by brown stripes. The leaves and stem will then start to dry out until the entire plant dies. This disease acts very quickly. One of the first signs is a pink coating in the sinuses under the leaves. You will also notice that the bulb with fusarium will have a dead root system and the base will be soft. Unfortunately, there is nothing you can do to save a garlic plant with fusarium; the best you can do is make sure it does not spread to your other plants. Remove all the affected plants and burn them. Make sure you treat the soil of the diseased plant with concentrated copper sulfate solution.

Bacterial rot causes garlic leaves to turn yellow and even to develop brown spots. The disease will start with the plant turning yellow, followed by the stem. As the disease progresses, a more and more noticeable rotten smell will develop from the bulb. The bacteria that cause the rot come from the soil. If there are no signs of mechanical damage to the plant, the disease is unlikely to infect the plant. However, if there is damage due to insects, this provides the bacteria with a route into the plant to destroy it. As with fusarium, there is no treatment for bacterial rot.

One of the most common pests to infest garlic plants is the stem nematode, which may also cause the garlic plant to turn yellow. They feed on the juice of the plant until the plant eventually dies. The tips of the leaves will turn yellow first, and then streaks will appear. The more the disease spreads across the plant, the more the leaves will curl and the plant will wither.

There are no known treatments for stem nematodes. You will have to remove the plants and burn them.

Poor plant care

Improper plant care can also cause the tips of the garlic plant to turn yellow. Insufficient watering as well as overwatering can negatively affect the appearance and condition of the plant. The first leaves to turn yellow are the ones at the bottom, and the yellowing gradually moves upwards.

Make sure you care for your plants properly by watering them twice a week when there is little rain. If there is no rain at all, water the plants four times a week. If there is plenty of rain in the spring, you do not need to water the plants. Garlic plants are more tolerant of excess water than lack thereof. Loosen the soil around the plant the day after watering.

Lack of nutrients

If you have eliminated all other possible causes of yellowing leaves and are still stumped as to what the cause could possibly be, it is most likely a nutrient deficiency. The plant needs magnesium, nitrogen and potassium. You cannot determine alone which elements your plant is lacking, but if you very rarely apply organic fertilizer, it is not a stretch to assume that the plant needs at least one of those elements.

Mineral fertilizers applied in early spring can help with the yellowing effects of nutrient deficiency. Make some furrows between the plant beds and pour the fertilizer into the furrows. Pour the rest of the fertilizer onto the plot and then water it. Make sure the three elements are present in the fertilizer you use.

Soil problems

The type of soil you use can also cause yellowing on the garlic plant’s leaves. This plant does not do well in acidic soil and prefers a neutral pH. If the soil is acidic, the garlic plant will turn yellow after a few weeks.

You can bring the soil back to a neutral pH using wood ash. You will need to cover the entire plot with this; mere handfuls of wood ash will not do the job. You can also use lime to lower the soil’s acidity. Lime works faster and can keep the soil at a neutral pH for up to a decade.

Conclusion

Yellowing garlic leaves are indicative of an environmental factor that is causing the plant stress. Being able to correctly identify the cause is the first step in remedying the situation.

The most common causes of yellowing garlic leaves are cold temperatures, disease, pests, poor plant care, lack of nutrients and soil problems.

Image: istockphoto.com / YuriyS

Fruit Tree Leaves Turning Yellow

Fruit Tree Leaves Turning Yellow

A fruit tree’s leaves normally change color around autumn as they enter a period of senescence, or winter dormancy. However, if the fruit tree’s leaves start turning yellow when it is not yet autumn, it can be alarming. This article will help you understand the reasons fruit tree leaves tend to turn yellow, and how to address the issues.

Fruit Tree Leaves Turning Yellow: What Are The Reasons?

Changes in the weather 

As mentioned earlier, fruit tree leaves tend to turn yellow during the cold months to prepare for the winter dormancy period. The fruit trees withhold nutrients and water from certain parts and, as a result, photosynthesis does not take place and the chlorophyll levels drop. 

The leaves turn yellow in the absence of chlorophyll, which is what gives plants their green color. Without the vital nutrients, they eventually fall off.

There is no need for any treatment, as this is part of the tree’s natural life cycle. 

Lack of, or too much, water 

Fruit trees may become stressed if they are given too much or too little water. If they do not receive adequate water for their needs, it could result in drought stress. Similarly, overwatered fruit trees tend to appear droopy and may develop root rot. The roots also become incapable of absorbing nutrients.

Watering inconsistencies could lead to yellowing leaves that eventually fall off. It may also increase fruit drop. Fruit tree varieties with shallow roots are less tolerant to drought. 

To fix the issue, water the fruit trees as soon as you notice signs of underwatering. If the trees are overwatered, hold off watering for a while. Plant trees in a well-drained location and allow the top few inches of soil to dry out before the next watering. 

Nutrient deficiencies

Fruit tree leaves could also turn yellow due to nutrient deficiencies. Nutrients that are essential for trees and plants include zinc, manganese, copper, sulphur and magnesium. If these nutrients are lacking in the soil, it could lead to reduced photosynthesis which results in yellowing leaves. In this case, the tree will not be able to produce sufficient energy for fruit development. 

A common sign of iron deficiency includes yellowing near the leaf veins. As this progresses the whole leaf turns yellow, with bright green veins. The yellowing begins on the new growth and makes its way throughout the tree. 

Manganese deficiency manifests the same symptoms. In this case, the older foliage is affected, while in severe cases the younger leaves will be affected.

To fix the issue, perform a soil test so that you know what nutrients are lacking and what measures to take. You should apply fertilizers to boost the presence of nutrients in the soil. 

Chelated iron addresses iron deficiency, while sulfur may be applied outside the tree drip line. Sulfur raises the acidity of the soil and allows nutrients to become more easily accessible to the fruit trees.

Diseases or pests 

Certain diseases associated with yellowing and falling leaves include the following:

  • Necrotic leaf rot

This disease usually invades apple trees and starts with brown blotches on the leaves, which eventually turn yellow and drop off. To treat this problem, apply fungicides with zinc ions to the affected fruit trees. 

  • Apple scab

This fungal disease appears on the leaves and fruits and is characterized by pale yellow spots on the upper side of leaves along with darker spots on the lower side. Copper fungicide is effective in treating this disease. Apply the fungicide at least every seven to 10 days until the fruit trees are revived. 

Pest infestation could also result in yellowing leaves. Aphids could invade the fruit trees and suck the sap or juice from the leaves, making the trees vulnerable and weak. To fix this, apply insecticidal spray or neem oil to control and eradicate the pests. 

Conclusion 

Fruit trees normally undergo leaf color changes during the cold months to prepare for the winter dormancy period. However, fruit tree leaves yellowing when it is not yet autumn may signify an underlying problem. The common reasons for this include overwatering, underwatering and nutrient deficiencies. It may also be due to diseases like apple scab and necrotic leaf rot, or a pest infestation.

Image: istockphoto.com / TommyIX

Kumquat Tree Leaves Turning Yellow

Kumquat Tree Leaves Turning Yellow

Yellowing kumquat leaves are due to the tree experiencing stress because of an environmental factor. The first step in fixing the problem is to correctly identify what is causing the leaf discoloration in the first place.

The most common causes of yellowing kumquat leaves are improper watering, low temperatures, disease, pests and natural leaf drop.

In this article, we will discuss the common causes of kumquat tree leaf yellowing and what you can do to remedy each one.

What is a kumquat?

The kumquat is a fruit tree native to the tropics. It has become increasingly popular in the US because aesthetically it makes a great landscape plant. Because of its size, it can be planted in a garden or in large containers.

The kumquat has olive-sized fruit and glossy green leaves. It belongs to the same genus as other citrus fruits like lemons and oranges, and can be grown quite easily in garden pots. Its fruit tastes sweet when ripe and has edible skin. It can flower and produce fruit twice a year. In ideal living conditions, the tree can grow two feet every year.

How do you care for a kumquat tree?

Water

One of the most important things to remember when growing a kumquat tree is proper watering. Keep the soil moist but not soggy or constantly wet. You will know if you need to water the plant by pressing your finger into the soil. If the top two inches of soil still feel damp, do not water and check the soil again in one or two days. If the soil is dry, you can water the plant. Do this by soaking the soil in the pot until you can see the excess water flow out of the drainage holes at the bottom. You can put pot feet under the pot so that the plant does not sit in any stagnant water.

If the tree is planted in your garden, you can keep the soil around it moist by applying a layer of mulch on the ground. This is necessary during the first few years of the kumquat’s life because it thrives in moist soil. Just make sure to keep the mulch a few inches away from the tree’s trunk to avoid fungal problems. Once the tree has adapted to the mulch keeping the soil moist, you do not really need to water it any more, except during dry spells.

Temperature and humidity

Kumquats are tropical plants, so they do not do well in cold weather. If you live in an area with cold winters, you should take the plant indoors. You can take it back outside after the last frost of spring. Put the plant in a sunny spot where it can still be protected from chilly nighttime temperatures. Gradually harden the plant by leaving it outside for progressively longer periods until you can leave it outside permanently for the summer.

Kumquat trees prefer 50 to 60 percent air humidity. This can be difficult to achieve in the winter when the plant is indoors and the central heating is on. Mist the leaves with water to make the air more humid around the plant.

Light

Kumquat trees like to be under full sun and they prefer to get at least six hours of sunlight a day. In the winter when the plant is indoors, give it as much light as possible by placing it near a sunny window. If there is little sunlight, you can use a grow light with one cool and one warm bulb. The grow light should be enough to provide the plant’s light requirement until you can take it back outside in the spring.

Soil

Kumquats like acidic soil, but they can survive in soil of any pH. If you plant the kumquat in a garden, make sure you enrich it by adding high-quality potting soil. Try not to plant it in dense soil like clay, because the water will not drain well and the roots may rot. You can use cactus or succulent potting mix for the kumquat to ensure proper drainage.

Why are the leaves on my kumquat tree turning yellow?

Improper watering

Giving the kumquat too much or not enough water can cause yellowing and dropping of its leaves.

Overwatering can happen when the kumquat is planted in poorly draining soil in a pot that does not have drainage holes at the bottom. The water is retained for too long, meaning the roots of the plant are soaked in the waterlogged soil where they cannot dry out or get access to oxygen. Eventually, the roots will die and rot. Root rot is caused by bacteria or fungi that make their way into the plant’s system through the vulnerable roots. The rot will climb up the roots and into the stem, branches and leaves. The leaves will turn yellow and fall off due to the excess weight of all the water.

Underwatering can also damage your kumquat plant because it will no longer be able to take in either moisture or the nutrients it needs from the soil. Plants need water to transport essential nutrients from the soil. If there is no water, the plant will shrivel and turn yellow or brown. You can remedy an underwatered kumquat plant by soaking the soil in the pot with water until you can see the excess flow out of the drainage holes at the bottom of the pot. This ensures that all of the soil has been soaked and all the roots have access to water. Eventually, the plant will bounce back and regain its original vigor. Just make sure you no longer forget to check whether the plant needs to be watered.

Low temperature

Kumquat trees lose both their leaves and their fruit after a frost, even though the tree itself has been known to withstand temperatures as low as -20 degrees Fahrenheit. Do not prune your kumquat tree until after the branches have died back, even if the tree is an eyesore in your landscape.

Prevent cold damage by bringing a potted kumquat indoors or to an area where it can get adequate shelter from the elements. If the kumquat is in your garden, remove the mulch around the tree, water the soil, cover the tree and use a heater if you deem it necessary.

Disease and pests

As mentioned above, kumquats are susceptible to root rot when their roots are overwatered. They are also susceptible to mealybugs.

Root rot can be due to a fungus or bacteria. Avoid this by making sure no excess moisture is retained in your plant’s soil. Plant the kumquat in well-draining soil and use a pot with drainage holes at the bottom. Try not to put mulch at the very base of the tree; only mulch several inches away from the base. Mulch helps retain moisture in the soil, so placing it on the base of the tree will contribute to waterlogging of the soil.

Aphids are another pest that can attack your kumquat tree. You can try to control them using natural predators, such as ladybugs, or you can use neem oil. Apply the oil to the tree early in the season, once a week for a month, to kill all the insects on your tree.

Natural leaf drop

The yellowing of the leaves on your kumquat tree may be due to something as normal as natural leaf drop. As long as the yellowing leaves are mostly at the bottom of the tree and they fall off gradually and not all at once, it is probably nothing to worry about. This is especially true if the rest of the tree looks healthy, and there is nothing you need to do in this situation.

Conclusion

Kumquat leaves turning yellow is a sign of an environmental factor that is causing the plant stress. The first step in fixing the problem is correctly identifying the cause of the discoloration.

The most common causes of kumquat leaf yellowing are improper watering, low temperatures, disease, pests and natural leaf drop.

Kumquats are hardy plants and it does not take much to grow them properly in your garden. As long as you provide them with their basic needs, you will have this beautiful plant and its fruit in your home for many years.

Image: istockphoto.com / JorgeMoyol

Ginger Leaves Turning Yellow

Ginger Leaves Turning Yellow

Ginger, of the family Zingiberaceae, is widely used as a spice and herbal medicine. These plants originated in Southeast Asia and were transported from there by Austronesian people. They thrive in tropical climates and tend to spread aggressively, which makes them popular garden perennials. Unfortunately, they are also prone to conditions and diseases that can cause yellowing leaves. 

Ginger Leaves Turning Yellow: What Are The Reasons?

It could be due to bacterial or green wilt 

Ginger leaves turning yellow could be due to bacterial wilt. This is a disease caused by bacteria and the initial symptoms are a slight wilting, curling and yellowing of the lower leaves. The discoloration will then progress upward, affecting the younger leaves. This is followed by a complete yellowing and browning of the entire shoot. 

The foliage eventually dries up and becomes yellow-brown in three to four days. The succulent shoots become rotten and break off from the underground rhizome at the soil line. The underground parts become damaged and infected, and the rhizomes become discolored while their central parts have a water-soaked appearance. In advanced infections, they become entirely soft and rotten.

To fix the problem, make sure your garden has proper drainage to avoid stagnant water. You can also plant the ginger plants on miniature hills or mounds to elevate them. 

It could be due to fusarium wilt or fusarium yellow 

Ginger leaves turning yellow could also be due to fusarium wilt or fusarium yellow, which is caused by the fungus Fusarium oxysporum. The leaves of an infected ginger plant turn yellow and fall off, and the plant eventually wilts and dies. A unique symptom of this disease is the reddish-brown discoloration of the water-conducting tissue of the stems and roots. 

There is no effective treatment for fusarium wilt; instead, you have to remove and dispose of affected plants immediately. Do not compost the garden refuse, but remove and replace fusarium-infected garden soil. 

It could be due to dry rot 

Your ginger plants could be infected with dry rot if you notice that the tips of the lower leaves are turning yellow. The upper leaves also begin to turn yellow as the disease progresses. The plant eventually becomes stunted and dried out, while the rhizomes develop a brownish ring. 

Dry rot is caused by certain species of fungus and may also be caused by exposure to too much water. There is no cure for this disease, but you can increase the chance of avoiding it by planting treated seeds. 

It could be due to rhizome rot 

Rhizome rot is also called soft rot or Pythium rot, a soil-borne fungal disease caused by Phytophthora sojae. This disease causes stunted growth, rotted and mushy roots, yellow stems and roots, as well as foul-smelling rhizomes. It usually happens in environments where the soil is warm and wet. 

To fix this problem, plant ginger plants on hills and use treated seeds and fungicides. If the plants have become infected, remove and destroy them at once so the disease does not spread to other plants. Keep your garden free of weeds and rotate the crops that you plant each year.

It could be due to white grubs

Ginger leaves turning yellow could also be due to white grub infestation. These are pests that feed on ginger rhizomes and leave behind big holes. The leaves will eventually turn yellow and may die.  Adult white grubs are dark brown, while young larvae are white and live in the soil.  

Eradicate white grubs by using neem oil or a vegetable fungicide.  You can also plant crops like onion, sunflower or maize to deter white grub infestation. 

Why are my ginger plant leaves turning brown?

Your ginger plant leaves could turn brown because of a lack of water. These plants prefer moist and well-drained soil with high humidity. If you fail to maintain a constant level of moisture in the soil, the leaves of ginger plants could turn brown. 

Why are my ginger plant leaves turning white?

Your ginger plant leaves may be turning white because of a disease called leaf spot. This condition could lead to severe blighting and rotting of the leaves. The symptoms include small spots on the younger leaves along with a white center, a dark brown border and a yellow halo. The spots could turn into lesions that may cover the whole leaf. 

The leaf spot disease spreads quickly and can be transmitted through rain and wind. To treat the disease, use herbicides containing boron, zineb or benomyl. 

Conclusion 

Ginger plants are widely cultivated because they are used as spices and also have health benefits and medicinal properties. Yellowing ginger leaves may be attributed to diseases like bacterial wilt, fusarium wilt, dry rot, or rhizome rot.

Image: istockphoto.com / ICHIBANHIGASHI

Kalanchoe Leaves Turning Yellow

Kalanchoe Leaves Turning Yellow

Kalanchoe leaves turning yellow is indicative of an environmental factor causing the plant stress. If you want to fix the problem, you need to first identify the exact cause of the discoloration.

The most common causes of yellowing kalanchoe leaves are improper watering, improper lighting, humidity, temperature changes, improper feeding and natural wilt.

In this article, we will discuss the different causes of yellowing kalanchoe leaves and how to remedy each one.

Why are my kalanchoe leaves turning yellow?

Improper watering

The kalanchoe plant is a succulent, meaning it has adapted to living in the most arid regions with little to no rain.

An eager plant owner may become too generous while watering the plant, or water it more often than needed. If you do not give the soil in the pot enough time to dry out between watering, you will notice the plant’s reaction to this excess water through the yellowing of its leaves.

Kalanchoe leaves are able to go long periods without water, since they are able to store water in their bodies for use during drought. Thus, they do not need to be watered every day; they do not even have to be watered every week.

When the plant’s roots are left to soak in soggy soil for days, they will develop root rot. This is because the roots need time to dry out to get access to oxygen. If they cannot get oxygen, the roots will eventually die and rot.

Signs of an overwatered kalanchoe include leaves that are turning yellow, plump and soft. The plant will look depressed and even bend to one side because of the weight of all the water inside the leaves.

It can be difficult to save an overwatered kalanchoe plant, especially if the rot has reached the stem and the leaves. The first thing you should do is stop watering the plant and to allow the soil around it to dry. Pull the plant out of the soil and wash the roots gently with water so you can inspect it. If not all of the roots have turned brown or black, you may still be able to save it. Trim off all the brown and black rotten roots, making sure you disinfect the scissors after every snip. Next, powder the cut areas with crushed activated charcoal. Place the plant on a dry paper towel to air-dry.

After a few hours, plant the kalanchoe in a new pot with drainage holes, using new soil. Make sure the soil is well-draining. Do not water the plant for at least one week to give the roots enough time to properly heal from the trauma of the trimming and repotting.

You will know when the time is right to water your plant by touching the soil in the pot. If the soil is dry to the touch you can water the plant, but if the soil is still damp, wait one or two days and check the soil again.

Wrong lighting

You can tell if your kalanchoe plant is lacking sunlight if it looks like it is shrinking, turning yellow, and the shoots have become long and thin. A kalanchoe that gets too much light, on the other hand, will have leaves that are yellow, curled and dry. This plant also does not bloom when it gets too much light.

You can remedy this by making sure that the kalanchoe gets no more or less than 10 hours of bright light every day. You can do this by creating an artificially short day by covering the kalanchoe with an opaque material. Alternatively, you can also just place the plant in a position where it will only get a certain number of hours of light, such as in an east-facing window.

Humidity

When the kalanchoe is in a place with dry air or low humidity, its leaves will also turn yellow. This is especially true during the summer. You will notice the tips of the leaves on the plant will start to turn yellow, until the whole plant dries out completely. The trick is to increase the humidity around the plant. You can do this by spraying clean warm water onto the plant. You can also put containers of water around the plant, or cover the radiators close to the plant with wet towels. 

Changing temperatures

If the temperature around your kalanchoe plant becomes too high, its leaves will turn yellow and the plant will look shriveled but not dry.

You can remedy this by keeping the plant away from more direct sunlight than it needs. You can also use white paper or thick white cloth to protect the plant from the heat of the sun while still receiving light.

Improper feeding

When it comes to plants, giving too much fertilizer is just as bad as not giving enough fertilizer. Some people place handfuls of fertilizer in the pot of a plant that has just been repotted. This is the wrong thing to do because new soil is nutrient-rich and does not need feeding so soon.

Signs of an overfed kalanchoe are leaves that turn yellow and then brown, while the borders of the leaves are red or brown. The plant does not look healthy and will not bloom.

Stop feeding the plant for several months. You can also use water to wash out the fertilizer from the soil. When you do need to fertilize your plant, use half-strength fertilizer to avoid overfeeding.

Natural wilting

Not all yellowing kalanchoe leaves are due to negative factors. They can also turn yellow due to the plant’s normal life cycle.

You will know the leaves are yellowing due to natural wilt if the leaves that are turning yellow are at the bottom of the stem and fall off gradually. The rest of the plant tends to look healthy and vigorous.

There is nothing you need to do when your plant’s leaves turn yellow naturally. Just wait until the leaves fall off. Some people even pull the leaves off when they are on the verge of falling off, because they believe that the dying leaves suck up water and nutrients that could be used on new and healthy foliage.

Conclusion

Kalanchoe leaves can turn yellow if they are suffering from stress caused by an environmental factor. In order to correct this discoloration quickly, you will have to identify the cause of the problem.

The most common causes of kalanchoe leaves turning yellow are improper watering, improper lighting, humidity, temperature changes, improper feeding and natural wilt.

Kalanchoe plants are hardy and low-maintenance plants that don’t need much in order to stay healthy. They grow in the driest, most arid places on earth that have little to no rain. As long as you give the plant its most basic needs, it will have no problem thriving in your garden.

Image: istockphoto.com / skymoon13

Maple Tree Leaves Turning Yellow

Maple Tree Leaves Turning Yellow

Maple is a genus of trees and shrubs of the family Sapindaceae. There are at least 132 species, mostly native to Asia, Europe, Africa and North America. They have recognizable palmate leaves and winged fruits. Maple trees and shrubs are an important group of ornamentals for lawns, parks and streets. However, like most plants, they can suffer from conditions that cause yellowing leaves.

Maple Tree Leaves Turning Yellow: Common Reasons 

Phyllosticta leaf spot 

If you notice yellow spots edged with a purple border on the leaves of your maple tree, the culprit is a fungal disease called Phyllosticta leaf spot. The spots measure about a quarter-inch in diameter and have a distinctive blackening in the center. The disease usually appears during spring and summer. 

The spores appear in spring and are carried from tree to tree through the wind. The trees should be partially defoliated in case of a severe infection. You should also apply copper-based fungicides at least three times at two-week intervals to control the fungus. Rake the fallen leaves, since the fungus can still survive on the ground during the winter months. 

Leaf scorch 

Maple tree leaves can also turn yellow due to leaf scorch or sunburn. This means the trees are not receiving the correct amount of light. Leaves turn yellow or brown if they receive too much or too little sunlight along with insufficient moisture. Leaf scorch commonly occurs during the summer months. 

To treat the problem, add mulch around the base of the trees to keep moisture near the roots and avoid unnecessary moisture loss. Make sure that the trees are watered enough; they need approximately 10 gallons of water for every inch of tree trunk diameter, measured at knee height, according to the National Gardening Association. 

Bacterial leaf scorch

Maple tree leaves turn yellow when suffering bacterial leaf scorch, which is caused by a bacterium. The infected leaves eventually become brown and drop off. The branches will weaken and the trees’ lives are threatened. 

This disease usually occurs during late summer or early fall, especially if there has been a period of drought. Leafhoppers help spread the disease, but they can be eradicated with insecticides. You should also water the trees just enough, and ensure the soil is fast-draining.

Insects

Scale and aphids could invade maple trees and feed on the sap or juice of their leaves. This makes the leaves yellow, wilted, and distorted. The discolored leaves may drop off. 

You can fix this problem by treating the tree with insecticidal soap, neem oil, or horticultural oil. Apply these thoroughly to control and eradicate the pests. You can also use predatory insects like parasitic wasps and mites that feed on aphids and scales. 

Iron chlorosis 

If a maple tree has yellowing leaves with green veins, it could be due to iron chlorosis. The tree is unable to absorb the available iron in the soil due to high levels of clay and alkalinity. It will experience an overall decline and the canopy will die back. 

There is no long-term cure for this condition, and you have to remove and dispose of the trees. Treating the soil with chelated iron can also help solve the problem. 

Maple tree decline

Maple leaves could also turn yellow due to maple tree decline. This is a progressive condition typically signaling the end of a tree’s lifespan. An early symptom of the condition is premature leaf yellowing, which occurs before the leaves normally change color for the fall months that start in July or August. Other signs of the condition include early defoliation, death of small twigs and branches, a lack of leaves on the upper branches, and brittle roots. 

Maple tree decline is a progressive condition due to causes ranging from insect infestation to a lack of nutrients. If treated early the maple trees can be saved, and it is not contagious, so does not endanger the nearby trees. 

Carotenoids 

Carotenoids are pigments that are present in maple tree leaves and hidden by chlorophyll during the growing season. Chlorophyll is the pigment that makes leaves green and is a requirement for photosynthesis. When the winter season sets in the chlorophyll starts to die away, revealing other pigments in the leaves.  

Sunny days followed by cold nights can speed up the process and the leaves will turn yellow faster. Warm and wet summers can also trigger the development of yellow pigments in leaves. 

Conclusion

Maples make up a large genus of shrubs and trees that are popular as ornamentals. Like most trees and plants, they suffer from conditions that cause yellowing leaves. The common reasons for yellowing leaves include leaf scorch or sunburn, and Phyllosticta leaf spot. It could also be due to maple tree decline, insect infestation or iron chlorosis.

Image: istockphoto.com / Татьяна Санина

Bird of Paradise Leaves Turning Yellow

Bird of Paradise Leaves Turning Yellow

Bird of paradise leaves turn yellow when the plant is experiencing stress due to an environmental factor. This could be improper care, or an outside element such as disease or pests. It can be tricky to narrow down the reason your plant is turning yellow, but being able to correctly identify the cause is the first step in fixing the problem.

The most common causes of yellowing bird of paradise leaves are overwatering, underwatering,  lack of nutrients, pests, diseases, edema, too much sun and not enough light.

In this article, we will discuss the most common causes of yellowing bird of paradise leaves and how to remedy each one.

Why are my bird of paradise leaves turning yellow?

Overwatering

The most common cause of yellowing bird of paradise leaves is overwatering. The more leaves there are turning yellow, the more likely it is that your plant already has root rot.

When you water the soil in a plant’s pot too much or too often, the soil becomes soggy. The roots are unable to dry out between watering, so they cannot breathe and absorb oxygen.

You can check whether your plant is overwatered by tipping the plant out of the container and checking the soil and the roots. If the soil is wet, you may need to lessen your frequency of watering. If the roots have turned brown or black, it may be too late to save the plant from root rot. If there are still some roots that are white and firm, you may still be able to salvage it.

You can remedy an overwatered bird of paradise by digging it up to properly assess the extent of the root rot. As mentioned above, if most of the root is brown or black and mushy, the plant is too far gone, especially if there is a distinct smell of rotting vegetation coming from the roots.

If there are still roots that look healthy, the bird of paradise may be able to bounce back to full health. Wash the whole root ball to remove as much soil as you can, and use clean scissors to cut off any affected roots. Dip the remaining roots in fungicide or a solution of chamomile, cinnamon and activated charcoal. Lay the plant on a dry paper towel on a tray. When the roots have dried out, replant the bird of paradise in a pot with drainage holes, using well-draining soil mix.

The best way to know when you need to water your plant is by touching the top of the soil. If the soil is dry, you can water the plant; if the soil is still damp, wait one to two days and check the soil again.

Underwatering

As much as overwatering can turn the plant’s leaves yellow, so can underwatering. The leaves on the plant will turn yellow and drop off, especially those closer to the bottom and the more mature leaves. Other signs of underwatering include wrinkled and brown leaves, wilted leaves that feel scaly, and crispy, dry soil.

Fortunately, it is much easier to fix an underwatered bird of paradise than it is to fix an overwatered one. You just need to give the plant’s soil a good soaking. Keep pouring water onto the soil until you can see the excess water flowing from the drainage holes at the bottom of the pot. This is to ensure that all of the soil in the pot has been drenched so that all the roots have access to moisture. If the soil is very dry, you can let the pot soak in a tray of water for ten minutes. If there is any excess water in the pot, dump it out so the soil does not become waterlogged.

Lack of nutrients

If your plant is lacking any of the essential nutrients that it needs, its leaves can also start to turn yellow. This is because the soil the plant is in has been depleted of the nutrients it once contained. The most common nutrient deficiencies for bird of paradise plants are zinc, magnesium, iron and nitrogen.

Zinc deficiency will turn new leaves yellow between the veins, while magnesium deficiency will cause the leaves to turn yellow on the edges, making them resemble arrowheads. Iron deficiency  will turn the edges, tips and veins of the leaves yellow. Nitrogen deficiency presents as yellowing on the lower leaves that works its ways upwards over time. This often affects older leaves, and may even stunt the growth of the plant.

You can correct magnesium and zinc deficiency by using a houseplant fertilizer that contains both these elements.

For iron deficiency, you do not need to add any fertilizer; all you need to do is make sure the soil is slightly acidic, since this is needed for the successful transport of iron into the plant.

For nitrogen deficiency, use a nitrogen-rich, water-soluble fertilizer.

Pests

The presence of pests can also cause yellowing of the bird of paradise leaves. Being able to spot the signs of specific insects can be helpful in determining the correct approach.

The opogona crown borer is an invertebrate that drills into the bracts of the bird of paradise flower. It damages the tissue of the leaves, causing them to turn yellow.

Whiteflies usually appear during the early spring, when you can see a fuzzy collection of eggs under the leaves of the plant. These insects suck the sap out of the plant and cause it to turn yellow.

Scale insects appear as small brown patches on the underside of the leaves. They also suck the sap from the leaves, making them turn yellow due to chlorosis.

Spider mites prefer dehydrated bird of paradise plants. They also appear as brown spots that leave the leaves yellow.

Aphids are small, but can be seen with the naked eye. They also drink the sap of the plant, while leaving honeydew behind. This honeydew attracts ants.

You can get rid of these insects by bringing the plant to an open space, such as the driveway or the shower, and hosing it down hard with water. This will help dislodge and wash away the insects that are hanging on to the plant. Dab the affected areas with cotton balls soaked in rubbing alcohol. You can also apply neem oil to the leaves to kill the insects. You might need to reapply the treatment once a week for a month to ensure that all the pests are eradicated. 

Make sure you keep the infested plants away from the other healthy plants throughout treatment, to make sure the infestation does not spread.

Diseases

Another reason for your bird of paradise leaves turning yellow is disease. The diseases can be caused either by fungi or bacteria that attack the plant’s tissue, leaving the plant discolored.

Leaf blight is a type of bacterial wilt that causes the leaves to become pale or yellow. Over time, the leaves will wilt and drop off.

Root rot has already been mentioned above, but this is actually caused by fungi. Because the roots are waterlogged and rotten, the fungi can easily infect the vulnerable plant, and the root rot can make its way up the stem and into the leaves.

Leaf spots are also caused by fungi that start out as small brown spots. The longer the infection, the larger the spots become, until they coalesce to form patches on the leaves.

It is much easier to treat the plant if the disease is caught in its early stages. You could use a fungicide or anti-bacterial spray, but these may do the plant more harm than good. You can also use a more organic material, such as baking soda. Make a solution and spray it on the plant until the disease is gone.

Edema

Edema is another effect of overwatering and high humidity. If the plant takes up too much water, its cells will fill with too much moisture and rupture. You can see signs on the leaves such as watery splotches surrounded by yellow halos.

You can remedy edema by following the steps on how to fix an overwatered plant. Stick to a working watering schedule to prevent overwatering. You can also remove the damaged leaves, because they cannot be salvaged.

Too much sun

Even though the bird of paradise is a tropical plant, it does not mean it should be out under the full sun for most of the day. When the plant gets too much sunlight, the leaves can get scalded and burnt. The tips of the leaves will turn brown, then the rest of the leaf will turn yellow.

You can remedy a sunburnt plant by moving it to a different location where it can get some shade during the day. You can remove any damaged leaves for aesthetic purposes. Make sure you water the plant when it should be watered.

Low light

Because it is a tropical plant, the bird of paradise still needs at least six hours of sunlight a day. Not enough light will cause chlorosis, turning the leaves yellow. If the plant is kept away from light, the soil will also not dry out as quickly as it needs to and may result in effects similar to overwatering.

You can remedy this by moving the plant to a well-lit area to make sure it gets the hours of light it needs every day.

Conclusion

When your bird of paradise plant’s leaves turn yellow, you need to identify the environmental factor that is stressing it in order to fix the problem.

The most common causes of yellowing bird of paradise leaves are overwatering, underwatering,  lack of nutrients, pests, diseases, edema, too much sun and not enough light.

Image: istockphoto.com / telev_cat

Hydrangea Leaves Turning Yellow

Hydrangea Leaves Turning Yellow

Hydrangeas are flowering shrubs native to Asia and America. They can grow from three meters up to 30 meters tall, depending on the species. They have big, beautiful blooms that look like pom-poms and come in various colors. These plants can also suffer discoloration and yellowing leaves for various reasons, some of which may impact their health and longevity. 

Hydrangea leaves turning yellow: What are the reasons?

1. It could be due to leaf scorch

Leaf scorch is characterized by yellowing and wilting leaves. The ones most affected are those on the top and sides of the plant that get the most sunlight. They may also have brown tips and edges. To correct this, move the plants to a shaded area to shield them from the hot sun. While some varieties can tolerate full sun, most hydrangeas require afternoon shade. Also be sure to water the plants more than usual on hot days. 

2. It could be due to leaf spot

Another reason for hydrangea leaves turning yellow could be Cercospora leaf spot, caused by the fungal pathogen Cercospora hydrangea. This disease is prevalent during warm and rainy weather. It is not a life-threatening disease but could take a toll on the plants due to unattractive symptoms such as purple spots that turn gray, and yellowing leaves that may also turn brown and fall off. 

To fix the problem, remove and destroy the fallen leaves. Water the plants at the base, and not from overhead. Fungicides are not needed unless the plants have been affected by the disease more than once already. If so, treat the affected plants with a fungicide that contains chlorothalonil. 

Follow the instructions carefully and spray only during springtime, making sure that the fungicide covers all of the foliage except for the flowers and undersides. Reapply the fungicide once a week until the plants have healed. 

3. It could be due to iron chlorosis

Chlorosis is a reduction or absence of the normal green color of leaves. This is typically due to iron deficiency in lime-rich soil, lack of light, or disease. If you notice that your hydrangeas’ leaves are turning yellow but the veins remain green, it is most likely iron chlorosis.

To treat the problem, add chelated iron to the soil. Combine one and a quarter ounces of liquid chelated iron with one gallon of water, as a general rule. The amount of solution will depend on the size of your plant: if your plant is one to three feet tall, use at least six ounces, and if it is three to six feet tall, use 12 ounces. Pour the solution directly into the soil beneath the plant and water as you normally would. 

If the symptoms still show, the soil’s pH could be too high. You can try reapplying the iron soil drench, or try to lower the soil’s pH using pine bark mulch. 

Another option is to apply sulfur to the soil. Use 12 pounds of sulfur soil acidifier per 100 square feet. Spread the sulfur solution to the dripline and water the plants as you normally would. 

4. It could be due to nitrogen deficiency

Another culprit of yellowing leaves among hydrangeas is nitrogen deficiency. The cure for this problem is simple, as you just need to apply ammonium sulfate to resolve it. Apply one-half to one pound per 100 square feet. Scatter evenly around the plants and water them as you normally would. 

5. It could be due to overwatering or underwatering 

Overwatering is a common cause of yellowing leaves in plants, including hydrangeas. If you are using pots with no drainage holes, the leaves may turn droopy and yellow. Because the pots are not draining well, the water stays stagnant around the roots, aggravating the problem. The plants also tend to have stunted growth, and are more prone to fungal diseases. 

Similarly, underwatering can also cause leaves to turn yellow and could lead to wilting, droopy plants. Forgetting to water your plants or being unable to do so when you are away could lead to leaf discoloration if not addressed promptly. Treat the problem by making sure your potting mix is well-draining, and that the root zone stays moist without being too wet. Water the plants at least once a week. 

Conclusion 

Hydrangea leaves turning yellow is a cause for alarm among plant growers.  It indicates a problem that could endanger your plant’s life and should be resolved promptly. Common reasons for this problem include overwatering or underwatering, iron chlorosis, other nutrient deficiencies, leaf spot or sunburn. 

Image: istockphoto.com / CatherineL-Prod

Blueberry Leaves Turning Yellow

Blueberry Leaves Turning Yellow

Blueberries are perpetual flowering plants that are popular for their blue and purple fruits. They are part of the genus Vaccinium, which includes huckleberries, cranberries, bilberries and Madeira blueberries. These North American native plants are famous for their health benefits: They are believed to help with bone and heart health, diabetes management, and cancer prevention. However, blueberry plants are also prone to disease and discoloration, as discussed below.

Why are my blueberry leaves turning yellow?

Blueberry leaves can turn yellow because of chlorosis. This yellowing of the leaves is observed between the leaf veins, making the veins appear greener than the rest of the leaves. Chlorosis is commonly caused by an iron deficiency, and is considered a nutritional disorder rather than a disease. The most common reason for this disorder is improper soil pH.

Blueberries are acid-loving plants and need the correct soil pH to get their required nutrients from the soil. The ability of a plant to absorb nutrients becomes limited if the soil pH is not appropriate for the plant. Thus, the wrong soil pH could cause poor growth or even kill the plant. 

What should I do if my blueberry plant is suffering from chlorosis?

You should do a soil test if you suspect that your blueberry plant is suffering from chlorosis. This can be done with the help of your local extension center, or you may opt to buy a home kit and a pH meter. If the soil test indicates that your soil pH is very high, you should apply sulfur to the soil.  This lowers the pH and helps unlock soil nutrients, which can then be absorbed by the plant. 

Sulfur can be bought from garden retailers, but keep in mind that not all sulfur products will adjust the pH immediately after application. 

Can yellow leaves turn green again?

Yellow leaves are unlikely to turn green again unless the discoloration was caused by a nutritional deficiency. If the deficiency was corrected, the green color may return, but not in all instances. 

What is the best fertilizer for blueberry bushes?

Fertilizers that contain nitrogen in the form of urea or ammonium are considered the best for blueberry bushes. Ammonium sulfate is considered among the best nitrogen fertilizers for plants. 

What other nutrient deficiency causes yellow leaves?

Nitrogen deficiency can cause general yellowing in plants. The inner and older leaves tend to turn yellow before the others. The yellowing moves outward as it progresses and reaches younger leaves. 

Potassium deficiency makes leaf edges become bright yellow, although the inner leaf will stay green.  

Magnesium deficiency in blueberries is manifested by mature leaves that are pink on the edges but yellowish between the veins. If your soil test indicates that magnesium is low, add Epsom salt, or magnesium sulfate, at three ounces per plant to make up for the deficiency. 

What are the health benefits of blueberries?

  • They are the kings of antioxidant foods. 
  • They are rich in nutrients and low in calories. 
  • They reduce DNA damage, which could help protect against cancer and aging. 
  • They prevent cholesterol damage in your blood. 
  • They lower blood pressure. 
  • They prevent heart disease. 
  • They improve memory and maintain brain function. 
  • They contain bioactive compounds that may have anti-diabetic effects. 
  • They may help fight urinary tract infections. 
  • They may reduce muscle damage after rigid exercise. 

Types of blueberries 

There are at least four types of blueberries, as follows:

  • Southern highbush
  • Northern highbush
  • Lowbush 
  • Hybrid half-high
  • Rabbiteye 

When should I plant blueberry bushes?

Blueberry bushes may be planted in spring or late fall, except for those in cold regions. In areas where the temperature is -10 to -20 degrees Fahrenheit, or Zone 5, it is ideal to wait for early to mid-spring before planting blueberries. One-to-three-year-old plants are good choices, and make sure to buy only from reputable nurseries.

Conclusion 

The yellowing of blueberry leaves is attributed mainly to iron chlorosis, or a deficiency in iron. This is considered a nutritional disorder and not a disease. The main reason for the disorder is improper (or too high) soil pH, which prevents the plants from absorbing iron from the soil.

Image: istockphoto.com / A_Daria

Tree Leaves Turning Yellow and Falling Off in Summer

Tree Leaves Turning Yellow and Falling Off in Summer

Trees and other plants are considered healthy if they have glossy, green leaves and firm stems and branches. While the changing of leaves is something to look forward to during the fall season, sometimes trees can lose their leaves during summer. Discoloration of tree leaves, such as when leaves turn yellow, is another cause for concern. 

Why Are My Tree’s Leaves Turning Yellow and Falling Off in Summer?

Watering issues 

Tree leaves tend to turn yellow because of either overwatering or underwatering. Once trees are dehydrated, the leaves turn yellow as they struggle to conserve water. You can ascertain the moisture level by sticking a screwdriver into the soil. If you have a hard time pushing it in, this could indicate that the tree is thirsty and requires deep watering. 

If the screwdriver test indicates that there is moisture in the roots, you should try watering less. Overwatering can harm the tree as it saturates the roots and soil, resulting in yellowing leaves. 

Too much or too little water could also result in premature shedding of leaves. If the summer season brought drought-like conditions, trees could lose their leaves to counter the stress of low water conditions. 

Similarly, too much water due to too much rain could also lead to yellowing leaves that fall off in summer. Too much water suffocates the roots, causing stress and loss of foliage.  Make sure you are not soaking the soil too much when you water your trees.

Insects or illness 

Insects or summer pest infestations could be the culprit of yellowing leaves and premature leaf drop. Pests like aphids affect tree species in certain regions and can do great damage to young and newly planted trees. Leaves may wilt and drop off as these pests suck the sap from the trees. 

Inspect the trees and branches, and check for holes in the tree trunk. Any signs of molds or blotches could indicate a fungal disease and you may have to consult an arborist to determine the disease. You may also opt for a tree risk assessment to identify diseases as well as the recommended treatment. 

Nutrient deficiency 

Trees require nutrients that are essential for their health and growth. Essential micronutrients include zinc, copper, iron, manganese, silicon, boron and molybdenum. There are also macronutrients, such as nitrogen, calcium, magnesium, sulfur and potassium, which are required in larger amounts and comprise a larger part of plant tissues.  A deficiency of these nutrients could result in yellow spots or leaves turning yellow, brown or black.

Too many leaves to support due to a crowded canopy

Trees tend to shed leaves early and fall off in summer to prevent their branches from being damaged by the weight of extra leaves. This happens when trees grow too fast and produce an abundance of leaves. With crowded tree canopies, trees may also be losing leaves to conserve water. This is usually the case in hot and dry climates where water is scarce and not enough to sustain the leaves. 

If your cultivated trees are not suffering from too much foliage loss, you could try adjusting your watering schedule. Supplying them with more water could halt the leaf loss, but you still need to keep an eye on the situation to avoid any issues. 

Other Reasons for Tree Leaves Turning Yellow and Falling Off in Summer

Too much shade 

Sunlight deficit could damage your trees as leaves are unable to photosynthesize. Sun-loving trees struggle when planted in the shade, while those that prefer shade will have burnt-looking yellow leaves when grown in full sun. Always select the right tree variety or species for the right place. 

Allow your sun-loving trees more sun by removing or pruning nearby trees. If some trees are getting too much sun, be sure to provide some shade such as a shade cloth or a structure to filter the sunlight. You can also transplant young trees to a more suitable area or remove the tree entirely so that you can still save it.

Herbicide damage 

Herbicide drift could damage or kill leaves and may result in yellowing. Apply herbicides only in calm conditions if you are using them in your garden or lawn. Do not spray herbicides near vulnerable trees or shrubs. 

High temperatures 

Tree leaves may turn yellow and eventually drop off because of heat stress brought about by high temperatures. You may have to seek the help of tree professionals to identify heat stress in trees.

When leaves turn yellow in summer, you should mulch and fertilize, as well as performing careful pruning and correct irrigation for your trees. Being able to identify the reasons for the discoloration will also help you treat them correctly so they are more able to recuperate.

Conclusion

Tree leaves turning yellow and falling off in summer could be a cause for alarm, as they normally mature and fall off during the autumn or fall. Common reasons for this occurrence include overwatering or underwatering, and nutrient deficiencies. However, it could also be due to disease, pest infestation, or an over-crowded tree canopy.

Image: istockphoto.com / Meindert van der Haven

Bottom Leaves Turning Yellow

Bottom Leaves Turning Yellow

If a plant’s bottom leaves are turning yellow while the rest of the plant is otherwise healthy, it is more than likely just a sign of aging. A plant will shed its lowest leaves in order to conserve its remaining nutrients and use them to push out new growth. This is completely natural and should not be any cause for concern.

If the leaves on your plant are yellowing in a random pattern, it may be due to other causes that are stressing your plant. You need to identify the cause as soon as you can, in order to remedy it before it does any further damage.

Why are the bottom leaves of my plant turning yellow?

Plants will naturally shed their lower leaves, absorb those nutrients, and push out new leaves. This is the case if only the bottom leaves are turning yellow while the rest of the plant looks green and healthy. It is completely natural for these oldest leaves to die off as the plant ages. It could also happen because the plant is adjusting to a new location or if the seasons are changing.

Another sign that this is just part of a plant’s life cycle is if there are no abnormal discolorations on the leaves. If they are transitioning from green to yellow to brown with fresh growth replacing them, there is no need for you to worry.

How do you know if a yellowing plant is normal?

If the plant is turning yellow very slowly and one leaf at a time, it is most likely natural.

If the whole plant is turning yellow, it could be due to a lack of a specific nutrient. But take note that there are some nutrient deficiencies, such as nitrogen deficiency, that start at the bottom of the plant as well, so it might look like natural yellowing in the beginning. However, these cases usually see the leaves turning yellow at a rapid rate.

You should also check whether the leaves themselves have any unusual markings, discolorations, droppings or stickiness, because this could point to either disease or pests as the cause. The longer you handle plants, the easier it will become to differentiate a normal aging leaf from leaves affected by disease or pests.

What are other benign causes of yellowing bottom leaves?

When your plant is losing its leaves faster than usual, it is normal for you to worry. But remember that it could be happening because of changes in its lighting conditions. The plant could simply be adjusting and you need to give it time to acclimatize to its new surroundings.

One of the most common such scenarios is when you buy a plant from a nursery and take it home with you. When a plant is in a nursery, it is exposed to its optimal growing conditions; this is why it looks so green and lush. Unfortunately, most homes cannot provide these same conditions, hence natural leaf shedding will occur. If a plant is not in a greenhouse, it cannot retain all of its leaves for long periods of time. It will need to lose some leaves in order to acclimatize to your home. Just make sure you are still giving the plant the sunlight that it needs and not keeping it in an area that is too shady.

Another instance where it is normal for a plant to shed its leaves is when it goes dormant. Dormancy usually occurs in the winter, but there are also plants that are summer-dormant. When plants go dormant, it is normal for them to shed their leaves because they will not be photosynthesizing during this time. There are even plants that will lose all of their leaves, but most will just shed a certain volume. There is nothing you need to do when the leaves drop except clear them up and wait for the growing season to begins again. Soon, new leaves will grow and the plant will fill out and become lush again.

What do you do when you see yellow bottom leaves on your plant?

There are conflicting schools of thought when it comes to the yellowing leaves at the bottom of your plants. There are those that believe that you should leave them alone because the plant will reabsorb the nutrients from the dying leaf. Others believe that the dying leaf is sucking energy from the plant and it should be removed to help the plant.

There are advantages to each method, and it is up to you which you want to follow.

If you remove, or prune, the dying leaf, it can be great aesthetically, encourage faster growth of new leaves, and prevent disease or pests better because there are fewer leaves to infest.

If you leave the dying leaves alone until they fall off by themselves, you are not wounding the plant by cutting it and making it expend more energy healing, you are allowing it to absorb more nutrients from the dying leaf, and it also makes less work for you. You will only have to clear away the dead leaves from around the plant once they have fallen off.

Conclusion

When the bottom leaves of a plant are turning yellow, it usually means that the plant is simply maturing naturally and is no cause for alarm. Plant leaves need to be replaced with new leaves as a part of the aging process. The older leaves are those at the bottom, which is why these leaves are the ones that turn yellow and fall off.

If the leaves on your plants are yellowing randomly, it could be due to other more alarming reasons, such as watering issues, light problems, lack of nutrients, changes in temperature, disease and pests.

If only the bottom leaves are turning yellow, you can either prune them off or leave them to drop off when they are ready. Either way, it is part of the plant’s life cycle and you need not worry.

Image: istockphoto.com / Firn

Alocasia Leaves Turning Yellow

Alocasia Leaves Turning Yellow

Alocasia plants belong to the family Araceae. They feature striking foliage and are popular indoor plants. There are roughly 80 to 97 species of these plants, which are natives to subtropical Asia and Eastern Australia. Some grow to almost three feet high, and like most plants, they can suffer from disorders that turn their leaves yellow. 

Alocasia Leaves Turning Yellow: Common Reasons

Exposure to direct sunlight or insufficient light 

Direct sunlight could cause yellowing and browning of alocasia leaves. Placing alocasia plants in a bright room without any shade could harm them. Rather place them in filtered light within a bright room. Inversely, placing the plants in poorly-lit areas could also pose issues, so it is ideal to create a balance when it comes to lighting. 

How to fix the problem: Place the plants in a room with indirect sunlight. You can also opt for sheer curtains if the room is very bright.

Watering and soil moisture issues

Overwatering and too much soil moisture could cause alocasia leaves to turn yellow. Only water the plants weekly and do not drench the soil with water. Maintaining soil moisture is essential for alocasia plants, but do not overdo the watering as this could lead to root rot.  Always settle for moist but not drenched soil.

During winter, plants go to hibernation. At this time, place your alocasia plants in a warm place in your home. Reduce watering during dormancy, but do not let the soil dry out. 

How to fix the problem: Invest in a water meter as it allows you to check the soil moisture and achieve the perfect moisture level. See to it that the leaves do not fill with water and make sure the soil is well-drained. 

The plants should be potted in the proper soil, which is loose and well-draining. The soil should act as a water filter as it helps the roots to acquire the right amount of water. 

Establish a regular watering schedule, since consistency prevents periods of dryness. If you do not stick to a reliable schedule, it could result in over-or underwatering. 

Humidity and temperature issues 

The Asian rainforest is the natural habitat of alocasia plants, meaning humidity and temperature as essential factors for the plants.  Alocasia plants thrive in humid areas and need constant moisture in the air to prevent leaf dryness. You need to keep this in mind especially if you are in a place with a dry climate. Your home temperature should be around 60 to 70 degrees Fahrenheit. 

How to fix the problem: Use a humidifier at home to correct any humidity or temperature issues. Humidifiers provide moisture in the air and release water vapor for misting. This replicates the natural habitat of the alocasia plants. Moving your plants to a different location may also address the issue; you may want to place them near kitchens or bathrooms that have a humid atmosphere. 

You can also create humidity by wetting some stones and placing them in a pebble tray under the plant. 

Insects or pest infestation 

Insects can inflict damage to plants, as they damage the plants’ cells and deform stems and other plant parts. Common pests include aphids, mealybugs, and spider mites. These pests suck the sap from plant tissues and cause yellowing and browning of the leaves. You may also notice curling leaves. 

How to fix the problem: You need to assess why insects are invading your alocasia plants. Treat with an insecticide solution to halt the problem permanently. You could also wash the leaves or wipe them often, as this promotes circulation and stress reduction in plants. Neem oil is also effective at killing bugs and preventing new hatchlings. 

Why Are My Alocasia Leaves Drooping?

Just as with yellowing leaves, drooping leaves are usually caused by over-or underwatering, insufficient light, or pests. It could also happen due to insufficient nutrients in the soil. You may need to check whether the soil is draining properly and drying out between waterings.  Aside from refreshing the soil, see to it that you are planting the plants in a sufficiently spacious pot or planter.

Conclusion 

It is inevitable that alocasia leaves will turn yellow if the plant is overwatered or underwatered, or if subjected to humidity and temperature irregularities. The leaves may also be yellow due to full exposure to sunlight or a lack thereof, as well as due to pest infestation.

Image: istockphoto.com / Jamaludin Yusup

Yucca Leaves Turning Yellow

Yucca Leaves Turning Yellow

Yucca leaves will turn yellow as a sign of stress due to changes in their living conditions that are less than ideal. One of the most common causes of yellowing yucca leaves is overwatering. Yuccas do not require frequent watering because they are succulents that can tolerate drought-like conditions. If you overwater them or plant them in poor-draining soil, yellowing leaves will be one of the symptoms.

Other causes of yellowing yucca leaves are underwatering, insufficient light, transplant stress and pests.

In this article, we will discuss the causes of yellowing yucca leaves and how to remedy each one.

Why are my yucca leaves turning yellow?

Overwatering

The most common cause of yellowing yucca leaves is overwatering. This happens when you water the plant too frequently, grow it in pots without drainage holes at the bottom, use a tray or saucer to catch the excess water under the pot and fail to empty it, or if the soil is too rich and retains too much moisture.

Yucca plants are native to the driest areas of the Caribbean and Mexico. They are adapted to living in sandy soil with little to no rain. They are also drought-resistant.

If your yucca’s roots are soaking in boggy soil for long periods of time, it can lead to stress and yellow leaves. Waterlogged yucca roots are also more susceptible to disease and pests.

You can save your overwatered yucca plant by essentially simulating the living conditions the plant might have in its natural habitat. Start by lessening the frequency and amount of water you give your plant. 

The easiest way to figure out if your yucca plant needs to be watered is by touching the soil. If the top two inches of soil are dry, you can water it. The frequency of watering yucca plants is typically between 10 to 14 days, but factors like sunlight, humidity and temperature also affect this. Just be prepared to adjust according to what your plant prefers. Grow your yucca plants in pots with drainage holes at the bottom. This will allow any excess water to flow out so that the soil does not become saturated with water.

Use succulent soil mix instead of normal potting soil. Normal potting soil is too rich and retains water too well for the yucca to have enough time to dry its roots. You can make your own succulent mix at home by mixing one part potting soil, one part perlite and one part sand. The perlite and sand will make the soil porous, well-draining and airy.

Not all overwatered yucca plants can make a full recovery; some may have root rot that has reached the stem and you are better off cutting some healthy leaves off for propagation.

Underwatering

Another reason for your yucca plant turning yellow is underwatering. Underwatering is less likely than overwatering, but it is still very much possible. Yuccas can become underwatered if they have been neglected, or if the weather changes and they are exposed to a hot climate with low humidity. The yucca’s roots may have a hard time taking in water because it is evaporating too quickly.

Even if yuccas are drought-resistant, they still need a good soak once in a while. The correct  way to water a yucca plant is to soak the soil with enough water that excess water flows out of the drainage holes at the bottom of the pot. This ensures that the soil is wet all the way to the bottom.

If the plant has been left without water for too long, it is best to place the pot in a tray with water for two hours, so that the plant can absorb the water instead of just getting soaked. After the plant has recovered, establish a watering schedule that suits your plant.

Insufficient light

If the yucca plant does not get enough direct sunlight, the leaves will turn yellow. In its natural habitat, yucca plants thrive under the sun. If you give it too much shade, the leaves will turn yellow and droop because of stress. In the winter, you need to take the plant indoors and near a south-facing window so that it gets all the light it needs despite the season. But take note that even if you place the plant in a spot that gets sun for a certain part of the day, this does not mean it is getting the correct number of hours of sunlight.

When a yucca thinks that it is not getting enough light, it will choose to let go of its bottom leaves and prioritize the leaves at the top. This is why the leaves at the bottom will turn yellow and wilt.

The wilted leaves at the bottom cannot recover, so just prune them off, but the rest of the plant should be able to make a full recovery especially in the spring and summer when it can get all the light it needs.

Keep in mind that yucca plants can get quite tall and the upper leaves can get blocked from the sunlight, depending on the angle of the light when it enters the window. Make sure you place the plant in a location where all the leaves get exposed to light. If that is difficult, you can just rotate the plant every few days so that every leaf gets its fair share.

Even if you give the plant enough light, its recovery may not be immediately apparent. Yuccas are slow-growing, so give them time to recover.

Transplant shock

Yucca leaves can also turn yellow when you have just brought them home from the nursery. This is the plant’s reaction to the sudden changes in living conditions when it is moved.

A plant that was grown in a nursery greenhouse was in the most ideal conditions. The moment you bring it home, it will go into transplant shock because of the disparity between the growing conditions in the nursery and those of your home. A greenhouse has consistent temperature, light and water. In your home, the temperatures are changing, the light is not consistent and the watering schedule is most likely different from the one it was used to in the greenhouse.

As long as you do your best to give the plant consistent and ideal living conditions, the transplant shock should be temporary and the plant will soon adjust to your home. Do not be alarmed if some leaves die back, because new growth will replace them. Just prune the dying and dead leaves and the plant should be fine.

Pests

Bugs like spider mites, scale insects and mealybugs can feed on your yucca plant and drain its moisture. If your plant becomes infested, its leaflets and fronds will turn yellow.

These insects are more likely to attack your yucca if it is kept indoors. If they are not caught in the early stages of the infestation, they will proliferate and spread from leaf to leaf until the entire plant has been taken over. The mouths of these insects pierce and deplete the plant, further accelerating the yellowing.

You can use a pesticide to remove the bugs, but you can also just use alcohol on a cotton ball to wipe down each leaf. Do this once a week for a month to make sure that all the pests are eradicated.

Conclusion

Yucca plant leaves turning yellow is indicative of a stressed plant. There is a multitude of reasons for a yucca’s leaves to become discolored. The most common reason is overwatering. Yucca plants are succulents, which means they do not need to be watered very often and are very susceptible to overwatering.

Other causes of yellowing yucca leaves are underwatering, insufficient light, transplant stress and pests.

Yucca plants are very hardy, and as long as you provide them with their basic needs, you will have no problem growing them in your garden.

Image: istockphoto.com / Luca Rossatti

Sweet Pea Shrub Turning Yellow

Sweet Pea Shrub Turning Yellow

Sweet pea shrubs are dainty evergreens that bloom year-round. These shrubs make a good addition to borders in warm climates, and are also good in patio pots. Their purple or mauve blooms are bouquet favorites. However, like other plants, they are also prone to yellowing and disease.

Why is my sweet pea shrub turning yellow?

Your sweet pea shrub may be turning yellow due to overwatering, or watering from a cold hosepipe. It may also be due to compost that is too rich and is burning the plant’s roots. 

Sweet pea shrubs only need to be watered once a week, but be sure to maintain balanced moisture throughout the growing season. These plants do not like hot weather, so water them regularly in the early morning during summertime to prevent buds from dropping and to prevent them from getting scorched. 

Why are my sweet peas’ leaves turning brown?

Sweet pea leaves may turn brown because of Pythium root rot that often affects these plants. The plants may appear light brown and the stems may feel mushy. 

Fusarium root rot, on the other hand, causes foliage to turn yellow and eventually gray, while the stem becomes dark brown. To control these diseases, plant your sweet pea shrubs in areas that have good drainage and apply fungicide as a seed treatment. 

Why is my sweet pea shrub turning white?

Sweet pea shrubs may turn white due to powdery mildew. Round, white, powdery spots and coating appear on the leaves, stems and pods. This is caused by fungal spores that germinate on the dry leaf surfaces when humidity is high. This is common during late summer or fall, but it does not cause major damage to the plants. 

Powdery mildew can be treated with Systhane fungicide which should be sprayed for the rest of the flowering season. 

Other conditions that may affect your sweet pea shrub 

Bud drop 

Bud drop is a condition, not a disease, caused by variations in temperature such as hot days and cold nights. The buds may turn yellow or green and eventually fall off when touched. There is no cure for this other than to wait until the weather settles and the nights become warmer. Avoid feeding the plants until they start to set buds and flower. 

Bud drop may also be caused by watering the plants with a cold hosepipe, so make sure only to use water that has stood for at least a day. 

Pollen beetle infestation 

Pollen beetles tend to invade sweet pea shrubs and get inside the keel of the flowers. These bugs usually come from rapeseed fields and are also called rape beetles. You can control these insects by placing cut rapeseed flowers in your shed or garage so the bugs will transfer to them. A yellow bucket of water among the plants in the garden will also attract these bugs, which eventually fall and drown in the water. 

Caring for your sweet pea shrub 

Sweet pea shrubs only need minimal care and can survive despite the absence of supplemental irrigation. These plants thrive if watered regularly, while those grown in containers require more water. They bloom the whole year round, and should ideally be given a general-purpose fertilizer during the spring and fall seasons.

Sweet pea shrubs require little or no pruning and a light trim at any time of the year is all that is needed to control their size. The stems of older shrubs may become woody, but you can always cut them to about 10 inches above the ground and allow them to regrow. You may also opt to let it grow naturally. 

You can also let the shrubs grow into small trees. Remove all except one vertical stem and take away the side branches on the lower half to two-thirds of the trunk while the plant is still young. Species like Polygala can be propagated from seeds that fall to the ground and take root if the plants are not deadheaded regularly. Hybrids are sterile and you can propagate them from softwood cuttings taken in spring or fall. 

Sweet peas in containers need to be planted with at least 10 inches of space around each plant. The containers should be as deep as possible.  Since newly-planted sweet pea plants are very hungry and thirsty, they will all fight for the nutrients in the containers if they are planted too close to one another. 

Conclusion 

Sweet pea shrubs turning yellow is usually attributed to overwatering or being watered from a cold hose pipe. These plants only need to be watered once a week, but make sure that the moisture balance is maintained throughout the growing season. Sweet pea plants do not like hot weather, so make sure that during these periods they are watered during the early hours of the day.

Image: istockphoto.com / Kamila Kozioł

Aloe Vera Plant Turning Yellow

Aloe Vera Plant Turning Yellow

Your Aloe Vera is probably turning yellow due to too much or too little water. The easiest way to correct this, especially if you are able to catch the problem early on, is to learn how to water your aloe correctly.

Other causes of a yellowing Aloe vera plant are lack of light, changes in temperature, lack of nutrients, diseases and pests.

If your Aloe vera is turning yellow and you want to learn more about the cause and how to remedy it, keep reading.

Incorrect watering methods

This is the most common cause of a yellowing Aloe vera plant. Aloes are succulents, which means that they are adapted to living in dry conditions with little to no rain. Their stems and leaves are able to absorb and store a lot of water, which they can then use in the event of a drought. So, watering them once every seven to ten days will suffice.

Aloe vera plants do not like their soil to be constantly wet. If their roots are constantly soaked in wet soil, it can lead to root rot, which happens because the roots cannot get any air, and are drowning and dying. If a root dies, it will rot, and the rot will make its way up into the stem and then the leaves of the plant. The leaves will turn yellow and become plump and heavy due to the excess water. They will feel soft and mushy, and will fall off at the slightest touch. The plant will eventually die if the problem is not detected soon enough.

Aloe vera has been observed to survive up to three months with no water, but that does not mean you should allow this much time between watering for your plant. If you want to keep your plant looking healthy and green, you still need to give it enough water.

If the soil in your plant’s pot is constantly dry, the plant will not be able to absorb the nutrients that it needs. These elements need water to keep them in a soluble form that the plant can absorb. A dried-out Aloe vera will eventually turn yellow.

The best way to remedy an overwatered or underwatered aloe plant is to make sure that you know how to water it properly.

The easiest way to determine whether your plant needs to be watered is to loosen the soil and check if the top two inches are dry or still moist. If it is still moist, wait one or two days and check it again. If the soil is dry, water it enough that it gets soaked. Just make sure that the excess water can flow out of the drainage holes at the bottom of the pot.

The ideal time between watering is usually seven to ten days, but you might have to water less frequently in the winter. If your plant is kept outside in the sun during the summer, you might also need to water it more frequently. The key will always be to check the soil.

Light issues

Aloe vera plants need a certain amount of light and will be greatly affected by either a lack of, or excess, sunlight. If you leave your plant under the sun for too long everyday, it can lead to sun damage and its leaves can turn purple.

Your plant will most likely turn yellow during the colder months. You might keep it in a cool room with not much light coming in, but you should be careful in this case. You need to keep in mind that your plant still needs light year-round for photosynthesis to happen. In the summer, you can just place it on your porch or patio, but during winter, placing it in south-facing windows will have to suffice.

If your home tends to get dark for long periods of time, you might need to set up a light for your plant. A grow light can help provide the daily 15 hours of light your Aloe vera plant will need.

Changes in temperature

The ideal summer  temperature for Aloe vera is around 77 degrees Fahrenheit, but it can tolerate temperatures as low as 64 degrees Fahrenheit.

In the fall or winter when temperatures drop to 50 degrees Fahrenheit, or in the summer when the temperature can reach as high as 85 degrees Fahrenheit, this can cause considerable damage to your plant. Both these extremes can cause the plant to turn yellow as a way of showing that it is stressed. It is best to address this immediately and transfer it to an area with a more stable temperature.

Lack of nutrients

When an Aloe vera plant does not get its required nutrients, you will see the effects on the plant’s appearance. The leaves will start to thin out and the tips will turn yellow.

Aloes, like any plant, need soil that has the required nutrients for their survival. A commercially available succulent soil mix is usually good enough for this. You do not need to fertilize a newly-transplanted aloe for a couple of months, because the new soil still contains sufficient nutrients.

An aloe vera plant will also turn yellow if fertilizer is applied too often, if not enough water was given before fertilization, if the roots do not receive a liquid solution but the leaves and stem are sprayed, or if you fertilize the plant during the winter.

Disease

As mentioned above, root rot can kill your Aloe vera if not detected early.

Root rot can spread quickly if you ignore an aloe’s requirements and have soil that does not drain well or soil that is too compact and causes moisture stagnation.

Symptoms of root rot include thin, watery, withered leaves, leaves turning yellow, and the aloe stem becoming so thin and fragile that it breaks off easily at the base. The pot will also start to smell like rotten vegetation and the plant’s growth will become stunted.

Dry rot is another disease that affects the Aloe vera plant. The tips of the medium-sized leaves will start to dry out and then the entire leaf will start to curl and dry out entirely. The fungus will spread from leaf to leaf until it dries all of them from the inside out.

You can keep these diseases away from your plant by making sure the plant has well-draining soil and is in a pot that has drainage holes at the bottom.

Dry rot can be avoided by making sure the plant gets the right amount of water.

You can also use fungicide to get rid of the disease on your plant.

Pests

Pests can also cause your Aloe vera plant to turn yellow. If you see dead leaf spots on your plant, it is safe to assume that it was caused by spider mites. As these spots spread, they will reach each other and form bigger blotches that will turn the leaf yellow. Even though these insects are very small, they can inflict a lot of damage. They set up their colonies at the bottom of young leaves and suck the sap from the plant.

Before treating the plant, make sure you transfer it to an area far away from your other plants. This is so you can isolate it and prevent the pests from spreading. You can then use neem oil to kill the spider mites. Apply the neem oil once a week for a month to make sure all the insects are killed.

Mealybugs can also cause the Aloe vera’s leaves to turn yellow. They leave a waxy substance on the leaves that will deprive them of oxygen and cause them to rot. You can use alcohol or apple cider vinegar to kill these bugs. Keep the plant in the shade while you treat it and repeat the treatment every ten days, three times, to make sure the bugs are eradicated.

Conclusion

An aloe plant will turn yellow if it is under any kind of stress, so if you notice your Aloe vera turning yellow, you need to find the cause immediately and fix it.

The most common causes of yellowing Aloe vera plants are overwatering, underwatering, lack of light, temperature changes, lack of nutrients, disease and pests.

Aloe vera is easy to grow and as long as you provide it with its most basic needs, you will have no problem keeping it green and healthy.

Image: istockphoto.com / magical_light

Chives Turning Yellow

Chives Turning Yellow

Chives are members of the onion family, with the scientific name Allium schoenoprasum. These companion plants deter pests, have beautiful edible flowers, and are cold-tolerant perennials best planted in early to mid-spring. Chives are close relatives of garlic, leek, scallion, shallot and the Chinese onion. They thrive across Asia, Europe and North America, but like most plants they are also susceptible to disease and discoloration. 

Chives Turning Yellow: What Are The Common Reasons?

1. Overwatering 

Most beginner plant owners tend to overwater their chives since they worry too much that they are not giving them enough water.  Excess water suffocates the chives’ roots and reduces the available oxygen. Roots need to exchange gases, and if this is prevented by factors such as excessive water, the chives will weaken and droop.  Leaf burn and yellowing leaves with darker veins are also indicators of overwatering.

Overwatered plants are not able to absorb all the water in the soil and this results in soil that stays wet longer. Low-oxygen and moist environments are breeding grounds for root-rotting bacteria. If this happens, you need to dispose of the plants as they cannot recover from root rot. Overwatering is more of a problem in wintertime, and overwatering your chives even once can kill them. 

Underwatering may also cause discoloration, but in this case the plants are more likely to recover if watered regularly. This is less of a problem than overwatering. 

A good way to tell whether you are overwatering or underwatering your plants is using the finger or toothpick test. Just insert a finger or a toothpick into the soil and check whether the soil is damp to the touch. If the soil sticks to the toothpick, it means you are overwatering. If the soil does not stick and the toothpick comes out dry, it means you are underwatering and you need to water your chives more.

Watering depends on varying factors such as temperature, the age of your plant, container size, the amount of sunlight received, and the number of leaves. 

2. Water salinity level

The kind of water you are using for your chives could also become a factor in why they are turning yellow. Water that is not from the tap may have a salinity content that is too high, which could ruin chives.  If the salinity is too high, you might spot whitish salt crusts on the soil’s surface when it is dry. To fix this, check the water salinity with a refractometer or hydrometer. You should also change the soil and transplant your chives. 

3. Insufficient light 

Chives prefer at least six to eight hours of light daily, just like most plants. They can survive even with only four hours of direct light, regardless of whether it is sunlight or artificial light. If the plants are not exposed to at least four hours of light they may develop droopy and yellowing leaves. You can compensate for a lack of light by using a grow light, so that the plants still have access to light for a few hours each day. 

4. High temperatures 

Chives prefer, and thrive in, cold temperatures. They could become stressed if exposed to hot temperatures and environments close to 80 degrees Fahrenheit. This will likely trigger a dormant state in your plants and they may stop growing and become droopy. There is also a potential risk of sunburn, so you should water the chives more often to nurse them back to health. 

5. Pest infestation 

While usual plant pests do not like chives because of their taste, they are still prone to attacks by onion maggots and thrips. This could cause drooping and yellowing leaves. These pests are often spotted at the base of the plant where they lay white eggs. These insects look like common flies and create tunnels in the chive bulbs, causing root rot and possible diseases.  

Thrips are similar to aphids, in that they suck the plant’s nutrients and fluids from the leaves. The larvae are white, semi-transparent bugs that spend most of their time feeding on leaves. The adults are brownish/dark, have four legs and wings with hair. You will know there are thrips in your chives when there are silver patches and small black spheres on the leaves, which are their excrement.

To fix the pest issue, you need to use sticky sheets that attract and trap thrips. You can also use insecticides or organic pesticides like neem oil. Soapy water or isopropyl rubbing alcohol may also be used to spray or wipe on the plants.

6. Poor potting mix 

This is usually old and overused soil that has been already used for a long period. It limits the exchange of gases and the plants may start to suffocate and become droopy. Check if the surface soil is hard to break and if the water sits on top of the soil before passing through the pot. These are the usual signs of compacted soil. 

To fix the issue, you need to replace the potting soil and move the soil each time you water the plants to allow more air to get in through the soil. 

Conclusion

Chives turning yellow could be attributed to overwatering or high temperatures, which are intolerable for these cold-resistant perennials. It could also be due to poor potting mix, pest infestation or insufficient light.

Image: istockphoto.com / Oksana Akhtanina

Jalapeno Leaves Turning Yellow

Jalapeno Leaves Turning Yellow

Jalapeno peppers belong to the Capsicum annuum species, and are commonly harvested and consumed while still green, although they can fully ripen and turn orange, red or yellow. This medium-sized chili pepper can grow two to four inches long, and is milder than Serrano peppers. These plants have many health benefits, but are also prone to diseases and conditions that can cause yellowing leaves. 

Jalapeno leaves turning yellow: What are the common reasons?

1. Watering stress 

Water is essential for a plant’s growth, but you need to give the right amount. Jalapeno pepper plants should be watered just enough to keep the soil moist, but not soaking wet. If you are planting the peppers in planters or pots, see to it that there is good drainage. Water should not be trapped in the root system because if the roots become waterlogged they could develop root rot. 

Pepper plants do not mind getting a bit dry, but if the soil gets too dry the leaves will start to wilt. This is an indication that they should be watered.

Yellowing leaves may also indicate overwatering. Use good, well-draining soil along with organic matter like compost. Jalapeno pepper plants cannot access oxygen if there is poor soil drainage, and this could lead to yellowing leaves. See to it that the soil dries out completely between waterings. Mulch the peppers with grass clippings to add nutrients to the soil and keep the soil consistently moist. 

Inconsistent watering may also be a culprit. Make sure you follow a regular schedule when watering your plants. 

2. Nutrient deficiency 

Jalapeno pepper plants need nutrients like nitrogen, potassium and phosphorus, as well as calcium, magnesium and trace elements. Nitrogen is important for vegetative plant growth. It helps plants to grow big and strong and produce healthy, green leaves. Without nitrogen, plants become weak and develop yellowing leaves.   

Jalapeno pepper plants are deficient in nitrogen if the yellowing starts at the bottom of the plants and moves upward over time. Nitrogen is a mobile nutrient and the plants can move nitrogen from one part of the plant to another. If nitrogen is running low, the plants will move the remaining nutrients from the older leaves to the newer growth, so the older leaves will turn yellow first. 

Signs of nitrogen deficiency may also include the following:

  • Leaves falling off
  • Stunted plant growth 
  • Flowers falling off

To fix the problem, add nitrogen to your plants by fertilizing them. In some cases, fertilizers may not be enough to nurture your plants back to health.  

Magnesium deficiency could also affect Jalapeno pepper plants. Leaves turn yellow starting at the bottom of the plants, but the veins remain green while the flesh is pale yellow. This is also called chlorosis, and is the best way to differentiate magnesium deficiency from nitrogen deficiency.   

Calcium is also essential in building strong cell walls and absorbing other nutrients. It helps in expanding the main root system of plants and calcium deficiency is characterized by curled leaves and brown spots on the leaves.  

To fix the problem, use cal-mag spray, and spray directly onto the plant’s foliage. You should also use richer soil with the right pH range, which is around 5.8 to 6.2.

3. Extremely cold weather 

Jalapeno pepper plants originated from a warm and arid climate. Once the growing season ends and fall sets in, the plants become stressed by the temperature changes. If temperature falls below 50 degrees Fahrenheit, the pepper leaves tend to turn yellow and fall off. This is a natural response of plants entering a hibernation state.  

If temperatures fall below 32 degrees Fahrenheit, this will likely kill the pepper plants. If the temperature is the culprit, the yellow leaves will be spread all over the plant and no particular location is affected more than another. This is how it is distinguished from a nutrient deficiency. 

To fix this, you need to place your plants in a greenhouse or indoors to protect them from cold weather. Wood or metal cages, sturdy garden stakes and bubble wrap can also protect your Jalapeno plants from the cold. 

4. Disease or pests

Diseases like bacterial leaf spot, wilt and phytophthora blight can cause pepper plants to have yellow leaves. Unfortunately, these diseases are usually untreatable and the only thing to do is to discard and destroy the plants. 

Pests like spider mites and aphids can also invade the plants and suck their sap or juice. This weakens the plants and results in yellowing leaves. To fix this, spray or wipe insecticides or neem oil on the pepper plants. 

Conclusion 

Jalapeno leaves turning yellow could be attributed to various factors. These include water stress, including overwatering, underwatering, or irregular watering of plants. It could also be due to very cold weather, diseases, pests or nutrient deficiency. 

Image: istockphoto.com / xiao zhou


Dieffenbachia Leaves Turning Yellow

Dieffenbachia Leaves Turning Yellow

Dieffenbachia leaves turn yellow when the plant is experiencing some kind of environmental stress. Correctly identifying the cause of the problem is the first step in effectively fixing the yellowing.

The most common causes of yellowing dieffenbachia leaves are overwatering, underwatering, humidity, changes in temperature, too much sunlight, drafts, diseases, pests and lack of nutrients.

In this article, we will discuss the different causes of yellowing dieffenbachia leaves and how to remedy each one.

Why Are My Dieffenbachia Leaves Turning Yellow?

The plant is overwatered

Overwatering the dieffenbachia plant is one of the most common causes of yellowing leaves. When you overwater the plant, there is a proggressive, generalized yellowing of the leaves. Often plants are overwatered because a lot of people overestimate the frequency and amount of water that their plants need. Some people may think that watering the plant with a lot of water today can save them from having to water it for the next few days. This is not how watering plants works. They need to have a regular watering schedule in order to stay alive. This schedule will depend on the type of plant you own, the season, the temperature in the plant’s environment and humidity.

When the plant’s soil is constantly waterlogged, air will not be able to flow around the roots. Plant roots need to be able to dry out because they need access to oxygen for the plant to function as a living being. If the roots are compromised, the plant’s usual processes will become hampered and this will eventually lead to the yellowing of the leaves. 

Roots left to soak in boggy water can also get root rot, making the plant more susceptible to fungal diseases.

You can tell if your plant is overwatered by touching the soil around the plant. If the soil is still damp several inches down despite having been watered a while ago, it is probably overwatered. If the plant’s pot is heavy, it might be full of water. If you suspect root rot, you may need to remove the plant from the soil and check the roots. If there are brown or black roots that feel soft and mushy, you have root rot.

If the plant is overwatered but does not have root rot, just lengthen the time between watering and make sure the soil is dry before watering it again. If the soil in the pot is too compact, you could repot it using new, well-draining soil and a pot that has drainage holes at the bottom. This allows any excess water to flow out of the holes and dries out the soil faster. Make sure you give the plant less water during the fall and winter compared to spring and summer, because soil will not dry out as quickly in cold weather.

Underwatering

While giving the plant too much water is bad, so is neglecting to give it any water at all. Underwatering can also lead to yellowing and even browning of dieffenbachia leaves. This often affects the newest and oldest leaves first, as well as the leaves at the bottom of the plant.

Even if dieffenbachia is reasonably drought-tolerant, you still need to be aware of the signs of an underwatered plant. Not only are the leaves yellow or brown; the soil is also bone dry. The pot also tends to feel lighter.

Thanks to being naturally drought-tolerant plants, dieffenbachia recover quickly from being underwatered. You just need to return to the normal watering schedule that worked for the plant. Try not to remove the yellow or brown leaves while the plant is recovering because it might add stress that the plant does not need.

Humidity

The dieffenbachia is actually more tolerant of low humidity than many other plants, but it can still develop yellow leaves if exposed to low humidity for long periods of time.

Yellowing leaves is usually due to a change in location from high to low humidity. This change in atmosphere requires the plant to make a rapid adjustment to its new surroundings, leading to transplant stress.

Transplant stress is very common in plants that were grown in nurseries or greenhouses with perfect living conditions. When you bring the plant into your home, which is a lot more arid than the nursery, the plant will respond to this change of location.

Fortunately, these changes are temporary and the plant will soon adapt to its new surroundings. You can aid its transition by providing it with the closest possible living conditions to its natural habitat.

Changes in temperature

Dieffenbachia plants prefer to be in temperatures that are somewhere between 50 and 80 degrees Fahrenheit. If it gets any lower or higher than these temperatures, the plant will display signs of stress such as yellowing leaves. This is because the plant is unable to function properly outside its preferred temperatures.

The inside of most homes have no problem adhering to these temperatures. Changes in temperature are most obvious in the summer or near a drafty window in the winter. A dieffenbachia that is left out in the summer sun but is not moved indoors when autumn comes can also be susceptible to the effects of temperature changes.

Avoid temperature stress by placing a thermometer near your plants so you can easily check the temperature when you need to.

Lighting issues

The dieffenbachia plant prefers bright, indirect light, and too much direct sunlight can dry it out and burn it. Not only is providing the correct amount of light important in order to keep it healthy; the amount of light the plant gets can also affect how much and how often you need to water your plant, too.

You can prevent light-related problems by placing your plant in a spot that is not near the path of direct sunlight. It would much rather be in an area out of direct light for most of the day and only exposed to direct light for one to two hours a day.

Remember that changing seasons can change the amount of light and heat that reaches your plant. You may need to change your plant’s location every couple of weeks to make sure it gets its preferred light year-round.

Drafts

If you cannot figure out the cause of the yellowing leaves despite ruling out all the possible reasons listed above, you might want to check if there is a draft flowing through the area where your plant is kept. Is the plant under an air conditioning vent? Maybe it is placed right next to a heating vent. Sometimes a leaky window can also be enough to cause these changes to your dieffenbachia.

You can correct this by transferring the plant to a different spot in your house that does not have any drafts hitting it. Eventually, your plant will recover and return to its original color.

Disease and pests

Another reason your dieffenbachia leaves are turning yellow could be disease and pests.

There are several fungal or bacterial afflictions that can affect your plant. As mentioned above, overwatering can make the plant more susceptible to a host of diseases. Prevent these diseases by making sure you do not overwater your plant.

The most common pests that attack your dieffenbachia plant are spider mites, scale insects and mealybugs. Make sure you check your plant regularly for any pests so that you can stop the infestation in its early stages. These bugs will pierce the leaves and feed on the sap, leaving yellow markings that spread out the more they feed on the plant.

You can get rid of these insects by using an insecticide or by applying neem oil to the leaves of the plant. Make sure you isolate the infested plant so that the pests do not make their way to the other plants in your garden.

Lack of nutrients

A lack of certain nutrients in your plant can also result in the yellowing of leaves. The most common deficiencies are phosphorus and nitrogen.

Your plant can suffer from a nutrient deficiency if it has been in the same soil and pot for years. Even once-nourished soil loses its nutrients over time, because you are gradually washing them away as you water your plant.

Fertilize your plant to help it grow and thrive, but make sure you do not overdo it because that can lead to nutrient toxicity. Fertilize your dieffenbachia every two or three weeks during the growing season with a water-soluble fertilizer at half-strength.

Conclusion

A dieffenbachia with yellow leaves is indicative of a problem in the plant’s environment that is causing it stress. You will need to identify this problem correctly in order to remedy it.

The most common causes of yellowing dieffenbachia are overwatering, underwatering, humidity, changes in temperature, too much sunlight, drafts, diseases, pests and lack of nutrients.

Dieffenbachia are low-maintenance and hardy plants, and as long as you provide them with their basic needs, you will have no problem growing them at home.

Image: istockphoto.com / CoinUp