Fern Turning Yellow

Fern Turning Yellow

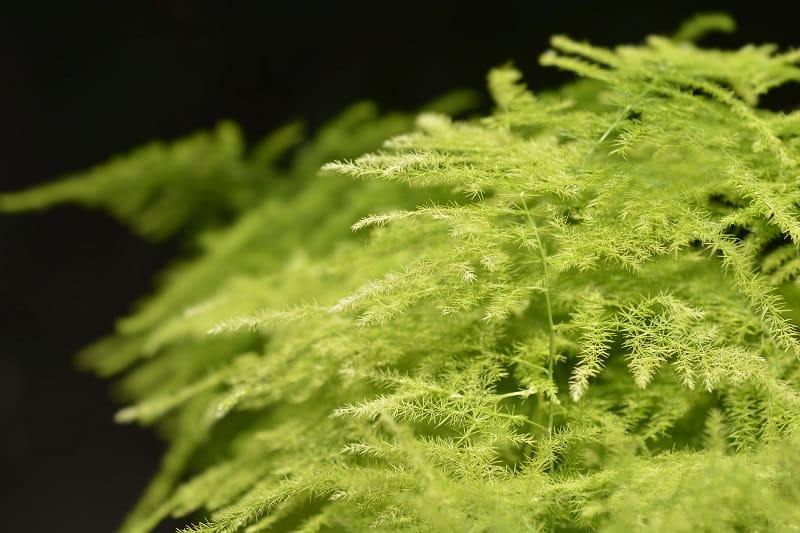
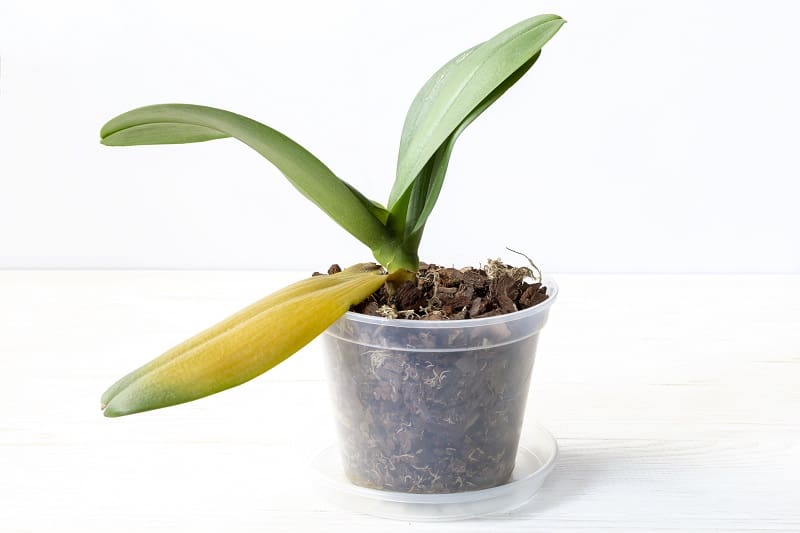
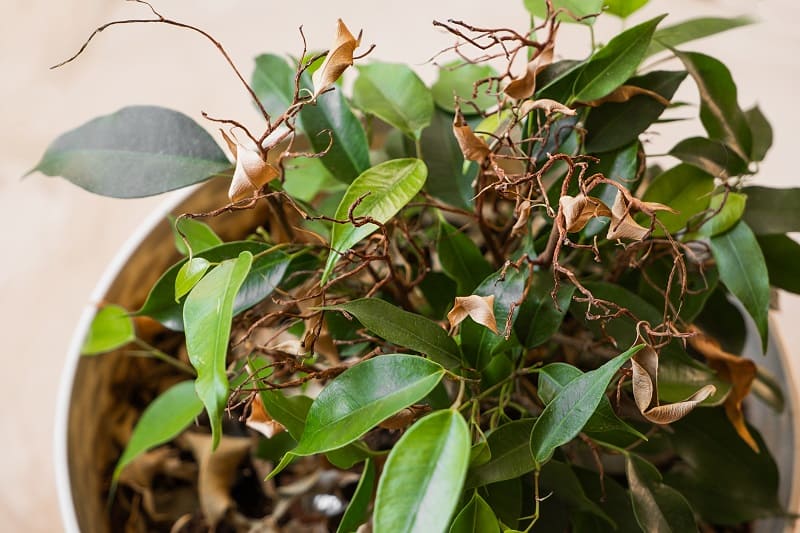
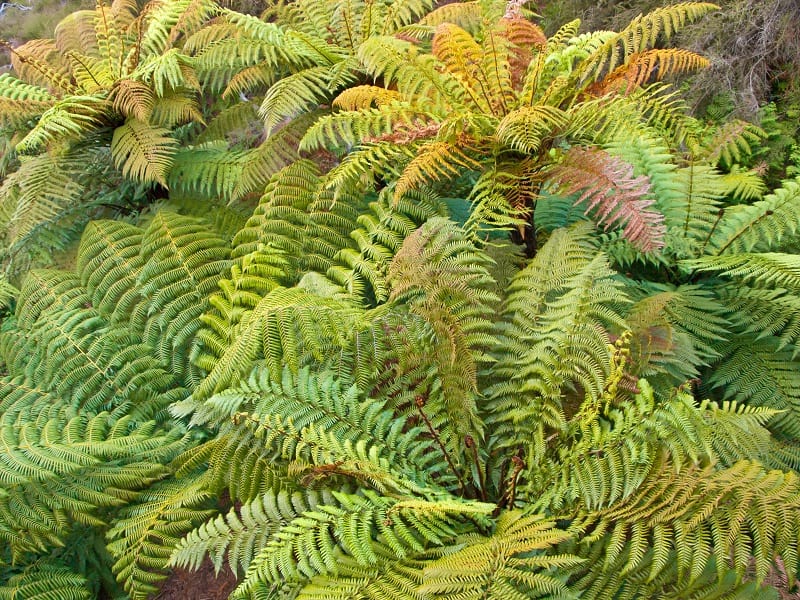
Fern fronds turning yellow can be completely normal. New fronds tend to be lighter in color compared to more mature ones. Older fronds that are about to drop off also turn yellow, then brown, due to the normal life cycle of the plant. These older leaves are at the base of the plant. If the fern fronds that are turning yellow are all over the plant, it is probably due to an environmental factor that is causing the plant stress, hence the discoloration.

The most common causes of yellowing ferns are transplant stress, root problems, lack of nutrients, pests, changes in temperature, light problems and watering issues.

Why is My Fern Turning Yellow?

Transplant stress

Ferns can quickly display signs of stress, such as turning yellow or even brown, when they are transplanted. Transplanting can mean either being taken from one location to another or being repotted from one pot to another. The best time to transplant a fern is during the springtime. This season is the mildest of all the seasons and allows the fern to recuperate more smoothly.

If you take the fern from a place where it has grown for months and has the ideal conditions for it to live in, and transfer it to your home where the conditions are less ideal than its natural habitat, the fern will react with signs of stress.

The same will happen if you uproot the plant. Try to cause as little trauma as possible to the roots when removing it from the pot. Make sure the diameter of the new pot is two inches wider than the root system and just as deep. This will help the fern adjust better.

There is really not much you can do while the fern is adjusting to its new home. The yellowing fronds will appear, but as long as you provide the plant with the best care you can, it will recuperate in a short time.

Root problems

A fern can also turn yellow if it has root problems, specifically if it is rootbound in the pot. Being rootbound can also contribute to a plant getting root rot. Severe root rot that has moved up the stem and into the leaves can result in yellowing. If the rot has only affected some of the roots, you can save the plant by cutting off the affected parts. Cut back on watering and change the soil to a well-draining variety. Make sure you transfer the plant to a pot that is big enough for the roots to spread out, so they are no longer rootbound. The pot also needs to have drainage holes at the bottom in order for excess water to flow out.

Lack of nutrients

Your fern could also be turning yellow due to a nutrient deficiency. A lack of nitrogen in the soil can greatly affect the fern, and may cause yellowing fronds. If the tips of the fronds look burnt and brown, it is probably due to too much nitrogen.

You can add nitrogen to the soil by mixing in perlite, pine bark or organic compost. These materials will help keep the soil pH at an optimal level.

Pests

Ferns are susceptible to spider mites, mealybugs and scale insects. Infestation by any of these insects can result in the fronds of the fern turning yellow.

The best way to prevent an infestation is to inspect the plant regularly to make sure there are no pests.

If you do happen to spot these pests, make sure you isolate the plant so that the pests do not spread to your other plants. You can use a cotton pad soaked with alcohol or neem oil to kill the pests on the fern’s fronds. Pesticides are not recommended, because fern fronds can be quite delicate.

It should also be a protocol for you to isolate any new plants for at least a week after bringing them home, so you can properly observe them for pests before placing them anywhere near your other plants.

Changes in temperature

Fern fronds can also turn yellow yellow and even brown if they are left in the cold. This is especially true for outdoor ferns that turn yellow in the winter as they enter dormancy. Indoor ferns do not have this same cycle, though. If the fern is anywhere near a draft, such as an air conditioning vent, the tips of the fronds can discolor.

Ferns prefer temperatures between 65 and 75 degrees Fahrenheit. If the temperature increases beyond this, you will need to water the fern more to keep the leaves from changing color.

Light issues

Ferns do not do very well in full and direct sunlight. They prefer to be in the shade. If the fern is exposed to too much sunlight, the fronds will become yellow. In direct sunlight, fronds can turn brown and become sun damaged. The tips will look scorched and dry.

Even though ferns like the shade, they still need a certain amount of light. Just make sure they get indirect light for small periods throughout the day. A fern kept in a spot that is too dark will eventually wilt and die.

You can toughen the fern by putting it outside in the shade first, and adding more and more time in the sun every day.

Watering issues

Ferns like soil that is always between moist and dry. It can be tricky to find the balance between underwatering and overwatering your fern. Going to either extreme can make the fronds turn yellow and wilt.

The best way to know if you need to water your plant is by looking at the soil. If it is dry, water the fern; if the soil is still damp, wait one or two days and check the soil again.

Conclusion

Ferns can require a little more maintenance and attention than most plants, but having their lush and beautiful foliage in and around your house is worth the effort.

When a fern’s fronds are turning yellow, it usually means there is an environmental factor causing it stress. You will need to identify the problem in order to remedy it as soon as you can.

The most common causes of yellowing ferns are transplant stress, root problems, lack of nutrients, pests, changes in temperature, light problems and watering issues.

Image: istockphoto.com / CreativeNature_nl

Avocado Leaves Turning Yellow

Avocado Leaves Turning Yellow

Avocados are certified favorites for people everywhere. The tree  most likely originated from South-Central Mexico. Avocado trees are self-pollinating and are usually propagated through grafting, mainly to maintain the fruit quality and quantity. They are cultivated in tropical and Mediterranean climates and, like most plants, are also prone to conditions that cause yellowing leaves. 

Avocado Leaves Turning Yellow: What Are The Common Reasons?

1. Due to overwatering 

Avocado trees are used to sandy and loose soil, heavy rains and warm temperatures. They are native to tropical and subtropical environments, so cultivating them in cooler climates or rainy areas with clay soil could pose a problem.  Avocado leaves are likely to turn yellow in these settings.

To avoid yellowing leaves, see to it that you provide sandy, well-draining soil. Deep watering is ideal; you should keep the avocado trees elevated on a mound or raised bed while providing at least four inches of water biweekly. Allow the soil to dry out between waterings.

Avocado trees have shallow roots, which could pose problems since shallow watering without proper drainage could lead to overwatering and root rot. Always fix the drainage before deep-watering the trees and see to it that the soil they are planted in is fast-draining.

How to prevent overwatered avocado trees:

  • Keep the tree’s soil elevated by planting it on a raised mound or bed. 
  • Add perlite or sand to the top of the soil.
  • Opt for mulching, because it has benefits such as better water retention, quality nutrients, weed prevention, and erosion resistance. For mulching, use leaves, bark or pine needles to improve the soil quality. 
  • Perform deep watering. To check when to deep-water your avocado trees, push a finger into the first two-to-four inches of soil to check if it is still wet, or use a moisture meter to check the deeper soil to about 10 inches deep. 

2. Due to seasonal leaf drop or aging of leaves 

Avocado trees usually shed some leaves around late spring to early summer, or from April to June. It is considered normal for leaves to turn yellow and fall off, since new green leaves will quickly grow to replace them. If you notice the yellowing of leaves around the months mentioned, there may not be much to worry about.  

If you suspect there are reasons other than seasonal leaf drop, consider waiting at least one to two months to see if the leaves improve or if new leaves grow. If you have already fertilized the avocado tree, avoid fertilizing again. You may add mulch if you want to protect the soil and provide nutrients. Be sure to mulch the soil only if it is draining well. 

3. Due to nutrient deficiency 

Avocado leaves turning yellow could be attributed to nutrient deficiency. Avocado trees need nutrients like nitrogen, phosphorus and potassium and should be provided with fertilizers that contain these. Synthetic fertilizers are usually used in early spring while organic ones like compost are used every one to two months. The soil pH should also be checked to allow the nutrients to be absorbed properly. 

Avoid fertilizing avocado trees from October to February, since they are dormant during these times and do not require nutrients to function. Other nutrients that tend to be deficient among avocado trees include iron and zinc. 

Compost provides a complete set of the nutrients that avocado trees need. Be sure to combine with mulching to provide high-quality nutrients and increase the trees’ resistance to drought. To use both compost and mulch, provide the soil with one to two inches of compost and one to two inches of mulch on top. Do not touch the compost and mulch as it could introduce mold or disease, and keep it at least three inches away from the tree’s trunk.

Always maintain a balanced soil pH so the avocado trees can absorb nutrients properly. Avocado trees prefer a soil pH of 5 – 7. If your soil’s pH is too acidic, which is below 5, or too alkaline, which is above 7, you need to adjust the pH accordingly. 

To increase alkalinity, add banana peels, wood ash and biochar. To increase acidity, add coffee grounds, sand and peat moss. 

4. Due to pests or diseases 

Another reason avocado leaves turn yellow could be the presence of pests or disease. Some tell-tale signs include cracking tree bark or oozing sap, small holes in the trunk, small bugs underneath the leaves, or sporadic brown or yellow spots. The possible culprits include mites and aphids, as well as fungal diseases. You can prune off the affected leaves and branches and burn them, or use organic insecticides like neem oil.

5. Due to insufficient sunlight 

Avocado leaves could also turn yellow because of insufficient sunlight. Avocado trees, like most fruiting trees, prefer four to six hours of sunlight per day. If they get less than the required hours, they tend to develop yellow leaves due to a lack of chlorophyll. To correct this, the avocado trees should be in an area where they get a few hours of sunlight daily to maintain the healthy green color of their leaves. 

Conclusion 

Avocado leaves turning yellow is not so much cause for concern if it is due to seasonal leaf drop, which usually happens around April to June.  However, yellowing leaves could also be attributed to other causes such as overwatering, insufficient sunlight, pest infestation or diseases.

Image: istockphoto.com / jaboo2foto

Dragon Fruit Plant Turning Yellow

Dragon Fruit Plant Turning Yellow

A dragon fruit plant turning yellow is often due to an environmental factor that is stressing the plant. Being able to identify the cause is the first step in finding a remedy for the situation.

The common causes of yellowing dragon fruit plants are too much sun, stem rot, overwatering, disease and pests.

In this article, we will discuss the different causes of yellowing dragon fruit plants and how to remedy each one.

Why is my dragon fruit plant turning yellow?

Too much sun

Dragon fruit is a type of cactus which means it tends to do well in places with little rain and plenty of sun, but there is such a thing as too much sun for this plant. Dragon fruits do best when in a semi-tropical climate, where they can get just the right balance of sun and cold.

When the outside temperature is over 100 degrees Fahrenheit, the plant can get sunburnt and experience summer stress.

You can check if the plant has been getting too much sun by squeezing its branch. If the branch feels firm, it likely still has moisture inside. If the branch feels dry and snaps, it may be in need of moisture and is getting more sun than it needs.

You can try to protect the plant from the sun by covering it with burlap or a shade cloth. A shade cloth can block out 75% of the sunlight and might affect the fruit’s sweetness, or fruit production in general. You can also use plant guard or sunscreen for the dragon fruit plant. This sunscreen is made of organic paint powder and plant oils which, when applied to the plant, protect it from the extreme heat. If the plant is in a pot or container, you can move it to a cooler spot in your home while also giving it water to help it recover.

There are varieties of dragon fruit, like the Tricia, that naturally produce a white powder that helps protect them from both extreme heat and cold. One downside of this variety, though, is the thorns.

You can also plant the dragon fruit in an area that has plenty of large trees that provide enough shade to protect it from the sun. Younger plants also tend to be more affected than mature plants. The older the dragon fruit plant, the more resistant and heat-tolerant it becomes, so it does not turn yellow as easily from too much sunlight.

Stem rot

Another common cause of yellowing dragon fruit plants is stem rot. Symptoms of dragon fruit plants that have stem rot include susceptibility to various diseases, smaller fruit, stunted growth, easily sunburnt, and a lower drought tolerance.

The fungi that usually cause stem rot are prevalent in tropical countries because they thrive in heat and humidity. It is possible that the spores are already present in a healthy plant, where they may have been transferred by contaminated tools or insects.

These spores are waiting for the perfect opportunity to attack. They do so when the plant’s immune defences are weak. It is tricky to pinpoint infected plants, especially if they are reasonably healthy. The best way to prevent stem rot is to prevent any opportunity for infection from happening in the first place. Make sure your plant is well-nourished and healthy.

The most common causes of stem rot that turn the dragon fruit yellow are the Erwinia carotovora and Xamthomonas campestris bacteria. 

It has also been observed that plants with nitrogen and calcium deficiencies are more susceptible to severe soft stem rot. These infections usually start from injured areas on the plant and spread from there. It can start from a sunburn or a spot caused by a fungus.

You can treat stem rot by pruning the dying stems. Remember that these diseases are spread through infected tools, so make sure you sterilize all the tools you use after each cut so you do not spread the disease to other plants. You can sterilize the tool by soaking it in an alcohol solution, a 10% bleach solution, or by running the blade over a flame in order to kill any pathogens on it.

You can use any form of copper fungicide, such as copper sulfate, to spray on the affected areas to help control the stem rot in its early stages. The copper fungicide will not treat the stem rot, but it can prevent the disease from developing further.

Another way to prevent stem rot is to whitewash the plant. This is when you paint the plant’s susceptible areas with a solution containing a fixing agent, insecticide, fungicide and lime. This solution prevents disease from developing in the first place.

Overwatering

When your dragon fruit plant is overwatered, it can lead to root rot. The roots of your plant turn brown or black and become weakened, and the nutrient transport system in the roots becomes ineffective, adding to the possible reasons for your dragon fruit plant turning yellow.

Do not overwater your dragon fruit plant, as this can also cause the little particles in the green branches of your plant to burst and become yellow. All of the excess water also makes the plant more vulnerable to bacteria and fungi.

The roots can be further weakened if you use too much fertilizer. In order for the soil to be ideal for your plant, you need well-draining soil, just enough fertilizer, and just enough water.

Pests

Dragon fruit plants also deal with their fair share of pests. Pests that suck the sap from the plant, such as the leaf-footed Leptoglossus, are believed to be the vector of the fungus Botryosphaeria dothidea. Other insects that might infest your dragon fruit plant include fruit flies, beetles and ants.

Conclusion

Dragon fruit plants can turn yellow as an indication of stress due to environmental factors, which need to be identified and remedied as soon as possible.

The most common causes of yellowing dragon fruit plants are too much sun, stem rot, overwatering, disease and pests.

It is essential to be able to quickly and correctly identify the problems that affect your dragon fruit, because this can dictate the potential outcome of your fruit yield.

Image: istockphoto.com / HuyThoai

Oleanders Leaves Turning Yellow

Oleanders Leaves Turning Yellow

Oleander, or nerium, is a shrub or small tree grown worldwide in temperate or subtropical climates. This ornamental and landscaping plant has colorful flowers that are pink, red, yellow or white, and are extremely toxic to humans and animals. It is the sole species classified in the genus Nerium.  It grows from seven to 20 feet, is easy to care for and can tolerate hot weather, but this plant is also prone to issues that cause yellowing leaves.

Oleander Leaves Turning Yellow: What Are The Reasons?

1. Improper watering 

Oleander leaves turning yellow could be due to improper watering of the plants. Plants have certain watering needs depending on light, soil, humidity and temperature. 

Oleanders are drought resistant, but they do prefer to be watered consistently, especially during dry periods. These plants also cannot tolerate overwatering, and if they are overwatered, their leaves will begin to turn yellow. 

To remedy overwatering, do not plant oleander in soil that does not drain easily. Try to change the watering schedule and hold off watering for a while. 

Underwatering, meanwhile, is a minor issue but should also be avoided. The root tips tend to die in dry soil and nutrients become depleted. To fix this problem, increase the water intake of your plants by watering more frequently. 

2. Poor drainage 

You may be watering your plants right, but wondering why the leaves are still turning yellow. The culprit could be inadequate or poor drainage. The pots you are using for your oleander plants may not have proper drainage holes, or the soil mix may not be the right kind. 

To fix the problem, use a balanced soil mix for your oleander plants. The soil should be able to retain moisture while draining excess water. These plants can adapt to various soil types, but do not use a porous soil mixture as it cannot hold sufficient moisture for the roots. Also, do not use compacted soil as this retains more water than required by the plant. 

If rainwater stands in the soil it could cut off the oxygen supply for the roots. This can stress the plants and they may develop yellow leaves. 

3. Lack of fertilizer 

Fertilizing your oleander plants is essential for them to absorb vital nutrients like nitrogen. If the plants are not fertilized, the older leaves tend to turn yellow. By feeding your plants with a balanced fertilizer the yellowing leaves will change to green in a matter of days. Oleander plants should be fertilized bi-annually, but they do not require heavy feeding. 

4. Leaf scorching 

Oleander leaves turning yellow could also be due to leaf scorching, a fatal bacterial disease spread by leafhoppers, sharpshooters and spittlebugs. These pests feed on oleander plants and introduce the bacteria, Xylella fastidiosa, to the plant stems. The bacteria thrive in the plant’s xylem vessels and block these water-conducting channels. 

Leaf scorch disease is characterized by yellow, droopy leaves and, as the bacteria grow, the plants will appear scorched and brown. To fix the problem, you have to remove or dispose of the infected plants. Most insecticides cannot eradicate this disease, so disposal of the plant is the only solution.

5. Crowding with other plants   

Oleander plants need plenty of space to grow because of their extensive root system. When they are placed too close together with other plants, it can harm their roots. Planting them in crowded areas in your garden could lead to a sickly and yellow appearance. To fix the issue, you need to replant them and make sure there is adequate spacing between the plants. 

6. Pest infestation 

Oleander plants are vulnerable to pests that suck their sap, such as scale insects and aphids. Scales have whitish-brown, flat, oval bodies, while aphids are usually found on the undersides of leaves. As they feed on the plants, the plants become weak resulting in yellow leaves. To fix the issue, use neem oil or isopropyl rubbing alcohol and wipe or spray on the affected plant parts. 

Helpful Tips to Prevent Yellow Leaves on Oleander Plants:

  • Use a trickle irrigation system, because overhead watering will soak the leaves. 
  • Check the soil and if it retains water, increase the drainage or reduce the irrigation. 
  • If you notice the area around the leaf’s central vein yellowing, your plant is stressed due to lack of water. 
  • Water your plants regularly, but with little water, as watering them heavily after a dry spell could trigger yellowing leaves.

Conclusion 

Oleander plants are lovely ornamental plants with colorful flowers. Like most plants, they also suffer from certain conditions that cause their leaves to turn yellow. This could be due to pest infestation, overcrowding, improper watering, poor drainage or bacterial diseases.

Image: istockphoto.com / ioanna_alexa

Asparagus Ferns Turning Yellow

Asparagus Ferns Turning Yellow

Asparagus ferns will turn yellow if they are experiencing any kind of environmental stress. The best way to approach this situation is to figure out the cause of the discoloration so that you can quickly remedy it.

The most common causes of yellowing asparagus fern are overwatering, underwatering, too much light, insufficient light, incorrect fertilizing, transplant stress and pests.

In this article, we will discuss the different causes of yellowing asparagus ferns and how to remedy each.

Why is My Asparagus Fern Turning Yellow?

The plant is overwatered

Overwatering is the most common cause of yellowing asparagus ferns. This is because the waterlogged soil can cause damage to the roots which can eventually result in leaf damage.

It can be easy to make the mistake of overwatering if you plant the fern in a pot that has no drainage holes, or if the soil you are using does not drain the water well. 

You can also overwater the plant if you keep it indoors or in low light, even if you are watering it only moderately. The water in this case is unable to evaporate as quickly as necessary, causing the same problems as in any other case of overwatering.

Overwatering causes yellowing leaves because the roots are not able to take up oxygen, as they are constantly in boggy soil. The soil needs time to be dry enough for air to flow through the spaces in the soil, so that the roots have access to the oxygen they need. When its ability to effectively transport nutrients is impaired, the plant cannot get what it needs to survive.

You can tell whether your asparagus fern is overwatered by checking the soil to see how much moisture it retains after watering. If it takes the water a long time to drain after watering, you might need to change the soil. You can make your own soil mix by mixing one part compost with three parts perlite and six parts peat.

You should also check the pot you are using. The pot should not be too big for the plant, because a big pot needs more soil to fill it, and more soil means it will take a longer time to dry out between watering. The pot also needs to have drainage holes at the bottom so any excess water can flow out instead of adding unneeded moisture.

Using terracotta or clay pots is also helpful to prevent overwatering. These materials are more porous, allowing air and water to travel more easily through them compared with plastic or steel pots.

You can remedy an overwatered plant by reducing the frequency of watering to allow the plant to dry out more. If the plant does better by just lessening the watering frequency, that should be enough. If the plant has been overwatered for so long that root rot has set in, it will be much harder to remedy. You can try to save the plant by removing it from the soil to check the roots. If there are parts of the roots that are brown or black, remove them using sterile scissors.

The plant is underwatered

Even though asparagus ferns look high-maintenance, they are actually quite hardy. These plants are drought-resistant because of their tuberous roots that store water for times when there is little to no rainfall.

Despite asparagus ferns doing well despite long periods without water, this does not mean they should be constantly deprived of water. A lack of water can cause the plant’s leaves to turn yellow and then brown. The first signs can be seen on the leaf tips and peripheral foliage, but it will affect the rest of the leaf over time. They will feel dry and crispy to the touch.

This issue is much easier to identify, because the soil will look and feel bone dry. You should also think of the last time you watered your plant.

You can fix this by simply resuming the correct watering schedule for your plant. Underwatering is easier to correct compared to overwatering and soon enough, new foliage will grow to replace the leaves that dried up. You can also remove the dried parts of the plant to retain its aesthetic appeal.

Note that there are also other factors that can increase the likelihood of underwatering. These include high temperatures in the plant’s environment, low humidity, and if the plant is pot bound.

Too much light

Excessive light can cause the leaves of your asparagus fern to yellow due to scorching. These plants can only tolerate sunlight for one to two hours a day, which is why they much prefer being kept in indirect light. Keeping the plant in a north or east-facing window should do the trick. Be sure not to keep the plant too close to a window that gets a lot of light, especially during the summer.

Not enough light

Another common cause of yellowing asparagus fern leaves is low light. This problem may be hard to identify in its early stages because the signs develop slowly. You might notice the plant stretching, known as etiolation, because it is growing in the direction of the nearest light source out of desperation.

Plants need light for photosynthesis to make their food. So, if there is insufficient light, the plant will not be healthy, and its leaves will turn yellow.

Fortunately, this problem is easily fixable. Place the plant in a location that is able to provide the plant with the little light it does need for the day. They like bright, indirect light such as near a window, but not directly under the sunlight that flows in.

You can check whether the plant is getting sufficient light by holding up your hand: If the shadow cast on the wall is clear, the light is sufficient. If the shadow cast is faint and indistinct, the light in that spot is not enough for your plant.

You can help a plant that has not been getting enough light by moving it into a spot that does have the correct light. This is a bit tricky since light can change depending on the seasons, so make sure you check the location of the plant every couple of months.

Fertilizer problems

Your asparagus fern will do well if it gets a steady supply of nutrients, but be wary of over fertilizing. You can dilute your fertilizer to half strength if you are afraid you are going to give too much.

A plant that does not get fertilized enough will also develop yellow or brown leaves.

You can counteract overfertilizing by thoroughly flushing out the soil with water. Run water through the soil for several minutes so that the excess fertilizer salts dissolve and wash out of the soil. Do not fertilize your plant again for a few months.

Transplant stress

When you buy your new asparagus fern, it probably came from a nursery with a greenhouse that provided it with ideal conditions. The conditions in your home are not as perfect as those in the nursery, so your new plant will need time to adjust. The leaves on your plant will turn yellow or brown in the first few weeks.

There really is not much you can do about a plant going through transplant stress. You just need to provide conditions for your plant that are as close to ideal as possible, and the plant will acclimatize over time.

Pests

The most common pests to attack asparagus ferns are scale insects, mealybugs and spider mites. In particularly bad infestations, the leaves will turn yellow because of the pests sucking out their sap. They pierce the leaves to steal water and resources, and thereby weaken the plant.

You can prevent the plant from infestation by regularly checking the asparagus fern for these insects. Isolate any new plants you have for at least a week before placing them near your other plants. Observe the new plant for any signs of bugs and get rid of them while keeping your other plants safe. 

Conclusion

Asparagus ferns turn yellow when they are experiencing some kind of environmental stress. Being able to correctly identify the cause of the stress is important if you want to fix the plant.

The most common causes of yellowing asparagus ferns are overwatering, underwatering, too much light, insufficient light, fertilizer problems, transplant stress and pests.

Asparagus ferns are hardy plants, so as long as you provide them with their basic needs, you will have no problem growing them successfully.

Image: istockphoto.com / Nahhan

Bougainvillea Leaves Turning Yellow

Bougainvillea Leaves Turning Yellow

Bougainvillea leaves turning yellow is the plant’s way of informing you that it is experiencing some kind of environmental stress that needs to be addressed and remedied.

The most common causes of yellowing bougainvillea leaves are overwatering, underwatering, insufficient light, transplant stress, temperature changes, lack of nutrients, and pests.

In this article, we will discuss the different causes of yellowing bougainvillea leaves and how to remedy each one.

The Bougainvillea Plant

Bougainvillea plants are sometimes referred to as flowering machines because of their many brightly-colored flowers and green leaves. They can grow up to 40 feet tall, and there are over 300 species of bougainvillea all over the world, thanks to botanists interbreeding the original 18 species. 

They have heart-shaped leaves and vibrant flowers. The inner flower has four to six bracts, which may be yellow, purple, red, orange, white, or pink. They bloom in the spring and summer, which makes this plant great for summer landscapes in your garden. They are often planted in hanging baskets, containers, or along walls and fences.

Why are the leaves of my bougainvillea turning yellow?

Watering issues

The most common cause of yellowing bougainvillea leaves is either overwatering or underwatering. Both can cause water stress to the plant resulting in leaf discoloration.

Overwatering drains the green color from the bougainvillea leaves because the soil is soggy and the roots are drowning. The plant is then unable to effectively transport nutrients from the soil into the plant. You need to make sure the plant’s soil has good drainage. The excess water from rain or your overwatering should be able to seep through the soil easily and not cause it to become waterlogged. You can add compost or peat moss to the soil to improve its drainage.

Underwatering can also cause yellowing of the leaves because you are depriving the plant of the moisture it needs to survive. If you notice the leaves on your plant are turning yellow and wilting, it is probably underwatered.

Bougainvillea plants need water not only to avoid dehydrating, but also as a means of transporting the nutrients from the soil into their roots. If there is no water, they will have no nutrients.

The natural habitat of these plants are the tropics and subtropics, where they get plenty of water. If you live in a place with a mostly dry climate, you need to water the plant more frequently in order to emulate its natural habitat.

Insufficient light

Another reason your bougainvillea leaves are turning yellow could be insufficient sunlight. Bougainvillea plants need at least six hours of sunlight per day in order to be healthy. Remember these are naturally tropical plants, which means that they are adapted to living in places that get plenty of sun all year round. Make sure you place your plant in a spot in your garden that provides it with enough light. If the plant is indoors, place it near a window that takes in plenty of light, and be sure to rotate the plant every few days so that all sides of the plant get their day in the sun.

If you take your plant inside the house during the winter, make sure you provide it with a grow lamp so that it still gets light despite the gloomy weather.

Transplant stress

If you have just moved your bougainvillea inside the house for the winter and the leaves have started to turn yellow, this may be due to transplant stress. Any change to the plant’s environment can cause stress, especially if the plant has become accustomed to living in certain conditions. This is completely normal and the best you can do is to make the transition as easy as possible on the plant by ensuring the place you are transferring it to has the same conditions.

Try to temper the stress by gradually moving the plant to its new location. You can take the plant indoors for a few days, then take it back outside for several days. Keep repeating this until the plant has adjusted to the inside of the house.

Do not overwater or give fertilizer to your plant after transplanting or moving it.

Lack of nutrients

Like most plants, bougainvillea needs to be fertilized regularly in order to keep blooming and keep its leaves vibrant.

If your plant has yellow leaves, it could have a magnesium or iron deficiency. You can correct this by using a fertilizer designed specifically for bougainvillea plants. You can also make your own solution by mixing a tablespoon of Epsom salts to a gallon of water and then applying the solution to the plant’s soil. This will help enhance the soil’s iron and magnesium content.

If the plant’s yellow leaves are also twisted, it might have a zinc deficiency. You can use a fertilizer with chelated zinc to correct this.

Temperature changes

As mentioned above, bougainvillea plants are tropical and are often found in coastal areas. They can survive in colder regions, but they will need to be provided with as many simulated tropical living conditions as possible.

Your bougainvillea plant will struggle in cold temperatures, especially in the winter. One of their reactions to this stress is the yellowing of their leaves.

You can lessen the risk of damage to your plant due to cold temperatures by placing it in a warm location. If you need to buy a grow lamp for the plant, then do so. The closer you are able to replicate the tropical setting of the plant’s natural habitat, the better.

Pests

Bougainvillea plants can get attacked by pests like spider mites. These insects feed on the leaves of the plant and deplete its nutrients. The more spider mites there are on a plant, the faster the leaves will turn yellow. Signs of spider mites on a bougainvillea plant include moving dots on the leaves, and webs.

You can get rid of these pests by spraying the plant with water jets every two weeks to dislodge the spider mites. You can wipe down the leaves with neem oil to kill the pests. Apply the neem oil once a week for a month to make sure all the mites are eradicated.

What should I do about the yellow leaves on my bougainvillea plant?

Yellow leaves no longer play a role in photosynthesis, and thus will not be able to produce any energy or food for your plant. They are just using up energy and resources that may be needed by new leaves.

The best thing to do is remove them to save the plant’s energy. Pruning also makes the plant look much prettier.

Conclusion

Bougainvillea leaves turn yellow when they are experiencing some type of environmental stress. In order to correct this change in color, you will need to identify what exactly is causing the discoloration.

The most common causes of yellowing bougainvillea leaves are overwatering, underwatering, insufficient light, transplant stress, temperature changes, lack of nutrients and pests.

Image: istockphoto.com / Bigpra

Pepper Plants Turning Yellow

Pepper Plants Turning Yellow

Pepper plants are popular as peppers are used in many food preparations. They belong to the genus Capsicum, of the Piperaceae family of flowering plants. Common types include green and red bell peppers which are used as vegetables, hot peppers such as tabasco, and other types used as ornamental plants. Pepper plants can also turn yellow for reasons such as lack of or excessive moisture in the soil. Read on for some insightful details on why pepper plants may turn yellow. 

Pepper Plants Turning Yellow: What Are The Reasons?

1. Water stress

Pepper plants tend to suffer from yellow leaves, low production and stunted growth due to watering inconsistencies. Overwatering can cause yellowing, but the effect is the same if the plants are underwatered. Watering too little or too much could lead to stress in pepper plants. You need to get the balance right and water just enough so that the soil stays moist, but not wet.

Pepper plants in planters or containers need plenty of drainage holes to avoid waterlogged roots. They cannot access enough oxygen without proper drainage, and this could lead to yellowing leaves, smaller fruits and productivity issues. These plants can more easily handle being dried out than being overwatered, so you should ideally stick to the dry side. 

How to fix the problem: 

Check the soil moisture of your pepper plants daily by sticking your finger into the soil. If it is moist around two inches down, they do not need to be watered. If the soil is dry, you should water the plants. You can also use a water meter to measure the water and the pH level in the soil.  

2. Nitrogen deficiency 

Yellowing leaves on pepper plants can be a sign of nitrogen deficiency. Without nitrogen, plants are unable to grow strong, healthy and have green leaves. 

The yellowing starts at the bottom of the plant and will slowly move upward. This is because nitrogen is a mobile nutrient and can move from one part of the plant to another. Plants tend to move the remaining nutrients into newer leaves from the older ones when there is a nitrogen deficiency. The older leaves turn yellow first and then fall off. 

Aside from yellowing leaves, pepper plants with a nitrogen deficiency will have stunted growth and the leaves and flowers will fall off. 

How to fix the problem:  

Fertilizing the plants is the best way to resolve this problem. Feed the plants with fertilizer at least once weekly throughout the growing season. The fertilizer should provide enough nitrogen to keep your plants from developing yellow leaves. 

3. Other nutrient deficiencies 

Your pepper plants may also be deficient in other nutrients such as magnesium and calcium. These nutrients are also necessary for plant growth, and a lack thereof can also lead to yellow leaves. 

You will know your plant is magnesium-deficient if the yellowing starts at the bottom of the plant but, unlike in nitrogen-deficient plants, the leaves’ veins remain green but the flesh turns yellow. This process is called chlorosis, and is the quickest way to differentiate magnesium deficiency from nitrogen deficiency. 

Calcium is vital in the development of strong cellular walls and without it, the plants will struggle to absorb the required nutrients and will have trouble bearing fruit. This nutrient is also essential in the expansion of the root system. Calcium-deficient plants will have curled leaves with brown spots, as well as yellowing leaves. 

How to fix the problem:  

Epsom salts increase the magnesium in the soil and crushed eggshells should also be added to provide magnesium and calcium. Enrich the soil with compost, especially before the next growing season to avoid having nutrient-deficient plants. 

4. Disease 

Yellow leaves on pepper plants could also be due to bacterial leaf spots, phytophthora blight or wilt. Aside from yellowing leaves, you will also notice that the plants will have black lesions on the leaves, brown leaf spots and become wilted. 

How to fix the problem:

Most diseases that cause yellowing leaves on pepper plants are untreatable. You may have to discard your plants or, if the damage is not yet too widespread, separate and quarantine them so they have time to heal and become normal again. 

5. Pest infestation 

Pests can cause damage to pepper plants, including yellowing leaves. They include spider mites, aphids, flea beetles and whiteflies. They suck on the sap of plants and weaken them, which could lead to disease or death. 

If you take a closer look at the yellowing plants, you will notice that there are tiny dot patterns on the top and underside of leaves due to the pests. Aphids and whiteflies are often found on the bottom of the leaves. 

How to fix the problem: 

Pesticides eradicate pests effectively but they are toxic and unhealthy for humans and animals. Organic options include neem oil, which only kills harmful insects. Isopropyl rubbing alcohol or liquid dish soap and water are also good options.

Conclusion 

Pepper plants are common food ingredients that add flavor and aroma. During the growing season, they tend to turn yellow due to lack of or excessive water in the soil.  Aside from water stress, yellowing of pepper plants may also be attributed to nutrient deficiency, disease, or pest infestation.

Image: istockphoto.com / Tatiana Mironenko

Mint Leaves Turning Yellow

Mint Leaves Turning Yellow

Mint plants are spreading perennial herbs that are usually planted in containers or confined beds. They provide aromatic flavor to food and tea, as well as offering many health benefits like aiding digestion and relieving headaches. These plants are bright green or variegated and are great garden accents but, like most plants, they are also prone to conditions that cause yellowing leaves. 

Mint leaves turning yellow: What are the common causes?

1. Underwatering

Underwatering your mint plants could be detrimental to their health. Mint survives well in moist soil and can wilt if the soil dries out or during hot weather or droughts. These plants prefer to be watered regularly and planted in soil that retains moisture. They do not do well in sandy or stony soil, as it drains too quickly. 

To save your underwatered mint plants, water them frequently to keep the soil moist. Adjust the frequency of watering according to the time of year and the climate. Water once every three days if you are in an area with a hot climate, and once a week if you are in a temperate climate. 

Plant your mint plants in rich compost, as this is good at holding moisture but still has a porous structure so the water can drain out. Monitor the soil moisture by testing to a finger’s depth and adjusting watering frequency so the soil does not dry out and dehydrate the plants. Water the plants generously so that the roots can establish themselves properly. Light watering encourages shallow root growth which makes your mint plants more vulnerable to drought.

Mulch helps mint plants in garden borders to retain moisture, while compost, leaf mold and well-rotted manure are also good options to retain moisture, improve soil structure and reduce soil evaporation. 

2. Root rot due to overwatering 

Mint leaves turning yellow could also be due to root rot as a result of overwatering. The leaves may also droop. Root rot and other fungal diseases thrive in soil that is saturated with water that does not drain away. Mint plants prefer moist soil with a porous texture that allows excess water to drain away so the roots do not sit in boggy soil. 

Root rot occurs because of slow-draining soil, such as compacted soil, and pots with no drainage holes. To fix the issue, scale back on the watering and transplant the mint to a well-draining area of your garden or to a pot with fast-draining soil and drainage holes. 

3. Fungal diseases

Yellowing leaves could also be attributed to fungal diseases such as verticillium wilt, rust, and powdery mildew. Verticillium wilt is caused by Verticillium fungi and is a common fungal disease affecting mint plants. 

Rust causes severe stunting and could even kill the mint plants. You will notice blisters at the bottom of the leaves; the leaves eventually turn yellow and may start to fall off.  

To fix the rust problem, use a thermal method such as flame weeding. If the infection is severe, remove the mint plants and dispose of them. The healthy plants should be transplanted to new beds and monitored regularly for signs of infection. You could also burn the roots to kill the spores in the soil. 

To treat verticillium wilt, fertilize on schedule and use a low-nitrogen, high-phosphorus fertilizer. Prune off dying branches and get rid of the fungus in the soil through solarization, which uses high temperatures to kill the fungus. 

Powdery mildew is a powdery, grayish fungus growing underneath the leaves. The fungus turns the mint leaves yellow and could even kill them. To fix this problem, spray fungicide on the afflicted leaves and inoculate the soil with fungicide so the fungus does not resurface.

4. Poor potting conditions

Yellowing mint leaves could be due to poor potting conditions. Pots that are too small for the plants could lead to yellowing leaves and wilting as the soil dries quickly. A lack of drainage holes in pots could also contribute to the problem.

To fix this, plant or transfer your mint plants to larger pots that are at least 12 inches across so the soil will not dry out so quickly and you will be able to prevent wilting. Larger pots have greater soil capacity and more moisture. The roots will also have more room to access nutrients so that more foliage is produced. See to it that the pots have drainage holes so the soil does not become boggy.

Water the mint plants regularly to keep the soil moist, and the yellowing and wilted appearance should be resolved within a few days. Avoid using saucers or trays that catch the water and make the soil boggy. 

5. Pest infestation 

Insects like aphids could destroy your mint plants by sucking their sap or juice. The leaves begin to pucker and curl and eventually turn yellow. To fix the problem, use organic insecticides like neem oil or insecticidal soap. 

Conclusion 

Mint leaves turning yellow can be alarming for mint growers as this may indicate serious damage to the plants. This yellowing could be attributed to overwatering, underwatering, fungal diseases, pest infestation or poor potting conditions. 

Image: istockphoto.com / Wylius

Succulent Leaves Turning Yellow

Succulent Leaves Turning Yellow

When a succulent’s leaves turn yellow, the most common cause is overwatering. If a succulent’s soil is constantly wet, it can cause the roots to rot and die. When the roots are damaged, they cannot effectively take up water and nutrients.

The rot will move up the stem and the leaves will become yellow, plump, soft and mushy. The leaves will fall off due to their weight and the plant will eventually die.

Once the root rot reaches the stem it is usually impossible to salvage the plant, so make sure you avoid overwatering from the start. Use well-draining soil and a pot that has drainage holes at the bottom to effectively remove any excess water.

In this article, we will learn about the various causes of yellowing succulent leaves and how to remedy each one.

Why are my succulent leaves turning yellow?

Overwatering

The most common cause of yellowing succulent leaves is overwatering. Yellow leaves are often a sign of a stressed plant. If the yellow leaves on your succulent are soft and mushy to the touch, you are most probably watering it too much.

One of the earliest signs of an overwatered plant are leaves that fall off easily after even the slightest touch. If you can see black spots on the plant’s stem, it may be too far gone to be salvageable, but you can still take the healthy looking leaves and propagate them to grow more plants.

If there are no rotten roots, transplant the succulent to a new pot that has drainage holes, using well-draining soil.

If there are black spots around the plant’s stem, you need to remove the plant from the pot and shake off as much soil as possible from its roots, as carefully as you can. Cut off any roots or stem that have rot and lay the plant out on a paper towel so it can dry out. Discard the infected soil properly. 

Once the succulent is dry, plant it in a pot with drainage holes using well-draining soil. Make sure you only water the plant a week after repotting to give the roots enough time to establish themselves.

Water the succulent only when the top inch of soil is dry to the touch. If the soil is still damp, wait one or two days and check it again.

Underwatering

Succulents come from some of the most arid places on earth, so they are adapted to high temperatures and little to no water for extended periods of time, but this does not mean that you should deprive them of all water.

Underwatered succulents can also turn yellow and dry out. The leaves in this case will also become quite brittle.

You can remedy this by simply watering the plant. Make sure the plant is in a pot with drainage holes and give all of the soil a good soak of water until you can see the excess water flow out from the drainage holes at the bottom.

Make sure you check the soil in the pot before watering. If the soil is dry, water the succulent, but if it is still damp, wait a few days and check the soil again. Even if you are trying to revive an underwatered succulent, this does not mean you should overwater it.

Not enough light

Your succulent’s leaves may also be turning yellow because you are not allowing it to get enough sunlight.

If the succulent’s leaves are yellow and its stems are getting longer and lankier, it may be going through a process called etiolation. Etiolation happens when a plant becomes so desperate for light that it compromises its body by placing all its energy and nutrients into growing in the direction of the nearest light source.

This does not really harm your succulent, but it does drastically change the way it looks. It will start to look asymmetrical.

Fortunately, lack of light is very easy to fix. You just have to transfer the succulent to a part of your house where it can get at least three hours of direct sunlight a day.

Pests

The most common pest that feeds on succulents and turns its leaves yellow is the mealybug. Mealybugs like to feed on the new growth of a succulent, and this causes significant stress to the plant. They can be found in the nooks and crannies of the succulent and, if not caught early, they can take over the entire plant in no time.

You can get rid of mealybugs by using an insecticide. You can also use neem oil to kill these insects. Just apply the neem oil on the leaves once a week for a month to make sure all the mealybugs have been killed.

You are using the wrong soil or pot

If all of the above causes are ruled out, it is possible that the reason your succulent’s leaves are turning yellow is that you are using the wrong soil or the wrong pot.

Succulents do not need a lot of water because they are able to store it for long periods of time. This means they do not need to soak in wet soil. Use a well-draining succulent soil mix that you can buy, or you can simply make some of your own by mixing potting soil, sand and perlite.

The sand and perlite helps keep the soil aerated. Make sure the pot has drainage holes so that any excess water is able to flow out in order to avoid overwatering.

The leaves are dying naturally

Sometimes yellow succulent leaves do not really mean that anything is wrong with your plant. It could just be that the leaves are dying naturally. When a leaf becomes old, the plant will decide to cut it off from any water and nutrients and choose to direct these to growing new leaves instead.

The old leaves will turn yellow, dry up, and eventually fall off. This is all part of the plant’s life cycle and should be nothing to worry about.

Take note that it is usually the leaves closest to the base that die off naturally. If the newer leaves at the top are dying, it may be because of something else.

Conclusion

The most common cause of yellowing succulent leaves is overwatering. It is very easy to overwater succulents because they are adapted to getting very little water.

Other common causes of yellow succulent leaves are underwatering, insufficient light, pests, the wrong soil or pot, or the plant’s natural life cycle.

Image: istockphoto.com / Natalia Van Doninck

First Set of True Leaves Turning Yellow

First Set of True Leaves Turning Yellow

First-time plant growers can get a bit too excited with their first set of cultivated plants. They tend to spoil them by watering often and fussing over the young plants’ growth as a mother would over her child. However, this could pose risks to young plants that are just developing their first set of true leaves.  

First set of true leaves turning yellow: What are the reasons?

1. Insufficient light 

Young plants tend to appear yellow or develop yellowing leaves if they do not get enough light. This is usually true if the plants are grown indoors. See to it that they are provided with the right amount and intensity of light. A grow light should be placed directly over the young plants and it should be kept on for at least 12 hours daily. 

Too much light could also damage the first set of true leaves, so make sure that it is only exposed for 12 hours every day. It is ideal to invest in a grow light with an automatic timer to save you having to turn it on and off, as is necessary when using a manual grow light. 

2. Insufficient water 

Young plants with their first set of true leaves may have yellowing leaves if they are not given enough water. They need water to grow healthy and to develop strong roots and plant parts. You do not have to water the plants every day; only when the soil is dry.  

3. Too much water

While insufficient water can cause yellowing, overwatering your new plants can produce the same result. This usually happens when there are consistent heavy downpours or if you leave the sprinkler on for a long period. 

Below are the common signs of overwatered plants:

  • There is no new growth. 
  • Young leaves appear brownish.
  • The soil appears greenish due to the presence of algae. 
  • The plants begin to wilt. 
  • The roots are stunted or rotten. 
  • The lower leaves are yellowish. 

Young plants need to breathe well and if they are overwatered they can drown. If the roots are constantly flooded, it hinders absorption of the required gases resulting in the first set of true leaves turning yellow. 

4. Overfertilization 

Some plant owners make the mistake of overfertilizing their young plants. Ideally, seedlings do not require fertilizer at this stage. If you are fertilizing your young plants, this could be the reason for their yellowing leaves. Avoid using fertilizer and flush out the soil slowly with water. 

5. High soil pH 

Certain plants, like tomatoes, tend to have yellowing leaves if the same soil is used repeatedly. The pH level becomes high and the soil becomes infertile. The acidic soil is the cause of yellowing leaves, which eventually fall off. 

You can do a soil test to ascertain the soil pH; if the reading is lower than 5.5 it means the soil is too acidic. You can add garden lime to the soil to balance the acidity. Ideally, test the soil pH at the start of each gardening year and make adjustments to the soil a few weeks before transplanting your seedlings. 

6. Nitrogen or iron deficiency 

Plants require nutrients like nitrogen and iron to be able to grow healthily and achieve above-ground growth. Older leaves tend to turn yellowish if there is a nitrogen deficiency, although the top leaves may remain green. To correct this, apply liquid fertilizer with a high nitrogen value and follow the instructions on the package carefully. You can also boost nitrogen in the soil by adding coffee grounds, compost and earthworm castings. 

For an iron deficiency, apply a liquid iron supplement or a chelated iron supplement. This can be sprayed on the foliage if mixed with water. You can also add these supplements to the soil. 

Aside from the causes mentioned above, your young plants may also be suffering from fungal diseases like early blight, septoria leaf spot, verticillium wilt and fusarium wilt. These fungal diseases can be treated with fungicides. Remove the affected leaves and burn them so that infection does not spread further. 

Pests like spider mites and mealybugs may also invade the young plants, so make sure to check the plants often and spray them occasionally with soapy water.

How to prevent the first set of true leaves from turning yellow?

There is still hope for your new plants if you follow these measures:

  • Use soil with the right minerals to support the development and healthy growth of seedlings or young plants. This prevents the need for fertilizers during the early stage of the plants’ lives. 
  • Water the plants regularly but avoid overwatering them to prevent yellowing leaves. 
  • Provide the right amount of light so the plants will grow healthy. 
  • If you must apply fertilizer during the early stages of growth, only do so in small quantities. 
  • Check the plants regularly to ensure they are free from any form of disease or fungal infection. 
  • Take preventive measures to keep pests away by spraying the plants with a mixture of soapy water now and then.

Conclusion 

The first set of true leaves turning yellow could cause panic and worry, especially for first-time plant growers. Common reasons for this could include overwatering, underwatering or insufficient light. However, it could also be due to overfertilization, nutrient deficiency or fungal diseases.

Image: istockphoto.com / ArtRachen01

Seedlings Turning Yellow

Seedlings Turning Yellow

If your seedlings are turning yellow – a condition called chlorosis – the most common causes are root damage from wet soil, overwatering, or nitrogen deficiency. 

Other causes of yellowing in seedlings are disease, pests, lack of nutrients, soil pH and other soil problems.

In this article, we will discuss the causes of yellowing seedlings and how to remedy each one.

Why are my seedlings turning yellow?

When a plant or a seedling turns yellow abnormally, it is called chlorosis. Chlorosis is a symptom of a lack of chlorophyll, which is the pigment that plants use to absorb and use sunlight so that they can turn water and air into food.

Chlorosis is caused by a number of factors including pests, disease, lack of nutrients, soil pH, compacted or damaged roots, and overwatering.

Seedlings lacking nutrients

When the soil that the seedlings are planted in has a pH either too high or too low, this can prevent the nutrients required by the plants from being available to them.

One of the most common deficiencies in plants is nitrogen deficiency. When seedlings do not get enough nitrogen, they can turn yellow. If your soil has sufficient nitrogen but your soil pH is too low, the nitrogen will not be available for the seedlings to use.

Chlorosis can also describe a deficiency of iron, manganese or zinc.

Seedlings have iron deficiency if their young leaves are turning yellow and the older leaves are also starting to turn yellow.

Nitrogen, manganese and zinc deficiency manifest as yellowing inner leaves, spreading to the outer leaves.

To find out the specific cause, you can ask a professional to perform a soil test.

Overwatering

Another reason seedlings turn yellow is too much water. When a seedling is overwatered, its roots become damaged and can no longer effectively perform their function of taking in nutrients from the soil. Plant roots can die when they drown in soggy soil, because they no longer have access to oxygen. This will result in the seedling turning yellow.

The best way to avoid overwatering is to check the soil. If it is dry you can water it, but if it is still damp wait one or two days before checking the soil again.

Stunted growth

Some seedlings can turn yellow and stop growing, leaving you wondering what happened. One of the causes of stunted growth in seedlings is nitrogen deficiency. It can also be caused by disease or pests, and even some environmental factors such as compacted soil, seeds planted too close to the surface, wet soil, and extreme soil temperatures.

When the temperature of the soil is too cold or too hot, the seedlings will have a hard time growing. Seeds prefer a temperature between 65 and 75 degrees Fahrenheit in order to germinate faster. Remember that even if the air is hot, the soil can still be cold.

If you are growing your seedlings in a seed tray, consider using a seedling heat mat so the seedlings get the warmth they need when temperatures are cold.

Make sure you do not overwater your seedlings, because that can also lower the soil temperature.

If you planted the seed too deep, it will have a more difficult time germinating because it cannot reach the surface and the light also cannot reach the seeds that badly need it. Conversely, if you plant the seeds too close to the surface, they may dry out and not germinate. You can usually read on the seed packet what depth the seeds prefer. If the packet does not come with instructions, a good rule of thumb is to simply plant the seed under a quarter inch of soil.

Long stems and small leaves

Seedlings will need plenty of light in the first few weeks of their life. If you are growing the seedlings indoors under a grow light, you may notice that they tend to stretch and grow in the direction of the light.

It is best to keep the grow light only about four inches away from the seedlings and raise the light as the seedlings grow taller. If you are using high-intensity lights, you can keep the light 18 inches away from the top of the plants. If you keep the light closer than necessary, it may end up burning the seedlings.

Bottom leaves turning yellow

When a seedling’s bottom leaves turn yellow, it could be due to several factors. These include a lack of nutrients, pests, disease and other environmental factors, but the most common cause of yellowing bottom leaves on a seedling is nitrogen deficiency. The next most common cause is soil that is perpetually wet and soggy.

Cotyledons

It is possible that the leaves you see that have turned yellow are the cotyledons. Cotyledons are the first leaves to emerge from the seed, but they are not considered true leaves. Their purpose is to give the seedling a good start, but when the seedling starts growing its own leaves, the cotyledons are no longer needed. This is when the cotyledons will turn yellow and fall off. If no other leaves are turning yellow except the cotyledon, your plants are probably completely healthy.

Conclusion

Seedlings can turn yellow due to different causes, ranging from something as benign and normal as cotyledons falling off of a growing plant, to factors that may need to be addressed and resolved.

Such factors include disease, pests, lack of nutrients, soil pH, soil problems and damaged roots.

If you think the yellowing of your seedlings is due to a negative cause, identify what it is as soon as possible so you can correct it immediately and save your seedlings.

Image: istockphoto.com / vasiliybudarin

Pilea Leaves Turning Yellow

Pilea Leaves Turning Yellow

The most common reason for your pilea plant to turn yellow is overwatering. Remember that you only need to water your pilea plant if the top 25% of the soil is dry. However, if you leave too much time between watering and allow the soil to become bone dry before wetting it, this can also cause the plant to become stressed.

Other causes of yellowing pilea leaves are humidity, insufficient light, potassium deficiency, temperature changes and pests. 

In this article, we will discuss the various causes of yellowing pilea leaves and how to remedy each one.

The Pilea Plant

The Pilea plant is native to the southern Yunnan province of China. It is also called the Chinese money plant or the friendship plant. It was brought to Norway by a missionary in the 1940s, and has only very recently become popular in the United States.

This is a very aesthetically pleasing plant that is hardy but is easy to care for. It is not toxic to animals or humans, so it is safe to have as an indoor plant.

Although the Pilea is a succulent, it prefers indirect light as opposed to full sun. It can become easily scorched when exposed to direct sunlight. It is able to adapt well to low light, but may spread out and change its hue. It tends to lean toward the sun as it grows. To avoid this, rotate the plant every couple of days.

This plant has a very distinct look that makes it stand out from other plants. It is a fast-growing plant, and because it is a succulent, it can tolerate dry conditions.

Pileas are thought to bring luck and wealth to whoever they have been gifted to, which is why the plant is often given as a housewarming gift.

Even though we mentioned that this plant is low maintenance and great for newbies, there are still factors you need to consider when growing a Pilea. Knowing how to spot an ailing plant and solving the problem will help to keep it healthy.

Why are my Pilea’s leaves turning yellow?

Overwatering 

The most common cause of yellowing Pilea plant leaves is overwatering. Pileas like their soil damp but not soggy. Overwatering can be more common in the winter when plant owners fail to adjust their watering schedule to the season. You need not water your plant as much in the winter because the cold weather will make the plant’s soil dry more slowly.

It is important for the plant to be in a pot or container that has drainage holes at the bottom. If there is a saucer at the bottom of the pot, be sure to discard the excess water in the saucer and not let the plant sit in the standing water. Plants do not like their roots to be constantly soaking in wet soil, as this can lead to root rot. The rot can make its way up the stem and the leaves, making them turn yellow. If the rot has reached the stem and leaves, it usually means that the plant is no longer salvageable.

The best thing to do if you do not know how often to water your Pilea is to touch the soil. If it is dry, water it, but if it is still moist, wait one or two days before checking the soil again.

Humidity

Dry soil and low humidity can cause the leaves of your Pilea plant to droop and develop brown edges. Over time, the leaves will turn completely yellow, then brown, and drop off the plant. You can increase the humidity around your Pilea by misting the leaves with water from a spray bottle.

Insufficient light

As mentioned above, the Pilea likes to be in indirect sunlight rather than full sun, but this does not mean you can allow a situation where the plant gets no light for long periods.

Yes, the plant’s foliage will burn if it is exposed to too much sun for too long, but if you place it in low light for too much time, its leaves will turn yellow.

Too little light can affect a plant’s ability to produce chlorophyll, which gives plants their signature green color.

Remedy this by placing the plant in a spot that is neither too sunny nor too shady. If you find the perfect spot for your plant, its leaves will become a brighter green.

Potassium deficiency

A Pilea plant with a potassium deficiency will develop yellow or brown leaves. The edges of the leaves will look burnt, as if they have been burned by too much sunlight. If your plant has not been in the sun but still looks like it was, this is probably due to potassium deficiency.

You can remedy this by treating the plant with a potassium-rich fertilizer. Check the soil pH and make sure it is somewhere between pH 6 to 7. This pH level is needed for effective potassium absorption.

Temperature changes

Pilea plants like their environmental temperature to be between 65 and 75 degrees Fahrenheit. Make sure you do not place the plant near heating vents or air conditioning. Extreme changes in temperature can cause the plant to become stressed and turn yellow.

Pests

The most common pests to attack Pilea plants are spider mites, mealybugs, and scale insects. They are more likely to attack your plant when it is stressed or weakened. All of these insects can damage the plant and cause the leaves to turn yellow, then brown, and fall off.

Pests feed on the plant’s juices and weaken it the more they feed on it. Make sure you keep the infested plant away from your other plants so the infestation does not spread.

Remove spider mites by spraying them off with a spray bottle full of water.

Remove mealybugs by wiping the leaves with alcohol on a cotton pad.

After you have removed the insects, protect your Pilea by applying a natural insecticide.

Conclusion

A Pilea plant’s leaves will turn yellow when it is stressed. This indicates a problem in its living conditions, or factors out of its control. If you want to salvage your plant, identify the problem as fast as you can so you can fix it immediately.

The common causes of yellowing Pilea leaves are overwatering, humidity, insufficient light, potassium deficiency, temperature changes and pests.

Pilea plants are hardy and great for beginners, so as long as you provide their basic needs, you will have no problem growing them in your garden.

Image: istockphoto.com / patnowa

Bromeliad Leaves Turning Yellow

Bromeliad Leaves Turning Yellow

Bromeliad plants are from the family Bromeliaceae, or the pineapple family. These plants are native to tropical North and South America and thrive in tropical and subtropical climates. In temperate climates they can only be grown as indoor plants, since they do not grow well in freezing temperatures. As with other plants, bromeliads can suffer issues such as yellowing leaves. 

Bromeliad leaves turning yellow: What are the reasons?

1. You may have watered your plants too much

Bromeliads prefer moist but not soggy soil. These plants should only be watered about once a week; more than that could cause problems. Watering your plants before the soil has completely dried out could cause root rot, which results in the leaves turning yellow. 

To prevent this from happening, be sure to check the soil with your fingers to ascertain whether it is moist or has dried out. If the former, refrain from watering, but if it is dry, you can proceed with watering the plants.

2. You may not be watering enough 

While watering your plants too much could pose problems, not watering enough may also result in issues. If you forget to water your plants or if you have been away for a few days, they will start showing signs of neglect. The leaves will turn yellow and become dry and crispy, and may also turn brown. 

Be sure to water the plants until you see water flowing from the drainage holes of the pots. Bromeliads need enough water to survive, so make sure that you check the soil regularly so that it doesn’t become too bone-dry before watering again.  

If your bromeliad plants are in bad shape and turning brown, let them soak up water by filling a basin with at least four inches of water. Let the plants sit in the water for 45 minutes to soak it up. Make sure the top three inches of soil have become moist. Water the plants from the top and then let them start to dry out. They will hopefully start to return to normal again after this process. 

3. It could be due to humidity issues

Bromeliads that are kept in environments with low humidity may start turning brown or yellow, as these conditions cause them to dry out faster than they normally would. The soil tends to get too dry, and the leaves may start browning around the edges and eventually turn yellow. 

Increase the humidity in your home using a humidifier. This will protect your plants, especially during the winter months. You can also mist the leaves of your bromeliads with water. Make sure to regularly monitor the humidity level in your home.

4. The plants may not be getting enough sunlight  

Yellowing bromeliad leaves may also be attributed to insufficient sunlight. Bromeliads thrive in environments with medium or bright indirect sunlight, but they do not do well in low-light areas. Plants that are placed in low-light areas develop yellow leaves, so make sure yours have appropriate lighting. Placing them near a window is ideal since there is indirect light, but avoid placing them in full sun to avoid sunburn.  

5. It could be due to pest infestation

Pests like spider mites, scale insects and mealybugs suck the sap from plants and drain them of moisture. As a result, the leaves turn yellow and eventually become wilted. The fronds will also turn yellow. You need to exterminate these pests with insecticides or a soapy water solution. You can also try neem oil, which is organic and equally effective. 

6. It could just be natural causes

If you notice yellowing of the leaves but the plant is healthy, there may be nothing to worry about. Bromeliads tend to get rid of older leaves to make way for new growth. The discoloration may be a part of the natural growth cycle. 

However, it is still ideal to monitor the plants for anything unusual in their color or growth.

Conclusion 

Bromeliads come in many varieties and thrive in tropical areas. They are also prone to yellowing leaves due to certain causes including humidity issues, or if you are watering too much or too little. It could also be due to pest infestation, insufficient sunlight or natural causes.

Image: istockphoto.com / Robi_J

Pine Tree Needles Turning Yellow

Pine Tree Needles Turning Yellow

Pine trees are from the genus Pinus, of the family Pinaceae. There are currently at least 126 recognized species of pine tree, as well as 35 unresolved species. These mighty trees are generally hardy and often live to a hundred years or more. However, like most trees, they are also prone to certain problems that might cause yellowing needles. 

Pine tree needles turning yellow: What are the reasons?

1. Natural causes 

Pine needles, especially older ones, can turn yellow due to natural causes. This usually happens during the fall season and is not a real cause for  concern. The yellowing of needles will usually just occur on the branches’ inner portions, and rarely on the tips. The process usually takes about a month. 

2. Sunscald and other environmental factors

Sunscald happens when dry winter wind combines with low soil moisture and intense sunlight. This results in needles yellowing at the tips, drying out on just one side of the tree, usually facing the southern sun. The pine tree may look unhealthy, but it will likely survive.

To reduce the risk of sunscald, be sure to water at least once or twice a month during winter. An anti-desiccant spray such as Wilt-Pruf provides protection from moisture loss through the needles. 

Strong wind storms could also cause yellowing pine needles, as could rapid fluctuations in temperature, especially during autumn. Air pollution and road salt that splashes on pine trees can also contribute to yellowing needles. 

3. Overwatering 

Too much water could suffocate pine trees and symptoms of overwatering include drooping branches and yellowing needles. Test the soil for moisture before you water the pine trees by poking your finger into the ground a few inches. If the soil is muddy or wet do not water, but if it is just slightly moist you may proceed with watering the pine tree. 

4. Transplant shock 

Improper planting methods, such as planting pine trees too deep or not providing enough water while the roots become settled, could also result in yellowing needles. If you plant pine trees during hot weather instead of in the wintertime, this could also result in yellowing pine needles that eventually turn brown. 

5. Nutrient deficiencies 

Pine needles become chlorotic and yellowish if they are deficient in nitrogen. Like all plants, pine trees have nutrient requirements and when they lack these nutrients, such as nitrogen, it could cause foliage to turn yellow. Make sure to fertilize the trees according to soil test recommendations to ensure that their nutritional requirements are met.

6. Pest infestation 

Pine needles turning yellow during springtime instead of during the fall season could be an indication of a pests infestation. Arachnids called eriophyid mites feed on conifers like pine trees. These mites could cause aesthetic damage to the trees, like distortion and yellowing of the needles. 

Foliar nematodes known as pine wilt nematodes feed on plant tissue and cause needles to turn yellow. Some species are more susceptible to these nematodes, such as the Japanese black pine. Scale insects also feed on pine needles, specifically of the Ponderosa pine tree, causing the needles to turn yellow. 

Treatment for pests may include foliar sprays like Sevin for heavy infestations, but for occasional pests you can always prune off and discard infested branches.

Common pine tree diseases and conditions:

  • Annosus root rot
  • Brown spot needle blight 
  • Cotton root rot 
  • Damping off
  • Diplodia tip blight 
  • Dothistroma needle blight 
  • Fusiform rust 
  • Needle rust 
  • Pine wilt 
  • Pitch canker 

Needle cast is a disease caused by fungal pathogens such as Rhizosphaera. The conifers shed large numbers of needles prematurely and only the new growth stays green. An affected tree looks as if it is dying, but this disease is treatable.

Some interesting facts about pine trees:

  • They grow primarily in the Northern Hemisphere, and can be found in Asia, Africa, Europe, Canada and the USA.
  • They are long-living and could live from 100 to 1000 years or more.
  • Their sizes can reach from 10 to 260 feet tall, with most species reaching 50 to 150 feet tall. 
  • The spiral growth of needles, branches and cone scales are arranged in Fibonacci number ratios. 
  • Cones are an essential part of pine trees, with male cones typically 0.4 to 2 inches and female cones 1.2 to 2.4 inches long. 

Conclusion

Pine needles turning yellow could be caused by overwatering, transplant shock or nutrient deficiency. It could also be due to environmental factors, pest infestation or natural causes.

Image: istockphoto.com / Vitalii Marchenko

Cantaloupe Leaves Turning Yellow

Cantaloupe Leaves Turning Yellow

Cantaloupe leaves turning yellow indicates something wrong with your plant. It may be related to its living conditions, or it could be due to a foreign element.

The most common cause of yellowing cantaloupe leaves is overwatering. Other causes include underwatering, manganese toxicity or deficiency, pests, disease, and poor living conditions.

In this article, we will discuss the causes of yellowing cantaloupe leaves and how to remedy each one.

Why are my cantaloupe leaves turning yellow?

Overwatering

The most common cause of yellowing cantaloupe leaves is overwatering. When the plant’s soil is saturated with water, it cannot receive as much oxygen as it needs. The roots will become ineffective at absorbing water and nutrients from the soil, and thus the plant’s ability to produce chlorophyll is impaired. Chlorophyll gives plant leaves their green color, so no chlorophyll production means discoloration of leaves. The leaves will turn pale and yellow.

Overwatering also makes your plant more susceptible to disease and pests.

When you notice your cantaloupe’s leaves turning yellow, it is most probably due to overwatering, so take this as a sign that your watering schedule needs to change. Remember that cantaloupe plants need one to two inches of water every week,especially during the first stages of fruiting.

The moment you notice yellowing in the leaves, reduce the frequency of watering. You can either lengthen the time between watering or reduce the volume of water you use each time.

Underwatering

As mentioned above, cantaloupe plants need one to two inches of water every week. As much as cantaloupes do not like to be overwatered, you should also make sure you are not underwatering your plant.

Plants need water to be able to effectively transport nutrients from the soil to the plant. Even if the plant is in nutrient-rich soil, it will still suffer if it is not being watered and the soil is dry, because nutrients are gathered in the water which is absorbed by the roots of the plant.

The plant will turn yellow due to lack of nutrition and water. In hot weather, even if you water your plant it can become underwatered, because the weather makes the water evaporate faster and the plant’s roots may not be able to keep up.

Check the soil around your plant before watering. If the soil is dry, water the plant, but if the soil is still damp, wait a few days and check the soil again.

Manganese toxicity and deficiency

Manganese toxicity in cantaloupe plants occurs when the soil pH gets anywhere below 5.4. The acidity increases the availability of manganese in the soil, so the plant tends to absorb more manganese than required. These elevated manganese levels are toxic to cantaloupe plants, which only need a very small amount of manganese. Some fertilizers contain manganese, so if you suspect manganese toxicity to be the cause of the yellowing leaves, stop using your fertilizer and test your soil’s pH – it should be neutral or 6.0. If the pH is lower than 5.4, add dolomite or lime to the soil to make it less acidic.

Conversely, when the plant does not get enough manganese, it can suffer chlorosis and the leaves will also turn yellow. If you think the plant has a manganese deficiency, apply fertilizer with manganese to correct this.

Pests

Whiteflies are pests that can cause the leaves on a cantaloupe plant to turn yellow. They will suck on the plant’s sap and excrete honeydew that causes a black mold to grow. These conditions interfere with the process of photosynthesis, hence the yellowing of leaves. You can get rid of whiteflies by vacuuming them off and spraying the plant with biodegradable soap. Fortunately, both the honeydew and the mold can be washed off.

Spider mites

Spider mites are pests that can turn the leaves on a cantaloupe yellow and even brown, while the underside of the leaf is silvery-gray with yellow or red spots. These insects also drink the sap of the cantaloupe leaves. You can get rid of them by spraying the leaves with insecticidal soap or wiping them down with neem oil. You can prevent these bugs from attacking your plant by keeping the plant watered, because spider mites like to live in dry conditions.

Squash bugs

If your cantaloupe leaves are speckled with yellow flecks, it may have squash bugs. These yellow speckled leaves will eventually turn brown. Squash bugs are small brown bugs that can be removed easily from the leaf by picking them off. Unfortunately, picking them off the plant one by one is only effective if the infestation is small and has just started. Mulch can also be a protective cover for the squash bugs, so remove it while you are treating the infestation.

You can use diatomaceous earth or pyrethrin spray around the base of the plant to kill these bugs.

Melon thrips

These long, yellow insects have a black line down their back. They will attack the cantaloupe leaves which will turn yellow, then brown, and drop off.

Disease

Cantaloupe plants are susceptible to several plant diseases, including the mosaic virus. This virus can cause the plant’s leaves to become small and distorted and turn a mottled yellow. If you suspect the mosaic virus, make sure you pull off any infected leaves and dispose of them properly so that none of your other plants are affected. 

This virus is introduced to the plant by insects. When you are pruning the infected plant, make sure you disinfect the tools after each cut so that you do not contaminate other parts of the plant or a completely different plant. Wash your hands after touching the infected plant.

Downy mildew is another organism that causes yellow spots to appear on the cantaloupe leaves. The undersides of the leaf will appear fuzzy and gray. You can control the spread of downy mildew by removing plant debris from around the base of the plant.

Poor living conditions

Air pollution can cause cantaloupe leaves to turn yellow, especially the older leaves at the crown of the plant. 

Fungicides and de-icing salt in the soil can also cause the leaves to yellow, but instead of those at the crown, the leaves at the bottom and along the margins are the ones that turn yellow.

Conclusion

Yellowing cantaloupe leaves can be indicative of a problem with the plant’s nutrient uptake or a factor in its surroundings such as weather, disease, or the environment.

The key to fixing the yellowing leaves on your cantaloupe plant is to correctly identify what caused the problem in the first place.

The most common causes of yellowing cantaloupe leaves are overwatering, underwatering, manganese toxicity or deficiency, pests, disease, and poor living conditions.

Image: istockphoto.com / Chadchai Krisadapong

Plumeria Leaves Turning Yellow

Plumeria Leaves Turning Yellow

Plumeria leaves turn yellow due to stress, which can be caused by a multitude of reasons.

The most common causes are overwatering, underwatering, too much sunlight, not enough sunlight, pests, disease, depleted soil, temperature changes and natural aging.

This article will discuss the causes of yellowing plumeria leaves and how to remedy each one.

Why are my plumeria leaves turning yellow?

Overwatering

Plumerias want their soil moist, but they can actually tolerate dry spells for a certain amount of time. They can become overwatered if you give them too much water and the soil is perpetually soggy. An overwatered plumeria plant’s leaves can become yellow. Overwatering can also lead to root rot, which happens when the plant’s roots are soaked in boggy soil, limiting their oxygen intake. The plant is unable to respire, leading to the roots dying and rotting.

You can remedy overwatering by skipping a week of watering so that the soil and the roots are given time to dry. If you are able to catch the overwatering in its early stages, your plant can make a full recovery.

You can help dry out the soil quickly by exposing it to the sun or a source of bright light.

You can also help with the excess water by making sure the pot has drainage holes at the bottom. Transfer the plant to a new pot with drainage holes and use new, well-draining soil.

Underwatering

Another reason plumeria leaves turn yellow is underwatering. The plant can become stressed if it does not get an adequate amount of water. Not only will the plant not be able to absorb water, but the transport of essential nutrients will also be affected. The roots will also be forced to exert extra effort in searching for water nearby, adding to the stress.

You can remedy underwatering by watering the soil until it is soaked. Keep pouring until you can see the excess water flowing from the drainage holes at the bottom of the pot.

Place the plant in a partially shaded location so that its transpiration rate will slow down. This will help avoid rapid moisture loss for the plant.

If you suspect you have not been giving your plant enough water, you need to compensate by increasing the watering frequency. If you were watering it every five days, try watering it every four days and see if that fixes the problem.

Too much sunlight

Plumeria typically has no problem growing in different light conditions, be it partial shade, partial sun or full sun. Even those that are grown indoors will get used to being in the shade. But if you suddenly move a plant that has grown indoors into full sunlight, it will suffer. The light can cause sun damage, including yellowing and browning of the leaves.

You can remedy this by taking the plant indoors to avoid further sun damage. You can try to help the plant adapt to sunlight by gradually introducing it to more and more light every week.

You can also just expose the plant to morning light and take it back into the shade in the afternoon. Morning sunlight is less destructive than afternoon sunlight.

If you cannot move the plumeria indoors, you can protect it by placing more sunlight-tolerant plants around it.

Not enough sunlight

Lack of exposure to light can also contribute to the yellowing of your plumeria leaves. This is not only because it causes stress, but it will also reduce the plant’s ability to photosynthesize. If its photosynthesis is compromised, it will not have sufficient food and will lose much of its vigor. The plant can also become leggy in pursuit of the closest light source.

Remedy this by transferring the plant to a spot that exposes it to more sunlight. Place it under the morning sun, but take it back in in the afternoon so that it does not scorch.

In seasons when there is little sunlight each day, you may need to provide the plant with alternative sources of light. Buy a grow lamp to use on your plant during the winter.

Pests

Insects can be sneaky when attacking your plant, and it might take weeks before you even notice that they are there. Plumeria is usually hardy against pests, but it is still vulnerable and its leaves can turn yellow because of them.

The most common pests found on plumeria are scale insects, thrips, whiteflies and mites.

Scale insects will insert their mouthparts into the plant and suck the sap from the tissue. This will cause the leaves to turn yellow and the plant to look water-stressed and stunted.

Thrips will puncture the plant tissues and also feed on its contents. They will leave silver leaf surfaces and brown spots.

Whiteflies pierce the plant’s phloem with their mouthparts and suck the sap, causing the leaves to turn yellow and fall off.

Mites will suck on the leaves’ contents and turn the leaves yellow and red.

You can eradicate these pests by using an insecticide.

Disease

One of the most common fungal diseases to affect plumeria plants is plumeria rust, caused by Coleosporium plumeriae. The fungus creates a yellow or yellow-orange appearance on the upper side of the leaves. It will also cause lesions and a sunken appearance on the leaves. Eventually, the leaves will curl and drop off.

You can get rid of the disease by removing all the infected leaves and destroying them. Make sure the infected plant is kept away from your other healthy plants so that it does not spread.

Apply a fungicide that is specially designed for this type of fungus.

Depleted soil

Another cause for plumeria leaves turning yellow is depleted soil. Soil becomes depleted when its nutrient level decreases, which can be caused by normal watering. The nutrients will be washed away sooner or later.

You can remedy this by repotting the plumeria. Replace the old soil with fresh soil that is full of nutrients. You can do this once a year or whenever the plant looks too big for its pot.

Temperature changes

This plant does not like the cold. It cannot stand temperatures lower than 40 degrees Fahrenheit. If exposed to extremely cold weather, the tissues become damaged and the leaves will turn yellow. Even getting hit by an air conditioner can have an effect on the plant.

Remedy this by taking the plant indoors during the winter, or whenever the outside temperature reaches below 40 degrees Fahrenheit.

If you cannot bring the plant indoors, insulate it using cotton sheets.

If there are cold drafts reaching your plant indoors, transfer it to a different part of your house where the room temperature is more stable.

Natural aging

When plumeria leaves become old, they will naturally turn yellow. This is not a cause for concern because it is a completely normal process.

You can remove the yellow leaves to preserve the plant’s aesthetic. Simply pluck them out at the base.

Conclusion

Yellowing plumeria leaves is usually a sign of stress, meaning a stressor needs to be identified, or there are aspects of its living conditions that are not ideal. Yellowing leaves can also just be part of the plant’s natural aging process.

The most common causes of yellowing plumeria leaves are overwatering, underwatering, too much sunlight, not enough sunlight, pests, disease, depleted soil, temperature changes and natural aging.

As long as you provide all of a plumeria’s basic needs, you will not have any problem growing it in your garden.

Image: istockphoto.com / Fahroni

Apple Tree Leaves Turning Yellow

Apple Tree Leaves Turning Yellow

If your apple tree’s leaves are turning yellow, it could have apple chlorosis. Chlorosis occurs when the soil in which the tree is planted lacks iron. This nutrient deficiency will cause the leaves to turn yellow, starting from the leaf veins and spreading outward, until the entire leaf is yellow except for its bright green veins.

Other causes of yellowing apple tree leaves are weather changes, watering issues, lack of nutrients, and disease.

In this article, we will discuss the causes of yellowing apple tree leaves and how to remedy each one.

Why are my apple tree leaves turning yellow?

Apple chlorosis

Chlorosis in apple trees is caused by a lack of iron. This causes the leaves to turn yellow and eventually die off. You will notice that the yellowing starts just outside the leaf’s veins, and will then spread out to the entire leaf. If the chlorosis is left unmanaged, the leaves can become pale with scorched edges.

Chlorosis affects the younger leaves first, and these are far more damaged by the condition than the older leaves. It is possible that only one side of the leaf may be affected, but it is also possible that the entire tree is compromised. Because the leaves are damaged, photosynthesis cannot take place, and less plant sugar means no fruit production.

Apple chlorosis can be caused by a lack of iron in the soil, or because the tree itself cannot absorb any iron. If the pH of the soil around the tree is above 7.0, the iron will solidify and the plant cannot absorb it. Cool soil temperatures, mulch or any covering over the soil, and overwatering can worsen the problem.

Prevent apple chlorosis by regularly checking your soil’s pH levels. If the plant is not native to where you live, it may prefer a lower pH to effectively absorb iron. You can also apply chelated iron in the form of a foliar spray, or simply mix it into the soil.

Foliar sprays need to be reapplied every two weeks. If the application is successful, the apple tree should become green after 10 days.

Soil application of chelated iron works well in calcareous or clay soils and it will also last longer, for about one or two seasons.

Changes in weather

When the cold season starts, an apple tree’s leaves will turn yellow and fall off. This is completely normal and is the tree’s way of withholding water and nutrients from its leaves so that it can prepare itself for dormancy during the winter.

The leaves will turn yellow and drop off because photosynthesis cannot occur if they are cut off from both water and nutrients. 

This type of yellowing will look familiar, because normal apple trees do it every year. After the fruits have matured, the leaves will turn yellow and then brown. The tree will lose all of its leaves just as winter is about to start.

This is part of a tree’s natural life cycle so there is nothing wrong with your tree.

Underwatering

When your apple tree does not get the amount of water that it needs, it can develop drought stress. Drought stress causes the leaves on the tree to turn yellow and fall off. It also causes increased fruit drop. Dwarf varieties and young apple trees are more susceptible to drought stress because of their shallow roots.

You can tell a tree has drought stress because their leaves yellow out of season. If your tree is yellow but all other trees are green, you may need to water it more. Apple trees need an inch of water a week. If there has not been much rain, be sure to water it.

Overwatering

Overwatering your apple tree is more damaging than underwatering it. When the soil around the tree’s roots are waterlogged, they are less effective at absorbing nutrients. Eventually, the leaves will turn yellow as more and more of its roots start to die.

You might be wondering how you can tell the difference between yellowing leaves due to overwatering and yellowing leaves due to underwatering. In an overwatered tree, the yellowing of the leaves will start at the bottom foliage and work its way up.

To avoid overwatering, make sure you plant the tree in well-draining soil so that it does not get boggy, even during heavy rains.

Disease or pests

It is also possible that the yellow leaves on your apple tree are caused by disease or pests.

It could be due to necrotic leaf blotch, which starts as brown blotches in the leaves followed by yellowing and dropping off. You can use a fungicide with zinc ions to get rid of this problem.

The tree could also have apple scab, which is caused by a fungus. This will initially appear as pale spots on the top side of the leaves and dark spots on the bottom side. You can get rid of the fungus by applying liquid copper fungicide once a week until the yellowing has stopped.

Pests such as aphids can also cause the leaves to turn yellow. You can use insecticides to rid your tree of these pests.

Conclusion

Apple tree leaves turning yellow are most probably due to apple chlorosis, in which the soil lacks iron which ultimately affects photosynthesis and fruit production. This can be resolved by foliar sprays or applying chelated iron directly to the soil.

Other causes of yellowing apple tree leaves are weather changes, overwatering, underwatering, disease and pests.

Image: istockphoto.com / Mikola249

Azalea Leaves Turning Yellow

Azalea Leaves Turning Yellow

Azaleas like their soil acidic. If it is too alkaline this can lead to chlorosis, which occurs when the plant is unable to absorb the iron it needs from the ground. The high pH causes the plant to develop an iron deficiency, which will then affect its chlorophyll production, making the leaves turn yellow.

Other causes of yellowing azalea leaves are underwatering, poor soil drainage, too much sunlight, and pests.

Why are my azalea plant’s leaves turning yellow?

The soil is alkaline

Azaleas need their soil to be acidic, with a pH between 4 and 6. Their leaves will turn yellow from the stress of being in alkaline soil for too long. The alkalinity makes it difficult for azaleas to absorb iron from the soil. The resulting iron deficiency will lead to chlorosis and turn the leaves yellow due to the plant’s impaired chlorophyll production.

Most soil is acidic because the organic material that ends up on it, such as fallen leaves, turns acidic when it decomposes and is integrated into the soil.

You can remedy alkaline soil by first determining the pH of your soil. If plants like camellias, daffodils, rhododendrons, and roses are thriving in the soil, then it is probably acidic. This must mean that the yellowing leaves are caused by something other than alkaline soil.

You can buy a soil gauge to measure the pH of your soil. Make sure you test it in multiple sites to allow for any variation in soil pH. This is important especially if you suspect that the cause of the alkalinity is artificial, such as wood ash or builders rubble under the garden.

A soil gauge will give you a reliable reading and can be bought online. Once you are aware of your soil’s pH, you can then buy plants that are most suitable for your garden. This will save you money and time in the long run.

If, after checking your soil, you have determined that it is alkaline, you can treat it with garden lime. Remember that changing your soil’s pH is a gradual process and that it will not last in the long term. The soil will eventually return to its original pH. 

If you want to make your job easier, you can dig up the plant and transfer it to a pot, where you will be able to control the soil’s characteristics more easily. Transplanting azaleas is best done during the late summer, but they can be transplanted successfully at any time during the growing season.

If the azalea cannot be moved, apply iron chelates to help with the iron deficiency. This solution is temporary and a bit expensive. Make sure that you only use this option when you are absolutely sure that the soil pH is neutral or alkaline. Applying iron chelate to acidic soil will be ineffective and even harmful.

Underwatering

Another reason your azalea leaves are turning yellow could be due to a lack of water. These plants are not drought resistant and need their soil to be moist with regular watering to keep healthy.

You can check whether the soil needs watering by sticking your finger into it. If the soil is dry one or two inches below the surface, the yellow leaves may be due to underwatering.

Azaleas need moist, well-draining soil with high organic content. They could experience drought due to little to no rainfall, or if the soil drains too quickly and is unable to retain moisture, such as sandy soil.

You can remedy an underwatered azalea plant by watering it up to three times a week, especially in a dry climate or during the hottest time of the year.

Plant your azalea in soil that has plenty of organic material. These components will provide nutrients and retain moisture well, but still have well-draining qualities. This allows excess water to drain away so that the roots are not constantly soaking in wet soil.

Add one inch of organic mulch to conserve moisture, especially in the summer growing season. If you can find compost that has decomposed for at least a year, that is even better. It will help reduce evaporation and keep the roots cool in the summer.

The soil is slow-draining

Another cause of yellowing azalea leaves is root rot due to slow-draining soil. As mentioned above, even though azaleas like their soil to be moist, it still needs to be able to drain excess water so that the roots are not saturated.

Heavy soils, such as clay, are not porous enough and the water becomes trapped and drains very slowly. The slow drainage makes the soil conducive to root rot from fungi. Yellowing leaves, falling leaves, and a wilted appearance are all signs of stress from root rot.

To determine whether root rot is causing the yellowing azalea leaves, check to see if the soil is boggy. Dig up the soil around the plant’s roots to see if it is slow-draining or has compacted.

You can remedy this by providing the plant with well-draining soil. If you need to, transfer the plant to a pot or a raised bed. 

Replanting the azalea in new soil that is well-draining will allow it to dry out and recover from root rot. If you see rotten roots, cut them off so that newer roots are encouraged to grow.

If you cannot move the azalea, you will need to adjust the clay soil to improve its filtration.

Make sure you work on the clay soil on a dry day so it is easier to handle and does not stick to your tools. Do not use sand with clay soil; use gravel instead. Sand mixed with clay will create a cement-like consistency. Gravel is a better choice because it will increase the porosity. Adding compost will also help with drainage while maintaining the soil’s ideal structure.

Too much sunlight

Azaleas like a location where they can get some sun, but they need to be out of the afternoon sun. They are fine with morning and early afternoon sun, but when exposed regularly to harsh afternoon sun, their leaves will turn yellow.

Pests

The most common pests on azalea plants are lace bugs. These are an eighth of an inch long and have lace-like wings. They feed on the sap of the azalea leaves, leaving white, yellow or silver spots. You can get rid of these bugs by treating the plant with insecticide.

Conclusion

When azalea plants’ leaves turn yellow, it is usually a sign of stress and you need to identify the stressor before it causes further damage to your plant.

The most common causes of yellowing azalea leaves are lack of nutrients, underwatering, poor soil drainage, too much sunlight, and pests.

Azaleas are fairly simple plants to grow, and as long as you are able to provide their basic needs, they will thrive in your garden.

Image: istockphoto.com / Trygve Finkelsen

St. Augustine Turning Yellow

St. Augustine Turning Yellow

The most common reason St. Augustine grass turns yellow is chlorosis, a condition caused by a lack of chlorophyll due to nitrogen or iron deficiency.

Other causes of yellowing St. Augustine grass are root rot, chinch bugs, chemicals, overwatering, too much fertilizer, disease and dog urine.

Why is my St. Augustine turning yellow?

Chlorosis

Chlorosis is one of the most common reasons your St. Augustine might turn yellow. This happens during the hot summer. Chlorosis occurs when there is a lack of chlorophyll caused by a deficiency of iron or nitrogen. When the temperature and the soil pH are high, the grass cannot effectively absorb nutrients from the soil. Poor soil health and compaction can also add to the problem.

You can help the grass by feeding the soil to stimulate microbial growth. This will help the grass absorb the nutrients it needs, even if the temperature is hot. You can also add mulch or compost to the soil to make it more acidic.

You can aerate the soil to reduce any compaction and to boost microbial activity. These microbes help break down organic matter and make nutrients available to your plants.

Root rot

Root rot is caused by a fungus that causes the grass to turn yellow. It can also cause the grass to thin out and die if it is not controlled or treated in time.

You can tell that your St. Augustine has root rot if you see yellow rings around the grass during the spring or summer.

Avoid thinning and yellowing in your grass by using a fertilizer that has ammonium nitrogen. You can also use a fungicide that contains azoxystrobin. Mix half an ounce of the fertilizer with five gallons of water to cover 1,000 square feet of grass. Spray the mixture on the grass once a month. Make sure you wear protective clothing while handling the fertilizer.

Chinch bugs

When you see patches of dead grass encircled by yellowing grass, it might be due to a chinch bug infestation. These insects are very common St. Augustine pests. They like to attack the grass when it has a lot of thatch and is susceptible to parasites.

You can prevent chinch bugs by mowing the grass to remove the thatches. You can then apply chinch bug spray to get rid of the insects.

Chemicals

Accidentally spraying or spilling chemicals on your grass can also result in yellow spots. You can remedy this immediately by flooding the affected area with water and covering the grass with an absorbent material, like a towel. Also remember that insecticides and herbicides contain chemicals that can scorch your lawn if used extensively.

Overwatering

If you overwater your grass it can lead to poor root development. Excessive water can deplete the soil of oxygen because it is waterlogged. The grass will end up with shallow and underdeveloped roots that will not effectively take up nutrients, water or oxygen. This will result in the grass turning yellow.

Overwatering also makes your grass more susceptible to fungal diseases and pests, and can cause the grass to thin out and discolor.

You can avoid overwatering your grass by adjusting your watering schedule. Only water the lawn if the top two inches of soil are dry. If you water your lawn three times a week and notice yellow spots, try reducing the frequency and only water it twice a week.

Too much fertilizer

If you give your grass too much fertilizer, you can end up burning it, especially if you use synthetic fertilizer. If you have just recently applied fertilizer on your grass and it started to turn yellow, then it is most probably due to the fertilizer. Too much nitrogen salts found in synthetic fertilizer can burn the leaves on your St. Augustine. Other signs of overfertilization include fertilizer crust on the surface of the soil, grass growing slowly, grass blades turning brown and yellowing of the grass starting from its base.

Disease

Some of the diseases that affect St. Augustine grass can cause yellow or brown patches. Common diseases include lawn fungus and dollar spot.

You can treat lawn diseases by using a fungicide. You can also treat your lawn immediately after winter to kill any fungi that develop during the frost.

Dog urine

Dog urine has high nitrogen compounds, so it is no surprise that it can be harmful to your grass. If you have a dog and you see yellow spots on your grass, it is likely that they are due to the dog’s urine.

You can prevent dog urine spots by washing off the urine with a hose after your dog has gone to the bathroom. You can also use a dog urine neutralizer, or train your dog only to pee in certain parts of your yard where it will not be as noticeable as on your green lawn.

Use

When your grass has just been installed or planted, make sure you put up some rope to warn people not to step on it. Give the grass enough time to develop a root system and become healthy before letting people or animals walk over it. Even if the grass is established, try to limit the use and wear on the grass. This will keep the grass green and lush.

Conclusion

Yellowing St. Augustine grass is most probably due to chlorosis. Chlorosis is a condition in which the grass lacks chlorophyll because its nutrient uptake has been impaired, leading to the yellowing of the grass blades. Other notable causes of yellowing St. Augustine are root rot, chinch bugs, chemicals, overwatering, too much fertilizer, disease, dog urine, and too much use.

Image: istockphoto.com / Ruth Peterkin

Plant Leaves Turning Yellow With Brown Spots

Plant Leaves Turning Yellow With Brown Spots

The most common cause of plant leaves turning yellow with brown spots is leaf spot disease. This is caused by a fungus that feeds on the leaves of the plant. The first thing you need to do if you suspect leaf spot disease is make sure you keep the infected plant as far away as possible from your healthy plants while you treat it. Remove any affected leaves and dispose of them properly so that spores do not find their way to the other plants in your garden.

You can get rid of leaf spot disease by mixing a solution of baking soda and water and spraying it on the plant’s infected leaves.

Why are my plant’s leaves turning yellow with brown spots?

The most probable answer to this question is leaf spot disease. If your plant has brown spots with yellow edges, it could be a sign of this fungal disease. It can affect both your indoor and outdoor plants. If there are spotted leaves nearby, the spores can get carried by the wind and find their way onto one of your plants, and if the spores start to reproduce, the distinct fungal leaf spot will begin to develop. The longer the fungus goes unnoticed in the plant, the larger it grows, until these spots start touching one another and looking more like brown blotches than spots. The leaf will eventually become completely brown and fall off the plant onto the soil. This is where the spores will wait for the next plant to infect. 

How do you treat leaf spot disease?

The first thing you need to do if you suspect leaf spot disease is to transfer the infected plant to an area of your house that is far away from your other plants. Just to be sure, in case the spores have already spread to other plants before you were able to separate them, do not water any of your plants from the top, as the water splatter can scatter the spores even more. Water your plants at the base until you are sure that they are all free of the fungus.

You can treat leaf spot disease by mixing one tablespoon baking soda and one teaspoon mineral oil in a spray bottle with water. Shake the solution well and spray the parts of the plant that are infected with the fungus. You may need to treat the infected plant once a week for a month to make sure that all the fungus and spores are eradicated.

How do you prevent leaf spot disease?

The fungus that causes leaf spot disease needs poor air circulation and moisture to thrive. In order to prevent this disease from making its way across your garden, you should water your plants at the base and not from above. Make sure the plants are far enough from each other that there is good air circulation between them.

In your outdoor garden, water the plants in the early morning so that the moisture on the leaves will evaporate in the morning sun.

If there are parts of your garden where the foliage is thick, you need to thin it out. Make sure you disinfect your pruning or cutting tools with a 10% bleach solution after each use. Remove as much as possible of the fallen leaves and debris from the base of your plants and dispose of them properly.

What are other causes of yellowing plant leaves?

Not enough water

When a plant’s roots are not getting enough water, its leaves will start to turn yellow. This will happen if you are only watering the top part of the soil.

You can remedy this by filling a basin or your sink with three inches of water and soaking the bottom of the pot in it. This will allow the plant to soak water from the bottom. After 30 minutes, remove the pot and let it rest so any excess water can trickle out. Repeat this process every four weeks.

Too much water

If your plant’s leaves are turning yellow but they also look dull and lifeless, you might be overwatering it. Plant roots do not like being in soil that is soggy; they will drown because they also need to dry out in order to get enough air. When a plant’s roots soak in wet soil for extended periods of time, they can develop root rot, which can kill plants if it starts to affect the stem and leaves.

Remedy overwatering by lessening the amount and frequency of your watering. Make sure the soil you use is airy and porous so it is well-draining. Use a pot that has drainage holes at the bottom so that any excess water simply flows out. If there are rotten roots, cut them off with scissors.

The plant is adjusting to a new environment

When you move to a new house, your plants go through an adjustment period just like you do. New environments can stress your plant and one of their ways of manifesting this stress is through yellowing leaves. The best way to destress your plant in a new environment is to make sure that, despite being in a completely new location, you are still able to provide it with everything it needs. Soon enough, the plant will acclimatize to its new environment.

The plant is getting too much light

A plant’s leaves can turn yellow if it is put in a spot in the house where it is bombarded by too much sunlight. Transfer the plant to another area of the house that provides it with just the right amount of light.

Conclusion

If your plant’s leaves turn yellow and have brown spots on them, they are most probably afflicted with leaf spot disease. This disease is caused by a fungus that feeds on the leaf, leaving behind the signature brown spots.

You can get rid of the fungus by spraying the plant with a mixture of baking soda, mineral oil, and water. Apply the spray once a week for a month to make sure all the fungus and spores have been killed. Also make sure the infected plant is separated from your healthy plants.

Image: istockphoto.com / Дмитрий Коростылев

Vegetable Leaves Turning Yellow

Vegetable Leaves Turning Yellow

The most common reason your vegetable plant’s leaves may turn yellow is due to your watering technique. The problem can be either overwatering or underwatering. If you have plants with yellowing leaves, check whether the soil in the pot is dry or boggy.

Other causes of yellowing leaves in vegetable plants are nutrient deficiency, temperature, and pests.

In this article, we discuss the different causes of yellowing vegetable plant leaves and how to remedy each one.

Why Are My Vegetable Leaves Turning Yellow?

Watering techniques

Plant leaves can turn yellow from overwatering. If the plant is in soil that does not drain well, the roots will drown and die. This will make the plant susceptible to bacterial and fungal diseases, and the rot will make its way to the plant’s stem and leaves. The leaves will turn yellow and eventually fall off. If the plant is not salvaged in time, it will die.

The best way to correct overwatering is to make sure that you always wait until the soil is dry before watering it again. If you have been watering your plant every three days, try watering it every five days and see if its color improves. It is also important that the pot or container has drainage holes at the bottom to allow the excess water to flow out in case you accidentally overwater it.

You can also repot an overwatered plant. When transferring the plant, check its roots and cut off any segments that are brown or black. Plant it in fresh soil and do not water the plant for a week after repotting. This gives the plant’s roots enough time to heal so they can effectively absorb water again.

Underwatering your plant can also cause yellowing leaves. If plants do not get the amount of water that they need each day, their leaves will turn yellow, then brown, and finally drop off. Plants do this when they are underwatered because they are trying to conserve water and energy to keep themselves alive. The more leaves they have, the more leaves they have to keep alive, so shedding leaves will help prioritise the life of the plant itself.

Sometimes the reason the plant is underwatered relates to how you are watering it, rather than how much water you are giving it. In order to encourage the plant’s roots to grow deeper downward, water it less but make sure you concentrate the water until it reaches the bottom of the soil in the pot. Check the soil in the pot by touching it. If the top inch of soil is dry, you can water the plant. If the top inch of soil is still a bit damp, wait one or two days before checking the soil again.

Nutrient deficiencies

A lack of nutrients is apparent when the top leaves of the plant are yellowing.

Calcium deficiency

This deficiency results in distorted, mottled or crinkled leaves. The tips of the leaves will also refuse to grow. You can correct this by adding agricultural lime to the soil.

Magnesium deficiency

This will cause the yellowing of leaves between the veins, while the veins remain green. This will usually appear on the plant’s lower leaves.

Nitrogen deficiency

This deficiency can cause stunted growth in your vegetable plants. Yellow edges will appear on your leaves. The veins will also become yellow, and the entire leaf will be a paler yellow. You can remedy this by adding coffee grounds to the soil, as this helps supply it with nitrogen.

Potassium deficiency

This deficiency causes the older leaves to develop yellow and brown spots, yellow edges or yellow and brown veins. You can remedy this by adding a potassium fertilizer containing potash.

Iron deficiency

This causes yellowing of the leaves, stunted growth and chlorosis. You can detect this by using a soil gauge to determine the soil pH. Make sure the pH is neutral or acidic.

Changes in temperature

If your plant is left out in the full sun for the entire day, every day, it should come as no surprise that it will suffer significant sun damage. This includes the leaves turning yellow and brown. Keep the plant in an area where the temperature is between 50 and 80 degrees Fahrenheit.

In the winter, plants that are native to tropical climates will have a hard time in the cold. Make sure you bring them indoors and keep them away from cold drafts around the house. Keep them away from air conditioners and purchase a grow lamp if you can. This can help give the plant its much needed light and also keep it warm.

Pests

If you find yellow spots on your leaves, inspect the leaves and see if you can spot small insects. It is possible that your yellowing leaves are caused by pests.

It is easier to know how to treat a pest problem if you know which bug you are dealing with. The most common pests that go after vegetable plants are whiteflies, scale insects, thrips, mealybugs, aphids and mites.

You can use horticultural soap if you want to try and get rid of the pests using an environmentally safe product.

Make sure you move the infested plant to an area far away from your other plants. This way it is isolated and you do not risk your other plants getting infested as well. Treat the plant once a week for a month to make sure all the bugs are killed.

Conclusion

Vegetable leaves usually turn yellow due to mistakes in your watering techniques. Overwatering and underwatering your plants can both result in the yellowing of your plant’s leaves.

Other causes of yellowing vegetable leaves include nutrient deficiency, changes in temperature, and pests.

As long as you are able to properly provide your plants’ basic needs, they will thrive in your garden.

Image: istockphoto.com / KalebKroetsch

New Sod Turning Yellow

New Sod Turning Yellow

When your new sod is turning yellow, it usually means it is getting overwatered.

Yes, new sod is supposed to be watered more than the grass in an established lawn, but the longer it has been since the sod was planted, the lower the frequency of watering should be. Make sure you do not soak more than just the first few inches of soil with water.

Other common causes of yellowing sod are pet urine, soil quality, too much fertilizer, fungi and insects, poor installation, and mowing the sod too soon.

This article discusses the reasons your new sod is turning yellow, and what you can do to fix it.

Why is my new sod turning yellow?

The sod is overwatered

If you see yellow patches on your new sod, you are probably giving it too much water. Fresh sod does need more water than a regular lawn because you want the roots to grow, but you have to reduce the watering over time.

New sod is watered three times a day for five to ten minutes for the first ten days after installation. Each watering should only soak the first couple of inches of soil. After the tenth day, decrease the watering to once a day and only soak the top quarter-inch of soil. After three weeks from installation, you only need to water the sod every other day for a week, and after it has been in place for a month, you can just water your lawn once or twice a week.

Your pet’s urine

Your dog’s pee can burn your new sod and even older lawns, because of the high nitrogen content of the urine. This can also cause the sod to have yellow or brown patches. If you can do so immediately, hose down the area where your dog just urinated to wash away the urine. You can also train your dog to pee in a more discreet area of your lawn and discourage it from going in the middle of the lawn.

Use

Too much walking or activity on the new sod can also cause it to turn yellow. Try not to walk on the newly-installed sod for four weeks after installation. You need to give it time to properly establish its roots, and it can only do this if it is not disturbed. If you absolutely have to tread on the sod, try not to walk the same path every time. Discourage others from walking on the sod by marking the perimeter with some tape or string.

Soil quality

When you install new sod near trees or bushes, it is possible that these areas will soon start to become yellow. This is because the trees and bushes will take the nutrients from the soil, leaving very little for the sod. The lack of nutrients will make it even harder for the sod to establish roots. The trees and shrubs will also keep sunlight away from the sod, which it needs when trying to establish itself. A great approach in this situation is just to put mulch or decorative rocks in these areas, instead of using sod.

Too much fertilizer

You do not need to fertilize newly-installed sod until after at least 30 days after installation. Fertilizing sod too early can result in yellow patches because the immature root system cannot absorb nutrients effectively, so the nitrogen from the fertilizer will just leach into the soil.

Most sod is fertilized before harvesting anyway, so you do not have to be in a hurry to add more. If you see the yellow patches after applying fertilizer, just water these areas so the nitrogen can be diluted.

Fungi and insects

There are some species of fungus and insect that can cause your sod to turn yellow. It may be difficult to assess what organism is attacking your lawn, so you will have to do your research regarding fungi and insects in your part of the country. If you are able to contact your local agriculture agency, they could help you with the information you need regarding the organism and how to get rid of it.

You are mowing the lawn too soon

If you mow the sod a little too soon after installation, this may also cause it to turn yellow. The only way to prevent this is to avoid mowing your lawn until after the patches have healed. It is also best to allow the grass to grow a little longer than usual. If the weather has been warmer than normal, try not to cut the lawn too short.

Poor installation of the sod

If the sod was not installed properly, this can also be a reason for it turning yellow. If there are air pockets trapped under the sod, this keeps the sod from properly forming roots in the soil since it might not be able to reach it. The roots stuck in the air pocket will dry out and die.

If you suspect a poor sod installation job, take plenty of pictures as evidence and contact the sod company that installed it to tell them about your concerns. If they come by to inspect the sod and realize they may have done a bad job, they should be willing to fix it for you.

Conclusion

If your new sod is turning yellow it is most probably getting overwatered. Remember that, even though new sod does need to be watered a lot, the frequency should be gradually reduced the longer it has been since installation.

Other causes of yellowing sod include pet urine, soil quality, too much fertilizer, fungi and insects, poor installation, and mowing the sod too soon.

If you are able to leave the sod as undisturbed as possible for the first month after installation, it should minimize the occurrence of any yellowing issues.

Image: istockphoto.com / sandsun

Ivy Leaves Turning Yellow

Ivy Leaves Turning Yellow

Ivy plants are evergreen, woody ground-creeping and climbing plants of the family Araliaceae. These plants are native to central, western and southern Europe, Japan, Taiwan and some parts of Africa. Common colors include shades of green variegated with yellow, white, black, gray and cream, while the flowers are greenish-white and greenish-yellow. They are considered hardy plants, but like most plants, are also prone to conditions that cause their leaves to turn yellow. 

Ivy Leaves Turning Yellow: What Are The Common Reasons?

1. It could be due to saturated soil or too much moisture in the soil. 

Ivy leaves turning yellow is often due to saturated soil or excess moisture around the roots. Ivy plants thrive in areas with moist and well-draining soil. If their roots stay damp due to slow drainage or boggy soil, it excludes oxygen from the soil and prevents root respiration. The plants then lose the ability to absorb nutrients, causing the leaves to turn yellow and wilt. 

The reasons for excess water in the soil and around the plant’s roots could include:

  • Compacted or slow-draining soil that prevents water from draining well. 
  • Overwatering the plants. 
  • Pots or planters with no drainage holes. 
  • Using saucers, decorative outer pots and trays that prevent water from draining properly from the planters.  

Stagnant water and saturated soil could also lead to fungal disease and root rot. Make sure you replicate the plants’ native environment by using loose, well-draining soil.

These are some steps you can take to save your ivy plants from saturated soil:

  • Cut back on watering. 
  • Replant the plants in new potting soil. 
  • Always plant in pots with drainage holes.
  • Make sure the soil is not compacted when you plant the ivy plants.

2. It could be due to a lack of nutrients in the soil. 

Ivy plants with abundant and healthy green leaves indicate nutrient-rich soil. However,  if the plants have been in the same spot for years, they tend to develop yellow leaves. This may be an indication that the roots have exhausted the nutrients in the potting soil, which include nitrogen, magnesium and iron.  

To correct this, provide supplements for your plants. For nitrogen deficiency, you can add manure and coffee grounds to the soil. For iron deficiency, add or spray chelated iron or iron sulfate on the foliage. For magnesium deficiency, fertilize the plants with Epsom salts, or magnesium sulfate.

Transplant the ivy plants to a larger pot or planter and add new soil. Larger pots have greater soil capacity and the roots thus have greater access to the required nutrients. Fertilize at least once a month during spring and summer using a general houseplant fertilizer. A balanced fertilizer may be a better option than treating individual deficiencies, to ensure that the plants receive the nutrients equally. 

3. It could be due to spider mites or other pests.

Ivy is a sturdy, hardy plant that is rarely prone to disease or pests. However, factors like overwatering or a lack of nutrients make it vulnerable and prone to attacks from pests like spider mites and mealybugs. Indoor ivy plants are more sensitive to pest attacks due to low humidity levels.  

Mist the plants at least twice a week and use insecticidal soap to kill spider mites and other pests. Isopropyl rubbing alcohol is also ideal, but you must dilute it with water. Neem oil is also favorable; you can wipe it on the leaves to ward off pests. 

Common Types of  Ivy Plants 

  • English ivy 
  • Goldchild ivy 
  • Ivalace ivy 
  • Needlepoint ivy 
  • Algerian ivy 
  • Gloire de marengo ivy 
  • Irish ivy 
  • Japanese ivy 
  • Himalayan ivy 
  • Persian ivy 
  • Sulphur heart ivy 
  • Canarian ivy 
  • Russian ivy 
  • Boston ivy 
  • Swedish ivy 

Conclusion 

Ivy plants are woody, evergreen climbing plants that are considered hardy and rarely afflicted with diseases. However, certain factors could still cause their leaves to turn yellow. These include saturated or over-moist soil, nutrient deficiency and pest infestation. These conditions weaken the plants, making them vulnerable to root rot, discoloration and wilting.

Image: istockphoto.com / kynny

African Violets Leaves Turning Yellow

African violets are indoor plants favored for their dainty flowers, and can also be grown outdoors in certain climates. They are also known as saintpaulias, and some species are considered endangered. These flowering plants have round to oval leaves and a fleshy texture, and can grow up to five inches tall. Their flowers come in violet, purple, pale blue or white, and as with any plant, their leaves can sometimes turn yellow and discolored.

African Violets Leaves Turning Yellow: Common Reasons 

1. It is part of the plant’s normal growth 

As African violets grow, their older leaves on the outer ring will turn yellow. You can remove those yellowed older leaves as part of the routine grooming of your plants. 

2. Due to water deficiency

If the soil is too dry, the result will be limp and yellow leaves. 

3. Due to root crowding 

The yellowing leaves could also be due to crowded roots. The roots may outgrow their planter and grow out of the drainage hole or protrude from the soil. This is an indicator that you should re-pot your plants.

4. Due to nutrient deficiency 

Yellowing leaves, especially on the upper part of your African violets, indicates a lack of nutrients. Make sure you fertilize your plants to avoid this.  

5. Due to light deficiency 

African violet leaves could turn yellow due to insufficient light. If your plants are placed in a dark corner they cannot access sunlight, and as a result the leaves will start to turn yellow. This yellowing usually starts in the lower ring of leaves. 

6. Due to cold drafts 

If your African violets are placed near an air-conditioning system or an open window,  they tend to suffer from cold drafts. Their leaves will start to turn yellow and become limp or mushy. To prevent this, move your plants to an area that is free of cold drafts.

7. Due to infection or disease

If you notice that the yellowing of leaves happens in patches or blotches, it could indicate an infection or disease, or a pest infestation.  

Aside from the reasons mentioned above, yellowing African violet leaves could also be due to overwatering, overfeeding, old age, incorrect humidity, or intense light. 

Yellowing leaves should be removed as they could affect the health of your plants. The rest of the plant could be deprived of vital nutrients if the yellowed ones are not removed, since the plant tends to spend energy just to maintain the health of the yellowed leaves. It also looks unsightly if your African violets have too many yellowing leaves. 

How To Avoid Yellow Leaves on African Violets

To avoid the development of yellow leaves on your African violets, here are some steps you can take:

  • Be sure to monitor the water temperature and use only lukewarm water. Do not give your plants chlorinated water.
  • These plants thrive in bright sunlight, so they should be grown in a brightly-lit and well-ventilated area. West-facing and southeast-facing windows are great locations for them.
  • See to it that you mist your plants’ surroundings or place them alongside other plants to maintain the ideal humidity levels. You can also place a water-filled pebble tray and change the water every three or four days to avoid attracting fungus gnats and other pests.
  • Spray neem oil on the flowers and foliage should there be a fungal infection or insect infestation.
  • Apply a balanced liquid fertilizer at least once or twice a month during the growing season. 
  • Make sure to properly fertilize to fulfill the nutrient requirements. Always refer to the manufacturer’s instructions.
  • Do not over-fertilize your African violets.
  • It is necessary to leach the potting soil to remove excess salts and minerals. Your plants’ soil should be washed at least twice a year. 

Caring for your African Violets 

African violets thrive in good soil, and favorable mixes include peat moss, perlite and vermiculite. 

These plants are quite picky when it comes to water, so stick with giving them lukewarm water.

Light intensity should be filtered, since light affects the growth of African violets. Turn the pots regularly so that the flowers do not have to reach for the light. Growing plants should be exposed to light for at least a few hours, or you can also supplement with grow lamps.  

Conclusion 

African violet leaves turning yellow could be caused by watering problems, root crowding, incorrect light, or nutrient deficiency. It could also be due to disease, pests or cold drafts.

Image: istockphoto.com / Leisan Rakhimova

Boxwood Turning Yellow

Boxwood Turning Yellow

Boxwood plants turning yellow is indicative of a problem that needs to be identified and remedied as soon as possible.

The most common causes of yellowing boxwood plants are boxwood blight, winter injury, salt damage, underwatering, boxwood leafminer, Volutella stem canker, Macrophoma leaf spot, and nematodes.

In this article, we will discuss the causes of yellowing boxwood.

How Can You Tell If Your Boxwood Has Boxwood Blight?

One of the first symptoms of boxwood blight is a lot of defoliation, or leaf drop. Plants that are not doing well often lose a lot of their leaves out of season.

Part of the plant may become chlorotic and even turn yellow and then brown. The leaves will fall off en masse, revealing bare branches.

Spots on your boxwood’s leaves are indicative of a possible infection. These spots can coalesce and grow larger. The black lesions may also be seen in the stem. If the weather is humid, there may also be a white substance on the underside of the leaf, caused by the formation of upright bundles of fungal spores.

Why is My Boxwood Turning Yellow?

Other causes of yellowing boxwood include:

Winter injury

Winter injury is one of the most common causes of yellowing boxwood. You can immediately tell something is wrong when the snow recedes and the uppermost and outermost leaves are yellow or brown. Most plants cannot tolerate temperatures of -10 degrees Fahrenheit or below, especially if they are close to the pavement or the side of the house. These locations can warm up the tissue of the plant too quickly.

Winter damage is most probable when the former snowline is still green. But as long as the damage to the boxwood is not too severe, you can simply prune out any of the damaged leaves and branches.

Salt damage

When salt is used to de-ice the sidewalk or walkway, it can damage your boxwood. The spray of the salt water can be forceful enough to dessicate the plant’s tissues and even kill the leaves. The salt from the spray that gets washed into the soil can also affect the water uptake of the plant, causing even further damage. This is also most noticeable when spring comes around.

It is easy to determine whether salt damage is the cause if there is a pattern of damaged boxwood only near walking surfaces.

Underwatering

Boxwoods can also suffer from drought stress if not given a sufficient amount of water every day. The leaves on the plant will turn yellow and then brown.

Drought stress is most severe in landscapes that have just been planted, because these plants are suffering from transplant shock. Boxwood that does not have great or effective irrigation, as well as those that have gone without rain or water for too long, will also suffer from drought stress. Boxwood that is grown in warm climates is also susceptible to drought stress.

Symptoms of drought stress include yellowing and browning of the center leaves and chlorotic foliage. Underwatered boxwood becomes chlorotic because the lack of water in the soil makes them unable to effectively absorb much-needed nutrients.

You can remedy an underwatered boxwood by making sure you water it when it needs to be watered. Check the soil by touching it. If the soil is dry, water the boxwood; if it is still moist, wait a day or two and check the soil again.

Boxwood leafminer

The boxwood leafminer can also cause the leaves of the boxwood to turn yellow and brown. This insect resembles a mosquito and will lay its eggs between the layers of leaves. The larvae will develop and feed on the tissue. Adult leafminers emerge from the leaves, leaving a hole where they exited. The affected leaves develop brown patches as the larvae develop inside them, and heavily infested leaves will eventually fall off.

Volutella stem canker

This fungal disease is caused by the fungus Pseudonectria buxi. It causes the leaves to become bronze or yellow. The fungus produces fruiting bodies when it sporulates on the undersides of the leaves. On the infected branches, the bark can become loose and may die back, leading to the death of parts of the plant.

This fungus is exacerbated by rainy weather. Unlike with boxwood blight, the leaves will not fall off in case of a Volutella infection.

Macrophoma leaf spot

Macrophoma leaf spot is caused by the pathogen Macrophoma candollei. This fungus causes yellow and reddish-brown lesions to appear on the leaves of the boxwood. When it sporulates, black fruiting bodies will appear on the undersides of the leaves.

Root and crown rot

Root and crown rot is caused by the fungus Phytophthora sp. They will appear as yellowing, browning and wilting on the foliage of boxwood plants. This fungal disease can also cause stunted growth, upward turning of leaves, root rot and discoloration of the stem near the soil line.

Fortunately, the leaves of plants infested with this fungus do not carry any fruiting bodies.

Nematodes

These microscopic pests are roundworms that feed on the roots of boxwood. The plant will turn yellow and wilt. Eventually, it will die back if the root has been damaged extensively.

You can try to prolong the life of your boxwood by watering and feeding it, but it will still succumb to the nematodes. You could try to grow nematode-resistant American boxwoods instead.

Conclusion

Boxwood turning yellow is indicative of a problem within the plant that needs to be identified in order to be remedied.

The most common causes of yellowing boxwood are boxwood blight, winter injury, salt damage, underwatering, boxwood leafminer, Volutella stem canker, Macrophoma leaf spot and nematodes.

Catching the problem early is key to minimizing the damage to your boxwood.

Image: istockphoto.com / MaYcaL

Elephant Ear Plant Leaves Turning Yellow

Elephant Ear Plant Leaves Turning Yellow

Elephant ear plants are popular among ornamental plant enthusiasts because they make good landscape plants. They can reach three to five feet in height, but are also ideal indoor plants. Foliage colors vary from green, green/white variegated, to purplish-black. Unfortunately elephant ear leaves can also turn yellow and fall off due to various conditions. 

Elephant Ear Plant Leaves Turning Yellow: What Are The Common Reasons?

1. Low humidity 

Elephant ears are not drought-tolerant plants, and poorly-timed watering could cause stress resulting in yellow leaves. Low humidity with dry soil could cause the leaves to droop and turn brown on the edges.   

To fix this, provide your plants with appropriate humidity levels through humidifiers, misting, and the use of a pebble tray. 

2. Water imbalance 

Elephant ear plants prefer damp, but not wet or saturated, soil. Take extra care when following a regular watering schedule. Improper soil moisture or overwatering could take a toll on your plants, resulting in yellowing leaves. 

When watering your plants, ensure that the liquid can flow from the drainage hole at the bottom of the pot. Discard any excess water from the planter and make sure the plants do not sit in standing water. Overwatering can also be avoided by installing a drainage system or a raised bed.

3. Improper light 

Elephant ear plants prefer bright but indirect sunlight. They can tolerate medium light, but if exposed to direct sunlight for too long the leaves may get burnt and may also turn yellow. 

Place the plants in an area with partial shade so the soil stays moist in the planters. Ideally, they should be exposed to the sun for at least three to six hours daily. 

4. Pest infestation 

Pests can invade your elephant ear plants and drain them of moisture. Sap-sucking pests like spider mites, scale, mealybugs and aphids could weaken the plants and result in yellowing leaflets and fronds.  

Spray the plants with warm soapy water every few weeks for pest prevention. If your plants are already infested with pests, use insecticides or neem oil to kill them, including their eggs. 

5. Planting problems

Elephant ear leaves turning yellow could be due to problems during the planting process. For example, the roots could be crowded in the pot and not have enough room to grow. This could result in the leaves yellowing, and eventually dying and falling off. 

To fix the problem, repot the plants and be sure not to repeat your planting mistakes. 

6. Natural causes

The yellowing leaves of your elephant ear could simply be due to natural causes. It is a natural occurrence for the older leaves, usually at the bottom of the plant, to turn yellow; the plant is just shedding its old leaves to make way for new growth. 

Elephant Ear Plant Care 

Elephant ear plants favor warm weather. Some varieties can survive in the ground over winter, but others need to be dug up and stored for the winter.  Make sure that you check the cold hardiness information of the variety you want to cultivate. 

Most varieties prefer full sun to partial shade, except for the black magic variety which prefers partial to full shade. 

These plants prefer loamy and moist soil with a high organic matter content. 

Spacing between plants may vary from two to six feet, depending on the variety you are growing. They should have enough room to spread out. 

Plant at around four to six inches deep, when nighttime temperature is around 50 to 60 degrees Fahrenheit. Most of these plants grow to be at least four feet wide, so they need a great amount of space. 

Plant the elephant ears around two to four feet apart at a depth of four to six inches in fast-draining soil. Smaller varieties may be grown in large containers. If you are growing the plants in containers, keep the soil evenly and constantly moist. 

Conclusion

Elephant ear plant leaves turning yellow could be attributed to low humidity or a water imbalance. It could also be due to pest infestation, improper light, planting problems or natural causes.

Image: istockphoto.com / Nattawat-Nat

Snake Plant Turning Yellow

Snake Plant Turning Yellow

The snake plant, or Sansevieria trifasciata, is native to Africa and Asia. It is popularly used in home decor since it adds aesthetic value while removing toxic pollutants from the air. Its graceful, sword-shaped leaves grow upright and resemble artificial foliage. However, the snake plant is also prone to discoloration and can turn yellow for various reasons. 

Snake Plant Turning Yellow: What Are The Common Reasons?

Below are some common reasons that snake plants turn yellow:

1. Your snake plant is overexposed to sunlight 

Snake plants are hardy succulents that are easy to cultivate. However, some plant owners tend to place the plants in areas with full sun or extreme sunlight. This can cause sunburn and yellow leaves for snake plants. 

If kept indoors, placing them near the windows allows them to get more light than they need. They can be affected by the scorching sun and may turn yellow and brown, which could also make the plants very dry.

2. Your snake plant is overwatered or underwatered

Snake plants do not need much water to survive and tend to wither and die if overwatered. Similarly, if your plants are underwatered their leaves may also turn yellow. If you notice the leaves turning yellow, you need to evaluate your watering routine. 

If you failed to water your snake plant for a couple of days because you were out of town, it may start to show signs of yellowing. When plants are underwatered, the root system cannot absorb water and nutrients from the soil. As a result, the plant dehydrates and the leaves turn to yellow. 

You can fix this problem by watering the snake plant at least every two to six weeks. If they are overwatered, give them a rest for a few days before resuming the watering routine. 

3. Your snake plant has root rot

Too much water can cause root rot and damage the overall functionality of the root system. It will eventually become damaged and start to decay. When root rot develops, snake plants cannot absorb enough of the nutrients that are important for their growth and wellbeing.  

This can result in the leaves turning yellow, a fungus may develop in the roots, and the plant could eventually die. 

4. Your plant is naturally aging 

Snake plant leaves may also turn yellow simply due to the natural aging process of the plants. This means that the yellow leaves will be replaced by new, green-colored leaves. 

5. Due to pest infestation  

Stressed or weakened snake plants are more prone to insect infestations. Pests like spider mites and mealybugs drain your plants of moisture as they suck on their sap or juice. As a result, the leaves and fronds turn yellow and the plants may eventually die, especially if they have experienced other issues such as nutrient deficiency. 

6. The plant is over-fertilized 

Your concern for your plants could endanger them, especially if you over-fertilize the plants. You should also not fertilize the plants during wintertime, which is a dormant time for them. Plants should ideally be fertilized only during the growth period. You may opt to use the nitrogen-phosphorus and potassium fertilizers for your plant, with a ratio of 7:4:10. 

7. The soil is old and depleted

The soil you use for your snake plants is essential as it can also affect the health and condition of plants. Using old and depleted soil allows the roots to stay wet for longer periods and could lead to root rot and yellowing leaves. Old soil loses draining capacity and becomes heavier over the years. You need to replace the soil of your plants every few years and feed them with a nutrient-rich fertilizer. 

8. The pot is overcrowded 

Snake plants that are planted too tightly together in one pot could also suffer from yellowing leaves. In this case, the nutrients and moisture will be insufficient for the plants and they need to be transplanted to a bigger planter. You may also opt to divide the plants into smaller clusters. 

Conclusion

If you notice your snake plant turning yellow, act on the problem at once to save your plant. Certain reasons that it could turn yellow include over- or underwatering, pest infestation and nutrient deficiency. It could also be due to old and depleted soil, overcrowded pots, or overfertilization.

Image: istockphoto.com / skymoon13

Fig Leaves Turning Yellow

Fig Leaves Turning Yellow

The fig plant belongs to the mulberry family, Moraceae, and is native to Asia and the Mediterranean, although it grows in most countries with warm climates. The fruit is rich in calcium, potassium, phosphorus and iron.  Unfortunately, fig plants also have their share of ailments and afflictions, some of which cause their leaves to turn yellow. 

Reasons for Fig Leaves Turning Yellow

1. Insufficient or too much water

Fig trees originated from the Mediterranean, and their roots tend to grow close to the surface to absorb every drop of water and moisture. The water that is not absorbed drains through the porous soil. To prevent the leaves from turning yellow, water your plants at least once a week. 

The soil should preferably be fast-draining; you should avoid incorporating moisture-retaining additives in the soil when transplanting your plants. Mulch well around the base of the fig tree to retain more water on the surface. 

2. Transplant shock 

One of the reasons fig leaves turn yellow could be due to transplant shock. Transplanted fig plants can suffer from stress and up to 20 percent of their foliage could be lost. Fluctuating temperatures during transplanting could also cause yellowing leaves. Make sure that proper planting requirements are met so you can avoid transplant shock for your fig trees. 

3. Nutrient deficiency 

Fig leaves turning yellow could indicate a deficiency in nutrients such as nitrogen, which is essential for healthy cell growth and division. Without nitrogen, the cell structures or chloroplasts cannot supply energy and nutrients to the fig plants. Fertilizing your plants annually can solve the issue, although the yellowed leaves are unlikely to turn green again. The yellow leaves should fall off so they can be replaced with healthy green ones. 

4. Pest infestation 

Insects and pests can invade even fig trees, and this can cause yellow leaves. Spider mites, scale and mealybugs can cause damage to foliage leading to more serious scenarios. Eradicate them with insecticides or insecticidal soap. If the situation is handled promptly, it will not lead to fatal damage and your fig plants will be able to recover easily. 

5. Bacterial infection 

Fig leaves turning yellow may also be due to a bacterial infection. In this case, pathogens usually target young leaves. To treat the problem, re-pot your plants with fresh earth and be sure to remove any remaining yellow leaves. 

Other Problems with Fig Leaves

Excessive leaf loss 

Fig trees may lose leaves excessively. To avoid this, allow your plant to acclimatize if you have just bought it recently. During such times, plants tend to lose leaves around the bottom part. When you notice that the top three to four inches of soil are dry, water the plant immediately. 

These plants prefer indirect sunlight; also make sure they are not placed near an air conditioning system to avoid excessive leaf loss. 

Brown spots

The appearance of brown spots is an indication of overwatering, and many beginner gardeners have this experience. Excess moisture leads to root decay and root rot, and the fungal infection spreads upward, leaving brown spots on the leaves. To treat this, you need to re-pot your fig tree and remove the affected leaves. See to it that there is enough light for the plant to recover. 

Leaves with holes 

Check your fig tree thoroughly, as this may be an indication of pest infestation. You can treat the problem by applying neem oil directly to the leaves. You can also remove the bugs manually or spray them with isopropyl rubbing alcohol. A spray consisting of liquid dish soap and water is also ideal for removing bugs. 

Curled leaves

Sometimes, fig tree foliage may curl up on the sides along with developing brown spots. These leaves tend to have a darker shade. The curling and browning usually start along the edges, until they reach the inner part of the leaves. This usually means your tree is thirsty, so always water the plants thoroughly while also making sure you are not overwatering. 

White leaves

Fig leaves may also develop white areas, and this is mostly attributed to mildew or sunburn. Stems and leaves are prone to developing a white powder-like substance, called mildew. This fungal disease appears due to lack of airflow along with stagnant water, low light conditions, and a temperature of around 70 degrees Fahrenheit.

To treat the problem, trim the fig tree for better airflow and choose a humidifier over misting. Be sure to remove all the white leaves and apply neem oil over the healthy ones to contain the infection. You can also spray the fig tree thoroughly with a mixture of baking soda and water. 

If the leaves are turning white but there is no trace of a powdery substance, it could be sunburn rather than mildew. If the plants are exposed to too much sunlight, the leaves tend to become bleached. The top leaves are the most affected, while the lower ones remain healthy since they benefit from the shade. To prevent this, move your fig trees to a shady area or further away from windows.

Conclusion 

Fig leaves turning yellow can be distressing for plant owners, but the correct assessment of the problem could save your plants. The common reasons for yellowing leaves are overwatering or transplant shock. However, it could also be due to nutrient deficiency, pest infestation or a bacterial infection.

Image: istockphoto.com / RiccardoTravani

Leaves Turning Yellow During Flowering

Leaves Turning Yellow During Flowering

A plant’s leaves turning yellow during flowering can be worrisome for plant owners. It signifies that something is not right with the plant. While plant experts note that leaves do naturally turn yellow, it could also be due to chlorosis, which is the yellowing of leaf tissue due to lack of chlorophyll. If the leaves are turning yellow toward the end of the flowering period, this is called senescence – the natural yellowing and dying off of plants. In this article, you can learn about the possible reasons that leaves turn yellow during flowering, as well as how to fix these issues. 

Why do leaves turn yellow during flowering?

These are some common reasons for leaves turn yellow during flowering: 

1. It could be due to light burn 

If you have indoor plants that are exposed to grow lights, they can also experience light burn. This makes the leaves turn yellow, and affects those that are closest to the light. Although the leaves are dead, they will be difficult to remove from the plants.
Insufficient light can also make leaves turn yellow, especially during the plant’s early life. However, if the discoloration happens during flowering, then insufficient light is not the culprit. 

Remedy: Hang the lights higher to lessen the brightness, or opt for dimmable grow lights.

2. It could be due to overwatering or underwatering 

Watering your plants too often could result in the yellowing of leaves. The situation becomes worse if the planters or pots do not have good drainage holes. The leaves will also look droopy and swollen if the plants are overwatered. Underwatering could also be the culprit, but this is less common. 

Remedy: Use good soil or coco coir, since this drains well and does not hold excess moisture. Water the plants less for at least a few days. When watering, see to it that 10% to 20% of the water spills out of the bottom of the pots. Also, make sure that the planters have drainage holes to ensure that water does not stay stagnant in the soil. 

To determine how often you should water, stick a finger into the soil about a knuckle deep. If it feels dry, you need to water the plants. If you are using coco coir, water the plants at least every two days. 

3. It could be due to nutrient deficiency

Nutrient deficiency could also be one of the reasons for leaves turning yellow during flowering. These nutrients include nitrogen, iron and magnesium. If plants are nitrogen-deficient, their leaves may turn yellow during flowering, especially the older ones at the bottom of the plant. 

Most of the time, these leaves will fall off and the plants will look pale or lime green in color. Sometimes, it could be a pH imbalance that is blocking the nitrogen absorption. While most soils already contain nitrogen, this can get depleted, so you have to supplement for this deficiency. An exception is coco coir, as this does not contain nitrogen. 

Inversely, too much nitrogen can also turn leaves yellow, but in this case the remaining leaves will look dark green rather than lime green. 

Magnesium-deficient plants will also have yellowing leaves, although the veins remain green. Iron-deficient plants also manifest discoloration and new leaves start as yellow but eventually become green. 

Remedy:  Add supplements such as magnesium, iron and nitrogen to enrich the soil and to prevent yellowing of the leaves. 

4. It could be due to the presence of pests 

Pests can cause leaves to turn yellow. These insects invade plants and suck their juice or sap. To check for pests, inspect your plants carefully and identify what kind of pests they are. Common pests include aphids, spider mites, whiteflies and fungus gnats. 

Remedy: Spray the plants with isopropyl rubbing alcohol or a liquid soap and water mixture. Remove the pests manually, or opt for organic pesticides such as neem oil.

Conclusion 

Leaves yellowing during flowering is a cause for concern, especially if there are other symptoms of an unhealthy plant. The common reasons for leaves to yellow during flowering are over- or underwatering, light burn, and insufficient light. It could also be due to a pest infestation or nutrient deficiency. 

Image: istockphoto.com / ligora

Calla Lily Leaves Turning Yellow

Calla Lily Leaves Turning Yellow

Calla lilies are dainty flowering plants that come in white, pink, yellow, black and purple. Their name derives from the Greek word, ‘calla’, meaning beautiful, and they are popular in bridal bouquets. These plants grow from rhizomes and are best used in flower beds and as borders. They are cultivated both as indoor or outdoor plants and, like most plants, they also suffer from diseases and infections which may cause yellowing leaves. 

Calla lily leaves turning yellow: What are the common reasons?

1. Overwatering 

One of the reasons calla lily leaves turn yellow is overwatering. The leaves may also appear mushy or droopy. You may also be using the wrong type of soil,resulting in stagnant water on the roots. Having poor drainage starves the roots of oxygen and nutrients are not properly absorbed.  

Calla lilies prefer slightly moist soil, but do not like standing in water since this could lead to root rot. You should water the plants when the top few inches of soil have dried out and the lower part is still slightly moist. Water them weekly, or depending on how fast the soil drains. 

The ideal soil for calla lilies is well-draining soil, to avoid standing water. Be sure to remove the yellow leaves so the plants use less energy on keeping their leaves alive. 

2. Nutrient deficiency 

Calla lily leaves turning yellow could also indicate a nutrient deficiency. Leaves tend to lose their original color when chlorophyll is not being produced sufficiently. This condition is known as chlorosis. 

If you suspect that the yellowing is due to nutrient deficiency, inspect the roots. Healthy roots should be firm and white; if they are mushy, dark and fall apart easily, it is an indication of root rot. 

Check that the soil you have been using is still ideal, as it may need to be replaced with fresh soil. Fertilizing is also recommended and re-potting may be done during the spring season.

3. Repotting stress 

Calla lily leaves may turn yellow when they experience transplant or repotting stress. If they are transferred to new containers that do not have the right fit, or if the soil has a different texture, the plants could experience stress. The leaves become yellow and droopy, and some may fall off after a while. Thankfully this is just temporary; just make sure that the plants are potted in spacious planters. 

4. Pest infestation 

Calla lilies are also prone to pest attacks. Fungus gnats and spider mites could infest your plants, resulting in the yellowing of leaves.  These pests suck the sap or juice from your plants, causing those plant parts to wilt and turn yellow. 

To treat pest infestation, spray good quality neem oil on the affected plant areas. You should also drench the soil with an organic pesticide if there are fungus gnats. Trim or remove the yellow leaves, too. 

5. Natural causes 

Calla lily leaves turning yellow may just be due to natural causes and not a cause for concern. Leaves naturally begin to die and fall off right before the dormancy period. 

Tips on growing calla lilies 

Calla lilies are rich with symbolism and history and are easy to grow. They do not require too much attention and you only have to consider proper planting and location. These beauties need to be planted in loose, well-drained soil. They like full sun or partial shade, especially in warmer climates.  

Calla lilies are usually planted during springtime. Make sure that the soil has warmed well and there is no more threat of frost before planting them. These plants should be planted about four inches deep into the soil and spaced approximately a foot apart. You should water the area after you have planted them. 

Calla lilies grow best in groups on flower beds. These plants prefer their soil moist and should be fertilized monthly during the growing season. However, handle them with caution as they are poisonous to humans and animals if ingested.

Conclusion 

Calla lilies are popular for their dainty and unique flowers that are popular for weddings and other social occasions. Their leaves may turn yellow because of overwatering, nutrient deficiency, pest infestation, repotting stress, or simply just due to natural causes. 

Image: istockphoto.com / Cristina Ionescu

Olive Tree Leaves Turning Yellow

Olive Tree Leaves Turning Yellow

Olive tree leaves will turn yellow when the tree experiences major changes in its nutritional intake. The change in color can also be due to factors that cause stress to the plant.

The most common causes of yellowing olive tree leaves are watering problems, nutrient deficiency, insufficient sunlight, weather, transplant shock, disease and pests.

In this article, we will discuss the causes of yellowing olive tree leaves and how to remedy each one. So, if you are having this problem, keep reading.

Why are my olive tree’s leaves turning yellow?

Watering problems

The most common reason olive leaves turn yellow is overwatering. An olive tree’s roots can become waterlogged and deprived of oxygen if they are constantly soaking in boggy soil. This can lead to the roots rotting and deteriorating, which can affect the rest of the tree and turn the leaves yellow. Eventually, the leaves will start to droop.

You can tell the tree is overwatered when the yellowing of the leaves appears in a mosaic pattern and is not a consistent, solid yellow color. The leaves will also have brown tips that are crunchy, but they will not fall off easily.

To avoid overwatering, plant the olive tree in a pot that has adequate drainage holes. This allows the excess water to flow out when you accidentally overwater it. 

Overwatering and rotting can also occur when the plant outgrows its pot, because the roots are crowding it. Transfer the plant to a larger pot with enough room for its roots.

Underwatering can also cause olive leaves to turn yellow. Plants need water to transport not only moisture, but also much-needed nutrients from the soil to the plant. If there is no water, the leaves that are considered least important are given the least resources. These are the leaves that eventually turn yellow. You can rewater the plant, but those compromised leaves cannot be salvaged and they will fall off.

Olive trees are very tolerant when it comes to changes in their watering schedules. It can take them several weeks before they show any signs of stress. So, if you see these signs, it probably means they are reacting to a change that has been ongoing for weeks.

You can remedy an underwatered olive tree by making sure you do not let the soil get dry between waterings. If the soil is dry to the touch, water the plant; if the soil is still moist, wait one or two days and check the soil again.

Nutrient deficiency

Olive leaves can discolor when they do not get enough iron or nitrogen. The leaves will also become pale in the absence of magnesium and zinc. Manganese deficiency affects the younger leaves first, while magnesium deficiency affects the older leaves.

Test the pH level of the soil around your olive tree before you make any adjustments. It could just be the soil’s pH affecting the transfer of nutrients into the plant.

Olive trees with a nitrogen deficiency will grow poorly and have yellow leaves, so nitrogen should be applied around the tree regularly. If the tree lacks iron, it can cause chlorosis, one of which symptoms is yellowing of the leaves.

Insufficient sunlight

If you keep your olive tree in the shade most of the time, or if you keep it indoors where it is unable to get all the sunlight it needs, it will not be able to photosynthesize properly. Plants need to be able to photosynthesize to produce chlorophyll, which is the substance that gives them their green color. Impaired photosynthesis will lead to the yellowing of the olive tree’s leaves.

Weather and seasonal changes

Olive trees, like most trees, will shed their leaves when winter comes. The leaves will turn yellow naturally and drop off. This leaf drop can also occur during other parts of the year, but to a lesser extent. If some yellowing happens and the rest of the tree looks healthy, then it is probably just a part of the olive tree’s growth cycle.

Transplant shock

Transplant shock is very common, especially for olive trees that were grown in a greenhouse or nursery. These places have the ideal conditions for the plant, so when you take it home with you, the sudden change in temperature, humidity and light can cause stress to the plant. Its leaves can turn yellow and fall off.

The only thing you can do in this situation is make sure you provide the plant with conditions that are as close to ideal as you can. Of course replicating a greenhouse in an ordinary home can be a daunting task, but as long as you simulate its natural habitat as much as you can, the olive tree will be able to adjust to its new conditions. Eventually, its leaves will retain their color and stop shedding.

Disease and pests

One of the most common diseases to infect olive trees is peacock spots. Peacock spots are caused by a fungus that leaves lesions on the leaves. This fungus proliferates more effectively during the growing season, and spreads from tree to tree via strong winds or insects.

You can use a fungicide to get rid of peacock spots.

Pests are also one of the most difficult problems to deal with when growing olive trees. They will suck the nutrients from the leaves and make the tree more susceptible to diseases and other pests. The most common types of pests on olive trees are spider mites, mealybugs, scale insects, whiteflies and aphids. They can also cause the yellowing of olive tree leaves if not eradicated in time.

You can use an insecticide to get rid of these pests. While doing any type of treatment on your olive tree, if you are able to move it to an isolated place, do so. This will help avoid the spread of any fungus or insects to your other, healthy, plants.

Conclusion

Olive tree leaves turning yellow indicates either a change in their nutritional uptake or an external stressor such as disease or pests. The best approach to treating yellowing leaves is identifying what caused the discoloration in the first place.

The most common causes of yellowing olive leaves are watering problems, nutrient deficiency, insufficient sunlight, weather, transplant shock, disease and pests.

Image: istockphoto.com / Adrian Vidal

How To Save An Overwatered Aloe Plant?

How To Save An Overwatered Aloe Plant?

Aloe plants are very tough, but one of the most common reasons home gardeners kill them is by unknowingly overwatering them.

Aloes are succulents that have thrived in the driest places on earth for thousands of years. They have adapted to living on very limited water because they are able to store it in their bodies and leaves for when the drought comes. Thus, watering them weekly is usually too much.

You can save an overwatered aloe by transferring it to a new container with new soil. The new pot must have drainage holes at the bottom, and the soil mix needs to include sand and perlite to make it more porous.

Aloe plants are very easy to grow, and as long as you provide them with their basic needs, they will be happy and content.

How To Tell If An Aloe is Overwatered

An aloe plant is evergreen, with stiff leaves that grow upright. When it is not healthy, you can usually soon see the effects on its leaves. Here are some signs to watch out for if you suspect an overwatered aloe:

The plant has root rot

When an aloe plant is overwatered, the first parts of its body to be affected are its roots. Succulent roots need well-draining soil and a pot with drainage holes at the bottom. This is because succulents do not like their roots in perpetually damp soil. The roots need airy soil that allows them to dry and breathe. Roots that are always soaked in wet soil will drown and die. This is called root rot, and it will soon affect the rest of the plant if not addressed immediately. Root rot also makes the plant more susceptible to fungal and bacterial problems.

Aloe roots with root rot will look brown or even black upon inspection, and will smell like rotten vegetables.

The plant’s stem is mushy

As the root rot makes its way up the plant, the stem will become mushy and soft. The excess water that the plant has absorbed will cause the stem and leaves to look plump but weak. It is often difficult to remedy an overwatered plant if the effects have reached the stem, but it is not impossible.

The plant’s leaves are turning yellow or brown

The most obvious sign of an overwatered plant can be observed in its leaves. If the plant’s leaves are discolored and wilting, chances are it is overwatered.

Remember that these plants’ natural habitat is desert, and they are completely fine with being watered inconsistently. If the soil in the pot is always saturated with water, the plant’s leaves will turn yellow due to lack of nutrients. Over time, the yellow leaves will turn brown and wilt.

How To Save An Overwatered Aloe Plant

Remove the plant from its old container

Remove the aloe gently from the pot to make sure that you cause as little as possible trauma or damage to the roots and the plant. If you need to use a trowel, run it around the edges of the pot to help dislodge the plant. If the roots are holding on too tightly to the pot, you may need to break the pot to free the roots.

When you finally get the plant out of the pot, shake off any soil on the roots to properly expose them, so you can examine them properly.

Check the roots

Examine the roots and identify any dead or dying roots. They are either brown or black in color and emit a smell similar to rotten vegetation.

Using a clean knife or scissors, cut off the rotten parts of the roots. Make sure you clean off the knife or scissors in a diluted hydrogen peroxide solution after each cut. This is so you do not inadvertently infect the healthy roots.

If there are leaves or part of the stem that look rotten as well, you are better off cutting those too. This will allow the remaining roots to concentrate on supporting a healthy plant.

Use fungicide on the roots

A three percent hydrogen peroxide solution can be used to disinfect the roots for any possible fungi. You can use the same solution on the container when you clean it before replanting the aloe.

Rinse the roots in this solution before planting the aloe in new soil so the fungal problem is not retained.

Choose the right container

Make sure the container you choose for replanting the aloe is going to be able to accommodate its roots. Aloes like a container or pot that is wide and more bowl-like than one that looks like a vase and is narrow. This is because aloe roots grow laterally. If it is planted in a tall and narrow container, it might tip over due to its weight.

Also make sure that the new container has drainage holes in the bottom so any excess water drains away easily.

Clay pots are recommended for colder places, because the soil stays wetter for longer in the absence of warm sun, and clay pots are more porous. Plastic pots are better for hotter climates because they trap water and allow the plant more time to effectively absorb water for storage.

Make sure you use the right soil

Succulents like their soil to be well-draining and airy. You can buy commercial succulent soil mix or you can make it at home by mixing one part potting soil, one part sand, and one part perlite. The sand and perlite will add grain and grit to the texture while the soil will provide the nutrients to the plant. 

Conclusion

Aloe plants may be tough and hardy plants, but they can be easily overwatered, especially if you are using the wrong soil or the wrong container.

If you suspect that your aloe is overwatered, check its roots and remove any parts that are rotten. Treat the roots with a three percent hydrogen peroxide solution and replant it in a container large enough to accommodate its roots, using well-draining soil.

If you follow all of these steps, your aloe plant will have no problem bouncing back.

Image: istockphoto.com / BCFC

Orchid Leaves Turning Yellow

Orchid Leaves Turning Yellow

When your orchid’s leaves are turning unnaturally yellow, it is not a good sign. It means there is something wrong with your plant that you will need to address and remedy as soon as possible.

The most common cause of yellowing orchid leaves is overwatering. Other causes include too much light, changes in temperature, transplant stress, too much fertilizer, not enough nutrients, exposure to chemicals, or disease.

In this article, we will learn about the different causes of yellowing and how to remedy each one.

Why are my orchid’s leaves turning yellow?

The orchid is overwatered

Overwatering is the most probable cause of an orchid’s leaves turning yellow. When its roots are overwhelmed with excess water, it can no longer take in any more water or nutrients. The orchid’s leaves will turn more yellow and mushy the more the roots are compromised. This is called root rot, and if allowed to persist, can lead to the death of the plant.

Orchids do not really need a lot of water, so the best way to control your watering frequency is to check the soil in the pot. If the soil is damp, wait a few more days before watering again, but if it is dry you are free to give it a reasonable amount of water. When it comes to orchids, always remember that it is exponentially better to underwater your orchid than it is to overwater it.

The orchid is getting too much sunlight

In their natural habitat of rainforests, orchids live under the generous shade of the tree canopy. They cannot tolerate direct sunlight and if they are left in an area with full sun, their leaves will turn yellow from sun damage, possibly even with burnt tips. Orchids prefer indirect light.

Inside your home, place the orchid in a north- or east-facing window during the winter so they get a decent amount of light each day. You can transfer them to a south- or west-facing window in the summer. If the light is still too intense even through a window, you can try adding a sheer curtain to lessen the intensity or move the plant further away from the window.

The orchid is not used to the extreme cold or heat

If you keep your orchid indoors, you do not have to worry about the temperature being too low for it. If you keep it outdoors, however, it might have a hard time adjusting to changing temperatures.

Orchids like to be kept in places where the temperature is somewhere between 60 and 80 degrees Fahrenheit. If they are subjected to temperatures below 60 or above 80, the plant will experience stress. This can manifest as yellowing and even dropping of leaves. If the stress becomes too much, the leaves can turn brown or black and lead to plant death.

You can monitor the temperature of your orchid’s environment by purchasing a thermometer which you can use to periodically check the temperature of the area.

The orchid has transplant stress

When you buy an orchid plant from the store where it has lived for the past couple of months, taking it directly into your home with a new set of unique living conditions can stress the plant. It’s leaves could turn yellow and may even fall off. This can also happen when you change apartments or houses.

There really is not much you can do for an orchid going through transplant stress, aside from making sure its new home has ideal living conditions. Providing the plant with the best care can make the transition easier on it.

The orchid has had too much fertilizer

You give fertilizer to your orchids to encourage better growth, but sometimes too much of a good thing can be bad for your plant. Giving too much fertilizer can add too much zinc, copper and calcium into the soil. If these other nutrients are too overpowering, the plant will be unable to absorb iron, which it also needs. If the orchid does not have its normal iron levels, its leaves will turn yellow; this condition is called chlorosis.

Just be sure, when giving your orchids fertilizer, that you do not overdo it and give just the right amount. You actually need to dilute the fertilizer for orchids to about a half or a quarter strength. Orchids are often sold while in bloom, so you do not need to fertilize at that time. It is best to read up on how often orchids bloom, and fertilize accordingly.

The orchid does not have enough nutrients

Inversely, if you do not give your orchid enough nutrients, it will also result in the plant’s leaves turning yellow. Soil has nutrients that it can provide to your plant, but over time these will deplete and you are going to have to provide the missing nutrients through fertilizer. The nutrients that most commonly run out are nitrogen, zinc, iron, and manganese.

This problem can be easily remedied by purchasing a fertilizer made for orchids and to do just as the instructions say on the package.

The orchid was exposed to chemicals

When you live in an area where the tap water is treated with chlorine, your delicate orchid may not react well to this, and this could manifest as yellowing leaves.

You can figure out if the water is causing the yellowing by requesting a water test. If the results come back with chlorine or any other element that may be harmful to your orchid, you can choose to collect and only use rainwater on your plants, install a home filtering system, or buy filtered water to use on your plants.

The orchid is diseased

Diseases that attack orchids include root rot, fungal leaf spot, and bacterial brown spot.

Root rot happens when the plant’s roots drown in overwatered soil in a pot with no drainage holes. Root rot takes effect quickly and will turn the leaves yellow, eventually killing the plant. You can save the orchid if there are still healthy roots left and if you are able to remove the rotten roots in time.

Fungal leaf spot also causes yellow areas to appear on the orchid’s leaves. These spots will eventually turn brown and even black if not treated immediately with fungicide. Remove all infected leaves and burn them so they do not infect other plants.

Bacterial brown spot will appear as yellow or brown spots on the orchid’s leaves. This disease is common among orchids that are kept in humid areas. You can treat the plant by removing all the affected leaves and burning them. Make sure you sterilize the scissors after each cut on the plant so that the disease does not spread to the healthy parts of the orchid. You can use a bacterial spray on the plant to prevent any further spread of the disease.

Conclusion

If you see any leaves on your orchid turning yellow, you need to narrow down the cause of the discoloration immediately so you know how to remedy it.

The yellowing of the leaves can either be due to overwatering, too much light, changes in temperature, transplant stress, too much fertilizer, not enough nutrients, exposure to chemicals, or disease.

Most of these problems are easily fixed, provided you catch the problem in its early stages. Your orchid should bounce back in no time.

Image: istockphoto.com / alexytrener

Basil Leaves Turning Yellow

Basil Leaves Turning Yellow

Basil is a leafy green aromatic herb and a popular food seasoning ingredient. Some of the popular varieties include sweet basil, Thai basil and Greek basil. Homeowners usually cultivate it indoors or in backyard gardens.  Basil may also be prone to yellowing and discoloration for certain reasons. In this article, you can get to know why basil leaves turn yellow and how to prevent this. 

Basil Leaves Turning Yellow: What Are The Reasons?

These are the reasons basil leaves may turn yellow:

1. It may be due to overwatering. 

Basil plants prefer full sun and well-drained soil. If they are turning yellow you may need to re-evaluate your watering schedule. Since basil likes well-drained soil, you should water when the top inch to two inches of soil feels dry. You should be able to test this easily by inserting your finger an inch into the soil. 

Consider soil drainage if you are growing basil in containers. The planters should have drainage holes to avoid excess water from becoming stagnant.

2. It may be due to diseases such as root rot or downy mildew. 

Root rot can affect plants, like basil, that prefer free-draining soil. Root rot can be bacterial or fungal and causes the roots to suffocate and die. While there is no remedy for this, you can remove the affected plant and separate it from the healthy plants so the disease does not spread through the soil. 

Downy mildew is another disease that causes leaves to turn yellow with a grey, fuzzy underside. This disease, a plant parasite, prefers a moist environment with low ventilation and humidity. Therefore, always water at the base of the plant and keep leaves free of moisture to prevent your basil plants becoming affected with downy mildew.

Separate affected plants from the rest to preserve the other healthy basil plants.   

3. It could be a nutrient deficiency. 

Basil leaves may also turn yellow because of nutrient deficiency.  To remedy this, try to mix a slow-release fertilizer with the soil when you first plant the herbs. If the growing season is longer than six months, be sure to fertilize again. If you are planting the herbs in small containers, try to add fertilizer on the third month, especially if you water frequently. 

Potassium deficiency could result in leaves turning yellow between the veins. Basil plants need minerals to survive, and this includes potassium as well as phosphorus and nitrogen. You can correct this by adding a potassium-rich fertilizer to your plants’ soil. 

4. It could be due to a pest infestation. 

If, as well as yellow leaves, you notice a black, sticky substance on the back of the leaves, or white bugs, you likely have a pest problem. Aphids and mealybugs can attack plants including basil.

Here are some things you can do if your basil plants are infested with pests:

  • Introduce a predator 

Insects like ladybugs and green lacewings feed on aphids and mealybugs. You can purchase them from your local nursery or you can attract these insects, particularly ladybugs, by growing plants and flowers that ladybugs like. You may also add a water source to help attract them to the garden where your basil plants are growing.

  • Use neem oil. 

You can also eradicate pests by using neem oil in your garden.  Apply this organic oil to infested plants for best results. 

  • Eradicate allies such as ants.

Ants feast on the secretions of pests, called honeydew, a sugary, sticky substance. To eradicate pests you also need to eradicate ants using ant-killing food or by treating ant hills and sprinkling the soil with cinnamon.  

  • Plant some companion plants. 

Consider planting your basil plants near zinnias and garlic that release odors that pests dislike. Other companion plants include geraniums, chrysanthemums and mint.

5. It could be due to a potting mix that is too compact. 

Compact potting mix could endanger and suffocate your basil plants since they require fluffy soil for gaseous exchange. To avoid this, use a good quality potting mix which is airy, fluffy and enriched with nutrients.

6. It could be due to the wrong soil pH. 

Yellowing basil leaves may also be due to high pH levels of eight and above. Nutrients become less available, such as nitrogen which is responsible for the green color of plants. To correct this, you need to change the soil to a good quality potting soil. 

Aside from the issues mentioned above, basil plants are also sensitive to temperature and light conditions.  Ambient temperatures around or below 60 degrees Fahrenheit stunt the growth of basil plants resulting in pale green or yellow leaves. To avoid this, ensure that your plants receive direct sunlight, or place them in a small room with a heater to replicate the atmosphere of a greenhouse.

Conclusion 

Basil plants are valuable kitchen essentials that have plenty of health benefits. However, they can also be prone to yellowing because of overwatering, diseases like root rot and downy mildew, nutrient deficiency,  wrong soil pH, or pest infestation.

Image: istockphoto.com / OlgaMiltsova

Lucky Bamboo Turning Yellow

Lucky Bamboo Turning Yellow

The lucky bamboo plant, Dracaena sanderiana of the family Asparagaceae, was named after the German-English gardener Henry Frederick Conrad Sander. According to Chinese beliefs, this household plant increases feng shui. The lucky bamboo plant is easy to grow in either water or soil and prefers indirect sunlight, but it can also be prone to yellowing and discoloration.

Lucky Bamboo Turning Yellow: Common Reasons 

Here are some common reasons a lucky bamboo plant may turn yellow:

1. It could be due to exposure to chemicals in tap water. 

Chlorine and fluoride, which are commonly present in tap water, can be dangerous for your lucky bamboo plant. These chemicals are harmful to plants and constant exposure could lead to yellowing and death for your plants.  

Solution: Use filtered, spring, distilled or rainwater for your lucky bamboo plant. If you have a garden and you grow the plant outdoors, it is ideal to have a rainwater collecting system, provided it does not travel over an asphalt roof. Also, never use cold water; only water with room-temperature water.

Make sure to change the water every seven to 10 days and avoid stagnant water. Old water attracts fungus, bacteria and mold, so throw it away. If the water turns green, dark, cloudy or murky, or if it smells foul, then change the water at once.

2. It could be due to exposure to direct sunlight. 

Lucky bamboo cannot thrive in direct sunlight, so if it is in full sun you need to move it to a shaded area. Too little indirect light could also make the plant weak and it will turn yellow or pale. 

Solution: Place your plant near a window but out of direct sunlight. Popular areas for lucky bamboo plants include the kitchen counter, near a window, or on a table near a window. Make sure it is not exposed to direct sunlight since the sun’s rays will burn the plant. 

3. It could be due to overwatering.

Lucky bamboo plants like moist soil, but soil that is too wet could result in yellowing. As with most plants, see to it that there is just enough moisture in the soil. 

Solution: Keep your plants in moist soil.  Add rocks on top of the soil which should maintain moderate moistness. Check the moistness of the soil by sticking your forefinger into the soil up to one inch; if it feels dry you need to water the plants. If the plants are in a soil bed, mist the leaves every two to three days to maintain their health. 

4. It could be due to overfertilization. 

Too much fertilizer could cause your lucky bamboo plants to yellow. 

Solution: Change the water and move the plant to an area with less light.  Avoid fertilizing the plant for a while. 

5. It could be due to fungal growth or pests. 

If you notice white or grey spots, this could suggest fungal growth or even pests.  

Solution: Clean the infected parts with soap and water or alcohol solution. Use a cotton swab to gently wipe the plant. 

Other than those mentioned above, you may try the following to prevent the plant from turning yellow:

  • Use filtered water instead of tap water. 
  • Re-pot the plant to a fresh container. 
  • Change any pebbles that were infected with fungus or pests.

Facts About the Lucky Bamboo Plant 

These are some interesting facts about lucky bamboo:

  • The plant originated from Southeast Asia. 
  • It has been popularly used in the practice of Feng Shui for almost 5,000 years. 
  • The plant is said to bring health, love and luck to those who own it. 
  • The leaves of the lucky bamboo plant can grow up to one inch per month. 
  • The plant has naked branches that end in tufts of thin leaves, developing into plant stalks as they age. Once the stalks are cut, they will not grow taller. As the stalks develop, the plants can be manipulated into shapes using wires.  
  • Stalks can be clipped at the base and placed in distilled water to propagate more. The parent stalk grows more leaf sprouts and continues the cycle. 
  • Lucky bamboo plants thrive well in a container with one inch of distilled or purified water, and should be placed in a corner of the home for positive energy, prosperity and good fortune. 

Lucky Bamboo Plant Care

Lucky bamboo plants could last for up to two years in water, but they grow better and longer when planted in soil. The plants will wither if over- or underwatered, so always keep the soil slightly damp. Use small amounts of fertilizer or pesticide for plant support. 

If you keep the plants in water, the roots should be under the water. Be sure to replace the water every seven to 10 days. Use filtered water instead of tap water which contains chlorine and fluoride that are toxic for plants.

Lucky bamboo plants prefer temperatures ranging from 65 to 95 degrees Fahrenheit. Keep them away from windows and drafts during wintertime. Also, do not place them in direct sunlight as they could develop sunburn. Move the plants to partial shade if the leaves become brown and only expose the plant to indirect sunlight in the morning. 

Keep the plants away from pets, since the leaves and plant parts are toxic for animals. 

Conclusion 

Lucky bamboo turning yellow could be attributed to overwatering or exposure to chemicals in tap water.  They may also be turning yellow because of fungal growth, pest infestation and exposure to direct sunlight.

Image: istockphoto.com / NickS

Geranium Leaves Turning Yellow

Geraniums have approximately 422 species, and are found in temperate areas of the world such as the eastern Mediterranean. These plants have broad circular leaves, with flowers that come in white, pink, blue or purple. They prefer fast-draining soil and can be propagated in autumn or spring by cuttings, seeds or by division. However, just like other plants, they can encounter problems like yellowing and leaf discoloration. 

Geranium Leaves Turning Yellow: What Are The Common Causes?

 1. Overwatering

Geraniums are sun-loving plants and native to temperate regions, so watering them too often can be detrimental. You will notice leaves yellowing at the bottom of the plants when they absorb too much water. 

Water the geraniums only when they need it. You can easily check this with a finger test: When the top inch of soil is dry to the touch, it is an indicator that you should water the plants. 

2. Underwatering 

Although it is uncommon for geraniums to die from underwatering, this could produce similar symptoms to those of overwatering.  When these plants are affected by drought, the edges of the leaves turn yellow. 

To ensure you are watering correctly, check that the top one inch of soil is dry; if so, water the plant. If you are unsure whether or not to water, leave it for a day or two and re-check the soil.

When leaves are left wet for a long period, this could also cause bacterial leaf spots. 

3. Insufficient or Too Much Sunlight

Geraniums adore the sun and need about four to six hours of full sun daily. The morning sun is ideal for these plants since temperatures are warmer during the afternoon. They grow well in the outdoors where there is full sun in the morning and light shade in the afternoon. 

4. Cold Snaps

Cold snaps are immediate and fleeting spells of cold weather. These can cause geranium leaves to turn yellow, especially during an extended period of wet and cool weather. Frost damage is possible especially during early springtime, so it is best to keep up to date with weather forecasts. This will allow you to prepare by insulating your geraniums and other outdoor plants. 

5. Micronutrient Deficiency

Geraniums need nutrients to grow healthily, just like other plants. Some of the essential nutrients include magnesium, sulfur, zinc and iron. The plants should be fertilized at least monthly or bi-weekly during the growing season. The ideal ratio is 20-20-20 to ensure that the nutrients are well-absorbed. 

Magnesium affects the chlorophyll molecule responsible for the green pigment of plants, so a geranium deficient in magnesium will have yellowing leaves. Epsom salt is a good source of magnesium for your plants. 

To check whether your plants lack vital nutrients, test your soil with a soil test kit. It should give you a pH reading and an electrical conductivity reading – a measurement of soluble salts in the soil. The Michigan State University guidance states that pH readings for zonal geraniums should be 6 to 6.4, while for the regal and ivy geraniums it should be 5.5 to 6. 

6. Geranium Diseases

Certain diseases are attributed as causes for yellowing geraniums.  These include the following:

  • Bacterial blight – This is observed on the underside of the leaves and looks like V-shaped lesions and yellowish or brownish water spots. It can cause stem rot and affect the entire plant. Isolate the affected plant and sterilize all tools used on the plant to prevent cross-infection. 
  • Bacterial leaf spot – This disease is similar to blight, although no wilting will occur; only yellow spots. The main cause is due to leaves that remain wet for a long period. To avoid this, always water geraniums from below and do not include the leaves. 
  • Southern bacterial wilt – The symptoms are the same as for blight, but this disease starts at the soil line and goes upward, causing discoloration. While blight causes discoloration on the lower part of the plant, it is the other way around with Southern bacterial blight, since the progress is upward from the soil line. 
  • Viral infections – At least 15 viruses are known to affect geraniums, and it takes as long as three weeks before symptoms start to show. The virus will also likely spread to nearby plants because of water splashing or through insects like aphids. Viruses can also spread through the propagation of infected cuttings. 

7. Herbicide Injuries 

Weeding around geraniums could lead to accidents, especially when using herbicides. They could cause a bleaching effect on geraniums which could lead to yellowing leaves. A safe alternative to herbicides is to use mulch. 

Conclusion 

Geranium leaves turning yellow is not a pretty sight and could indicate a serious infection or disease. The common causes for this discoloration include overwatering, underwatering and exposure to too much sunlight. However, it could also be due to cold snaps, micronutrient deficiency or geranium diseases.

Image: istockphoto.com / Jonas Rönnbro

Grass Turning Yellow

Grass Turning Yellow

Homeowners tend to be very particular about their front lawns. Popular options when it comes to lawn grass include a combination of bluegrass, fescue and ryegrass. While most lawn grass is well maintained, certain issues, like yellowing grass, are not uncommon. Read on for some helpful information about why lawn grass turns yellow and how to prevent it. 

Grass Turning Yellow: What Are the Reasons?

Here are some common reasons for lawn grass turning yellow:

1. It could be due to drought stress. 

Grass needs water to survive and if it is inadequate the grass will begin to wilt and turn pale green or yellow. Consistent drought or hot weather can take a toll on your lawn grass. Ideally, there should be a regular watering schedule or an irrigation system to ensure that the grass is absorbing enough water. 

Lawn grass needs at least one to one-and-a-half inches of water weekly, the whole year round, including in the winter season. You should water deeply at least two to three times per week instead of daily. Water the grass more frequently during hot weather.

2. It could be due to insect damage.

Insects could invade your lawn since they eat grass and roots.  Insect-infested grass appears wilted, turns yellow, and ultimately goes brown. In parts of the US, common insects that invade lawn grass are grubs, armyworms and chinch bugs. There are insect control products available commercially to eradicate these insects, or you can seek the help of grass professionals. 

3. It may be due to lawn disease. 

Lawn grass discoloration could also be attributed to turf diseases such as fungal diseases. These can spread rapidly and make the grass turn yellow and eventually brown in color. Lawn fungus is aggressive, but there are fungicides that effectively control the spread of these diseases. You should also regularly monitor your grass. 

4. It might be due to unwanted grass species. 

Certain undesirable grasses tend to grow and blend in with your lawn grass. These unwanted grass species could infest your lawn which is why it turns pale green or yellow. Lawn aeration is helpful, as it removes thatches and weeds while encouraging good grass to grow healthily. Ideally, sodding and lawn renovation should also be carried out. 

5. It could be due to nutrient deficiency.

Grass turning yellow could also be due to nutrient and nitrogen deficiency. The right application of fertilizer at the proper time of the year is essential for healthy lawn grass. You may opt to hire a lawn professional to ensure the best results. 

6. It may be due to fertilizer burn or overfertilization. 

Fertilizer application should be done with caution since applying too much on your lawn grass could lead to fertilizer burn. This can cause yellowing grass and create unsightly spots on your lawn. If you are not too sure of the proper procedures, it is best to consult a lawn professional. 

Common signs of overfertilization include the following:

  • Leaf blades are yellowing at the base. 
  • Leaf blades are turning brown at the top. 
  • There is a crust of fertilizer on the soil surface. 
  • The grass is slow-growing or has stunted growth. 

7. It could also be due to dog urine. 

Dog urine has a high concentration of nitrogen compounds. If your dog regularly pees on your lawn you will notice yellow spots on the grass. 

Restoration Tips for Yellowing Grass 

Here are some restoration tips if your grass is turning yellow:

  • Allow plenty of sunlight on your lawn or yard by cutting back overgrown tree branches that could be barring full sunlight from the area. 
  • Mow only when the grass is dry and maintain sharp mower blades. 
  • Check and improve your lawn’s drainage. 
  • Rake and clean any excess grass clippings and fallen leaves from your lawn or yard. 
  • Fertilize as recommended by lawn professionals and check for any unwanted weeds. 
  • Water your lawn only when the two inches of topsoil has dried out.
  • Reseed urine spots in your lawn. 
  • Treat lawn diseases. 
  • Hire a professional lawn care service for prompt maintenance of your lawn grass.

Conclusion 

Lawn grass adds aesthetic appeal to any front or back yard. However, it can be prone to yellowing and discoloration for various reasons. Yellowing grass could be due to drought stress, insect damage, lawn disease, fertilizer burn or nutrient deficiency.

Image: istockphoto.com / Singjai20

Tomato Plant Leaves Turning Yellow

Tomato Plant Leaves Turning Yellow

Tomatoes are ideal backyard plants, as they are common food staples and a must-have in most salads. Their scientific name is Solanum lycopersicum, of the family Solanaceae. You may notice some of your tomato plant’s leaves turning yellow at some stage – read on for some helpful information on why that might happen and how to prevent it. 

Tomato Plant Leaves Turning Yellow: Common Reasons

Here are some common reasons tomato plant leaves may turn yellow:

1. Fungal disease

Yellow leaves on tomatoes could be attributed to fungal diseases. This includes early blight, which is characterized by yellow leaves and small lesions, which could grow larger and eventually take on a bulls-eye look. The fruits are not affected unless the infection is severe. Late blight is more harmful since it starts on the upper leaves; it is recognizable by the large, oily-looking lesions on the leaves and stems. 

Fusarium wilt causes yellowing on one side of the plants and will begin with the older, bottom leaves. The growth becomes stunted and no fruits are produced. 

These fungal diseases are usually treated with a fungicide that contains chlorothalonil. Allow space between the plants for ample air circulation and water the plants properly. 

2. Viral disease

Viral diseases could also cause tomato leaves to turn yellow, including tomato mosaic virus, single streak virus, cucumber mosaic virus, and tomato yellow leaf curl. 

Most tomato viruses are characterized by stunted growth and mosaic leaf patterns. Some viruses may cause malformations like a fern leaf, broccoli-like growth, severe curling, or brown streaks. These diseases are usually spread by pests such as aphids, thrips and whiteflies, or by tools or hands. 

Plants may not survive these viral diseases and there are no chemical controls. The best course of action is usually to discard the infected tomato plants and plant new disease-resistant varieties in a new location or section of your garden. Maintenance of proper pest control and a watering schedule should also be followed.

3. Pest infestation 

Pests can invade tomato plants and may cause yellowing leaves. Common pests include aphids, thrips, flea beetles, whiteflies and spider mites. These can be treated with insecticidal soap or horticultural oil such as neem oil.  

4. A watering problem 

Being overwatered or underwatered can also cause tomato leaves to yellow. To prevent this, soak the plants thoroughly at least once every five to seven days, depending on the soil type and the weather.  Allow the soil to dry up between watering and never allow it to remain soggy. Water the base of the plants carefully, keeping the leaves dry, and ideally only water them in the early morning. 

5. Nutritional deficiencies

Tomato plant leaves may also turn yellow due to nutritional deficiencies, either because leaves are not getting the nutrients they need from the soil, or due to insufficient sunlight. This usually happens on older fruit-bearing plants and may be a result of a lack of nitrogen. You need to do a soil test to determine which nutrients are lacking. Fertilize the plants at planting time and monthly throughout the season. Follow the instructions carefully to avoid overfeeding. 

Homemade compost can keep the soil rich and full of nutrients, preventing the need for fertilizers, especially in organic gardens. Mulching can also conserve moisture. 

Cottonseed meal is also a natural tomato fertilizer that you can mix into the soil at planting time. Its main contents include nitrogen, potassium and phosphorus, as well as calcium, sulfur, magnesium, copper, manganese and zinc. Nitrogen supports the leafy growth of young plants. These nutrients are released gradually for four months. 

Should I Remove Yellow Leaves from My Tomato Plants?

Yes, you can remove yellow leaves from your plants as long as they are below the first set. When most tomato plants reach a height of 12 to 18 inches, it is natural for some of the leaves to turn yellow or start to wither. 

Can Yellow Leaves Turn Green Again?

It is unlikely that yellow leaves will turn green again unless the cause is nutritional deficiency. If this is the case, it can be rectified and the green color may return, although in most cases it is unlikely. 

What Nutrient Deficiency Causes Yellow Leaves?

Nitrogen deficiency causes yellow leaves. Inner, older leaves turn yellow first. The yellowing moves outward and eventually reaches the young leaves. Potassium deficiency manifests as leaf edges turning bright yellow while the inner ones stay green. 

Conclusion 

Tomato plants are very productive and easy to cultivate. They love the sun and are remarkably long-season plants. However, they can also suffer from diseases and infections, some of which can cause their leaves to turn yellow. Common reasons for leaf yellowing may include overwatering or underwatering, as well as nutritional deficiencies. It could also be due to fungal or viral disease or pest infestation. 

Image: istockphoto.com / Rini Indrawati

Cucumber Leaves Turning Yellow

Cucumber Leaves Turning Yellow

If you notice your cucumber leaves turning yellow, there is something wrong with the plant and you need to identify the problem to know how to properly address it. These problems can range from mild to severe, and you should know how to distinguish between them so that you know what actions to take to save the plant. The causes of cucumber leaves turning yellow include nitrogen deficiency, disease, pests, overwatering, the wrong soil, and insufficient sunlight.

If your cucumber plant’s leaves are turning yellow and you want to learn about how to remedy it, keep reading.

Why are my cucumber leaves turning yellow?

Nitrogen deficiency

The leaves on your cucumber plant will turn yellow if it does not have enough nitrogen. You can treat this by giving your plant a fertilizer rich in nitrogen. You can also add a tablespoon of ammonium nitrate to the soil every three weeks if you see that the plant’s flowers have begun to bloom. Make sure you do not overdose your plant with fertilizer because this can damage the plant and its ability to produce fruit.

Disease

Cucumber plants are susceptible to various bacterial and fungal diseases such as verticillium wilt and mosaic virus. For now, there are no known treatments for these two diseases, so any affected cucumber plant will die. The best thing you can do when faced with these infections is to make sure you remove them and take them as far as possible from your healthy plants. Make sure you destroy the infected plants by burning them to make sure they do not infect anything else. 

To better your chances of eradicating these pathogens, make sure you do not plant cucumbers or any other plants of the same family in that same plot of land. Some of these pathogens only thrive in the presence of a specific type of plant, so if they have no possible host, they will have no choice but to die off. This is why rotating crops in your garden is very beneficial.

Pests

There are many types of insects and pests that feed on cucumber plants and can cause the leaves to turn yellow. These include aphids, whiteflies, and spider mites. They feed on the sap of your cucumber plant and will leave the plant to die.

Cucumber plants can tolerate pests for a certain amount of time, but if the pests persist and the infestation grows larger, the plant will eventually succumb.

You can get rid of these pests by using insecticide. Treat the leaves of the plant on a weekly basis or according to the manufacturer’s instructions. Try to only apply the insecticide during the afternoon or early morning, because the heat from the sun may cause the treated leaves to burn.

Another pest that affects cucumbers is the potato leafhopper. They also feed on the sap of the cucumber plant, but they carry a toxin that turns the leaves yellow. These leaves will then drop off until the plant dies.

Another option, if you prefer not to use insecticides, is to use other insects such as pirate bugs, lacewings or ladybugs. These insects do not harm the cucumber plant but do feed on the plant’s pests.

Overwatering

Cucumber plants only need one to two inches of water a week. They can be easily overwatered, just like other plants. If they are overwatered, the roots become deprived of oxygen which can cause the leaves of the plant to turn yellow and wilt. Overwatering, poorly-draining soil, and a pot without drainage holes all contribute to this problem. You can try to loosen the soil or transfer the plant to raised gardening boxes.

Underwatering

Even though cucumber plants do not need that much water, it does not mean that you can just forget to water them for long periods of time. If a cucumber plant does not get the amount of water that it needs, the leaves will turn yellow and wilt. The best way to know if a plant needs watering is to touch the soil in the pot. If it is dry, water the plant, but if it is still damp, you need to wait a day or two before checking the soil again.

Remember that if the weather is warm you need to water the plant more frequently, and if the weather is rainy or cold, lengthen the time between watering a little.

Problems with the soil

Cucumber plants consume a lot of nutrients from their soil. If they do not get their required nitrogen and potassium, their leaves will turn yellow. Cucumber plants need these nutrients to encourage growth and to make sure their new leaves grow out healthy and vibrant. Making sure there is always a nitrogen-rich component in the soil can keep the yellowing at bay. Nitrogen-rich components include coffee grounds, compost and some fertilizers.

If the leaves’ yellow hue is deeper and bronzier, the plant may lack phosphorus. You need to correct this with phosphorus-rich fertilizer before it starts to affect the fruit production.

Not enough sunlight

If your cucumber plant is not getting enough sunlight, the leaves will become yellow and droopy. This is easy to remedy; just transfer the plant to a spot where it can get six hours of sunlight per day.

Conclusion

Yellowing leaves on a cucumber plant are indicative of a problem that should be addressed and resolved immediately.

This change in leaf color can be caused by nitrogen deficiency, disease, pests, over- or underwatering, the wrong soil, or insufficient sunlight.

It is important that you remedy the problem with your cucumber plant as soon as possible, because if you are not careful, this can affect the fruit production not only of one plant, but possibly of all of your cucumber plants.

Image: istockphoto.com / barmalini

Hibiscus Leaves Turning Yellow

Hibiscus Leaves Turning Yellow

Hibiscus leaves turning yellow indicates that there is a problem with the plant that needs to be addressed and remedied before it is too late.

The most common reasons for yellowing hibiscus leaves are overwatering and underwatering. Hibiscus plants typically need plenty of water, especially during the summer, but if you are too generous with watering it can be detrimental to your plant. Not giving the plant enough water can also cause its leaves to turn yellow, so finding the perfect balance is key. Other causes of yellowing hibiscus leaves are lack of nutrients, temperature changes, too much or lack of light, dormancy, wrong location, and pests.

In this article, we discuss each cause and how it can be remedied.

Why are My Hibiscus Leaves Turning Yellow?

Watering issues

When a hibiscus is getting either too much water or not enough water, its leaves will turn yellow. Hibiscus plants need plenty of water, and this need is greater during the warmer months, but overwatering is still very possible and can be destructive to your plant. Ideally, hibiscus plants want their soil to be moist but not soggy. Decrease your watering when the plant is dormant and make sure the soil is just damp enough that it does not dry out. The plant needs to be in a container that has good drainage so any excess water flows out and does not kill the plant’s roots.

Because hibiscus plants like a lot of water, underwatering can be an issue when growing them. Check the soil in the pot regularly to make sure you are not letting it dry out.

Lack of nutrients

If your hibiscus leaves are turning yellow but are not falling off, it may be a sign of nutrient deficiency. This condition is called chlorosis, and can be caused by not providing the plant with fertilizer or due to the pH levels of the soil.

The condition can be remedied by providing fertilizer or by neutralizing the soil’s pH. You can do your own extensive research before doing either of the above, or you can visit a local nursery to talk to a gardening expert before you proceed.

Temperature changes

Hibiscus is a tropical plant in its natural habitat. It is not adapted to the cold, so it needs to be taken indoors when the days start to get colder. If the plant is left outside in the frost, its leaves will turn yellow and fall off.

Drafts can also cause hibiscus leaves to turn yellow and drop off. They do not like hard wind and should be sheltered from it at all times.

Extremely hot weather could also  be the cause, especially if the plant is not getting the water it needs to survive through the elevated temperatures. A hibiscus plant that is too dry will also have leaves fall off. You will need to transfer the plant to a shadier area and make sure you meet its watering requirements to survive the summer, so that it does not die from heat stress.

Light problems

As with water, hibiscus plants also require the perfect balance when it comes to light.

Too much light can result in the leaves getting burned, which can be seen on the leaves as white spots. You can fix this by moving the plant to a shadier spot in your garden or house. Remove the damaged leaves.

If a hibiscus plant does not get enough sunlight every day, its leaves will start to become discolored and begin to fall off. This can happen to an indoor plant that is kept away from a window or nowhere near a source of light. You can help the plant by simply moving it to a sunnier spot in your house.

Dormancy

Hibiscus plants grow during the spring, summer and fall seasons. In the natural cycle of plants, the leaves will turn yellow and fall off by the end of autumn, so do not be surprised. There is nothing wrong with your plant and it is simply getting itself ready for a period of dormancy. Remember that you will need to significantly reduce the frequency and amount of water. This is the time for your plant to get itself ready for the harsh winter conditions.

Wrong location

When your hibiscus plant is dormant, be sure to take it indoors so that it can be kept in a cool, dark place during the winter.

These environmental and location changes may stress the plant, so when its dormancy period is about to end, make sure you ease it into the sun slowly by placing it on a windowsill instead of immediately placing it under the full sun. Water the plant more frequently when the weather starts warming up again. New leaves will soon appear and this is the ideal time to fertilize your hibiscus. Do not be worried when you finally take your plant outside and it starts to turn yellow and look wilted; these are signs of stress due to the changes in the plant’s living conditions. Eventually, the plant will adjust to the outside world.

Pests

Pests like the spider mite can feed on your hibiscus plant and leave it with mottled markings and yellow leaves. If the infestation becomes too much, the plant can become stressed and may even lose all of its leaves.

You can get rid of these pests by spraying the plant with a pesticide or even just some soapy water. Just be sure that you do not overuse the pesticide because that can also cause the leaves to turn yellow.

Make sure you keep the infested plant away from your other plants while it is being treated so that the infestation does not spread to your other plants.

Conclusion

A hibiscus plant’s leaves yellowing is a sign that there is a problem with the plant that needs addressing. You need to be able to distinguish what exactly is causing the leaves to change color before you go about fixing it.

The causes of this leaf discoloration could be overwatering, underwatering, lack of nutrients, temperature changes, too much or lack of light, dormancy, wrong location, or pests.

The faster you are able to identify the problem, the faster you can resolve it and save your plant.

Image: istockphoto.com / kendoNice

Aloe Vera Root Rot

Aloe Vera Root Rot

Root rot in Aloe Vera plants occurs due to excessive watering and low temperatures. It is one of the most common problems encountered by Aloe Vera owners and, if not recognized immediately, can cause the plant to die.

The symptoms of root rot in Aloe Vera are yellow, soft and mushy leaves, soft stems, and black or brown roots. If you identify root rot in its early stages you may be able to salvage the plant, but when the stem is affected, it is usually too late.

In this article we discuss the causes of root rot in Aloe Vera plants, and how to remedy it.

How do you know if your Aloe Vera has root rot?

Because root rot starts in the roots of the Aloe Vera plant, it can be tricky to catch the problem before it becomes worse. You need to be aware of the signs that will alert you to this problem so you can be quick to address it and avoid any further unnecessary damage to your plant.

Often people only realize their Aloe Vera has root rot because they were repotting it, but you can actually tell a lot about the current state of your Aloe Vera just by looking at it.

Inspect your Aloe Vera regularly so you can tell if it has not been growing as rapidly as in previous weeks.

An overwatered plant has leaves that are yellow and withered. Its stem will become more and more exposed at the bottom and it will also look dried up. The root neck will become thin and weak and may break. Even if the stem looks normal but the leaves are soft and mushy, this still points to possible root rot.

Root rot has a distinct smell coming from the pot, which smells like rotten vegetation. If you are repotting your plant, inspect the roots and check for portions that are brown or black. These roots will also feel soft and mushy when touched.

What are the causes of root rot?

Overwatering

Aloe Vera plants are succulents which live in the driest places on earth, with little to no rain. This means that they are used to getting minimal water and storing as much as they can to save up for drought season. They are not used to getting an abundance of water every seven days. They do not like their soil to be perpetually wet because their roots will drown and die. They like soil that is porous and airy so that excess water drains easily and allows their roots to get oxygen.

Root rot develops when the roots drown due to excess water in the soil. This also makes the plant more susceptible to other fungal and bacterial problems.

The best way to know when to water your Aloe Vera is to touch the top inch of the soil in the pot. If it is dry to the touch, you can water the plant.

Cold weather

Aloe Vera in its natural habitat grows in some of the hottest deserts and semi-deserts on earth, so it is understandable for them to be sensitive to cold temperatures. When Aloe Vera is grown in a cold place and watered excessively, it is a recipe for disaster. This is why root rot is more common during the fall and winter seasons. Soil that is both cold and damp is ripe for fungal growth.

This is also why people are advised against using cold water to water succulents, even in the summer, because you do not want to give fungi and bacteria any reason to survive anywhere near your plant’s roots. Stick to watering your aloe vera with room-temperature water.

Wrong size container

If you are keeping the aloe vera plant in a container that keeps the roots bound and tight, the water will have a hard time draining to begin with, and if you then overwater the soil, it will be all the more conducive to fungal and bacterial breeding. Crowded roots will also cause the roots to suffocate and die easily. If you see the roots forcibly growing out of the drainage holes at the bottom of the pot, it may be time to transfer the plant to a container that will be more accommodating to its size.

Reusing unclean pots

When you have pots that were used before for Aloe Vera plants that had root rot, you need to be careful about reusing them. Of course it makes sense to reuse pots, especially if they still look sturdy and new, but what if that was where your diseased Aloe Vera grew?

You need to properly disinfect all your old pots before using them again. Make a three percent hydrogen peroxide solution and clean the old pots with it. This will kill any fungi and bacteria left in the pot. 

How do you prevent Aloe Vera root rot?

Here are some tips to remember to prevent and avoid root rot:

Do not overwater

The fungi that cause Aloe vera root rot thrive in a cold and wet environment, so try to lessen this possibility by making sure you do not waterlog the soil in the pot. Using well-draining succulent soil mix in a pot with drainage holes at the bottom can really help keep root rot at bay.

Keep to a watering schedule

Aloe Vera’s watering requirements differ according to whether it is in the growth phase or dormant, and depending on the weather. If you have a hard time figuring out the frequency it prefers, you can always check the soil by sticking your finger into the top inch to feel whether it is dry. If dry, you can water the plant, but if it is still damp, wait one or two more days and check the soil again.

Plant rotation

Usually, a certain pathogen will only grow around a specific kind of plant. So if you have an outdoor garden where the Aloe Vera is constantly becoming diseased, try planting a different plant in that plot the next year and try not to plant Aloe Vera for one or two years. Diversifying your plants may help clear out the pathogens in your soil.

Try loosening the soil

If you suspect overwatering to be the cause of the root rot, try loosening the soil around the Aloe Vera with a trowel so the soil becomes aerated and allows the water to drain more effectively.

Conclusion

Aloe vera plants are durable and hardy plants that are very easy to care for. One of the most common problems with them is root rot. This is caused by overwatering, cold weather, using a pot that is too small, and reusing old pots that still have pathogens in them.

If you are able to establish a watering schedule that works, make sure you do not expose your plant to winter cold, plant the aloe in an appropriately-sized pot, and wash old pots before reusing them, it should be very easy to grow these beautiful succulents without root rot.

Image: istockphoto.com / szefei

Bamboo Turning Yellow

Bamboo Turning Yellow

If your bamboo’s leaves are turning yellow, it can be due to something as benign as the leaves naturally yellowing as part of the plant’s life cycle. But there are other reasons for the change in color that may be cause for concern and will need to be addressed and remedied as soon as possible to avoid any lasting damage to your plant.

Yellowing of bamboo leaves can be due to a lack of nutrients, overwatering, underwatering, or stressful growing situations.

In this article, we will discuss the other signs to look out for when bamboo leaves turn yellow, what they mean, and how to remedy them.

Is bamboo leaf yellowing normal?

Bamboo is an evergreen plant, but it is normal for it to get some yellow leaves and culm. You just need to be able to discern what is normal from what is abnormal.

Bamboo sheds its old leaves in order to grow new ones, just like any other plant. These old leaves will die and fall off because the plant will cut off their access to nutrients in favor of other parts of the plant, like the new leaves. Bamboo also loses its leaves gradually and will replace them with new ones, so it is normal to see a mix of green and yellow leaves on bamboo most of the time. Springtime is when you naturally see the most yellow leaves on bamboo, because this is when it replaces the most leaves at one time.

If the leaves turn yellow and fall off, but do not get replaced with green ones, this is indicative of a possible problem.

Is bamboo culm yellowing normal?

It is possible that the bamboo you have is a yellow variety. These kinds of bamboo start out green and turn yellow as they mature. Even if your bamboo is not a yellow variety, its yellowing can still be normal. Do not worry about younger culms turning yellow; if they distract you too much you can always just trim them. 

Which bamboo species have more yellow leaves and culm?

The bamboo species which produce more yellow leaves and culm are the Phyllostachys aurea, or the golden bamboo, and the Phyllostachys edulis, or Moso bamboo. These plants will lose most of their leaves in the spring.

One of the most common bamboos in the United States, the golden bamboo grows straight and strong. The Phyllostachys edulis, or Moso bamboo, is not as common in the United States, and is usually used to make bamboo threads.

How do I know if the yellowing of leaves on my bamboo is not normal?

When fresh bamboo leaves are turning yellow

If you are able to identify which of the bamboo’s leaves are new, and if those are the leaves that are turning yellow, this is indicative of a bamboo plant with an iron deficiency. This usually happens in places where the soil is alkaline. Most plants are fine with any soil pH, but if they could choose, they would prefer acidic soil. You can buy a pH testing kit for your soil so you can check it whenever you need to.

If the soil is alkaline, you can use compost containing pine needles, oak leaves and coffee grounds. Mix this with your soil and it should do the job.

You could also add an acidic plant food that contains iron. Just make sure you do not overdo it with the fertilizer.

You can also just add sulfur to the soil to make it more acidic. Add some into your soil every time you think it is becoming alkaline.

When older bamboo leaves are turning yellow

If you are able to tell which leaves are the older ones, and if they are turning yellow and not dropping off, you may need to apply fertilizer that contains nitrogen. The soil has probably run out of nutrients for the bamboo. It is best to give fertilizer when the leaves start to turn yellow.

When the bamboo leaves turn yellow with brown tips

If the leaves on your bamboo plant are turning yellow but with brown tips, this could mean that it is being underwatered and that you may need to water them more frequently.

Bamboo plants love water and if you cannot water them manually as much as they need you to, you should consider setting up a drip irrigation system. It will also help if you leave some of the fallen leaves on the soil, because they can help keep the soil moist.

When the bamboo leaves have pale yellow spots

If your bamboo’s leaves have yellow spots, you may have a pest problem. This is most likely a mite infestation. These insects are very small and difficult to spot with the naked eye, but if there are enough of them, they can deplete the nutrients from a bamboo’s leaves. You can try to get rid of these insects by using a pressure washer and insecticides. Neem oil is also effective against the mites.

When both the leaves and culm are yellow

If you have a watering schedule that you follow but the soil always seems to be soggy, there might be something wrong with the soil. Bamboos like their soil well drained and aerated.

You can try to add compost to the soil to make it drain better, and this will also provide more nutrients for the plant.

Conclusion

Bamboo leaves turning yellow can be something as benign as the normal cycle of the foliage, or it can be due to a more pressing concern that will need to be remedied.

The common causes of yellowing bamboo are iron deficiency, soil pH, lack of nutrients, watering issues, pests, and soil problems.

If you are able to identify the problem in its early stages and remedy it quickly, the bamboo will bounce back to its original vigor in no time.

Image: istockphoto.com / Peerayot

Why Do My Succulents Keep Dying?

Why Do My Succulents Keep Dying?

Succulent enthusiasts prefer them because they are so easy to care for and only need minimal attention. However, succulents may still be prone to pests and diseases. Some signs of a dying plant include withering and yellowish leaves, as well as mushy stems.

In this article, you can get to know the reasons your succulents keep dying and how to prevent it from happening again.

Why do my succulents keep dying?

These are the reasons succulents keep dying despite your care and attention:

1. Through a bottom-up death caused by waterlogging a succulent’s roots. 

Succulents suffer a bottom-up death when the soil stays too moist for too long and the roots are being overfed with water. As a result, the roots start to rot until the rot reaches the actual plant, from the bottom up.

Since these plants come from dry regions, they are well-adjusted to waterless conditions with the help of their fleshy leaves and stems. Inversely, their roots are shallow and always seeking water, and could end up absorbing too much. 

Plants that absorb too much water turn yellowish, become transparent, and eventually black spots start to appear that could potentially kill them.

2. Through a top-down death caused by stagnant water on top of the plant. 

This usually happens when you water the top of the plant instead of focusing on the soil. To avoid a top-down death, always focus on watering the soil. If water sits stagnant for about three days on the top of the plant, root rot will start to develop, which could ultimately lead to the death of the plant.  

3. Due to a bacterial or fungal disease.

Succulents can become afflicted with bacterial or fungal diseases due to wet soil that comes into contact with air-borne fungal spores or bacteria. 

4. If exposed to too much sunlight. 

Succulents can survive in harsh conditions, especially hot temperatures, because of their fleshy leaves and stems. However, constant exposure to direct sunlight is another story. This could lead to extreme sunburn resulting in unsightly scorch marks, especially on the leaves. 

5. If there is not enough sunlight.

Succulents, like all other plants, need sunlight to maintain their great shape and vibrant colors. When they do not get enough of it, they tend to stretch out to seek light sources, resulting in etiolated plants.

Without sufficient sunlight, plants will not be able to perform photosynthesis to fuel their metabolic activities. 

6. Due to the planters or containers used.

Certain containers, such as glass ones, are not ideal succulent planters as they do not have drainage holes. Water tends to stagnate in the soil, resulting in root rot. Glass pots could also burn and kill your plants, since glass could bend and magnify direct sunlight.

Plastic planters could also endanger succulents, as they do not have good airflow and could suffocate the soil.  

7. Due to the type of soil used for the plants. 

Succulents thrive in fast-draining soil that does not soak up moisture. The ideal soil for these plants does not stay wet too long, which makes succulent and cacti mix the perfect soil for them. Traditional soil could kill these plants since it retains moisture and stays wet for longer. 

8. Due to a cold climate or extreme temperatures.

The extreme cold of winter months could kill succulents, so the plants should be placed indoors or in a greenhouse. Since the plants are more adapted to hot and desert areas, a cold climate could lead to frost and rot.

Plant growers need to be aware of their hardiness zone, so they can identify what type of succulents to care for.

Succulent enthusiasts may also opt for cold-hardy succulents that can tolerate cold temperatures. Here are some examples of such plants:

  • Red yucca 
  • Hens and chicks 
  • Queen Victoria agave
  • Thompson’s yucca
  • Broadleaf Stonecrop 
  • Aloe Blue Elf 

Succulents also tend to become shriveled and sickly because of the presence of pests like mealybugs, aphids, spider mites and fungus gnats. Check the plants regularly for any signs of pestilence and spray them at the earliest indication with a mixture of isopropyl rubbing alcohol and water or a soapy water solution. 

How to fix dying succulents

You can fix dying succulents by making sure the plants are in a well-draining medium. Containers or planters should have drainage holes so the soil does not stay moist. Excess water causes decay and root rot and encourages fungal disease. Make sure there is adequate sunlight for your plants to prevent etiolation that could lead to stretchy and weak succulents.

Conclusion 

Succulents can get by with minimal care and maintenance, but they also deserve prompt attention. They are prone to disease and could eventually die due to overwatering, underwatering, or being deprived of sunlight and nutrients. Make sure that your succulents are planted in containers or pots with drainage holes, in fast-draining soil. Cold and freezing weather can also harm the plants, so they should be placed indoors to avoid frost and root rot.

Image: istockphoto.com / Boyloso

Cactus Turning Yellow

Cactus Turning Yellow

Cacti are a plant collector’s delight due to their miniature sizes and shapes. They are great indoor plants and very easy to care for, as they can thrive despite having just enough moisture in the soil. However, they are also prone to disease and may turn yellow for various reasons.  

Cactus Turning Yellow: Common Reasons 

These are the common reasons cactus plants turn yellow:

1. They are either overwatered or underwatered.

Cacti are hardy desert plants, but they also need water to thrive.  They should be watered at least once a week to stay healthy. They reserve some of the water in their water storage cells located in their stems. However, once they have used up the reserved water they may look shriveled and will start to turn yellow from the base upward. 

Solution: Water your plants often and use a stick or your finger to check if they need more water. If the stick comes out dry from the soil it means you have to water your plants again. Overwatering could prevent proper aeration, and cactus plants turn yellow when air does not get to the roots. It can also cause root rot, so you should only water cactus plants about once a week. 

2. There is insufficient light.

Adequate sunlight is essential to the growth and survival of cacti. Insufficient light could lead to etiolation, a process whereby plants grown without adequate sunlight grow smaller leaves and extended stems in search of light. Some of the plant parts could turn yellow due to insufficient light. 

Solution: Place the cactus plants where there is adequate sunlight, like on a windowsill, but make sure the light is just enough, to prevent scorching. Yellowing may also be due to sunburn, even though cacti are hardy desert plants. Some varieties only need partial light and store-bought cacti are not meant to be exposed to bright light. If the plants turn yellow from the top, provide partial shade so they can recover. 

3. The soil type is incorrect. 

Cactus plants thrive in areas where there is sandy soil that properly drains the excess water. For your indoor cactus plants, make sure you are purchasing the right type of soil, since some florists tend to use clay soil which retains water. Excess water could result in root rot and nutrients will not be transported from the soil. Your cactus plants will start to turn yellow. 

Solution: Mix sandy soil into the pots to improve the drainage. Make sure there are drainage holes at the bottom of your planters to avoid stagnant water in the soil. 

4. There is a pest infestation.

Pests such as mealybugs, spider mites and fungus gnats tend to invade cactus plants and other succulents because of their juicy sap. They leave scars and blemishes on the plants that could cause yellowing. 

Solution: Eradicate these pests by spraying some insecticide on your plants. You may also opt for safe alternatives like rubbing alcohol, liquid soap and neem oil. 

5. Due to inadequate nutrients. 

Cactus plants may also turn yellow because of inadequate nutrients. When plants cannot absorb nutrients from the roots, they tend to change color and become malnourished. The culprit is usually root rot or harmful bacteria. 

Solution: Check the roots of your plants to see if they can still be saved. Scrape off rotten roots and replant the cactus in fresh soil. You may add manure or compost to boost the nutrients in the soil.

Cacti may also turn yellow due to stress, such as when their pots are too small. Place the plants in bigger pots and invest in proper well-draining soil as well. 

Why is my cactus turning brown?

Cactus plants may also turn brown. This is mainly due to corking, and happens naturally when the plants mature. It starts from the base of the plant where it meets the soil, and moves slowly upward or may stay in one spot. Corking gives cacti a woody appearance, but they are generally firm to the touch and healthy. 

Cactus plants that are brown but also soft to the touch or mushy could be rotting or have diseases. This usually happens when the plants’ soil is constantly wet, since rot settles from the roots and spreads to other plant parts. 

Fungal diseases and pest infestation could also turn the plants brown. The discoloration happens in various parts of the plant and they become soft and mushy. 

Conclusion

Cactus plants add character and aesthetic beauty to homes and offices. While they are hardy plants like other succulents, they are also prone to disease and other issues which could make them yellow.  The reason may be due to overwatering or underwatering, or inadequate sunlight. It may also be due to pest infestation, stress or inadequate nutrients. 

Image: istockphoto.com / Dmitriy Sidor

How To Tell If A Plant is Overwatered or Underwatered?

How To Tell If A Plant is Overwatered or Underwatered?

Droopy and yellowing leaves are a cause for concern for plant owners. It is an indication that something is not right with the plants. Despite a regular watering schedule, you may notice that your plants’ health continues to deteriorate. This article will help you determine whether your plants are overwatered or underwatered. 

How To Tell If a Plant is Overwatered or Underwatered

You can tell whether a plant is overwatered or underwatered by feeling the leaves and the soil. Underwatered plants are dry and crisp to the touch, while overwatered plants are soft and droopy. Underwatered soil is dry and crusty, and overwatered soil is soggy. Either of these situations could be equally harmful to your plants, so there should be a fixed watering routine with just the right amount of water. 

What are the symptoms of overwatered and underwatered plants?

These are the symptoms of  overwatered and underwatered plants: 

  1. Wilting – This is a symptom of both over- and underwatering, so always check the soil to determine which it is. Moist soil means it was due to overwatering, but dry soil means the wilted plant was overwatered.
  2. Browned edges – Like item one above, this is another symptom that could indicate either problem. Determine the cause by feeling the texture of the leaves. If they are crisp and light they are underwatered, but if they are soft and limp they are overwatered. 
  3. Yellowing leaves – If the leaves are yellowing but also curling on the lower part it suggests underwatering, while yellowing and falling new growth is an indication of overwatering. To determine the real cause, check whether or not the soil is moist. 
  4. Foul odor emanating from the soil – A foul odor from the soil is an indicator that the roots beneath are rotting because of overwatering. 
  5. Mildew, mold or fungal growth – This is an indication of  overwatering. 
  6. Slow and stunted growth – If plants are growing slowly and unable to flower, it means that they are underwatered. 
  7. Brittle and  crisp stem – If stems are snapping and look brittle, your plants may be underwatered since healthy stems are strong and flexible. 
  8. Soft and mushy stem – This indicates the presence of root rot in the soil due to overwatering. Root rot is characterized by slimy, mushy, black, grey or brown roots.
  9. Soil pulling away from the planter’s sides – This is an indication of underwatered plants. 
  10. Dropping leaves – This is an indication of either overwatering or underwatering, so always check the moisture of the soil. 
  11. Blisters on the leaves – The presence of blisters on the undersides of leaves may be an indication of burst plant cells due to overwatering. 
  12. Pests – The presence of pests could indicate over- or under watering. Fruit flies and fungus gnats like moist conditions, suggesting overwatering, while spider mites prefer dry conditions, which may indicate underwatering. 

How to avoid overwatering

These are the things you should do to avoid overwatering:

Always check the soil first.

Make sure to check each plant’s soil individually before watering it. You can do this by pushing your finger about two inches down into each planter to test for moisture. If the soil is dark and there is a bit of moisture, do not water. Plants only need water when the soil is light-colored and dry, although some plants may also have specific preferences, so it is always best to learn more about the plants you are cultivating. 

Avoid watering the leaves. 

Leaves that are often splashed with water could develop mold, so avoid getting leaves wet during watering. See to it that you water from the base of the plant.

Water the plants during daylight hours. 

Ideally, plants should be watered when the sun is out so the moisture will evaporate easily. Watering at night time allows the soil to stay moist for a longer period, and this could encourage rot and fungus. 

Ensure that planters and pots have drainage holes. 

Drainage is vital to prevent overwatering of your plants. See to it that your plant  pots have good drainage holes so excess water won’t get trapped. Overwatering could lead to a lack of oxygen. Also, root rot and fungus thrive in soil that is not drying out.

What should you do if you have overwatered your plants?

Here are some tips on what to do if you overwatered your plants:

  • Be sure to remove any decaying leaves. 
  • Always refresh the roots and soil. 
  • Treat your plants with fungicide if there are signs of fungus or root rot. 
  • Wait for a week before watering the plants again. 

Conclusion 

Proper watering is essential for plants to survive. Plant owners sometimes have the misconception that consistent watering is the best option for their plants. To tell if a plant is overwatered or underwatered, the best thing to do is check the leaves and the soil. 

Underwatered plants are crispy and dry to the touch, with crusty soil.  Meanwhile, overwatered plants are soft and droopy and the soil is soggy. 

Image: istockphoto.com / Aleksandra Pavlova

Yucca Plant Diseases

Yucca Plant Diseases

The  most common afflictions in yucca plants are caused by fungi and insects. 

The usual suspects that cause discoloration on yucca leaves are Coniothyrium, Sclerotium, Cytospora and Cercospora. The spores of these fungi are spread from one leaf to another by water splatters, which is why overhead watering of yucca plants is not advisable.

The yucca plant

The yucca plant is part of the Liliaceae or Agavaceae family, and is native to the North American desert regions. It is a resilient plant that can withstand different soil conditions and even temperate climates that are far different from their desert home.

There are over 20 varieties of yucca and while they may look different from one another, they have similar characteristics that help you identify them as part of the yucca family.

Color

The leaves of the yucca plant are green, but they can range from pale blue-green to dark green. Some types of yucca can be variegated, meaning that they have yellow, white, or cream longitudinal stripes along their leaves. Most yuccas usually have the younger and more vibrant leaves at the top of the plant while the browning and dying leaves are closer to the base of the plant.

Shape

Yuccas are known for their signature leaves that look like swords with their pointed tips. The leaves can measure between one to three feet long. Most yucca plants have leaves that form a rosette starting from the base. The yucca plant’s trunk makes it easier to differentiate it from other plants that may be confused with it, such as agave plants.

Texture

The leaves of the yucca plant are thinner and more pliable than agave leaves. They are leathery and stiff and have serrated edges that stop at the tip of the leaf. The leaf spine is thinner than that of the agave. The tips of the yucca plant’s leaves can become frayed into filaments and hang from the edges of the leaves.

Yucca plant diseases or pests

Cercospora leaf spot

This condition is caused by the Cercospora fungus, which causes rust-colored spots on the yucca plant’s leaves. These small spots can grow to be a quarter of an inch wide and turn brown. You can keep the spores of the fungus from spreading to other leaves by watering the plant from the bottom, and avoid overhead watering. Make sure you remove all of the affected leaves and burn them. This will kill the spores of the fungus so that it does not spread to your other plants. You can also use a fungicide that contains thiophanate methyl.

Southern blight

The disease is caused by the Sclerotium rolfsii fungus, and while it attacks the entire plant, its effects are most noticeable on the stem. This fungus causes white threads, or mycelia, to grow on the plants and on the soil. These mycelia will form a fan shape. Eventually, as the disease progresses, circular lesions will form in the plant, called sclerotia. They will start out as white spots but will become brown as they mature towards being able to produce spores.

You can take care of this disease by cutting off all of the affected areas, bagging them, and then burning them. This keeps the spores from spreading to your other plants.

Gray leaf spot

This disease is usually observed on the Spanish bayonet yucca and is caused by the Cytospora fungus. In the early stages, the disease will manifest as graying and browning of the tips and edges of the leaves. Over time, the leaves will start to die and develop lesions three inches in diameter. As with other fungal diseases, make sure you do not water the yucca from overhead to avoid spreading the spores through water splatter. Remove any infected leaves and debris from the pot and burn them. You can also use fungicides to kill the fungi and its spores.

Brown spot

This yucca plant disease is caused by the Coniothyrium concentricum fungus and is characterized by brown spots on the plant’s older leaves. These spots usually have a purple border and the older ones even look black. Sometimes these lesions grow into each other and fuse, which ends up affecting entire sections of the leaf.

You can prevent brown spots by only watering the yucca plant from the bottom and never from the top. Make sure you remove all the infected leaves and burn them to kill the fungus and its spores. You can also use fungicides that contain both chlorothalonil or mancozeb.

Scale insects

One of the most common pests that can infest your yucca plant is the scale insect. These pests can also cause black spots to appear on your plant’s leaves. The black spots appear after the scale insects have fed continuously on the sap inside the plant’s leaves.

Scale insects can be eradicated by wiping the leaves down with a cotton ball soaked with rubbing alcohol. You can also use pesticides designed specifically for these types of insects. Because these insects go through a complicated life cycle, you have to reapply the alcohol several times to be sure that all of the insects have been killed and will not reinfest the yucca plant.

Systemic pesticides, which are those that make their way into the vascular system of the plant, are also very effective against scale insects: they will die after feeding on your plant.

You can make a homemade horticultural soap by mixing water, rubbing alcohol and dish soap into a spray bottle. Spray the solution on your yucca plant once a week for a month, and that should take care of these pests.

Conclusion

The yucca plant is most susceptible to fungal diseases. These are spread when infected leaves touch other leaves or through the spores being dispersed onto other plants when the infected plant is watered from overhead.

The most common fungi that infect yucca plants come from the families Cercospora, Sclerotium, Cytospora, and Coniothyrium. They can all usually be sorted out by using a fungicide. Make sure you remove all of the infected leaves and debris and burn them to kill all the spores.

Image: istockphoto.com / AdamRegan

How to Revive an Aloe Vera Plant?

How to Revive an Aloe Vera Plant

You can revive an Aloe vera by directly addressing what is causing it to die. Aloe vera is a very hardy and resilient plant, and as long as you cater to its basic needs, it will thrive in your home.

To learn more about how to revive your aloe vera plant, keep reading.

Common causes of a dying aloe vera plant

Changes in temperature

When the temperature in Aloe vera’s environment drops below 50 degrees Fahrenheit, it can turn brown and slowly die. In temperatures anywhere above 90 degrees Fahrenheit, Aloe vera will also turn brown and die.

It is imperative that you take the plant indoors if the temperature outside becomes too cold or too hot.

Aloes come from some of the driest places on earth, and the closer you are able to simulate the living conditions they would have in their natural habitat, the happier they will be.

If you have Aloe vera planted in your outdoor garden, you can protect it from the cold using cloth.

The plant is not getting enough sunlight

Aloe vera plants love the sun and need between four to six hours of it every day. But that does not mean that you should just leave the plant outside in the direct sun for the whole day. It will burn and suffer sun damage.

You can remedy any damage by moving the plant into a shaded spot. If you have an indoor plant that you want to transfer to the outdoors, do not place it immediately under full sun. You need to let the plant adjust by gradually exposing it to more and more sunlight every day until it is able to adapt.

The plant is overwatered

Succulents, in general, are very sensitive to overwatering. When the plant takes in too much water, the leaves will turn yellow and droop because of the weight of the water. It is often impossible to remedy an overwatered plant whose leaves and stem are affected.

You can correct overwatering by always checking whether the soil around the base of the plant is dry to the touch. If the top inch of soil is dry, you need to water the aloe, but if the top inch of soil is damp, you should wait one or two days and check it again.

The plant is underwatered

We know that Aloe vera plants can survive with little water, but that does not mean they should be left for long periods with no water at all. An underwatered Aloe vera looks brown, dry and withered.

Fortunately, reviving an underwatered Aloe vera is simple. Just soak the soil thoroughly with water until you can see the excess water flowing through the drainage holes at the bottom of the pot. Most Aloe vera only need to be watered once every seven to ten days, so check the soil in the pot seven days after its last watering.

If the top inch of soil is dry, it is time to water the plant, but if the soil is still damp, wait one to two more days and check it again.

The wrong type of soil was used

Aloe vera plants, like most succulents, like their soil to be a bit sandy because this is the kind of soil they would have in their natural habitat. If you use normal gardening soil for your succulents, it will not drain as quickly and will retain a lot of water, which puts the plant’s roots at risk of root rot.

When the plant’s roots are drowning in water they will die, and the sickness will travel up into the stem and the leaves until the whole plant dies. If you make a succulent soil mix with gardening soil, perlite and sand, the water will drain quickly allowing the roots to dry out and take in some air.

Aloe vera does not really need that many nutrients from the soil, but regular watering can wash out essential nutrients from your plant’s soil, so it is still helpful to fertilize your aloe once a month, especially during spring and summer.

The pot does not drain well

Even if you use well-draining soil for your Aloe vera, the plant is still going to become overwatered if the pot it was planted in has no drainage holes at the bottom. Succulent plant pots need to have drainage holes in order to avoid root rot and fungal and bacterial problems due to overwatering.

You can try using clay or terracotta pots instead of plastic and metal, because the former are made of porous material that helps get rid of the water in the soil much faster.

The plant has pests

Another reason your Aloe vera may be struggling is because of pests. These insects can cause the leaves to turn brown.

The most common pests afflicting Aloe vera are scale insects, spider mites, and mealybugs. Thankfully you can get rid of them using certain insecticides. If you do not want to use chemical sprays, you can take a cotton ball with rubbing alcohol and wipe down each leaf on the plant. You might have to do this once a week for a month to make sure that all the insects are killed.

Exposure to chemicals

Your Aloe vera may also be browning due to exposure to chemicals. It can be due to a herbicide from a neighbor drifting through the wind, or the plant getting accidentally splashed with a strong cleaning agent. There really is not much that you can do to the affected areas on the leaves, so you can just cut them off.

Conclusion

Reviving an aloe plant successfully is going to depend on your ability to address the cause of your plant starting to die in the first place.

Your aloe plant may be struggling because of changes in the temperature around it, not getting enough sunlight, being overwatered, being underwatered, being in the wrong soil or the wrong pot, being afflicted by pests, or exposure to chemicals.

Fortunately, these problems are quite easy to remedy and your Aloe vera should be able to bounce back with no problem.

Image: istockphoto.com / Sundaemorning

Guppy Aquaponics

Guppy Aquaponics

Guppy aquaponics has the benefit of allowing you to cultivate herbs and vegetables while raising colorful, hardy fish. The guppy fish, also known as the rainbow fish or million fish, is a popular species of live-bearing freshwater aquarium fish. This widely distributed tropical fish originally comes from South America and the Caribbean, and could improve the success of your aquaponics system provided you have a full understanding and knowledge of the species. 

Guppy aquaponics: Things you need to know 

Interesting facts about guppy fish 

Scientific name: Poecilia reticulata 

Family: Poeciliidae 

Life expectancy: two to three years 

Adult size:  two inches  

There are about 40 species of guppy fish, the most popular ones being the common guppy and the Endler guppy, which is closely related to the common guppy. The Endler guppy has a peaceful nature and its colors are mostly red, green and silver. It loves warm water, while the common guppy likes cold water with a strong flow.  

The female Endler guppy can grow up to 1.4 inches long, while the male stops growing at one inch. Domestic guppies are more colorful and have larger bodies than their wild counterparts.  Male guppies have more vibrant colors than females, and some have short, rounded tails while others have V-shaped, elongated tails. The tail fins have a marbled or striped appearance and the fish may have one or two colors. 

Always stick to mainstream varieties of guppy fish with well-established lineages. If ever you breed two different strains, the mix can produce surprisingly great colors. 

The best temperature range for guppies is around 72 to 78 degrees Fahrenheit. They can tolerate fluctuations in temperature. It is also important to maintain a pH between 6.7 and 8.5. 

Guppies mix well with other fish species since they are peaceful and easy-going community fish. You can keep them with other live-bearing fish like mollies and platys; other great tank-mates include the zebrafish. However, some aquaponics enthusiasts prefer a guppy-only tank. 

Guppies are low maintenance and great beginner fish. You may need a large tank as they are very active, and they enjoy tanks with soft decor items and plants.  

It is ideal to separate males and females and place them in different tanks. The females can store sperm for multiple spawnings, even after separation. To keep unwanted spawning to zero, it is recommended to use two separate tanks. 

Guppies are omnivores and they are generally fed with commercially available feeds like micropellets, which hold more nutrients than flakes. You may opt to add vegetables or frozen diets, but this should just be once or twice a week. Feed your fish at least once or twice a day, depending on the tank’s temperature and other tank dwellers. 

Start with a bit of food and when the fish have consumed it, add just a little bit more. Repeat the process for a few minutes as you check that your fish are not sick or acting strangely. 

Most beginner hobbyists and aquaponics enthusiasts usually start with only one female guppy. It only takes one spawning for a few generations to be born, since female guppies can store sperm. It is ideal to divide male and female guppies to prevent over-stocking. Females can give birth to 50 to 100 wiggling fry per birth. 

The newborn fry is usually eaten by other fish, so it may be better to put them in a separate tank or breeding box. You may notice more fish with congenital abnormalities, such as crooked spines or shortened life spans, after breeding many generations of the same population. Inbreeding is a common occurrence, which could also add more diversity. 

Can you eat guppies?

Yes, technically you can eat guppies but they are so small that it would be very hard to clean their insides before consuming them. You may contract potential diseases if you do not cook guppy properly, because bacteria thrive inside the fish. You would also need to consume a considerable number of fish, so it is unlikely to be a viable food source for the whole family. 

How long do guppies live?

The average guppy fish only lives up to two years in the wild, but in an aquaponics system they can thrive for as long as five years. These fish reproduce very quickly and are also easy prey for many other fish due to their small size.

Conclusion 

Guppy aquaponics is a great way to match hydroponics with aquaculture and establish a sustainable method of consumption and income. Guppies are a popular aquaponics option as they are colorful, hardy fish that get along well with other fish such as mollies, platys and zebrafish.

Image: istockphoto.com / Gerlando Lo Savio

Bamboo Plant in Bathroom

Bamboo Plant in Bathroom

Although bamboo varieties do exist that can be grown indoors, like the Chimonobambusa marmorea, the most popular bamboo plant, which is kept in bathrooms, is actually not a bamboo plant at all.

The Lucky bamboo plant, or Dracaena sanderiana, does well when kept in the bathroom because it thrives in areas with low light. This plant can also be kept in a bowl of water if it is still quite young, and it helps give your bathroom a very zen and oriental feel that will help you relax while you take your bath.

Lucky bamboo plant

The lucky bamboo plant, or Dracaena sanderiana, is native to the countries of Southeast Asia. This plant has been used in Feng Shui for over 5,000 years by the Chinese. This makes the lucky bamboo plant a popular gift between families and business partners. Another reason the plant is so popular is because it can be bent and shaped into different designs.

This plant is also low maintenance and very easy to care for, which is why a lot of homes and even offices have them. If the lucky bamboo is grown in water, the water just needs to be changed once a week, and if it is planted in potted soil, the soil should be damp. Never let the soil become dry, but also do not water it too much. They prefer indirect light with a room temperature of 60 to 90 degrees Fahrenheit. Remember that these plants come from the rainforests of Asia, so simulating those living conditions is best.

How suitable is a bamboo plant for the bathroom?

Size

There are many different varieties of bamboo, which means they also come in a wide range of sizes. Some bamboo can reach up to 98 feet tall in nature. They spread using underground rhizomes, resulting in bamboo clumps. These rhizomes can be pruned to keep the bamboo from spreading too much.

Keeping bamboo small is important, especially if you wish to keep it indoors. They grow quite fast and they will take over your house if you do not keep them under control.

Humidity

Because these plants are native to rainforests, they love being in a humid environment. So, you should remember to spray the bamboo with water everyday, or you can choose to place a pebble tray below your bamboo to keep the humidity high around it.

If you are keeping the bamboo plant in the bathroom, you might not need to do either of these things since the bathroom is already pretty humid as it is.

Temperature

There is a reason bamboos are often used as a metaphor for resilience. They are very adaptable to different weather conditions. Even if they feel most at home in a tropical climate, some bamboos are also known to survive mountain and desert conditions.

Bamboo species such as Fargesia and Phyllostachys can even tolerate temperatures as low as -30 degrees Fahrenheit.

Due to the bamboo’s hardiness, the normal temperature in your bathroom should be fine for your bamboo.

Light

Bamboo is very adaptable when it comes to the light it needs to survive. They do fine in either direct sunlight or in low light situations. This makes them great choices for the bathroom.

Bamboo like the Pseudosasa japonica, Pleioblastus viridi-striatus, and the Chimonobambusa marmorea can thrive in moderate light levels when potted.

Examples of bamboos that do well in low light are Indocalamus tessellatus and the Indocalamus latifolius.

Water

The most crucial factor when growing bamboo is water. They want their soil to be damp almost all the time. If you allow the soil to become dry, the leaves on the bamboo will curl to minimize evaporation and conserve water. The moment you water the bamboo, the leaves will rehydrate and unfurl.

Can you put the lucky bamboo plant in the bathroom?

Yes, you can put the lucky bamboo plant in the bathroom, because it is not sensitive to low light conditions. It can grow either in soil or just in water, so if you do not want soil in your bathroom, you can put the lucky bamboo in a vase or bowl of water. Just place some pebbles in the container so the bamboo can root. Always check if the plant still has water so that it is always hydrated.

What are other plants that do well in the bathroom?

Orchids

Orchids do well both indoors and outdoors, depending on the species. Their beautiful flowers add a lot to the decor of a bathroom. They tend to flower in a high humidity setting, which a bathroom has.

Orchids often have a reputation for being difficult to grow because they seem delicate and temperamental, but put them on the windowsill of the bathroom where they get exposure to indirect sunlight, and the orchid should be fine.

Spider plants

This plant also does well in a dimly-lit room, which a bathroom often is. This is a great choice for the bathroom since it has the ability to remove impurities from the air. These plants also reproduce by sprouting new buds which can be repotted. They only need to be watered twice a week, and should be placed in front of the bathroom window with indirect light exposure.

Aloe vera

This succulent is one of the most popular houseplants because of how easy it is to care for. All it needs is to be situated in a spot near a window. This plant is known in many cultures as a miracle plant because of its multiple health benefits.

Conclusion

There are many different varieties of bamboo and some can grow to be up to 100 feet tall, while others can be small enough to keep as indoor plants.

While there are some true bamboo plants that can be grown in your bathroom, the most popular “bamboo” plant is, in fact, not a part of the bamboo family.

The lucky bamboo plant is a native plant of the rainforests of Asia and has been regarded as great for Feng Shui by the Chinese because of the good fortune it brings to whoever it is gifted to.

Lucky bamboo makes a good bathroom plant because it does not need a lot of sunlight to thrive. It can be planted in soil or in a bowl with pebbles and water. It is very low maintenance and can add an aura of zen and tranquility to your bathroom.

Image: istockphoto.com / asiantiger247

How to Care for a Potted Basil Plant?

How to Care for a Potted Basil Plant

The three most important things for a basil plant owner to remember are to water the plant regularly and consistently, harvest the leaves often to encourage growth of new leaves, and to prevent flowering by pruning the plant, because the basil leaves lose a lot of flavor after the plant has flowered. Do not fret if the plant flowers, though, because flowering means the plant has also seeded, so you can always keep those seeds and save them to plant in the spring.

What is basil?

Basil is a popular herb that originates from Asia and the South Pacific. This is why Thai cuisine often uses basil. It is a member of the mint family and is quite easy to grow. It is known for its aromatic leaves which are often used in Italian and Mediterranean cooking.

Basil is considered a tender annual and grows very quickly. It usually only takes three to four weeks to grow it from seed to harvest.

Basil is so easy to grow that it is, in fact, great for beginner gardeners.

Types of basil

1. Cinnamon basil

This fragrant basil is full of spice but has a mild flavor that complements Asian dishes as well as fruits and vegetables. It has tight, serrated leaves and dark purple flowers. Not only can you cook with it; it will make your kitchen look more beautiful too.

2. Spicy globe basil

This basil is perfect for growing in a container indoors because it does not spread out as it grows, but instead forms a tight clump. This is a dwarf basil with a peppery flavor.

3. Lemon basil

One of the more popular varieties of basil, the lemon basil can be found in most nurseries. It goes well with light dishes such as those with vegetables, chicken, or fish. Interestingly, it can even be consumed in the form of tea.

4. Purple basil

This variety of basil is often used as garnish on dishes because of its unique deep burgundy to purple color. Its color is what ultimately makes it stand out in prepared dishes, but it does bring a clove taste and is also not as sweet as most other basil varieties.

5. Sweet basil

This is probably the most common of all the basil varieties. When a person says they have a basil plant in their garden, it is most likely going to be this one. The basil you find in the grocery store is often sweet basil. It is the most versatile because it can be used in pestos, pastas, and even salads. This plant has round, cup-shaped leaves that are green in color.

How to plant basil

If you want to plant basil from seed, you will need the following:

  • Basil seeds
  • Seed starting mix
  • Starter pot
  • Starting container
  • Spray mister

First, prepare your starter pot by adding the moist seed starting mix until it is an inch below the top of the pot.

Then add the basil seeds into the pot. It is wise to plant several seeds to improve the chances of growing a strong plant. Some seeds can be duds, so adding extra seeds to one pot will increase your chances of success.

Cover the seeds with more seed starting mix and mist the soil with water. Use a spray bottle with a fine spray.

Now you need to maintain the humidity by placing the pots in a starting container with a plastic dome. If you do not have one, you can just use a shallow pan and cover the tops of the pots with a sheet of plastic wrap.

Place the starting container in a part of your house that is approximately 70 degrees Fahrenheit. Because you are trapping the humidity with the plastic dome or plastic wrap, you will not really need to water the seeds until after the seedlings have emerged.

The basil seedlings usually take between seven to ten days to emerge. You can then remove the plastic dome or plastic wrap and transfer the pots to a windowsill. You need to make sure that the soil is always moist with regular misting.

When the basil’s true leaves start to appear, choose the strongest plants from among the seedlings. Remove the other seedlings from the pot, leaving the main seedling.

Now that you have chosen your strong seedlings, and when they have three pairs of leaves each, you can transplant them to their individual 4-inch pots. You can add a weak fertilizer solution to help them grow.

Let your basil plants adjust to living outdoors by gradually exposing them to the sun. If the outside temperature is around 70 degrees Fahrenheit, you can place the plants in a shaded location outside for up to one week.

Tips for basil plant care

Water consistently

It is imperative that you keep the soil in your basil plant’s pot moist so that it grows well. Watering it in the morning is ideal and, if it is summer season, consider adding mulch to the soil to hold in more moisture.

Harvest often

It is important to harvest the leaves of your basil plant so that it can grow more new leaves. If you do not harvest regularly, the plant will start to flower. After the plant has flowered, the leaves will lose their flavor and will not be suitable for cooking. You can try picking off the flowers as this can help bring back the flavor, or you can collect the seeds and plant new ones when the weather gets warmer.

Fertilize your basil plant

Although basil plants grow quickly without the help of fertilizer, adding a weak liquid fertilizer twice each season can really help them grow, especially if they are being grown indoors.

Conclusion

Basil plants are very easy to grow and are a great choice for beginner gardeners. The main thing to remember when caring for a basil plant is to make sure you keep its soil moist at all times, while also making sure not to overwater. Basil plants love the sun, but you should also keep an eye out for signs of wilting.

You should also harvest the leaves on your plant regularly so that it can grow more leaves and to delay flowering.

You can fertilize your plant twice each season to help its growth.

Image: istockphoto.com / Zbynek Pospisil