How To Save A Dying Pepper Plant?

How To Save A Dying Pepper Plant

Pepper plants, with the scientific name Capsicum, comprise more than 30 species of flowering plants of the family Solanaceae. These plants are widely grown for their pungent edible fruits, which are used in a wide variety of culinary recipes. They are native to tropical America and are very easy to grow, but they are also prone to problems and diseases that could kill them if not timeously addressed. 

How to save a dying pepper plant

1. Hold off on watering if overwatering was the problem. 

Some plant owners tend to spoil their plants by watering them too often. This is not a good scenario, since plants tend to develop root rot when they are overwatered. This can spread to the rest of the plant, causing leaf discoloration, wilting and, ultimately, the death of your pepper plants. 

Remove any brown or black infected roots and replace the old soil with fresh potting mix. Allow the soil to dry out before you water the plants again. 

2. Rehydrate your plants if underwatering was the problem. 

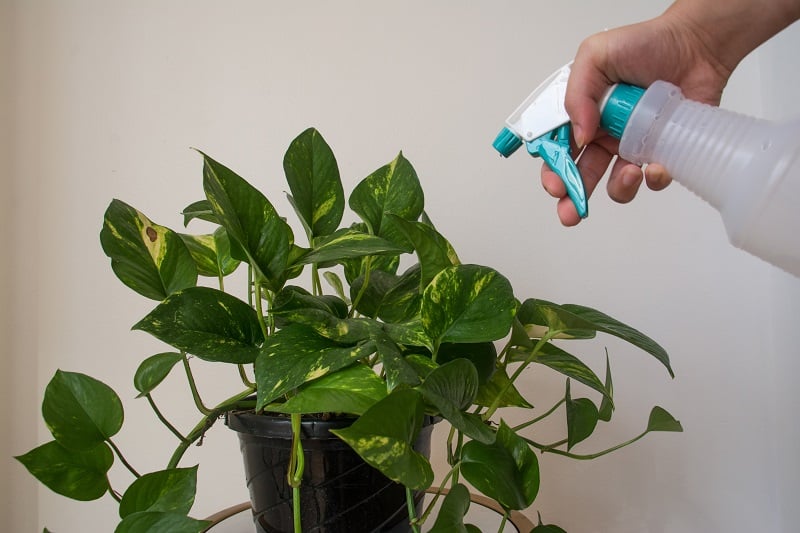
Place the entire pot in a sink or bucket full of water and let it sit there for 15 to 30 minutes. Then, allow the pot to drain thoroughly; do not allow the plants to sit in water. Establish a proper watering schedule so you do not miss any watering sessions. 

3. Replant the plants in fresh soil if they are rootbound. 

Pepper plants will wilt and die if their roots are choked due to overcrowding. In this case, remove the plants from their pots and loosen up and separate the roots gently. Repot them in fresh soil, in new pots just slightly bigger than the previous ones. 

4. Transfer the plants to a spot where there is less harsh light. 

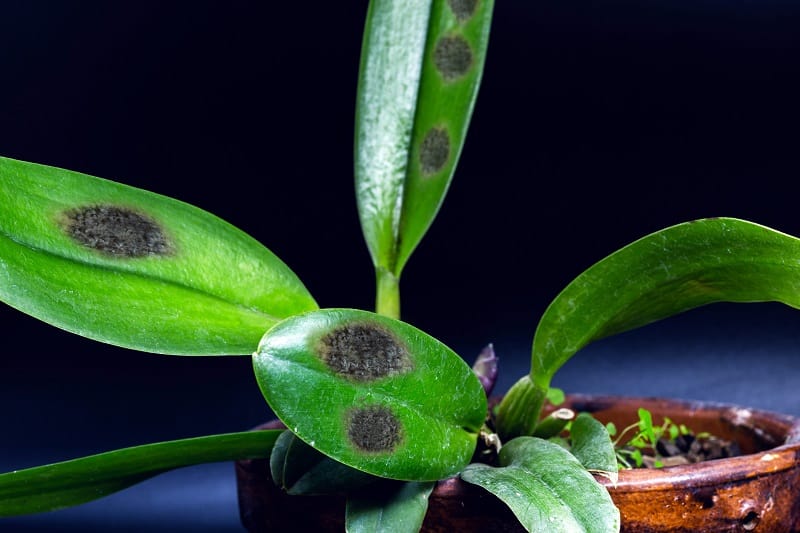
If you notice that your dying pepper plants have brown or black spots on their leaves, it could be due to sunburn from the harsh midday sun. Trim off the affected leaves and move the plants to another area where there is no direct sunlight. 

5. Provide more indirect light if the culprit is too little sunlight.

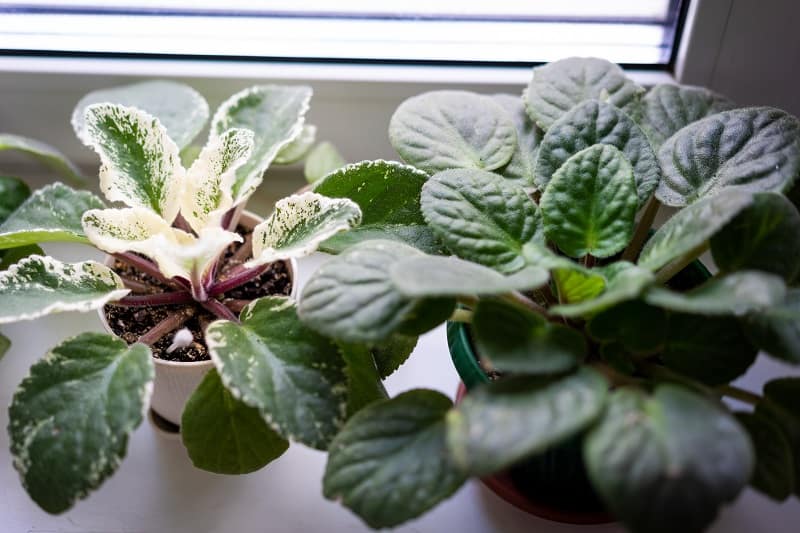
Dying pepper plants with yellow or pale leaves that are dropping off could be getting too little sunlight. Provide bright but indirect light for your plants to enable them to thrive again. 

6. Check the growing conditions if the plants are failing to thrive. 

If your pepper plants are dying and you have ruled out watering or light issues, it may have something to do with the growing conditions. Sudden temperature changes and incorrect humidity can both play a role in the plants’ overall wellbeing. Make sure the plants are not located near air conditioning or heating vents, or in areas that catch drafts, and assess the humidity inside your home.

7. Check for pest infestations. 

Pests like cutworms could damage pepper plants, especially the young seedlings. Aphids can also colonize the leaves and excrete honeydew that attracts other insects, while flea beetles attack young plants. These pests can distort the leaves and cause wilting. Severe infestations could take a toll on your plants’ health and threaten their survival. 

Reasons your pepper plant is wilting and dying

It could be due to disease. 

Pepper plants are prone to fungal and viral diseases, such as Verticillium wilt, which can cause yellowing, droopy leaves. Root rot, a fungal disease, affects the roots first, but can eventually cause the entire plant to wilt and die.

Other diseases that affect pepper plants include:

  • Bacterial leaf spot – This causes yellowish spots and leaf drop.
  • Mosaic virus – A viral infection that also attracts insects. 
  • Southern blight – Signs include rotting stems followed by wilting, dying plants. 
  • Powdery mildew – A disease that is prevalent in humid conditions and develops at any stage of the plant’s life. Symptoms include white, patchy, powdery growth that expands to cover the entire lower leaf surface.
  • Blossom end rot – This affects ripening peppers and is caused by calcium deficiency and sporadic watering. 
  • Sunscald – The fruits become dry and papery as a result of too much exposure to sunlight. 
  • It could be due to pests. 

The presence of pests could lead to wilted and dying pepper plants.  Some of these insects also cause yellowing leaves and stunted growth.  

Here are some common pests that invade pepper plants:

  • Cutworms – These pests attack young seedlings.
  • Aphids – They suck the juice of plant tissues and excrete honeydew that attracts other insects. 
  • Fruitworms/armyworms – These pests feed on tender pepper pods, and may also feed on foliage. 
  • Flea beetles – They like to feed on young pepper plants. 
  • Corn borers – They invade and feed on pepper pods. 
  • Hornworms – These pests also feed on and decimate pepper plants. 
  • Whiteflies – They transmit viruses and cause foliage to shrivel and turn yellow.
  • It could be due to insufficient water. 

Pepper plants will wither and die if they do not get sufficient water.  The first sign is usually drooping leaves, because the plants are losing more water than they are taking from the soil. Environmental factors, such as temperature and humidity, also play a major role in how plants utilize water. 

Give your pepper plants a heavy watering, but make sure the excess water drains off. To keep track of the soil’s moisture, use a water meter to ensure you are giving the plants the right amount of water. 

It could be due to heat stress. 

Pepper plants can tolerate high temperatures and thrive in warmer climates, but they also have their limits.  

Here are some measures to protect your pepper plants from heat stress:

  • Water the plants to maintain soil moisture. 
  • Move the plants to a shady location, especially during the afternoon when the sun is at its most intense. You may also place a cheesecloth over the plants to give them temporary shade. 
  • Avoid pruning and fertilizing in high temperatures, as this could add to the stress. 
  • Monitor your plants’ temperature.
  • It could be due to transplant shock. 

Pepper plants that have been transplanted to new containers or moved from the outdoors to indoors may experience transplant shock, and their leaves will start to wilt and drop off. To fix this problem, provide shade during the transition and be patient while the plants adjust. 

Conclusion 

Pepper plants are widely cultivated for their fruits, which are popular as spices and add flavor to numerous cuisines. They are easy to grow and can tolerate high temperatures up to a point, but they are also prone to problems and diseases that could kill them if not treated promptly. You can save your dying pepper plants by determining and addressing the cause of the problem, be it over- or underwatering, crowded roots, incorrect lighting, or pests. 

Image: istockphoto.com / Aleksandr Rybalko

How to Save A Dying Pitcher Plant?

How to Save a Dying Pitcher Plant

Pitcher plants are carnivorous plants with leaves that are referred to as ‘pitfall traps’. These trapping mechanisms consist of a deep cavity (the pitcher) that contains digestive fluid. These plants live in various habitats with poor soil conditions, and can survive in pine barrens and sandy coastal swamps alike. However, they are also susceptible to various problems and diseases, and could succumb to these if not treated promptly.

How to save a dying pitcher plant

1. See to it that the plant is getting enough sunlight. 

Pitcher plants love sunlight, so place them in areas where they can enjoy direct sunlight for at least eight hours daily. 

2. Check whether you are providing enough water. 

Pitcher plants crave water, but should also not be left to sit in waterlogged soil. Make sure not to let the soil dry out completely, but also do not overwater, too much water can cause root rot. Ideally, you should use filtered or purified water. 

3. Place your pitcher plant in a humidified spot. 

Your pitcher plant could be dying because it is planted in an area with low humidity. These plants like humidity, so make sure to choose a location accordingly. You can also use a humidifier or humidity tray to help the plant. 

4. Check the soil acidity. 

Pitcher plants thrive in slightly acidic, well-draining soil. Test the pH with a soil pH meter to check whether the acidity is ideal for your carnivorous plants. 

5. Do not use fertilizers. 

Pitcher plants can wither and die if you mistakenly fertilize them. These plants get their food from insects and do not need any fertilizer at all. 

6. Provide extra care for indoor pitcher plants. 

Indoor pitcher plants need extra care since they are out of their natural habitat and cannot catch insects as they would outdoors. You can feed them with freeze-dried bloodworms or crickets to revive them if they become weak and start to wither.

Signs that your pitcher plant is dying 

The plant turns yellow and brown. 

When leaves start to turn yellow or brown, it could mean a few things. You do not need to worry if you notice spots, since this may just mean that the plant is naturally aging. It may also simply be shedding older pitchers to make way for new ones. If the plant fails to produce new pitchers, it could just mean that it is entering dormancy.

However, you should be concerned if the yellow and brown discoloration affects the entire plant. Complete discoloration could indicate a prolonged overwatering problem. To fix the problem, dry out the soil around the crown of the plant, as this allows the plant to start breathing again and may help revive it.  

If you are watering your plant with tap water, that could also cause the leaves to turn yellow or brown. To avoid this, always use purified or filtered water for your pitcher plants. 

The plant is turning completely black. 

When pitcher plants turn black, it is usually an indicator of death but this is not always the case. It could also mean that the plant is going dormant and has turned black because it has stopped producing new pitchers. Wait until the end of the season and see if it springs back to life. Do not interfere with a pitcher plant while it is dormant, as it could damage the roots and kill the plant. Rather just leave it alone. 

Make sure that your pitcher plant gets at least eight hours of direct sunlight each day, adequate humidity, and enough water to keep it properly hydrated. 

The plant is not producing new pitchers. 

This can be alarming for pitcher plant growers, but it may be a normal occurrence, especially during the fall season which is when pitcher plants become dormant. However, if it is not the fall season and the plant is still not growing new pitchers, it could mean that the plant has died. 

Conclusion

Pitcher plants may look creepy, but many plant growers enjoy cultivating them because they are so unique. These carnivorous plants can be kept indoors, and they love bright sunlight and humid areas. Like all plants, they are also prone to problems and diseases, and may wither and die if not cared for properly. Help revive your dying pitcher plants by making sure that they have optimal growing conditions, including ample sunlight and water. Use slightly acidic soil, and do not fertilize them because their diet of insects is sufficient to feed them.

Image: istockphoto.com / Galumphing Galah

How To Save A Dying Cilantro Plant?

How To Save A Dying Cilantro Plant?

Cilantro, with the scientific name Coriandrum sativum, is an annual herb belonging to the family Apiaceae, which also includes parsley, celery and carrots. These plants are also referred to as coriander, dhania or Chinese parsley, and can grow up to 24 inches tall. They are native to Asia and are commonly grown for their fresh leaves and dried seeds which are widely used in cooking. Like all plants, Cilantro is susceptible to its share of problems and diseases, some of which may kill the plant unless treated promptly. 

How to save a dying cilantro plant

Whether or not you are able to save your cilantro plant will depend on the cause and extent of the damage. The sooner you address the problem, the better your chances of reviving it. Nevertheless, a good first step is to ensure that you are providing the plant with optimal growing conditions, as this will ensure that it is not further weakened, and may even fix the problem.

Water your plants at least once or twice weekly. 

To keep the soil consistently moist, water your plants at least once or twice a week. This will prevent the leaves from wilting and drooping.  However, in droughts or heat waves, water at least thrice weekly, or as often as required to keep the soil moist. 

Use plenty of compost in your potting mix.

Compost should be integrated into your potting mix to help the soil retain moisture. It is also an important factor in good soil drainage, and encourages root establishment. For cilantro plants in the garden, enrich the area with compost and mulch to conserve moisture around the plants.  

Replant the cilantro in bigger pots. 

If your plants are dying and their pots are smaller than 10 inches in diameter, replant them in pots at least 12 inches across in width. Bigger pots can hold more compost and retain more moisture, which helps revive the plants. 

Provide the right balance of sunlight. 

Place your dying cilantro plants in a spot that gets partial sun, or morning sun followed by an afternoon shade. Having the right balance of sunlight is important for the plants to grow and regain their overall health. 

Other life-saving tips to revive your cilantro plants 

  • Prune off some leaves. 
  • Mist the plants to hydrate the leaves. 
  • Feed the plants some wood ash or potassium sulfate to help them absorb water.
  • Do not feed them any nitrogen at this time.
  • Reduce the levels of light for a while.  

Reasons your cilantro plant is dying 

The plants are not being watered enough.

Cilantro plants tend to lose a lot of moisture through their leaves on windy or hot days. To prevent them from wilting and dying, the soil should be consistently moist so that the roots can draw up water as fast as it is being lost through the leaves. Avoid using sandy or fast-draining potting mix, as the roots may struggle to absorb water and the plants will be more likely to wilt. 

You have used the wrong type of soil. 

Planting your cilantro in the wrong type of soil could cause damage and possibly death. Soil quality and correct pH are essential for cilantro plants. The pH should be around 6.2 to 6.8; lower or higher than that could result in improper or stunted growth. The seeds should be planted at least four inches apart for them to grow well. 

You could be overwatering your plants. 

Cilantro plants do not like to be watered too much, and if the soil is too wet for a long period they may turn yellow and die. Find a watering balance whereby the soil maintains moisture without becoming waterlogged. Once the soil becomes too wet, the roots will sit in stagnant water and drown, and the plants will eventually die. 

It could be due to nutrient deficiency. 

If your dying cilantro plants also have yellowing leaves, it could be due to a nutrient deficiency in the soil, among other things. To fix a nutrient deficiency, apply a fertilizer that includes nitrogen, phosphorus and potassium. You can also do a soil test to ascertain exactly which nutrients, if any, are missing from your soil.

Signs that your cilantro is dying 

  • The leaves are wilting and drooping, and the plants have a sickly appearance. 
  • The tips of the leaves are turning yellow or starting to dry out. 
  • The leaves are falling off. 
  • There are black or yellow spots on the leaves, which could be indicative of fungal diseases.  

Conclusion 

Cilantro plants are annual herbs that are easy to cultivate. These plants are native to Asia and are widely grown due to their important role in culinary recipes. While they are low-maintenance plants, they can also be prone to certain problems and diseases which can take a toll on their overall health.

If your cilantro plants appear to be dying, first ensure that you are providing optimal growing conditions to give them the best chance of bouncing back to health. First and foremost, they should be exposed to partial sun and afternoon shade, provided with suitable soil enriched with good quality compost, and should be watered at least twice a week so that their soil does not completely dry out. 

Image: istockphoto.com / Anawat_s

Monstera Adansonii Care And Propagation

Monstera Adansonii Care And Propagation

Monstera adansonii is a vining houseplant with beautiful leaves that have striking fenestrations that help it stand out. This plant is relatively easy to grow and care for.

Plant your Monstera adansonii in a well-draining aroid mix, give it bright, indirect light, the humidity of at least 60%, water it once a week or just enough to keep the soil moist, and keep the ambient temperature between 65 and 80 degrees Fahrenheit.

You can propagate cuttings from this Monstera using either soil or water.

Keep reading to learn more about how to propagate and care for Monstera adansonii.

Monstera Adansonii Care

1. Light

Monstera adansonii’s natural habitat are the jungles of Central and South America. This means that they live just below the tree canopy, protected from direct sunlight. The plants that live in our homes will need the same kind of sparse light, so bright, indirect light is ideal for them.

Pick a spot a couple of feet away from an east- or west-facing window, because these windows do not get that much harsh light throughout the day. If you only have south-facing windows, you can try to diffuse the sunlight with a sheer curtain to help protect your plant.

During the winter, when natural light can be scarce and weak, it is a good idea to buy a grow light to supplement the Monstera adansonii’s lighting needs. You can use the grow light even during other seasons, when it will help the plant grow faster.

2. Watering

We mentioned that the Monstera adansonii is relatively easy to grow and care for, but one area that may be a bit tricky to figure out initially is the ideal watering schedule for your plant.

This plant wants its soil to be perpetually moist, but it should never be soggy. Watering once a week for an indoor plant is usually sufficient, as long as you make sure that the soil never dries out.

Remember that this plant is from the jungle and such plants are typically quite thirsty, but you should still know when enough is enough. Drowning the plant’s roots in soggy soil can be detrimental to its overall health. When the roots drown, they will die, and dead roots are susceptible to opportunistic pathogens that can eventually kill the entire plant if the condition goes unchecked.

You can avoid overwatering the plant by using well-draining soil and a pot that has drainage holes at the bottom, so that any excess water in the soil can simply flow out.

3. Soil

To grow your Monstera adansonii, use an aroid mix that contains charcoal, peat moss, perlite and orchid bark. This plant is an epiphyte, which means its roots need to be exposed to the air to a certain extent. Therefore, make sure your soil mix is porous and airy to keep your plant happy.

Keep the soil’s pH between 5.5 and 7.0 in order to maintain a healthy growth rate.

4. Temperature

Because these plants come from the jungle, they require a steady temperature that should not go lower than 65 degrees Fahrenheit or exceed 80 degrees Fahrenheit. You might want to keep a wall thermometer to be aware of the current temperature in your home.

If the temperature in the room is too low, the plant’s growth will slow down considerably and it might even start to wilt and die due to the cold. Exposure to cold temperatures for short periods is probably fine, but you need to take the plant to a warmer, indoor place if you do not want it to die back or die.

5. Humidity

Plants that come from the jungle naturally prefer a higher humidity level than those from other regions.

You may have to employ a few techniques to raise the humidity in the room where you keep your plant. 90% humidity is best for the plant, but this may be difficult to maintain, especially in a home setting, so just keeping it above 60% will suffice.

You can try misting the plant’s leaves to create a microclimate around it. Do this several times a week as needed. You can also place a water tray next to the plant to help raise the humidity around it.

Another trick is to surround the plant with other plants, so that they all help each other by raising the humidity collectively.

Finally, if you have a hard time keeping track of all these humidity-raising methods, you can always just purchase a humidifier to do the work for you.

6. Fertilizer

If you are growing your adansonii indoors, you may need to use fertilizer. Dilute the fertilizer to half-strength and it should be enough to boost the plant’s growth by helping it produce more chlorophyll. If you do not give the plant fertilizer, its leaves may turn yellow due to a lack of nutrients.

Fertilize the plant once a month in the spring and summer, because this is when the plant is actively growing. Try not to give it too much fertilizer, however, because you might end up burning the roots.

Monstera Adansonii Propagation

Propagating in soil

Make sure you are using a sterile pair of scissors when taking a cutting. The cutting must have a few leaves on it, and should be cut about a quarter-inch below a node. Remove some of the leaves that may be too close to the node because you do not want any leaves to be buried under the soil.

After planting, place the plant in a room where it can get bright, indirect light and try to keep the soil constantly moist, but not soggy.

If you do everything correctly, the roots will grow in and establish nicely within four weeks.

Propagating in water

Take the cutting the same way as for soil propagation, by snipping it a quarter-inch above the node. The node is important because this is where the roots are going to grow from.

Place the cutting in a clear jar of water and make sure the node is submerged. Place the jar in a spot where the plant can get bright, indirect light. Change the water in the jar when it starts to look cloudy, and refill the water if it drops below the node, because the node needs to be underwater all the time.

If you follow these steps correctly, the roots should start to come in after two to three weeks, but you will need to wait a little longer, until the roots are at least three inches long. When the roots are long enough, you can plant the cutting in well-draining soil in a small pot.

Conclusion

Monstera adansonii is a magnificent plant that will add beauty to any space. It is a relatively easy plant to grow and care for, but you may need to be vigilant when it comes to watering.

You can propagate this plant by taking cuttings and growing them in either soil or water.

As long as you provide the plant’s basic needs and try to simulate the conditions of its natural habitat, the jungle, you should have no problem keeping it happy and healthy.

Image: istockphoto.com / Firn

Peperomia Obtusifolia Care And Propagation

Peperomia Obtusifolia Care And Propagation

The peperomia obtusifolia is a beautiful, slow-growing and low maintenance houseplant that has thick, sturdy, glossy green leaves. They are perfect tabletop plants, because they usually only grow to around one foot by one foot in size. They can also be placed in terrariums because of their size, and they can be propagated using soil or water.

To learn more about propagating and caring for peperomia obtusifolia, keep reading.

Peperomia obtusifolia care

1. Light

This plant, like most houseplants, grows best in bright, indirect light. Place the plant a few feet away from a window and it should be perfectly fine. An east- or west-facing window is ideal, but if you only have south-facing windows, you can diffuse the intensity of the light by placing a curtain over the window. Make sure the plant is never under direct sunlight, because the leaves will get sun-damaged.

The plant will survive in low light, but if you have the variegated variety, the lack of light will affect the definition of the variegation. Low light can also result in leaf drop.

2. Water

Peperomia obtusifolia stores water in its thick, fleshy leaves and body, which means it can last longer than most plants without being watered. This is also why it can very easily become overwatered if its owner is a little too enthusiastic when it comes to watering. 

Let the plant’s soil dry out completely between waterings. You can do this by checking the soil before watering it. Touch the top inch of soil with your index finger. If the soil is still damp, do not water the plant yet. If the top inch of soil is dry, you can water the plant.

Another sign that the plant needs water is if the leaves are droopy and more flexible than normal. Hydrated leaves feel rigid and firm.

You should not simply base your watering on a set schedule; it is best to actually check the moisture level of the soil to determine whether the plant needs water or not. Adjust your watering according to the weather and local climate.

3. Temperature and humidity

This plant will do just fine with the temperature you are comfortable with in your home. Just make sure you do not leave it outside during the winter when the frost can do considerable damage to the foliage.

It likes its environment to be quite humid, since the leaves collect water from the environment and the root systems are quite small.

If you live in a place with a dry climate, you may want to wet the plant’s foliage while watering it. You can also leave it out in the rain a few times a year to wash the leaves and keep it moist.

If conditions are drier than normal, mist the leaves using a spray bottle a couple times a week. You can also place a saucer or tray of water near the plant to increase the humidity around it. If you have a hard time following these methods, you can also just buy a humidifier to maintain the humidity for longer periods.

4. Soil

Because the peperomia obtusifolia is epiphytic and likes its soil to dry out between watering, the type of soil that you use must be well-draining and loose. The plant does not like tightly-packed soil; this does the plant more harm than good.

Use a mixture of  two parts gardening soil to one part perlite, and avoid packing down the soil mix  so that it remains as airy and porous as possible.

Peperomias have slow-growing roots and are not really affected if they become rootbound, so regular repotting is not that important; about every five years is sufficient. As long as you can see that the plant is healthy and doing well, you do not need to repot it. 

If you see the roots of the plant starting to grow out of the drainage holes at the bottom of the pot, it may be time to repot it. Repotting may also be needed if the plant’s growth has become stunted or when the plant looks way too big for the pot.

The new pot should be one size bigger than the old one, and must have drainage holes at the bottom.

5. Pruning

Pruning is not that important for the plant’s health, but it may be necessary if you want to keep its aesthetic symmetry. The branches may grow unevenly in different directions and become floppy, so pruning will keep those at bay.

6. Fertilization

Peperomia obtusifolia does not need to be fertilized, because it is a slow-growing plant with a small root system. It is actually quite easy to overfeed the plant and end up doing it more harm than good if you give it fertilizer.

If you want to fertilize your plant, use a fertilizer made specifically for indoor plants, but dilute the formula to half-strength and apply it once a month in the spring and summer.

Peperomia obtusifolia propagation

Propagation in soil

If you want to propagate the plant in soil, choose a stem that has some leaves at the end and is several inches long. With a pair of sterile scissors, cut a quarter-inch below the node. A node is where leaves or roots shoot out from the main plant.

Plant the cutting in a small pot that contains soil mix made specifically for the plant. The soil should be slightly moist. Make sure at least one node is buried in the soil and make sure none of the leaves are under the soil.

Do not water the plant, because the moisture in the potted soil should be enough to last a few days. Also, the roots need to be given time to recover and establish themselves in the soil before you water it.

Put the plant in a spot where it can get bright, indirect light and make sure the soil does not dry out.

Do not expect any new growth for at least a few weeks, because propagation takes some time.

You can help the plant even more by covering it with a plastic bag for a few hours a day to raise the humidity.

Check the root development by tugging on the plant; if there is resistance, that means the roots have grown in nicely.

Propagation in water

You can root peperomia in water by cutting a stem a quarter-inch below the node with a clean pair of scissors. Place the cutting in a jar with enough water to submerge at least one node. Do not submerge any leaves; remove them if you need to.

Place the jar in a spot with bright, indirect light and make sure to change the water when it becomes cloudy.

The roots should grow to about three inches within a few weeks, and you can then plant the cutting in fresh soil.

Conclusion

Peperomia obtusifolia is one of the easiest plants to grow, especially for novice gardeners. They are hardy and low-maintenance but offer a great addition to the beauty of your home.

Give the plant bright, indirect light, room temperature, medium to high humidity, and only water it when the soil is dry.

You can propagate this plant by planting the stem with a node directly into new soil, or by letting the roots grow out in water first. 

Image: istockphoto.com / Elena Shikanova

How To Save A Dying Magnolia Tree?

How To Save A Dying Magnolia Tree

Magnolia trees are popular for their glossy, dark green leaves, fragrant blossoms, and bright red-orange berries. These flowering plants belong to the family Magnoliaceae and are native to East Asia, the Himalayas, Central America and eastern North America. They are also referred to as tulip trees, swamp magnolias and laurel magnolias, and can grow up to 80 feet tall with a maximum spread of 30 to 40 feet. They are cold-hardy trees, but like most plants, they are susceptible to problems and diseases that can seriously affect their health and could cause them to die if not treated in time.

How to save a dying Magnolia tree

1. Pinpoint the cause of the problem. 

To be able to provide the right treatment for your dying Magnolia tree, you first need to determine the cause of the problem. Signs to look out for include a lack of leaves, dry or brittle wood, cracks on the trunk and areas of decay. You may have to consult an arborist to accurately diagnose the problem. Arborists are certified professionals who have the training and knowledge to diagnose and successfully treat tree problems. 

2. Rectify any watering issues. 

Magnolia trees usually die due to moisture or watering issues. Young and mature trees alike can be affected by too much or too little water. See to it that there is good drainage where your tree is planted; if the soil is waterlogged, you will need to improve the drainage. 

Just as too much water can damage trees, underwatering can yield the same result. Installing an automated sprinkler system with timers is the most sure-fire way to resolve an underwatering problem. 

3. Go easy with the mulch.  

Mulching is beneficial for trees, but too much can be harmful. Go easy with the mulch and be sure it is not too thick around the base of your Magnolia tree. Thick layers of mulch around the tree’s trunk could suffocate the roots, so pull it back and thin it out if necessary. This will also help prevent the onset of fungal diseases, pests and bacteria. 

4. Fertilize your tree correctly. 

Apply fertilizers with utmost care as they could potentially harm trees instead of nourishing them. Avoid sprinkling or spraying them too close to the tree, especially when using lawn fertilizer. Do not use diseased plant materials as ingredients for organic fertilizers. Test the soil before deciding which fertilizers to use, and consult an arborist if you are unsure what to do. 

5. Prune your tree properly. 

See to it that you are following proper pruning techniques to avoid any further damage to your dying tree. Remove the infected parts to encourage the growth of new leaves, and dispose of diseased branches to avoid the spread of the disease. Sterilize the pruning shears, knives or saws that you used to cut off the infected tree parts. 

If you are unsure about what to do, consult a tree professional to do the pruning work for you. 

Common reasons your Magnolia tree may be dying 

Root rot 

Fungal infections like root rot are a common culprit in dying Magnolia trees. Root rot is caused by soil pathogens, and certain fungal Phytophthora species such as cactorum and cinnamomi are to blame for this disease. The disease usually develops because you are overwatering your trees in warm weather, as this encourages the growth of pathogens. The leaves will wilt and branches will die when the root rot spreads from the roots to the rest of the plant. 

To fix the issue, avoid overwatering and allow the soil to dry out before you water it again. Clean away any debris that accumulates around the tree base to avoid pathogen growth. 

Leaf scorch

Leaf scorch is not caused by fungus or bacteria, but is a non-infectious physiological condition caused by unfavorable environmental situations. This condition occurs when there is a high temperature, dry wind or low soil moisture. It may not kill the tree, but it can burn the leaves resulting in widespread defoliation. The condition often occurs in areas where the ground freezes over. 

Verticillium wilt

This disease is caused by at least six species of verticillium fungi and causes branches to die one by one. It is usually characterized by vascular discoloration, and the branches will look red or brown. To prevent the spread, prune off the affected branches and disinfect your shears. 

Canker diseases

Canker diseases are associated with open wounds that have been infected by fungal or bacterial pathogens. They kill branches and weaken plants, and the infected area eventually breaks free, often during extreme weather conditions. After the appearance of sunken patches, the leaves turn yellow or brown and begin to wilt. Pruning the infected branches could prevent the spread of the disease, but if the infection is severe you may lose your tree and should not plant any new Magnolia trees in the same spot.

Magnolia tree care 

Magnolia trees are low-maintenance and usually need little help to survive. Some of these beauties have survived for almost 200 years. Most varieties can withstand hot summers and drought, but younger trees need to be watered regularly for two years until they are well-established. 

These trees do not need much pruning except for damaged branches, or if you want to shape the trees for aesthetic reasons. The best time to prune them is after the blooming period, in late spring or early summer. Young trees may be fertilized; mature trees that are healthy and blooming need not be fertilized. They have sensitive roots that are easily damaged, so be sure to keep foot traffic away from the root zone.

Conclusion

Magnolia trees are widely cultivated for their pretty, fragrant flowers and as ornamental trees. Like most plants, they are also prone to diseases and could wilt and die if not treated in time. You can save your dying Magnolia tree by correctly determining the cause of the problem to ensure appropriate treatment. Also make sure you are providing optimal conditions for the tree’s overall vitality, to help it bounce back to health. 

Image: istockphoto.com / Mariusz Brainard

How To Save A Dying Vanda Orchid?

How To Save A Dying Vanda Orchid?

Vanda orchids are widely cultivated worldwide for their attractive flowers that come in various colors, including yellow, orange, red, pink, purple, blue and white. These plants belong to a genus of the orchid family Orchidaceae, and have glossy, waxy foliage. They grow epiphytically, clinging to tree bark, and have sturdy stems and strap-like leaves. Like most plants, they are also prone to problems and diseases, and may die If not treated in time.

How to save a dying vanda orchid

Check whether there are still signs of life.

Some vanda orchids may cease flowering or shed their leaves after blooming, but this is not necessarily an indication that they are dying or dead. Check the plant’s color: if the stem is still green, it can still be saved. Also inspect the roots, and if they are firm and pale, they are still healthy. However, if the roots are brown and mushy they are dead and should be disposed of. 

Diagnose the problem to identify the right solution.

To save your dying vanda orchid, you need to determine the cause of the problem. If it is not blooming, it may need repotting in a fresh potting mix. The orchid may also need more or less sunlight or water.  If the buds drop before they bloom, the plant’s environment may not be suitable or it may be suffering from gas poisoning or other pollutants. 

The presence of spots and leaf discoloration could be due to diseases or pests. If so, apply a fungicide or pesticide and prune the affected plant parts. 

Provide a healthy environment. 

Set up the ideal environment for your orchid to help restore its good health. Vanda orchids are tropical plants and prefer warmer climate zones. They like bright, indirect sunlight with at least 40 to 60 percent humidity. These plants need weekly watering, and fertilizing at least once a month. 

Vanda orchids undergo natural dormancy when they might shed leaves. However, this does not mean they are dying or even sick. As long as the orchids retain their green stems and healthy roots, they will bounce back from dormancy, develop green leaves and produce new flowers.

Common problems with vanda orchids 

Leaves turning yellow 

Yellowing leaves in vanda orchids could be due to various reasons. It could be water-related, or from too much or too little sunlight. It may also be due to incorrect fertilization.  

Root rot

Root rot could develop either due to overwatering or from being in a too-dark location. The leaves will also turn yellow, the roots will turn brown and rot, and the plant’s growth will be stunted. Brown and mushy roots should be treated at once by pruning off the affected roots while taking care not to harm the healthy ones. Check your watering habits and change the plant’s location, because those that are in darker areas tend to rot more easily when overwatered.

Purple or reddened foliage  

Vanda orchids with reddening or purple foliage are often located in areas with too much sunlight. To correct this, reduce the amount of light that your orchid gets by placing it in a spot that only gets indirect light. This will prevent sunburn. 

Lack of flowers 

Vanda orchids that fail to bloom could have undergone an insufficient dormancy period. This can happen when the temperature is the same for the whole year. Provide less water and reduce the temperature by a couple of degrees to encourage proper dormancy. 

Sudden loss of older flowers, with yellowed stalks 

This condition can come about due to prolonged droughts. For these plants to bloom, they need near-continuous moist conditions. To correct this, submerge the roots in lukewarm water for at least 15 minutes, every day for a few days, as well as continuing with the mandatory misting method. 

Short-lived flowers 

If your vanda orchid’s blooms do not seem to last as long as they should, the humidity could be too low. Place the plant in a humidity tray and keep the reservoir topped up with water. Do not mist the flowers, as this increases the risk of a fungal disease called botrytis.  

Total flower loss

Vanda orchids may experience total flower loss due to changes in location or dehydration. It could also happen if the temperature is too hot or too cold, or due to pest infestations. 

To correct this, keep the roots moist while the plant is producing flowers, and choose a location where the temperature and humidity will be appropriate and constant. Inspect for pests like mealybugs and treat them as soon as possible with insecticidal soap or neem oil. 

Botrytis petal blight 

This is a fungal disease that is usually characterized by spots or patches on the flowers’ bodies. It is often caused by misting, or an over-humid location with poor air circulation. Cut off the infected flowers or complete stalks to stop the spread of the disease. Place the plants in a brighter location, but ensure there is no direct sunlight. 

Conclusion 

Vanda orchids are sought-after for their lovely flowers that come in many colors. These beauties can be prone to problems and diseases, and may die if you do not remedy the problem in time. Save your dying vanda orchid by correctly diagnosing and addressing the cause of the problem, and providing an environment conducive to their overall health. Make sure you grow these plants in tropical areas with bright, indirect light, and humidity of at least 40 to 60 percent.

Image: istockphoto.com / winlyrung

How To Save A Dying Zebra Plant?

How To Save A Dying Zebra Plant?

If a zebra plant is dying, it is because an environmental factor is stressing it and causing a decline in its overall health.

The first step in saving a dying zebra plant is identifying the cause of the problem, which will make treatment much easier and more accurate.

In this article we will discuss the different reasons your zebra plant may be dying, and how to save it.

Why is my zebra plant dying?

Cultural care problems

There are many factors to consider when growing any plant, so if your zebra plant is dying, you need to determine exactly which of these elements is the one doing the damage.

If the leaves wilt and drop off more than normal, it could be that you are overwatering the plant. If you give it more water than it needs and the soil in the pot is not well-draining or the pot does not have any drainage holes, it can lead to root rot.

Leaf wilting and dropping can also be due to overfeeding of the plant. The leaves closest to the base are usually the most affected in this situation.

To figure out which is causing your plant problems, check the soil in the pot. If the soil is waterlogged and soggy, it is most probably due to overwatering, but if your watering techniques are good and you only water the plant when the soil is dry, then you may be overfeeding it.

Another sign to look out for is if the leaves become crinkled and start to curl up. This may be because your plant is getting more sun than it needs. Plants do appreciate basking in the sun because it helps them produce food to survive, but there is a limit after which they will suffer sun damage. In this case, you just need to move the plant to another spot where it can get afternoon shade.

If the tips of the leaves are wilting and turning brown, you may be underwatering the plant. The soil mix will be completely dry, so you will need to properly soak all of the soil so that all the roots get water. Keep watering the soil until you see the excess water flowing out of the drainage holes at the bottom of the pot.

Diseases

Corynespora or Myrothecium leaf spot

These two fungal diseases are very common among zebra plants. In fact, fungal infections as a whole are common in zebra plants, because they like conditions with high humidity, in which fungi also thrive. These two diseases both cause water-soaked lesions to appear on the leaves of the plant, and produce spores on the undersides of the leaves.

Botrytis blight

This blight affects the edges of the leaves on your zebra plant, which ultimately results in leaf collapse. It also leaves spores on the undersides of the leaves that form gray-colored patches.

Both the blight and leaf spot diseases can be eradicated using a copper-based fungicidal spray.

Make sure you keep the infected plants away from your healthy plants so that the spores cannot be spread. You may need to apply the treatment multiple times to make sure all the fungi and their spores are killed. Try not to water the plant from above, because the splashing water can spread spores to neighboring plants. Water the soil directly using a watering can with a long spout.

Phytophthora stem rot

If your plant has mushy, black lesions at the base of the stem, it might have Phytophthora stem rot. If this is allowed to continue, the plant will collapse from the damage. This rot starts when water splashes infected soil and hits the stem of the zebra plant.

Unfortunately, there is currently no known cure for Phytophthora stem rot, so all you can really do is prevent it from happening. Make sure your soil is well-draining so that the water does not pool around the base of the plant, and avoid letting water splash onto the stem.

Pythium root rot

This is also caused by a fungus and usually affects plants that are already compromised health-wise. The plant’s roots will turn mushy and black, and the longer it is left unchecked, the more leaves will turn yellow, wilt and die.

Avoid Pythium root rot by never allowing the soil to become soggy, because these are the conditions the fungus likes.

Pests

Aphids

Aphids feed on the leaves of zebra plants by sucking out the sap. Use insecticidal soap to get rid of them and remove badly-infested foliage as necessary.

Whitefly

These small insects feed on the sap of the zebra plant and leave yellow spots on it. Remove all damaged foliage and use sticky traps to catch the adult whiteflies. You can also use insecticidal soap to get rid of them.

Mealybugs

These insects can be found on the leaves of the zebra plant and also leave yellow spots on the plant. You can try to remove them by spraying the plant with neem oil or by placing rubbing alcohol on a cotton swab and wiping down the leaves.

Fungus gnats

These insects are big fans of moist soil. Use sticky traps for the adults and apply neem oil on the soil to kill any larvae.

How do I care for my zebra plant?

Light

Give your zebra plant partial shade or indirect light in order to simulate the kind of light they would be getting in their natural habitat. These plants grow in tropical jungles, under the canopy of tall trees. Too much direct sunlight can cause sun damage, while insufficient light can affect the plant’s ability to bloom.

Soil

Make sure you use soil that is neutral or only slightly acidic. In order to make the soil well-draining, you can make your own potting soil by mixing one part sand or perlite to one part gardening soil to two parts peat moss. You can also substitute the peat for coconut coir depending on availability. You can also use leaf mold.

Remember to give the plant fertilizer every two weeks during the spring and summer  to make sure that it grows well.

Water

Keep the plant’s soil moist but never overwatered. Every two weeks, water the plant until you see the excess water flow out of the drainage holes at the bottom of the pot. This is to make sure that all of the soil in the pot gets wet and water reaches all of the roots.

During the winter, allow the soil to dry out between watering and try to maintain a barely-moist environment during the cooler months.

Temperature and humidity

Zebra plants are tropical plants so the temperature in their living conditions should be at least 60 degrees Fahrenheit. Humidity should be around 60 to 70%. If the plant is kept indoors where the humidity is low, you can use a humidifier. Keep the plant away from heating or air conditioning vents, because the draft from the vents can dry out your plant’s leaves. You can help the plant’s leaves from drying out too quickly by misting them every once in a while.

Fertilizer

Zebra plants are very hungry and tend to deplete the nutrients and minerals in their soil. They can be easily underfed, especially if they are planted in containers or pots.

If you want your zebra plant to flower, you will need to feed it regularly in the spring and summer.

Conclusion

If a zebra plant is dying, it is because an environmental factor is causing the plant stress. You need to be able to diagnose the cause of the problem in order to proceed with treatment and save the plant.

The most common reasons your zebra plant may be dying are light issues, overwatering, underwatering, lack of fertilizer, disease and pests.

Zebra plants are tropical plants, so to grow them properly you need to try to simulate the living conditions of their natural habitat.

Image: istockphoto.com / ByronOrtizA

How To Save A Dying Strawberry Plant?

How To Save A Dying Strawberry Plant?

Your strawberry plant is dying because there is an environmental factor causing it stress. In order to save your dying plant, you first need to correctly identify the cause of its declining health. A correct diagnosis will enable a more specific course of action for treatment.

The most common reasons your strawberry plant may be dying are lack of nutrients, frost, overwatering and underwatering.

In this article, we will discuss the different reasons your strawberry plant may be dying, and how to save it.

Why is my strawberry plant dying?

Drought

One of the most likely reasons your strawberry plant is dying is that you are not giving it as much water as it needs to survive.

If you just recently planted the strawberry and it has begun to turn brown, it could be because you planted it a little too shallow in the soil and are not watering it frequently enough, or you planted it deep enough but are not watering enough for the water to reach the deeper roots.

The leaves of an underwatered plant will turn brown and its fruit will become shriveled.

When you have a newly planted strawberry plant, water it as frequently as necessary for the soil to be always at least moist. This is the time when the roots are still adapting to the soil and establishing themselves. Watering will help the roots grow out, which will not only take in more water for the plant, but will also help anchor it and hold it up. A well-established plant becomes more resilient against drought.

Drought is more commonly observed in strawberry plants that are planted in containers or pots. The limited soil in the container holds limited water, so if the plant is in a spot that gets plenty of sunlight, the soil will dry out fast.

The best way to know when to water your plant is by touching the soil in the pot. If the top inch of soil is dry, water the plant, but if the soil is still moist, check the soil again after one or two days.

Strawberry plants usually recover well from being underwatered, but try not to let it get to that point in the first place. Avoid drying out the soil by mixing mulch into the soil’s surface. This helps lock in soil moisture while also providing the plant with much-needed nutrients and minerals.

Try to only plant the strawberries during the spring, so that they are well-established by the time summer rolls around.

Overwatering

If your strawberry plant is being overwatered, its leaves will turn yellow and then brown.

While these plants like their soil to be moist, it should still be well-draining so that any excess water you might accidentally give the plant will simply flow out of the drainage holes at the bottom of the pot.

The plant becomes overwatered if the soil is not well-draining, such as heavy soil types like clay. These kinds of soil hold onto water a little too well. The soil should be airy and porous; if it is too compact, add manure, leaf mold or compost so that enough moisture is retained but excess water will simply drain away.

Another reason the soil becomes waterlogged is if the container or pot does not have drainage holes at the bottom. Before you choose a pot to plant in, check that it has drainage holes. You can always just drill holes into pots that you already have. Make sure the holes are large enough to drain the water properly.

Another obvious cause of overwatering is giving the plant water too often. If you water it every day with a lot of water, even if the soil is well-draining and even if the pot has drainage holes, this might not be enough to get rid of all of the excess water in time. Only water the plant when the top inch of soil feels dry to the touch. If the soil is still moist, wait one or two days before checking the soil again.

Crown rot

One of the most serious conditions that can affect your strawberry plant is crown rot. This is caused by overwatering and letting the plant’s roots soak in waterlogged soil for long periods of time.

When the plant’s roots are constantly underwater, they will drown and die. The dead roots will rot, and will become susceptible to opportunistic pathogens that cause the rot to worsen.

The rot will start at the end of the roots and make its way up the plant until it reaches the root crown.

The symptoms of crown rot include yellowing and browning of the leaves and discoloration of the tissue in the crown. Unfortunately, if your plant has crown rot it usually means it is not salvageable and is better off discarded. Try not to plant any new strawberry plants in the same area, because the fungus may still be living in the soil. Apply a fungicide on the soil so that no reinfection occurs.

Because this condition starts from overwatering, if you refrain from overwatering you should be able to avoid crown and root rot with no problem.

Lack of nutrients

When your strawberry plant does not get the right nutrients and minerals, its leaves will also turn yellow. A lack of nutrients can also result in stunted growth. This happens to plants that are in stony or sandy soil that does not have sufficient organic matter mixed in.

During the plant’s growth period, in the spring and summer, it will need to feed a lot because it is producing fruit as well as new foliage.

To prevent the yellowing of leaves, you need to add manure, leaf mold or compost to the soil. This not only provides nutrients, but also helps the soil retain more moisture. Make sure that at least 10 inches of soil have been amended before you plant the strawberry.

If the plant is growing slowly and is planted in the ground, it might recover better if you transfer it to a pot so that you can control the amount of organic matter that goes into the soil. Feed the plant every 14 days during the spring and summer so that it produces plenty of fruit.

Frost

If a strawberry plant is left outdoors and exposed to frost, its leaves will curl up and turn brown or black.

This most often happens to plants that grew in a nursery over winter and are then taken outdoors and become damaged by the late spring frost.

If the damage is only to some leaves, your plant may be able to recover if you cut off the affected parts and protect it from frost.

Fungal diseases

Powdery mildew and grey mold affect the leaves of the strawberry plant. In humid conditions, the grey mold can be found on the decaying parts of older leaves and flowers. The plant will rot and die back.

Powdery mildew looks like a white fungus that affects the plant’s growth and causes the leaves to curl and shrivel.

Conclusion

Your strawberry plant is dying because an environmental factor is causing it stress. You need to correctly determine the cause of the problem in order to make treatment easier and save the plant.

The most common cause of a dying strawberry plant is underwatering. These plants want their soil to be a little moist at all times. This is especially important when the plant is still establishing its roots. Its leaves will wilt and turn brown unless you learn how to water it correctly.

Overwatering causes root and crown rot, so make sure the soil is well-draining and the pot has drainage holes at the bottom. Feed the plant every spring and summer to make sure it gets all the nutrients and minerals it needs.

Strawberry plants may be a little tricky to grow, but provided you get it right, you will be rewarded with six years of fruit.

Image: istockphoto.com / romiri

How To Save A Dying Chilli Plant?

How To Save A Dying Chilli Plant

 Chili plants are widely cultivated around the world for their culinary uses. Their scientific name is Capsicum annuum or Capsicum frutescens, and they are native to southern North America and northern South America. These plants are cultivated in warm climates and common cultivars include jalapeno, cayenne, serrano and Thai chili peppers. While chili plants are drought-tolerant, they are also prone to problems and diseases which may cause them to die unless you take the necessary measures to revive them.

How to save a dying chili plant

Remove the dead leaves. 

If your chili plant has damaged or dead leaves, prune them off. This will encourage the growth of new leaves and help revive the plants. It will also divert the plants’ energy away from maintaining withered foliage. 

Re-pot the plants. 

Your chili plants could be dying because their root systems are too crowded in their current containers. Transplant them into larger pots, using fresh soil and general-purpose compost to revive them. 

Feed the plants. 

Chili plants can die if they do not get their required nutrients from the soil. Feed your plants with a fertilizer that compensates for any nutrient deficiencies in their soil. Some plant growers recommend a seaweed-based fertilizer for best results; they claim that leaves become shiny and green after only a few days. 

Reasons your chili plants are wilting and dying 

1. Your plants are not getting enough water. 

Potted chili plants tend to dry out faster, especially during hot weather, so they require frequent watering. Check the soil’s moisture by pushing your finger one or two inches into the soil. If the soil is dry, you water the plants. You can also add mulch over the top of the soil to protect it from the sun and help it retain moisture. 

2. It could be due to too much sun exposure. 

Chili plants tend to wilt in the middle of summer despite having moist soil. If this happens only during the middle of the day, the culprit is likely too much hot sun or high temperatures. 

Most often, 95% of the water absorbed by plants is lost through transpiration. The hot sun increases the rate of transpiration and the roots may not be able to absorb water fast to keep up with this. The plants then suffer a net loss of water and become wilted despite the wet soil. 

To fix this, move the plants to a partially shaded area or use a shade cloth to protect them from the harsh rays of the sun. 

3. It could be due to too much water. 

Chili plants could also die from too much water, or overwatering. Their roots need oxygen to survive, and if the soil is always soggy or waterlogged, oxygen cannot reach them and they will die and rot. While minor root rot does not cause great damage, if it goes unresolved it could kill the entire plant. 

See to it that the soil is well-draining and not constantly soggy. If the soil is heavy clay, add compost to increase its content of well-draining organic matter. Water only when the top inch of soil is dry, especially for mature plants.   

While chili plants are vulnerable to overwatering, young seedlings are more likely to die from damping off than from root rot. Damping off is a disease that attacks seedlings’ roots and the base of the stem, causing them to flop over and die. 

4. It could be due to transplant shock. 

Another reason your chili plants are wilting or dying could be that they have not fully adjusted after being transplanted. This can happen when you take the plants outdoors after starting them off as indoor plants. They will go through a period of adjustment as they settle into their new location. It will also happen if they have to adapt to any other changes in living conditions, or if the roots are damaged when they are transplanted. 

You can minimize transplant shock with the following measures: 

  • Be gentle when transplanting so that the roots are not damaged.
  • Water the plants well so that the wet soil can settle around the roots after transplanting. 
  • Stay away from heavy fertilizers as they could stress the plant. 

If you take your chili plants outside after growing them indoors, they may wilt due to the sun or fall over due to wind. Ideally, you need to harden them off, or gradually increase their exposure to the outdoors. Leave them outside for a few hours each day during the morning or late afternoon, when the sun is not too strong. Gradually increase the time they spend outside before bringing them back indoors. 

After a while, the plants will develop sturdier stems and the leaves will gradually adapt to the bright sun. The hardening off period may last five to seven days, although some people recommend up to 14 days. Only after this period should you transplant or transfer your plants. 

5. It could be due to fertilizer burn.

Too much fertilizer could kill or burn the roots, and could eventually kill the entire plant. Nitrogen toxicity or salt buildup can badly damage your plants. To fix the issue, water the plants heavily to wash away any nitrogen or salt buildup, although this may not entirely solve the problem. 

Nevertheless, the plants can still be revived if any roots are still alive. This works better for potted plants, since you can continue flushing the soil with water many times and allow it to drain from the containers. 

6. It could be due to diseases or pests.

Pests like aphids could damage your chili plants since they suck the juice from plant tissue. This results in wilting and the plants may eventually die, especially if aggravated by hot or dry weather conditions. 

Diseases like root rot could also affect the plants, as could fungal infections like Fusarium and Verticillium wilt. Common signs include yellowing and wilting leaves, and the lower leaves also tend to curl.  

To treat pest infestation, spray insecticidal soap or neem oil onto the plants. For fungal diseases, use a fungicidal spray and apply the crop rotation method by avoiding replanting in the same spot for at least three years. Discard the potting mix at the end of the season if you are growing your chili plants in containers, and wash out the containers with a bleach solution. 

Conclusion 

Chili plants are perennials that are widely cultivated for their culinary uses. They are drought-resistant, but are also prone to problems and diseases and may eventually die if not treated promptly. You can save your dying chili plants by pruning off the dead leaves to encourage new growth, re-potting the dying plants in a fresh, well-draining potting mix, and making sure the pots have drainage holes to avoid stagnant water. 

Image: istockphoto.com / chameleonseye

Overwatered Palm Tree

Overwatered Palm Tree

Palm trees are members of the botanical family Arecaceae, of the order Arecales. They thrive in tropical and warm temperate climates, and commonly-known species include the date palm and the coconut palm. They are popular as ornamentals in parks and gardens, and along streets. However, they also suffer their share of problems, overwatering being one such issue. 

Common signs of an overwatered palm tree

Pale, limp leaves 

An overwatered palm tree will have an unhealthy appearance and the leaves will appear pale and limp. Healthy palm trees have vibrant, luscious foliage which will be noticeably absent if the tree is overwatered. Its canopy will lose its shape and droop down, lacking  strength. The reason the leaves become limp is that the roots are damaged and cannot absorb nutrients. 

Reduce the amount of water or hold off watering completely so that the roots have a chance to dry out and will be able to absorb oxygen again. If caught in time, this will enable the plant’s circulation to return to normal. 

Root rot

An overwatered palm tree’s roots will become suffocated in the constantly soggy soil, and they will be unable to absorb oxygen, nutrients or minerals. The drowned roots will be susceptible to root rot, which can cause major plant damage because the roots are the plant’s lifeline. Fungi and disease could spread from the roots to the rest of the plant, by which time it will likely be too late to save your palm tree. This is why any overwatering issue should be acted upon at once. Pay close attention to any foul smell, and check for roots that are brittle or black and mushy. 

Presence of pests 

Pests like mealybugs, fungus gnats and whiteflies thrive in humid and soggy environments. If your plants are overwatered, it is quite likely there will be pests lurking, too. 

Loss of color in the foliage 

Palm trees will lose their vibrant green, lush foliage colors if they are overwatered. When the roots are unable to absorb nutrients from the soil due to the constant excess moisture, the plant will develop a nutrient deficiency and chlorosis will set in, causing the leaves to turn yellow. If this happens, reduce your watering and prune or remove any leaves that have turned brown.  

How to save an overwatered palm tree

Remedy the root rot  

Treat root rot by removing the palm from the soil and washing off the roots with running water. Use sharp scissors to cut off rotten roots and save the healthy ones so they can bounce back. Sterilize the scissors between cuts, to prevent the spread of infection. Dispose of the old soil and wash the pot with a solution of bleach or hydrogen peroxide. 

Repot the palm tree 

Having pruned away any rotting roots, leave the remaining roots to dry out for a day before repotting the palm tree. The fresh potting mix should be well-draining, and you can add sand and pea gravel to act as mulch. Ensure that the pot has adequate drainage holes. 

Place the palm in a shaded spot

Place the plant in a shaded spot to recover, and move it back to its normal position once it becomes healthy again. Add perlite to improve soil aeration and increase drainage. Use tap water, rain water or distilled water for watering.

Below are some tips to prevent any further overwatering accidents:

  • To improve drainage, add sand to the soil. 
  • Use a moisture meter to check the moisture in the soil before watering your plants. You can also use a shovel to dig into the soil and check whether it is water-logged. 
  • Plant palms of the same variety together, so that they share the same water requirements. 
  • Water more during hot weather and reduce watering during winter.
  • Do not deep-water every time you water the plants. 

How much water does my palm need?

Palm trees prefer moist soil and should ideally be watered several times a week. When planting these trees, water them daily for the first week and every other day for the second week. Thereafter, water at least two to three times weekly.

Be sure to check the surface of the soil with your fingers and water your palm when the soil feels dry. If the soil is still wet, check it again after a few days, as this is an indication that it is still too soon to water.

Conclusion 

An overwatered palm tree will deteriorate to develop an overall sickly appearance, with leaf discoloration. Aside from yellowing, the leaves may also turn brown or black, and will appear limp, soggy and wilted. Root rot may develop, and there could be a noticeable presence of pests. 

To save your overwatered palm tree, start by remedying any root rot and repotting the palm in fresh soil. Remember to place it in a shaded spot while it recovers. 

Image: istockphoto.com / LightFieldStudios

How To Save A Dying Bamboo Plant?

How To Save A Dying Bamboo Plant?

Bamboo plants, or Bambusoideae, belong to the grass family Poaceae. These evergreen perennial flowering plants can grow as high as 90 feet, depending on the species, while some only grow to several inches high. They originated from China and are fast-growing plants, but also have their share of health issues that could lead to sickness or death.

How to save a dying bamboo plant

Check that your bamboo is getting enough water. 

Bamboo plants thrive in moist conditions and if they are receiving insufficient water their health could deteriorate. Indoor bamboo plants are grown with their roots submerged in water, and pebbles may be added for support. Outdoor bamboo should ideally be watered twice weekly, especially when newly planted. Mulching around the roots could also help retain moisture for your plants.

Ensure that the plant is getting enough sunlight. 

Bamboo plants, especially the large varieties, thrive in areas with full sunlight. To ensure that your entire bamboo plant is getting enough sunlight, you can cut the tops off the bamboo to allow more light into the whole of the clump. You can also thin out the clump to allow more light to penetrate, by cutting off older culms at ground level. 

Check whether the bamboo is planted in suitable soil. 

Bamboo plants thrive in slightly acidic soil with a pH of 6.0, so you may need to test the soil with a test kit to check whether it is suitable for your bamboo. If the soil pH is too high, add compost or fertilizers that are rich in nitrogen. If the pH is too low, add lime or wood ash to increase the alkalinity. 

Check your plant for signs of insects or other pests. 

Bamboo plants are susceptible to aphids, mites, scale insects and mealybugs. You can eradicate these pets by using natural pest deterrents like neem oil and pesticides. 

Prune the bamboo to promote growth. 

Prune away dry and yellowing leaves and cut off excess stems. Indoor bamboo plants may have to be repotted or transplanted if not regularly trimmed back. Outdoor bamboo needs constant pruning; cut back the rhizomes underground at least once a year so the plants stay healthy and do not spread beyond their boundaries. 

How to save a dying indoor bamboo plant

Indoor bamboo plants, scientifically named Dracaena sanderiana, are also called lucky bamboo. Although they look like bamboo, they are actually a member of the Asparagaceae family and therefore not real bamboo. These lucky bamboo plants are popular in homes, apartments and offices. You can save your dying indoor bamboo plants by following these measures:

  • Avoid using chlorinated water; stick to filtered water for your plants. 
  • Provide your plants with an indoor temperature between 60 and 70 degrees Fahrenheit. 
  • Avoid overwatering or underwatering your plants. 
  • Fertilize the plants at least twice per year. 
  • Prune away dying or dead leaves and stems.
  • Place your plants in a spot where there is indirect light. 
  • Check for pests and remove them with insecticides or neem oil. 

Bamboo plant care 

Bamboo plants do best if they receive at least one inch of water weekly, from rainfall or manual watering. Water the plants deeply to help protect them from drought. Do not rake bamboo leaves from around the roots, since the leaves protect the roots, keep them moist and encourage growth. Adding mulch could also promote growth, and a balanced fertilizer should be applied during springtime. 

Bamboo plants prefer fertile, slightly acidic soil that is well-draining but moist. These plants thrive in areas of full sun, and if these ideal conditions are met the plants will grow strong and healthy. 

To plant bamboo, dig holes twice as wide as the root balls. Set the bamboo in the holes and spread out the roots. Backfill the holes and gently press down the soil. Water the holes well to fill in any air pockets. By planting this way, the plants can establish themselves faster since the soil around them is loose and the roots and rhizomes can grow faster. Water the bamboo weekly until it is well-established. Provide some shade for newly-planted bamboo plants for the first two weeks after planting them. 

Conclusion 

Bamboo is a fast-growing plant that is widely cultivated for many uses, including construction, furniture, fabrics and ornamental gardening. It is also prone to problems and diseases, but you have a good chance of saving an ailing plant provided you take the necessary measures as soon as possible. See to it that your plants are getting enough sunlight, water and drainage. Also ensure that their soil is suitably well-draining, and check them regularly for signs of pests.

Image: istockphoto.com / Achim Prill

How To Save A Dying Leyland Cypress Tree?

How To Save A Dying Leyland Cypress Tree?

Leyland cypress trees, with the scientific name Cuprocyparis leylandii, are fast-growing coniferous trees often used for hedges and boundaries. These evergreens are popular for their slender, pyramidal shape, and can grow as high as 60 or 70 feet. However, like most plants, they are also prone to diseases and conditions that can weaken them, and possibly even kill them, if not addressed in time. 

How to save a dying Leyland cypress tree

Check the soil drainage around the tree

If you suspect your Leyland cypress is dying, carefully check the soil’s drainage. These trees thrive in well-draining soil, and if they are not planted in such soil, they are more likely to be afflicted by cypress diseases. Plant the tree in well-draining soil while it is still young. 

These trees grow well in slightly acidic, loamy soil. If the soil is compacted, organic matter may be added. This will enrich the soil with nutrients and discourage the growth of weeds.

A raised mulch bed may also be made to improve soil structure and conserve moisture. Compost manure can be added to fertilize the soil. 

Plant the tree where there is full sunlight 

Leyland cypress trees need at least eight hours of sunlight daily to grow well. Be sure that they are positioned in open spaces where they can soak up the sun. If they are planted in shady spots, it is possible that they won’t grow well and may die. 

Potted trees should not be placed indoors since they won’t have access to full sunlight. Place them outdoors so they can get good air circulation and plenty of sunlight. Remove any taller plants near your Leyland cypress that could be blocking the sun. 

Examine the tree for possible diseases 

Diseases usually develop when the trees are over- or underwatered, or if there is poor air circulation. Any of these factors will weaken the trees and they will become more prone to pathogens that bring diseases. 

Common diseases of Leyland cypress trees include the following:

  • Canker or Seiridium canker – This fungus attacks tree bark and turns the leaves yellow while slowly killing the tree. To detect this fungus, check the bark for cracks, where the fungus attacks. To treat the tree, cut off and get rid of all infected branches. If the fungus has already attacked most of the tree, you will need to dispose of the entire tree at once to prevent the spread of disease. 
  • Phytophthora root and crown disease – This is caused by soil-borne fungal pathogens of the Phytophthora species. It is characterized by red or yellow, wilted leaves. Revive your tree by removing the infected barks, or with the use of fungicides.
  • Needle blight – This non-parasitic disease is caused by incorrect watering techniques, either through under- or overwatering. The leaves will turn brown and the roots become damaged. Revive the tree by providing it with the correct volume of water and use an anti-fungal spray to eradicate the disease. 

Inspect for insect infestation 

Insects and other pests can kill Leyland cypress trees. Common insects that attack these trees include bagworms and spider mites. Bagworms lay countless eggs that hatch into caterpillars, which form silk bags. These numerous bags could damage the tree unless you take prompt action, so apply pesticides as soon as you can and remove the silk bags by hand.

Spider mites attack trees by sucking the sap from the plant’s cells, killing the foliage and destroying the trees. The leaves may also turn brown. Use insecticidal soap, high-pressure water and pesticides to eradicate these pests. 

Make sure you are watering correctly 

If young Leyland cypress trees are not provided with enough water to grow well, they could become weak and possibly die. Take extra care to provide enough water for your trees during their growth stage. Keep in mind that too much water could lead to root rot, while a lack of water will cause the leaves to turn brown, followed by dehydration of other plant parts. 

Young trees should be watered to at least three inches deep. The initial watering should be three times a week for three weeks, after which the watering may be reduced if the roots are established.  If the plants are still showing signs of stress, apply fertilizer in early spring, before the late spring dormancy period.

Mature trees are drought-resistant and their soil should be allowed to dry out between waterings. Water should penetrate at least 24 inches into the soil to ensure that the root balls are properly soaked. 

Conclusion

Leyland cypress trees are fast-growing conifers that are popular as hedges and in landscapes. They are also prone to problems and diseases, but they can be saved from death if treated promptly and correctly. Make sure you support the overall good health of your tree by watering correctly, providing adequate sunlight and drainage, and inspecting regularly for the presence of diseases and pests.

Image: istockphoto.com / keepphotos

How To Save A Dying Rubber Tree Plant?

How To Save A Dying Rubber Tree Plant?

Rubber trees, or rubber plants, are resilient and low-maintenance, but that does not mean you can just neglect them. If your rubber tree is dying, it means there is an environmental factor causing the plant stress, which can manifest as a variety of symptoms. In order to save your dying rubber tree, you need to identify the cause of the problem as soon as possible.

The most common causes of a dying rubber tree are insufficient or too much water, too much or not enough light, root rot, pests, and temperature and humidity issues.

In this article, we will discuss why your rubber tree is dying and how to save it.

How can you tell if your rubber tree is dying?

The most common indications that your rubber tree’s health is declining are leaf blight, black spots on the leaves and stem, stunted growth, dull-colored leaves, rotten-smelling soil, soggy soil, leaves turning yellow or brown, or leaves drooping. 

Why is my rubber plant dying?

Not enough water

If your plant’s leaves look dull and lifeless, or if the plant’s growth has noticeably slowed, or if the soil in the pot looks dried out, your plant is most likely underwatered.

Save your underwatered plant by soaking the soil with water until you can see the excess flow out through the drainage holes at the bottom of the pot. This is to make sure that all of the plant’s roots are reached by the water. When you think the soil has been sufficiently soaked, allow all the excess water to drip out so that the soil does not become soggy. You can also mist the leaves to help rehydrate the plant.

Avoid underwatering your rubber tree by following a watering schedule appropriate for your plant. Normally, rubber trees like to be watered every four to five days, but the frequency may differ according to the local climate and weather. In a warmer setting, the soil dries out faster so you may have to water it more often, while in a colder setting, you may need to water more sparingly to avoid overwatering. Once you have figured out the delicate balance of proper watering, it will be easy.

Too much water

Another common reason that rubber trees die is due to overwatering. When your plant is overwatered, its leaves will turn yellow and start to fall off. It will also become susceptible to opportunistic pests and pathogens.

Save your overwatered plant by withholding water for a longer period than normal to allow the soil to dry out. Remove any dead or dying foliage to prevent the spread of rot.

Avoid overwatering by knowing how to water the plant correctly. The key elements to avoid drowning your plant are well-draining soil and a pot that has drainage holes at the bottom. These two factors will make sure that, even if you accidentally give the plant more water than it needs, the excess water will simply flow out of the bottom of the pot. The aerated soil and drainage holes also allow more air to move through the soil, which helps it dry faster.

As with underwatering, adjust your frequency of watering according to the weather and the climate where you live.

The easiest way to know whether to water your plant is by touching the top two inches of soil. Stick your finger into the soil and if the top two inches are dry, you can water the plant. If the soil is still damp, wait one or two days and check it again.

Lighting issues

Your rubber plant likes its light to be bright but indirect. It needs just the right amount of light – neither too much nor too little.

If the plant’s leaves appear droopy and sun damaged, it is getting too much light. If its leaves are turning brown and drooping and the plant’s stem has grown long and thin, it is not getting enough light. The thinning and lengthening of the stalk is due to etiolation, which happens when light is so scarce that the plant actively grows in the direction of the nearest light. This results in the asymmetrical and uneven growth of the plant.

Save your plant by placing it in a spot where it can get bright, indirect light. A good place for the plant is near a window that gets lots of light in the morning but not in the afternoon. Make sure the spot does not get harsh noon sun, as this may be too much for the plant. If the only possible windows still let in too much light, you can diffuse it by placing a curtain over the window. If the rubber tree is kept outdoors, plant it under another tree or a light-diffusing net.

Root rot

Another reason your rubber tree plant may be dying is root rot. Root rot develops when the plant has been overwatered for so long that the roots have drowned and died. The dead roots start to rot and become susceptible to pests, bacteria and fungi, which will cause the rest of the plant to rot as well.

The symptoms of root rot are mushy, brown or black roots, black spots on the leaves, dull and yellowing leaves, and stunted growth. If the root damage is severe, it may be too late to save the plant.

You can save your rubber tree from root rot if you detect the problem early. Do this by inspecting the roots as soon as you suspect root rot. If parts of the roots have turned brown or black, or have become soft and mushy and are starting to smell like rotten vegetation, then there is rot.

If there are still parts of the roots that are white, those parts are still healthy. Cut off the brown and black roots using a sterile knife or scissors. Dispose of all of the old soil and do not reuse it, since the pathogens that caused the rot will be in there. Clean as much soil as you can off of the roots using water and spray fungicide on the remaining healthy roots. Let the roots air-dry for the next 24 hours.

When the roots are dry, the plant can be repotted. Use a clay or terracotta pot as these materials are more porous: they allow the soil to dry faster and promote better airflow than plastic or steel pots. Make sure the new soil you use is well-draining. You can make your own mix of one part perlite, one part cocopeat, and three parts gardening soil.

Prevent root rot by using the right pot with proper drainage and well-draining soil, and only water the rubber tree when the soil is dry to the touch.

Pests

Pests can also cause a noticeable decline in your plant’s health. Symptoms of pest infestation in rubber trees include falling leaves, leaves with spots and holes, and yellowing leaves due to the insects feeding on the sap of the plant tissue.

You can get rid of rubber tree pests by applying neem oil on the plant or spraying insecticide. Cut off foliage that has become badly infested. If there are only a few visible bugs, you can pick them off by hand or use water from your hose to knock them off.

Alternatively, you can soak a cotton ball with rubbing alcohol and wipe down the leaves with it to kill the insects. Make sure you keep the infested plant away from your other healthy plants to avoid the spread of the pests.

You can prevent pests by keeping your plants a few feet away from each other so they do not spread too fast, checking the plant for pests every time you water it, and keeping the plant as healthy as possible so that it does not become vulnerable to pests.

Temperature issues

If the temperature where you live is constantly fluctuating, your plant may end up suffering. The most common signs of a plant that has been negatively affected by temperature changes are shrunken, browning, discolored and disfigured leaves.

You can save your plant by removing all of the affected leaves, placing it in an area where the temperature is higher than 55 degrees Fahrenheit, and avoiding direct sunlight.

Prevent temperature problems by making sure you keep the plant in a place where the temperature is somewhere between 55 and 80 degrees Fahrenheit.

Humidity issues

Rubber trees need their humidity to be constant for them to stay happy and healthy. You can tell the humidity may be too low if the leaves become dry.

Fix humidity issues by maintaining a constant humidity and misting the plant’s leaves. During dry winters, place the plant in a humid part of your house, such as the bathroom. You can also use a humidifier to help keep the humidity up.

Conclusion

Rubber trees are very easy to care for and require little maintenance, but if you notice any symptoms, or a drastic change in the plant’s overall health, you need to figure out what is causing the problem so you can remedy it as soon as possible.

The most common causes of a dying rubber tree are insufficient or too much water, too much or too little light, root rot, pests, and temperature and humidity issues.

Image: istockphoto.com / Patcharamai Vutipapornkul

How To Save A Dying Avocado Tree?

How To Save A Dying Avocado Tree

Avocado trees, with the scientific name Persea americana, are members of the family Lauraceae. The fruits are botanically considered large berries, containing single, large seeds. These trees originated in south-central Mexico and are cultivated in countries with tropical and Mediterranean climates. They are also prone to pest infestation, diseases and other problems that could lead them to the brink of death unless promptly addressed. 

How to save a dying avocado tree

1. Identify the problem, and consult professionals if necessary. 

Make a mental note of when you notice symptoms on your avocado tree, as it can be helpful when determining how to address the problem. Once you have identified the problem, you need to decide whether you can handle the situation yourself, or if you would like to seek the help of professionals. It could also be helpful to discuss the issue with fellow avocado tree growers, as they may be able to provide some guidance. 

2. Protect the tree from sunburn. 

If your avocado tree looks like it is dying and the leaves are turning black or brown, it could mean that the tree has severe sunburn. This damages the chlorophyll in the leaves and slows the rate of fruit production, eventually leading to death. Provide shade for your tree using cloth, or apply white latex paint on the branches to protect them from sunburn.

3. Protect the tree from fungal diseases.

Brownish leaves and branches that are starting to turn black could be an indicator of fungal disease. Common diseases among avocado trees include the following:

  • Rosellinia root rot – Symptoms include white patches on the trunk or limbs, and purple growths near the soil. This is also known as white root rot.
  • Oak root rot – These fungi look like a large group of yellow or brown mushrooms near the soil line. It is also known as Amarillo root rot.
  • Common avocado root rot – Symptoms include brown leaf tips, black and rotting feeder roots, and dead branches on the treetops. 

If your tree is infected with Rosellinia root rot, or white root rot, destroy it. Uproot it, along with all of the infected soil, to avoid the spread of infection to other trees. 

Oak root rot and common avocado root rot are both treatable with fungicides. Apply these immediately and again in late spring and summer. Gypsum should be added to the first six inches of soil to prevent the diseases from spreading. 

If the infection is severe, dry out the tree’s roots by pulling away the top six inches of soil to expose them. Make sure you do not damage the roots, and cover them with a cloth so they do not get sunburnt. Allow them to dry and then replace the soil with fresh, sandy soil.

4. Use wood mulch to encourage growth.

To help your avocado tree recover from diseases and boost its growth, place wood mulch around its base. The mulch discourages the development of bacterial or fungal infections and retains the soil’s moisture. Cover the root area near the base properly. 

5. Take care not to overwater the tree.

Keep track of your watering schedule to avoid overwatering your tree.  Overwatered avocado trees could develop root rot, which will likely lead to fungal and bacterial infections. By keeping track of your watering schedule, you will reduce the opportunity for fungal spores to thrive and multiply. 

6. Check for excess minerals. 

Excess minerals like chlorine and boron could promote bacterial and fungal growth. This happens most often in areas near the sea, or if the water source is saltwater. To avoid this, use rainwater or freshwater to irrigate around the base of the tree. If the tree does not get better, take a soil and water sample and have it tested by professionals so they can assess the situation and provide a suitable solution. 

7. Ensure adequate drainage. 

Excess water near the tree’s base makes the soil soggy and could lead to root rot since the roots are always soaking in water. The culprit is usually a poor drainage system. To fix this, dig drainage channels around your tree. You can also plant the tree on sloping land, or use pipes for channeling. Potted avocado plants should be in pots that have drainage holes at the bottom. 

8. Fertilize correctly.

Avocado trees need a suitable mix of nutrients to grow well, and a nutrient imbalance may encourage the development of pathogens. Plant growth becomes stunted and the tree’s overall health may deteriorate. Provide avocado fertilizers in the correct proportions, and take soil samples to determine which nutrients are missing. 

9. Use fungicides only as a final recourse. 

If the above-mentioned measures were not sufficient to revive your dying avocado tree, you could try applying fungicides. Consult with specialists regarding the correct application. Fungicides, when used correctly, can eliminate pathogens and promote plant recovery and growth. 

Conclusion 

Avocado trees yield nutritious, edible fruits that are consumed by people the world over. However, they can be prone to problems and illness, and could die if not treated promptly. Save your dying avocado tree by ensuring that all of its needs have been adequately met to support its optimal health, and consult professionals when necessary for guidance on the proper measures to revive it.  

Image: istockphoto.com / lukrecja

How to Save a Dying African Violet?

How to Save a Dying African Violet

African violets, with the botanical name Saintpaulia, comprise ten species of perennial flowering plants of the family Gesneriaceae. These cute houseplants have dark green fuzzy leaves and produce blue-violet, pink, lavender, red-violet, lavender-pink or white flower clusters. They are native to Tanzania and southeastern Kenya, in East Africa. Like most plants, they are prone to problems and diseases, and could deteriorate and even die if not treated promptly. 

How to save a dying African violet

1. Fertilize your dying plants.

African violets tend to suffer from flower loss or limp blooms if they are under-nourished. If you notice these signs, fix the issue by fertilizing your plants with plant food to provide them with the essential nutrients they are lacking.

2. Avoid overwatering. 

Crown or stem rot can develop if your plants are constantly drenched with water. Invest in a self-watering pot to prevent the plants from sitting in damp potting mix, and keep a detailed watering schedule. 

3. Increase the humidity. 

African violets originated in rainforests where the humidity is high, and they can suffer from burnt or dry leaf tips if they become dehydrated due to low humidity. To prevent this, place your plants on a humidity tray to boost the air’s moisture around them. 

4. Maintain a suitable temperature. 

Drooping leaves could mean that your plants are suffering due to low temperatures. Make sure to maintain the temperature for indoor plants at around 70 degrees Fahrenheit, both during the day and at night. 

5. Treat fungal diseases immediately to avoid further damage. 

White leaves and flowers indicate mildew, which is a fungal disease that can weaken your plants. To remedy this, repot your plants using fresh potting mix, and sterilize the pots if you are reusing the same ones. Use fungicides or a homemade antifungal solution to get rid of the infection.

6. Move your plants to a shaded spot, or where there is indirect sunlight. 

If your African violets have brown spots on their leaves, it could indicate sunburn from too much exposure to direct sunlight. Transfer your plants to a location where there is indirect sunlight, or use curtains to diffuse the harsh rays. 

Signs that your African violet is dying 

Limp blooms and flower loss

Damaged, limp and wilted flowers indicate that your plants are in distress. Flower loss is an indication of too much light, nutrient-deficient soil, or insufficient water. See to it that you water your plants enough, nourish them with fertilizers, and make sure they are not placed in areas with direct sunlight.

Presence of crown and stem rot

African violets that look sickly in the middle or along the stems could be suffering crown or stem rot. This is caused by bacterial or fungal pathogens that infect decaying plant parts, and usually affects the roots first. The decay is caused by overwatering, so to fix the problem you need to repot the plants in coarse, well-draining potting mix. This prevents the roots from sitting in stagnant water that pools in the soil.  

Invest in self-watering pots that are designed to release just the right amount of water into the potting mix. 

Dry or burnt leaf tips

Leaves that are turning brown, burnt, dry or crumbly are indications that your plants are dehydrated. Act on this problem at once, because the leaves could develop necrosis, a form of cell damage. The usual culprits are under-watering, dry air, or too much sunlight. African violets thrive in humid and bright conditions, but prefer not to get direct sunlight. 

Place your plants in humidity trays so they can enjoy the extra moisture as the water evaporates from the trays.

Drooping leaves

African violets with drooping leaves could be thirsty or suffering due to low temperatures. If your plants are well-watered but still have drooping leaves, they may be positioned near air-conditioning vents.  To fix the problem, make sure that the temperature near the plants is around 70 degrees Fahrenheit, while the nighttime temperature should not be lower than 60 degrees Fahrenheit.

White leaves and flowers 

Powdery mildew is a fungal disease that could overrun your plants and turn the leaves and flowers white. To treat your plants, you need to hold off on watering and repot them using a fresh soil mix. Apply fungicide or make a homemade antifungal solution of baking soda and water and spray it on the plants. 

Brown spots on leaves

Brown spots, or leaf scorch, is a form of sunburn and indicates that your plants have been exposed to too much sunlight. To encourage healing, transfer your plants to a room where there is indirect sunlight or, if planted outdoors, move them to a shadier spot. 

Conclusion

African violets are sought-after houseplants due to their attractive flowers that come in blue-violet, pink, lavender, red-violet, lavender-pink and white. Like most plants, they are also prone to problems and diseases that could lead to their death unless the causes are acted upon. Make sure your plants are adequately fertilized and correctly watered, and take special note of the humidity where they are growing. Also, maintain suitable temperatures for your plants, and treat any fungal diseases promptly with fungicide. 

Image: istockphoto.com / Pilat666

Overwatered Christmas Cactus

Overwatered Christmas Cactus

Christmas cactus plants, with the scientific name Schlumbergera bridgessii, are also referred to as Thanksgiving cactus or Easter cactus plants. These plants, which originated in the coastal mountains of southeastern Brazil, are easy to care for and maintain. However, like most plants, they are susceptible to the negative effects of overwatering. 

Overwatered Christmas cactus: What are the symptoms?

The common symptoms of an overwatered Christmas cactus include:

  • Limp, wilted leaves 
  • Leaves dropping off 
  • Soft branches
  • A bad odor
  • Blackened, slimy roots 

How to save an overwatered Christmas cactus

If your plants are showing signs of overwatering, you can probably still save them if you act fast. Tip out any standing or stagnant water and carefully remove the affected plants from their containers. Remove any soft stems and rinse the roots to remove any fungus that may have started to grow. If there are any blackened roots, trim them off, as they are rotten.

Let the plants dry out for a day or two and then repot them in fresh soil. Wait a day after replanting before recommencing a regular watering regimen. Plants recover more easily if the symptoms are addressed promptly. 

Use a soil meter to check the condition of the soil and to avoid any future overwatering issues. Be sure to use a mixture of one part sand, one part potting mix and one part orchid bark for good drainage.  Unglazed pots are ideal, as they encourage evaporation of excess moisture.

Expose the plants to full sun for at least a few weeks before the blooming period. Provide darkness for at least 14 hours a day to encourage flowering, and suspend watering during that time. 

How often should you water a Christmas cactus?

The frequency with which you water your Christmas cacti will depend on the time of the year. The general rule to avoid overwatering is to make sure that the top inch of soil is dry before you water again. You should also take into account the climate and your location. If the weather is very hot, then the plants may need to be watered every two to three days. If the plants are grown indoors in a cool area, you may need to water them only once a week. 

Water less during the fall and winter, as this can help encourage the plants to bloom. 

These plants also enjoy a humid environment, and the best way to provide them with humidity is to place a tray of water next to them. The water will evaporate, increasing the humidity in the surrounding air. You can also mist your plants with a spray bottle.  

Christmas cactus plant care 

Christmas cacti adapt well to low light conditions, but will bloom more if exposed to brighter light. However, too much light can burn their leaves, so be sure to place them in an area where there is some shade.

These plants require frequent watering during the growing period in spring and summer to keep the soil slightly moist. Allow the top inch of soil to dry out between watering, and do not allow the plants to sit in water as this could lead to root and stem rot. A weekly application of fertilizer is appropriate. 

Christmas cacti prefer temperatures between 60 and 70 degrees Fahrenheit and average to high humidity levels. Place a tray of pebbles filled with water near the containers to add humidity to their environment.  

Once the plants finish flowering, around six to eight weeks before reblooming, allow them to begin their dormancy cycle by reducing the light and the temperature. Cut back on watering and make sure the plants receive 14 hours of darkness daily, with average temperatures of 50 to 55 degrees Fahrenheit. Make sure to keep them away from drafty areas. 

Conclusion 

Christmas cacti are indoor succulents popular for their extended bloom time. Like most plants, they are also prone to overwatering. The most common signs of an overwatered Christmas cactus are limp, wilted leaves and soft branches. The leaves may also fall off more easily, there may be a bad odor, and the roots could turn dark and slimy due to root rot. 

Image: istockphoto.com / Olga_Anourina

How To Save A Dying Palm Tree?

How To Save A Dying Palm Tree?

Your palm tree may be dying due to insufficient light, cold temperatures, incorrect soil type, overwatering, underwatering, lack of nutrients, transplant shock, or pests.

Figuring out exactly which of these factors is causing your palm tree’s declining health is the first step in treating the problem.

In this article, we will discuss the different reasons your palm tree may be dying. and how to save it.

Why is my palm tree dying and how can I fix it?

Light issues

If your palm tree does not get enough bright, indirect light, it can cause the plant to become stressed. Although there are species of palm that do fine in areas with low light, they will still thrive when given more.

Palm fronds that do not get enough light will gradually turn yellow, then brown, and then die. They may even become etiolated, a process in which the plant will literally grow toward the closest source of light out of desperation. This results in the plant growing asymmetrically, and such stretched-out palm trees are more likely to attract the attention of pests.

If the palm tree gets too much light, on the other hand, the fronds can become sun-damaged, so make sure that they only get morning or late afternoon light where they are planted. If you keep the palm tree indoors, place it in either an east- or west-facing window. A skylight may be enough for a tall plant, but will be insufficient for short plants.

During cold or rainy weather, sunlight may be scarce and you may need to use a grow light to give the palm the light it needs.

Soil type

The moisture balance in the soil is important for a palm tree, which is why the correct soil type can make a huge difference to your palm’s growth. The soil you use should hold some moisture, but it should not be compact. It needs to be well-draining and aerated so that it can dry out between watering. This allows oxygen to reach the roots, which is a requirement for the plant’s survival.

Check if the soil contains perlite, coconut coir or coarse sand; these components will help keep the soil well-draining. Refrain from using organic matter because it will break down and make the soil even more compact.

Another soil issue your plant may experience is a buildup of materials that are toxic to the plant in high levels. These materials can come from fertilizer. The tree’s leaves will develop brown tips and its growth could be stunted. You can get rid of these toxic materials by flushing them out with water once a month. Try using distilled or filtered water to reduce the problem.

Overwatering

Even though palm trees want moist soil, they should not be left to stand in soil that is constantly waterlogged.

An overwatered palm tree will have yellow and brown leaves, but the most definitive sign of overwatering can be seen in the roots. You will need to uproot the tree to check the roots. Healthy roots should be firm and white; if they are brown, black, mushy and smell like rotten vegetation, the tree has root rot.

You can try to save the tree by cutting away the rotten parts of the roots and changing all the soil in the pot. After repotting, do not water the soil immediately; instead, wait for the soil to dry out after several days.

Underwatering

Your palm tree will also not do well if it is left to dry out for extended periods of time. Brown tips on the fronds may indicate a less-than-ideal watering situation.

Humidity

Palm trees are native to the tropics, so the low humidity inside most homes can be a challenge for your palm. When the moisture in the air is low, the tree becomes stressed and the fronds will start to develop brown edges.

Try to keep the humidity around the plant at around 50% or higher. To increase the humidity, keep a water tray near the plant and always keep the plant’s soil moist but not soggy.

You can also use a mister to spray water on the palm during the dry winter, but some people believe this does not do much for the overall humidity of the room and can even encourage fungal growth. You may be better off purchasing a humidifier to keep your palm tree healthy.

Drafts

Another reason your palm tree may be dying is due to drafts in your home. The tree will turn yellow and dry out when exposed to either cold or warm drafts. These plants like a place with good air circulation, but if the air is too cold or too hot for their liking, they will become stressed. Good air circulation also helps keep pests away.

In the winter, keep the palm tree away from areas of the house that are affected by air flow from vents.

Too much fertilizer

Palm trees do not need much fertilizer to thrive, so feeding them even a little more than they need can result in burned roots and browning leaf tips.

Limit the feeding to only two or three times a year during the warmer months, using a half-diluted formula. Organic fertilizer will also be more gentle on the tree.

Transplant shock

When you repot your palm tree, its health may decline because the process is traumatic and stressful for the tree.

When repotting, do not disturb the root ball. Cutting or tearing the root ball will only cause more stress. You may need to water the tree more frequently after repotting, since the roots will need time to recover and return to normal.

Pests

If your palm tree starts to look yellow and mottled, it could be a sign of a pest infestation.

The most common pests that attack palm trees are spider mites, mealybugs and whiteflies.

Look for pests under the leaves, especially near the base of the tree. Watch out for cottony patches of mealybugs and tiny spider mite webs. You can tell if the plant has a whitefly colony because they will fly around when disturbed.

You can try to remove the bugs by spraying the plant with water to dislodge the insects, or you can also use rubbing alcohol as a topical fix to kill them.

In a more serious infestation, you can use neem oil. Coat the underside of the leaves once a week for a month to make sure all the pests are dead.

Conclusion

The most common reasons your palm tree may be dying are insufficient light, cold temperatures, incorrect soil type, overwatering, underwatering, lack of nutrients, transplant shock or pests.

Treatment always starts with correctly identifying the cause of your plant’s declining health.

As long as you are able to provide your palm tree with all its basic cultural needs, you should be able to revive it and keep it happy in the future.

Image: istockphoto.com / Eagle2308

How To Save A Dying Venus Fly Trap?

How To Save A Dying Venus Fly Trap?

Venus flytraps, with the scientific name Dionaea muscipula, are carnivorous perennial plants that are popular as houseplants. They capture and digest their prey, mostly insects and arachnids, using a trapping structure on their leaves which is triggered by tiny hairs on the inner surfaces. These plants are native to the subtropical wetlands on the East Coast of the United States in North and South Carolina. Like most plants, they are also prone to certain problems and diseases, and may even die without timely intervention. 

How to save a dying Venus flytrap

Check your plant’s soil.

Venus flytraps thrive in poor soil and are intolerant of nutrients. This means they do not like standard soil that contains minerals and nutrients. If this is what you are using, you need to re-pot your plant at once, or it could cause the plant to die. Venus flytraps prefer nutrient-free carnivorous plant mixes. You can also make a DIY mix by mixing peat or long sphagnum moss and a draining agent like sand or perlite. 

Check the water you use to water the plant. 

While regular plants prefer tap or bottled water, avoid giving this to your Venus flytrap plants. Use nutrient-free, mineral-free water such as rainwater, distilled water, or water treated with reverse osmosis. If you have been using the wrong water, it is best to re-pot the plant in new soil moistened with the right kind of water. Continue watering the plant using nutrient-free water. 

Review your watering schedule. 

Venus flytraps are accustomed to moist soil and humid weather. These carnivorous plants need constantly wet soil to thrive. If the soil dries out between watering the plants may start to wilt. Make sure you water your plant as soon as the soil starts to dry out, to keep it moderately damp. 

Continue to water during dormancy, but lower the rate and be sure to adapt to changing weather conditions. Adjust your watering schedule according to the season. 

Check that the plant is receiving enough sunlight. 

Venus flytraps adore the sunlight and they should have at least 12 hours of sunlight daily. If you cannot provide sufficient access to sunlight, you can also supplement natural sunlight with grow lights. If they are deprived of light their leaves become droopy and their color may fade. If this happens, either move the plant to a sunnier spot or introduce a grow light. 

See to it that you are feeding the plant correctly. 

You can help revive your dying Venus flytrap by feeding it correctly. Feed it with insects or arachnids only, and do not give it any kind of human food. You should only feed the plant if it does not have natural access to insects, such as if it is kept indoors. 

Be sure not to overfeed the plant; one bug every four to six weeks is enough. You should also only feed one trap on the whole plant at one time. The bugs you feed your plant should be about one-third the size of the trap. 

Check the plants for pests and diseases.

Examine the plants regularly for any signs of pests or diseases. Eradicate aphids with Pyrethrin, mites with a miticide, and apply a sulfur-based fungicide to treat a fungal infection. 

While you are awaiting the full recovery of your Venus fly trap, do not fertilize it. Instead, focus on feeding it correctly. If the plant is recovering from a sickness, avoid repotting it until it has recovered, and wait before you change the soil. 

Place the plant in areas where there is no constant movement to prevent stress. Keep the plants away from pets, as they can also cause stress.  You may also have to skip the flowering process and cut off the flower stalks, as flowering can drain the plant’s energy if it is not healthy. 

Conclusion 

Venus flytraps are unique, carnivorous houseplants that love sunlight and are very easy to grow. Like most plants, however, they are also prone to problems and diseases, some of which could cause them to die. Make sure you use the correct soil, as Venus flytraps do not thrive in standard soil. Also ensure that you use the correct type of water, feed them correctly, and follow an appropriate watering schedule.

Image: istockphoto.com / de-kay

How To Save A Dying Apple Tree?

How To Save A Dying Apple Tree?

If an apple tree is dying, it is because an environmental factor is causing it stress and affecting its overall health. If you think there is something wrong with your apple tree, you need to act quickly to diagnose the ailment in order to correctly fix the problem.

The most common causes of a dying apple tree are Nectria canker, woolly aphids, fire blight, Frogeye leaf spot and Phytophthora rot.

In this article, we will discuss the various reasons your apple tree may be dying, and how to save it.

Why is my apple tree dying?

Nectria canker

This fungal disease is caused by the Nectria galligena fungus. It attacks the vulnerable wounds on the tree’s branches, causing sunken areas. When the branches get severely infected, they will die back and fall off.

Several factors make the apple tree susceptible to Nectria canker, including root damage, bad pruning techniques, diseases, pests and injuries. If your tree is healthy, you do not have to worry about this disease because the tree will be more than capable of staving off the infection on its own. Only newly transplanted trees, young or old trees and unhealthy trees have a high risk of infection, and most of these actually die from it.

You can tell a tree has nectria canker when there are discolored, sunken and dead areas on the trunk and branches. The leaves will wilt and the fruit will rot.

Treat nectria canker by pruning off any infected twigs and branches. If you have to remove a big branch, do so and paint over the stump immediately with wound paint.

Woolly aphids

These are a type of aphid that feeds on the sap of the apple tree. First, they will attack the bark and the stems, but they can progress to the roots if the infestation is not dealt with. These insects may be minute and unassuming, but if there are enough of them they can really do some damage to the tree, making it vulnerable to even more opportunistic pathogens.

You can tell that your apple tree has woolly aphids if you see that the bark of the tree is being attacked, but the leaves are largely unaffected. You will see a white, fluffy substance on the bark, and if you scrape it off, you will find brown bugs feeding on the sap.

You can get rid of the aphids by using neem oil on the affected areas. This is useful in small-scale infestations. If the infestation is large, you are better off using pesticides. If there are any severely damaged branches, prune them off. Repeat the treatment if necessary, until you have killed every single aphid.

Fire blight

This disease is caused by the Erwinia amylovora bacterium, a lethal disease that is highly contagious. The infected tree will pass the bacteria to the twigs and the blossoms, from where it will be spread to other trees by birds, rain, wind and irrigation water.

You can tell that an apple tree has fire blight if its blossoms look scorched and brown. The branches will then become affected, the leaves will wilt and the twigs will curl. The branches will have cankers with orange-colored liquid, making the tree look like it is on fire – hence the name of the disease.

You can save an apple tree with fire blight by pruning off any dead or infected branches during the late winter when the tree is dormant. Make sure you do not prune during the growing season, because this only causes the disease to spread even further. Burn all branches that have orange ooze. If the fire blight was severe the year before, make sure you spray fungicide on the tree before it blooms.

Frogeye leaf spot

This disease is also called black rot, and is another deadly apple tree disease. This is a fungal disease caused by Botryosphaeria obtusa, and can affect the branches, trunk, leaves and fruit of the apple tree.

Specifically, the frogeye leaf spot refers to the stage of black rot when the leaves are infected. Once the fungus reaches the fruit, it is referred to as black rot. This disease is definitely capable of killing the tree, especially once it reaches the branches.

Symptoms of frogeye leaf spot or black rot are purple spots on the leaves; these spots will enlarge into brown circles with a purple margin. The spots look like frog eyes. Near the end of the blossom, rotten spots will develop on the fruit and the fruit will dry out while still on the branches.

You can save an apple tree with frogeye leaf spot by using proper sanitation. Prune off all the infected branches and fruit, and dispose of them properly. Prune any area showing signs of leaf spot as soon as possible.

Trees that are already infected with fire blight will be more susceptible to black rot. To avoid black rot, avoid fire blight first. As mentioned above, prune the tree in the dormant season as opposed to the growing season, so the fire blight does not spread.

Phytophthora rot

This is the most common cause of root rot in apple trees. It is caused by a fungus that affects the base and the root of the tree. It is also called root rot, crown rot and collar rot. 

The differences in the name depend on the location of the infection: Collar rot happens in severe infections and is visible above the tree union. Crown rot affects the crown system of the roots and the trunk base. Root rot, meanwhile, refers to the infection that occurs in the roots.

Symptoms of Phytophthora rot mostly go unnoticed in the early stages and only become noticeable when the disease has advanced into the tree. As the disease progresses, the branches will start dying and the leaves will turn yellow, wilt and fall off the tree. These above-ground symptoms are not unique to Phytophthora rot, so you may need to examine the roots themselves to be sure. The root system will appear weakened, there will be rotten feeder roots, and the larger roots will be rotten and decayed.

You can test to confirm a Phytophthora infection by cutting off a piece of root bark with a knife. If the inside of the root is green, it is healthy, while an infected root will be brown or orange.

You can save a dying tree by removing the soil around its base and exposing the affected areas. When you leave the roots exposed, they will dry out and temporarily stop the spread of the disease. Spray the roots with fungicide and place new soil over them once they are dry.

Conclusion

If your apple tree is dying, it is most likely due to pests or disease. These pathogens cause stress to the tree, which affects its overall health. Make sure you address the problem as soon as possible so that damage is minimized.

The most common causes of a dying apple tree are Nectria canker, woolly aphids, fire blight, Frogeye leaf spot and Phytophthora rot. Do not ignore any of these infections, because they are all capable of killing your beloved apple tree.

Image: istockphoto.com / Tarja Jalkanen

How To Save A Dying Rhododendron?

How To Save A Dying Rhododendron?

Rhododendrons comprise about 1,000 species of woody flowering plants of the family Ericaceae. They are famous for their attractive foliage and dainty flowers, and several species are cultivated as ornamentals. While these plants are relatively low-maintenance, they can still  be prone to problems and diseases that could lead to sickness and death if not promptly addressed.

How to save a dying rhododendron

Whether or not you can save your dying rhododendron will depend on how much damage has already been done. However, the following general health care tips will ensure your best chance at doing so:

  • Cut back overhanging parts, or transplant them if necessary.  
  • Reduce your use of nitrogen-rich fertilizer, since over-use could result in non-blooming buds. 
  • Practice mulching to protect the plants from freeze and thaw cycles during winter. Mulch over the root zone also helps retain moisture in the soil.
  • Prune the plants well to prevent die-back. 
  • Check the leaves regularly for any discoloration, to ensure early diagnosis and control of pests or disease. 
  • Plant the dying plants higher in the ground to enable the roots to absorb nutrients more easily from the soil near the surface. 
  • Minimal cultivation should be done around the plants, because their shallow roots are susceptible to damage if this is not done with caution.
  • Avoid overwatering the plants. 
  • Be sure to test the soil regularly for iron or magnesium deficiency.
  • Position a shade-net to prevent sunburn, or transfer your plants to another spot if their current position is resulting in sunburn.
  • Spray the plants with water in the evening to correct drooping leaves. 
  • Check the adequacy of the soil drainage and make amendments if necessary. 

These plants need regular watering during summer when there is less rainfall. To promote vegetative growth, remove the dead flowers. Warp the plants with burlap in extremely cold temperatures, and apply extra mulch around the base of the plants during the fall season. Transplanting should be done during fall or early spring when the plants are dormant due to the cool temperatures. 

Reasons your rhododendron plants may be dying

Drainage 

Rhododendrons become sickly and could die because of poor drainage and waterlogged soil. If the soil particles are too heavy or compacted, the roots will drown and root rot can set; the plants will not mature and will eventually die. 

Wrong planting depth 

Rhododendrons should not be planted too deep in the soil, since they have surface roots. Root balls should be at the soil surface; if they are buried too deep they will die. To ensure that the roots are able to breathe, be cautious about applying too much mulch on the soil’s surface. Replant ailing plants at a shallower depth if you suspect they may be planted too deep, and apply mulch over their root zone. 

The variety is not hardy enough

The hardiness of the specific rhododendron variety may also play a role in whether it will survive in the area where you are growing it. If you are struggling to keep your plants alive, it may be a good idea to select hardier varieties.

Diseases and pests 

Common diseases among rhododendrons include honey fungus and root rot. Pests such as vine weevils attack the stems, leaves and roots of the plants. 

Early signs of a dying rhododendron

Yellowing leaves

Rhododendrons that are magnesium-deficient tend to develop yellowing leaf tissue between green veins, especially among older plants. If the leaves are yellowing on younger plants, it could be that the soil is too alkaline for the plants.  Fix this issue by spraying iron sulfate around the plants, or adjusting the soil pH to make it more acidic.

Brown spots on the leaves

Brown spots can be caused by fungi and humid summer temperatures. To fix this, cut or trim a few branches to prevent overcrowding, and treat the plants with fungicides. 

Buds fail to open

Buds turn black and die before opening because of a fungal infection called bud blast. To fix this, increase the humidity around the plants and place them in areas where there is sufficient sunlight. 

Curled-up leaves 

Leaves can curl up, especially during winter, when plants are trying to conserve water over the cold spell. If this happens during summer, it means that the plants are too dry. Water them immediately to prevent their leaves from curling and wilting, and to stop the dehydration doing any further damage. 

Sudden wilting and death of stems 

Fungi, such as the Phytophthora species, can cause stems to wilt and die. This type gets under the bark, causing stems to die in the middle of a healthy plant. Plants most at risk are those which have been weakened by late frost, drought, or over-exposure to the sun. The dead plant parts should be cut off and disposed of to prevent the spread of infection.

Rhododendron plant care 

Take special care of your plants and mulch them every spring with two to five inches of pine bark chips or pine needles. This will protect the shallow roots and help retain moisture, since lack of water could reduce bud formation. Leave a few inches free of mulch around the trunks.

Fertilize rhododendrons sparingly and only when the flower buds swell during early spring, despite them being fall bloomers. The plants will get burned if you apply too much fertilizer.

Water your rhododendrons regularly, particularly during summer and if there is less than once inch of rainfall per week. Practise deadheading, and remove the dead flowers carefully.  During the fall, wrap the plants with burlap and apply extra mulch around the base. 

Conclusion 

Rhododendron plants are popular for their spectacular blooms and attractive foliage. However, they are also prone to problems and diseases and may wilt and die if not treated promptly. Check the plants regularly for any leaf discoloration and avoid overwatering them to prevent root rot.

Image: istockphoto.com / AL-Travelpicture

How To Save A Dying Jade Plant?

How To Save A Dying Jade Plant?

Jade plants, with the scientific name Crassula ovata, are also commonly known as lucky plants, money plants or money trees. These succulents are popular house plants, and are considered by some to bring good luck. Although relatively hardy, they are also susceptible to problems and diseases that could lead to their death unless promptly addressed. 

How to save a dying jade plant

Repot the plant 

To save your dying jade plant, try repotting it in a new pot with fresh and well-draining soil. This will help if your plant has been overwatered or has developed root rot. Wash off the roots and cut away any that are dark or slimy, so that only the clean parts remain. 

Use a blend of organic matter, like peat moss, and inorganic matter, like granite or clay, for your potting mix. Jade plants prefer not to have too much space around their roots, and only need repotting every three years if they are healthy and disease-free. 

Prune your plant 

Another way to save your dying jade plant is to prune it. Start with the older leaves at the bottom of the plant, as these are the oldest and the first to fall off. Get rid of long, leggy branches, which will droop over time. Prune the plant regularly to encourage new growth and to keep it tight and upright. 

Propagate if there is no hope of saving your plant

You can propagate new jade plants should your dying plant have no hope of survival. Propagate using stems or cuttings; the stems should be two to three inches long with at least two pairs of leaves. Place the stems or cuttings in a warm, dry area for a few days until calluses form over the cut areas. You can then lay the leaves on top of the soil and cover the cut ends with soil. 

Place the new plants in a warm area with bright but indirect sunlight. Do not water them for about two weeks, or until the cuttings develop roots. Once the plants are firmly rooted, water them as you would regular jade plants. 

Signs that your jade plant is dying 

Drooping leaves

Drooping leaves may be normal in certain circumstances, especially if there has been a sudden temperature change. However, if the leaves continue to droop or fall off frequently despite a consistent temperature, it could mean the plant is sick. Common reasons for drooping leaves include over- or underwatering, insufficient light and pest infestation.

Brown leaves 

Dying or sickly jade plants tend to manifest brown leaves. Older leaves may also turn slightly yellow. Common culprits include sunburn or underwatering, but this may also be due to the presence of pests. 

Wilted and limp leaves 

Limp, wilting leaves are common signs of dying or sick jade plants. The leaves may also appear soggy, and the plants will have a sickly appearance overall. This could be due to inadequate sunlight, overwatering, over-fertilizing, or exposure to freezing temperatures. 

Reasons your jade plant is dying

Overwatering 

Succulents retain water, meaning these hardy plants can thrive in desert temperatures and survive without water for long periods. It also means they are susceptible to overwatering. If over-eager plant owners spoil their plants by giving them too much water, their leaves will become soggy and the branches will develop a mushy texture. Correct this problem by only watering the plants if the soil has completely dried out.  

Root rot 

Your jade plant could be dying because of root rot, which is caused by a fungus that thrives in wet, soggy soil and attacks vulnerable plant roots that have been weakened by overwatering. 

Because this condition initially manifests under the soil, it goes unnoticed until its later stages. Check the plant’s root system frequently to make sure that the roots are healthy. Root rot can cause the plant’s leaves to turn yellow and the branches to break off easily. The roots will also develop a black, gunky slime. 

Fix this issue by making sure to use well-draining soil and keep your plants in pots that have drainage holes. This way, the water does not remain stagnant in the soil. 

Freezing temperatures

As mentioned earlier, jade plants thrive in areas with hot climates. If exposed to freezing temperatures, they could end up sickly and dying. Protect your jade plants from cold weather by bringing them indoors or placing them in a greenhouse during the winter months. 

Pests 

Jade plants become sickly and may die due to pest infestations. Mealybugs suck the sap from plant tissue, weakening the plants. They also secrete honeydew, a sticky substance which attracts aphids and fungal diseases. Other pests that could ravage your jade plants include spider mites and fungus gnats. 

Eradicate these pests by spraying the plant with a solution of isopropyl alcohol and water, or neem oil. You may also use insecticidal soaps. 

Conclusion 

Jade plants are drought-resistant plants that thrive indoors. Like most plants, they are prone to certain problems and may become sick or even die because of fungal diseases, overwatering or frozen temperatures. You will have the best chance at saving your dying jade plant if you address the problem promptly by pruning and repotting the plant, reviewing your watering schedule, and checking thoroughly for pests and disease.

Image: istockphoto.com / Helin Loik-Tomson

How To Save A Dying Poinsettia Plant?

How To Save A Dying Poinsettia Plant?

If your poinsettia plant is dying, it means there is an environmental factor that is negatively affecting your plant and causing it stress. The key to effectively reviving your dying poinsettia is to correctly identify the cause of the stress.

In this article, we will discuss the different reasons your poinsettia may be dying and how to save it. If you are currently experiencing this problem, keep reading.

How do I know my poinsettia is dying and how can I save it?

The leaves are turning yellow

One of the signs that indicate an ailing poinsettia is yellowing leaves. Yellowing poinsettia leaves are often an indication of overwatering, but they can also be observed in underwatered poinsettias. You can tell if the discoloration is due to overwatering or underwatering by checking the soil at the base of the plant and through the drainage holes of the pot. If the soil looks and feels boggy and waterlogged, then it is probably overwatered. Overwatered poinsettias’ leaves will droop and turn yellow.

When a plant’s soil is waterlogged, oxygen cannot penetrate it to reach the roots. Roots need oxygen to breathe, and they will die without it. Dead roots can develop root rot, which will leave them susceptible to fungal or bacterial diseases.

Other factors that contribute to overwatering are pots that do not have drainage holes at the bottom, soil that is poorly-draining, and placing a drip-tray or saucer underneath the pot but forgetting to empty it.

You can save a yellowing poinsettia by making sure the soil is capable of drying out in just the right time – neither too quickly nor too slowly. If you think you have been watering the plant too frequently, scale back the watering and only do so when the top two inches of the soil are dry. If the soil is still somewhat damp, check it again after one or two days. Essentially, you are aiming to provide the volume of water that the plant would consume in its natural habitat.

The plant is turning black

When the temperature around your plant is too low, or if the plant is exposed to frost, it can turn black from frost damage. Remember that these plants do not like the cold; they prefer to be kept in a place no colder than 60 degrees Fahrenheit.

If you notice that some leaves on your poinsettia are turning black, check that the plant is not touching the glass of the window, as this glass can frost over. Cut off any damaged foliage and make sure you place the plant in a location where it is not hit by cold drafts from windows or vents.

Leaves are falling off

The most common causes of falling poinsettia leaves are changes in the temperature around the plant or in the air flow.

This is commonly seen in plants that have just been brought home from the nursery, where they were grown in near-perfect conditions. In a greenhouse, the humidity, light, water and temperature are all controlled, so when the plant finds itself in your home with conditions that are drastically different from those in the greenhouse, it will become stressed.

If the plant is taken out of the greenhouse and exposed to temperatures that are lower than it is used to, the leaves will fall off and the plant will die back, even if you provide it with good care.

The leaves will also fall off if the plant is underwatered.

Save your poinsettia by making sure the temperature is always above 60 degrees Fahrenheit. Pick the warmest room in your house for your plant, and ensure that there are no drafts or vents anywhere nearby. These can cause unstable temperatures which can dry out your plant and cause leaf drop.

Poinsettias do not like full sunlight, so place them somewhere with bright, indirect light.

If the leaf-dropping is due to drought, soak the soil well. You may need to place the pot in a basin of water for the water to really penetrate the dry soil.

As mentioned above, water the plant only when the top two inches of soil are dry. If the soil is still somewhat damp, check the soil again after one or two days.

Curling and wilting leaves

Low humidity and underwatering are the most common culprits of wilting and curling poinsettia leaves. These signs indicate that the roots of the plant are drying out faster than they can absorb moisture.

Because poinsettias are tropical plants, they need more humidity than most other house plants, but they also need their soil to dry out between watering.

Your plant may be underwatered either because you are not giving it enough water, or because you are only lightly watering the top of the soil so that the deeper soil is not getting enough moisture.

Leaf curling and wilting happens when the plant sacrifices the older leaves near the bottom so that it can better channel its limited water into the younger leaves at the top.

Save your wilted poinsettia by placing it in a spot where there are no warm or cold drafts, as these can dry out your plant. While the plant is recovering, make sure you do not put it anywhere where it can get direct sunlight.

Mist the plant twice a week to make its surroundings temporarily humid. This also protects the leaves from drying out.

In cases of chronic underwatering, the soil can become so dry that it actively repels water and pouring water from above may be ineffective. To correct this, place the plant in a basin of water for 10 minutes to give it a good soak.

To know when to water your poinsettia, touch the soil in the pot. If the soil is dry, water the plant; if it is still damp, wait one or two days and check the soil again.

Conclusion

Your poinsettia is dying because it is stressed due to an environmental factor. This factor could be drought, low humidity, overwatering or temperatures lower than 60 degrees Fahrenheit.

To save a wilting poinsettia, increase watering and mist the leaves. If the plant is suffering from cold temperatures, transfer it to a warm room and remove any dead or dying, blackened foliage. If you have overwatered your plant, check for root rot, remove any rotten roots, repot the plant and adjust your watering schedule.

Only water your poinsettia when the top inch of soil is dry to the touch. If the soil is still slightly damp, wait one or two days and check the soil again before watering.

Image: istockphoto.com / Andrei Lavrinov

How To Save A Dying Begonia?

How To Save A Dying Begonia?

If your begonia plant is wilting, drooping or dying, it means there is an environmental factor that is causing it stress. The first step toward saving your begonia is to correctly diagnose exactly what is causing the stress in the first place. When you have figured out the reason your plant is dying, the treatment can be faster and more specific.

The first steps you need to take to save your dying begonia are to check whether the soil is soggy, check that the plant’s pot has drainage holes, assess the plant’s location and humidity level, check the type of soil it is planted in, and check for pests or infection.

In this article, we will discuss the possible reasons your begonia is dying, and how to save it.

Why is my begonia dying?

Overwatering

One of the most common reasons for a begonia dying is overwatering. You can forget to water your begonia for a few days and it will be completely fine, but overwater it and it may lead to the plant’s death. It is much better to ensure proper watering techniques for your begonia from the start than to have to salvage an overwatered begonia.

Begonias prefer their soil to be a little moist most of the time, but it should never be soggy. If the soil around the plant’s roots is always waterlogged, little to no oxygen will be able to reach the roots, and oxygen is essential to the plant’s survival. Essentially, the roots will drown and die. The dead roots will rot, making them vulnerable to pests and infections, which in turn will help the rot to spread up the plant’s stem and leaves, until the entire plant dies.

An overwatered begonia will have yellowing leaves, beginning at the base. You may also see brown leaf tips despite the plant’s location having good humidity. The leaves may start to drop off, and they will feel soft and mushy.

You can save your overwatered begonia by gently removing it from the pot and checking its roots for rot. If there are roots that are brown or black, remove them with a sterile pair of scissors.

Repot the plant using soil that is well-draining. You can make your own mix of one part perlite to two parts regular gardening soil. The perlite will help keep the soil aerated and allow oxygen to get to the roots. Use a pot that has drainage holes at the bottom to allow excess water to flow out.

Place the plant in a part of your house that has bright but indirect light and do not water it immediately after repotting. Wait at least one week to give the roots enough time to recover from the trauma of pruning and replanting.

Water the plant only when the top two inches of soil are dry. If you touch the soil and the top two inches are still damp, wait one or two more days and check the soil again.

Underwatering

As mentioned above, begonias are slightly drought-tolerant, but that does not mean that you can neglect to water the plant all the time. Underwatering can also lead to the begonia dying.

You can check whether your begonia is underwatered by feeling the soil. Press your finger down into the soil a few inches; if the soil feels dry, the plant may be underwatered.

Save your underwatered begonia by soaking the soil until you can see the excess water flowing out of the bottom of the pot. Make sure all of the soil in the pot gets wet so that all of the roots can get water. After a few days, your begonia should bounce back and recover.

Avoid underwatering your plant by checking every couple of days whether it needs water. Touch the soil and if it is dry, water it. You can also simply lift the pot to check how heavy it is, because dry soil is much lighter than wet soil.

Acclimatization

Another reason your begonia may be dying is if the plant is still in the process of acclimatization. Most plants become stressed when transported from one place to another, but begonias seem particularly prone to the effects of changes in their living conditions.

If you buy your begonia from a local nursery, remember that the nursery probably has a greenhouse where the plant was grown in ideal conditions. When you take the plant from the only habitat it has ever known and into a place where the light, humidity and temperature are all different, it will result in the plant becoming stressed. It is also possible that the plant was not properly cared for in the store, and those problems will become more apparent once you have had the plant at home for a few days.

Help ensure smooth acclimatization by buying your plant from sellers that you know maintain good cultural techniques. Choose plants that look healthy, even if they might be more expensive than discounted plants that are not as healthy-looking. When you take the plant home, make sure you do not expose it to extreme temperatures. It is normal for some of the plant’s leaves to wilt due to the stress; you cannot save those leaves and it is best to just prune any dead foliage off.

Disease

Diseases can also severely damage your plant. Begonias are prone to diseases such as fungal and bacterial leaf spot, blight and Pythium rot. These diseases can have rapidly-developing symptoms and the plant may look like it is dying in as little as one to two days.

Symptoms of disease in begonias include collapse of the plant, brown and black spots on the leaves, collapsed petioles and soft black stems.

Often these diseases are present in a compromised plant, such as an overwatered one.

Save a diseased begonia by isolating it from the rest of your healthy plants. Remove any affected foliage using a sterile knife or scissors. Remove the plant from the soil to check the roots for rot and remove any rotten roots. Rinse the remaining healthy roots and spray them with fungicide before repotting the plant.

Make sure you take these measures as soon as you suspect disease, because the earlier you act, the higher the chances of a full recovery.

Temperature

Begonias like to be in temperatures between 60 and 75 degrees Fahrenheit. The temperatures inside our homes are well within that range, but if you keep your begonias outside, they can be exposed to temperatures that are lower or higher than they prefer. However, an indoor plant can still be affected by temperature if they are placed in a spot within range of an air conditioning vent, a drafty window, or a radiator. These drafts can be enough to cause temperature stress in your plant.

Avoid exposing your begonia to extreme temperatures by keeping a digital thermometer near your plants. These thermometers can record the current temperature as well as the highest and lowest temperatures for the day. Use this data to know when to relocate your plant to a better location.

Transplanting

One instance when your begonia may appear to  be dying, but is not actually dying, is when it has been recently repotted. Repotting is very stressful for a begonia, more so than most other plants. Begonias are known drama queens and will wilt after they are repotted.

Help your begonia through this stressful time by making sure every other aspect of its living conditions is close to perfect. You can try to fashion a makeshift greenhouse by hanging a plastic sheet over the plant to increase the humidity. This reduces the plant’s water loss and helps it recover faster.

Pests

A handful of pests do not inflict that much damage on a begonia, but if the infestation goes unnoticed and becomes severe, it can be fatal to the plant.

Check your begonia regularly for the presence of pests so you can catch any infestation in its early stages. You can do this while watering the plant. Look out for damage to the leaves such as holes, mottled yellowing, and irregular yellow or brown spots.

Before treating the begonia, isolate it away from your other plants to keep the pests from spreading. Use rubbing alcohol or neem oil on the plant once a week to get rid of the insects. Treat the plant weekly for a month to make sure that all the insects have been killed.

Humidity

Low humidity can have a great effect on your begonia’s overall health. This is more apparent in places with an arid climate and if the begonia is kept outdoors. It can cause the plant to become dehydrated and even make it more susceptible to pests.

Keep the humidity levels around the plant at around 40%. If the humidity where you live is low, you can increase it around your begonia by grouping the plant together with your other tropical plants. You can also place a dish of water near the plant or simply mist the plant with water every once in a while.

Conclusion

Your begonia may be dying due to one or several of the following reasons: overwatering, underwatering, acclimatization, disease, temperature, transplant shock, pests or humidity. These factors cause the plant stress, resulting in a decline in its health.

The best way to save your begonia from dying is to pinpoint the exact reason it is dying and address it specifically. Begonias can be quite finicky, but as long as you provide them with conditions as close to ideal as possible, they should be fine.

Image: istockphoto.com / prill

How To Save A Dying Maple Tree?

How To Save A Dying Maple Tree?

Maple trees, with the scientific name Acer, are native to Asia and also cultivated in Europe, Africa and North America. They comprise roughly 132 species, and have distinctive winged fruits, palmate leaves and striking leaf colors during the autumn season. These ornamental trees are often planted along streets, in parks and on lawns. However, like most trees, they are also prone to problems and diseases that could endanger their lives. 

How to save a dying maple tree

Determine the cause of the problem 

If you have ascertained that your maple tree is dying, it is essential to identify the cause of the problem. Your tree could be dying due to watering issues; check whether the leaves are drooping or dying. If you notice that the tree is producing smaller leaves, it is usually a cause for alarm. 

Your maple tree could also be manifesting abnormal leaf discoloration, slow growth or scorched leaves due to lack of nutrients or excessive fertilizers. Too much mulch could be harming the roots, resulting in the presence of pests or fungi. You may have to seek the help of an arborist to accurately pinpoint the problem. 

Alter your watering schedule 

If you have determined that the cause of the problem might be underwatering or overwatering, try to change your watering schedule. Younger trees, and even older, more mature trees, can be very fickle about their watering preferences. Overwatering can cause root rot and suffocation, so make sure you have a good drainage system. You may also opt for modern solutions like automatic water pumps or drip irrigation.

Try adjusting your fertilizer use 

Fertilizers are important for trees since they provide nutrients and facilitate photosynthesis which speeds up the trees’ growth. Which ones to apply can be determined by taking soil samples. However, trees can only absorb a certain amount of nutrients, and overfertilization could be fatal.  

Excessive nutrients can affect the natural physiological processes of trees. Overfertilization can also damage the trees’ cells. 

Prune the dying tree

Eliminate any ailing parts of the tree, like dry or dying branches and leaves, by pruning them off. This could prevent the spread of disease to other parts of your tree. Pruning also promotes aeration to bring about quick healing and encourage new plant growth. It also makes the trees aesthetically pleasing, but take care not to damage the healthy parts. 

The best time to prune your sickly tree is at the end of winter or at the beginning of spring when it is starting to bloom. Maple tree suckers also compete for nutrients. Prune the shoots by scraping the soil to expose the suckers’ base. Cut off the base of the shoot carefully so as not to damage the roots of the mother tree.

Provide mulch for the tree 

Mulching is essential to conserve water for the tree and to control soil moisture content. However, you should only not apply more than necessary, as too much could suffocate the tree. Mulch can also encourage the presence of pests, fungi and diseases. Apply fungicides and pesticides to safeguard your trees. 

Control pests and diseases 

Your maple trees could be dying because of pests or diseases.  Consult a tree professional to identify the problem so that the necessary measures can be taken.

Symptoms of a dying maple tree

  • Abnormal or excessive shedding of leaves. 
  • Changes in leaf color or the appearance of mixed color spots on leaf veins. 
  • Changes in bark color from gray and brown to a dull green color, indicating decay. 
  • Branches dropping off. 
  • Flowers falling off before pollination or failing to produce seeds.
  • New shoots drying up. 
  • Cracks on the tree trunk. 
  • Dry, brittle and weak wood. 

Maple trees, like most plants, can become stressed for various reasons and may end up sick or even dying. Those trees that live in the city are more exposed to water and air pollution that can strip their energy levels. Salt in the road, nutritional imbalances and long drought periods can also cause maple trees to become sickly and die. 

Conclusion 

Maple trees add aesthetic beauty to lawn areas, parks and alongside streets because of their striking colors during autumn. Like most trees, they can be prone to diseases and other issues causing them to become sickly. Leaf color changes and abnormalities in the trunks and branches are just some of the obvious symptoms. Make sure to identify the causes, act on the problem at once or better yet, consult tree professionals to receive proper assistance in addressing the problems.

Image: istockphoto.com / Dmitry Potashkin

How To Save A Dying Fern?

How To Save A Dying Fern?

Ferns are generally quite easy to care for, so a dying fern must be undergoing a lot of stress to have a noticeable decline in its health.

The most common reasons your fern may be dying are too much water, not enough water, pests, light issues and too much fertilizer.

In this article, we discuss the different causes of death in ferns, and how to save them.

Why is my fern dying?

Too much water

One of the most common causes of a dying fern is overwatering. Like most plants, ferns do not like their soil to be waterlogged and this can lead their health to deteriorate.

Letting the plant’s roots sit in water causes root rot, which is what results in such rapid deterioration.

Ferns like their soil moist, but it should never be soggy. It can be difficult to find the right balance of soil moisture in the beginning, but the longer you care for your ferns, the more you will learn about their preferences and the easier it will become.

Giving a fern more water than it needs is only one factor that contributes to overwatering. If you water the plant more frequently than necessary, use poorly draining soil, or use a pot that does not have drainage holes at the bottom, you also increase the chances of overwatering.

Signs you should watch out for if you suspect overwatering include constantly wet soil that dries out very slowly, drooping fronds, yellowing fronds, the tips of the fronds turning brown, and the roots starting to rot and smelling like rotten vegetation.

You can avoid overwatering by ensuring that the pot your fern is planted in has drainage holes. This is so that even if you do accidentally overwater your fern, the excess water will simply flow out through the holes at the bottom.

Even if your pot does have drainage holes, it will be pointless if you use soil that does not drain well. Make sure you use well-draining soil so as not to retain too much moisture. Compact soil, such as clay, holds onto water and barely allows it to pass through, leading to drowned roots and, eventually, root rot.

Also make sure you water the fern less in the winter, because the cold weather and limited sunlight means the soil is slower to evaporate than in the spring and summer.

There is no strict watering schedule you need to follow; the key to figuring out your plant’s preferred watering schedule is to touch the soil. If the soil is still moist, wait one or two days and check the soil again before watering. If the soil is dry, you can water the plant.

Save your dying fern by inspecting its roots for signs of rot. Remove the plant from the pot and shake off as much soil as you can. If there are parts of the roots that are brown or black, those are rotten and you need to use a clean knife or a pair of scissors to cut them off. Spray the remaining healthy roots with a fungicide and let the plant air-dry on a tray, covered with a paper towel. The plant will dry out after a couple of hours, after which you can replant it using new, well-draining soil. You can reuse the old pot, but make sure you wash and sterilize it first and that it has sufficient drainage.

Not enough water

If the soil in the fern’s pot is almost always dry, you are most probably underwatering it. Dry soil will become compact and the top layer may even shrink and become crusted. If you cannot remember the last time you watered your plant, you are likely neglecting your watering duties.

Although the effects of underwatering do not damage the plant as fast as those of overwatering, this does not mean it cannot ultimately cause your plant to die.

The symptoms of overwatering are dried-up fallen leaves around your plant, inability on your part to remember the last time it was watered, and soil that is dry to the touch.

The fern’s fronds will dry up first, and when they do, they cannot be salvaged. However, if there is even one healthy frond left alive on your plant, you can still save it.

Save your underwatered fern by removing all the dead leaves. If there are fronds that are half-dead and half-dry, just trim those.

Water the plant generously by soaking all the soil in the pot so that all of the roots get water. Keep pouring until you can see the excess water flowing out of the drainage holes at the bottom of the pot.

Pests

A few pests may not inflict much noticeable damage, but a larger infestation can take a toll on the overall well-being of your fern.

Check your fern for pests every time you water it. Look at the undersides of the fronds. Some pests may be harder to spot than others, so use a magnifying glass if you need to.

Symptoms of a pest infestation include stunted growth, yellowing or damaged leaves, and pests on the plant and soil.

Fungus gnats are one of the most common pests found on ferns. They might not be able to kill the fern by themselves, but if they attack an already diseased and vulnerable plant, it just might be fatal. The larvae of these gnats attack the fern’s roots, and the adults can be seen flying around the plant. Get rid of fungus gnats by using yellow sticky traps to control and eliminate their population.

Spider mites are another pest that attacks ferns. The infestation is hard to catch in its early stages because of the mites’ tiny size, but be on the lookout for their signature webbing on the leaves. Knock the spider mites off of the plant by spraying them with a stream of water from your garden hose. If they persist, you can use neem oil as a topical fix to kill the insects.

Light issues

Another reason your fern might be looking sickly is if it is not getting enough light. In its natural habitat, ferns live in rainforests where they only get some bright, indirect light that passes through the canopy of trees. If you put the plant in an area that is too dark, it will grow poorly. Give the plant morning light or filtered afternoon sun.

Conclusion

Ferns are very hardy plants that can tolerate just about any environmental extreme for a certain time, but that does not mean you can just neglect them.

The symptoms of a dying fern are drooping fronds, yellowing and dried-up leaves, and a general lack of vigor.

The most common reasons for a fern dying include overwatering, underwatering, pests and light issues. Being able to correctly identify the root cause of the plant’s declining health is the first step in effectively solving the problem.

Image: istockphoto.com / Vera Aksionava

How To Save A Dying Christmas Cactus?

How To Save A Dying Christmas Cactus?

If your Christmas cactus is dying, it means there is an environmental factor causing the plant stress. This factor may be underwatering, overwatering, mineral salt buildup or too much sunlight. If you can properly diagnose the reason the cactus is dying, treatment will become much easier.

In this article, we will discuss the different reasons your Christmas cactus may be dying, and how to save it.

How can you tell if your Christmas cactus is dying?

The plant is shriveled and soft

If the soil is very dry and your cactus is shriveled and soft, it may be dying due to underwatering. Moisture is not able to reach the stems when the soil is too dry or the roots are damaged.

Underwatering is easy to distinguish by looking at and feeling the soil. Once you are sure that the shriveled stems are due to underwatering, you can remedy the situation by watering the plant. A deep, thorough watering is what a dehydrated Christmas cactus needs, to ensure that the entire root ball gets access to water.

In hanging plants, the soil can become so dry that it actually repels water when it comes into contact with it. The water cannot penetrate the soil because of how dry and compact the soil has become, and ends up running off the soil and into the tray or saucer under the pot. In this case, regular watering will not do the job and you will need to soak the root ball of the plant. Place the pot in a sink or in a bucket of water and allow it to soak for up to 15 minutes. After soaking, let the pot drain completely. Once the soil is rehydrated, it should no longer have a problem with being water-receptive, and you can continue watering normally in the future.

Christmas cacti, unlike most cacti, are not desert plants, which means they do not require long periods of dryness between watering. They are low maintenance, but they do like a constant level of moisture throughout the year. All you really need to remember when it comes to watering your Christmas cactus is to water it deeply enough that the entire root ball is moistened. Wait until the soil is relatively dry before watering it again.

The plant is droopy

Overwatering 

If the plant is drooping and you notice that the soil is wet most of the time, it may be dying due to overwatering. When the soil is constantly waterlogged, the roots are unable to breathe and they will start to die. When there are dead roots underground, opportunistic pathogens are able to attack them and this will lead to root rot. These pathogens are the dormant spores of various fungi that are awoken due to the presence of rotten roots.

The rot will start on the dead tissue but will move up to the healthy roots, effectively spreading the rot. This will continue until all the roots are compromised, thereby killing the entire plant.

Mineral salt buildup

Another reason your Christmas cactus is drooping may be mineral salt buildup.

If the plant has been around for several years, it is no surprise that salts will have accumulated in the soil. These deposits come from the water you are giving the plant, as well as from fertilizer.

When the salt levels become too high, there will be more salt in the soil than there is in the plant. Because of this difference in salt levels, osmosis will encourage water to move from the plant to the soil, instead of the other way around. The plant’s roots will begin to lose water and become droopy.

You can tell there is a salt buildup in the soil when there is a yellowish or whitish crust on the rim of the pot and on the plant’s stem.

Christmas cacti are especially prone to mineral salt buildup when compared with most other plants.

How do I save a dying Christmas cactus?

Water

The most important factor when trying to revive a Christmas cactus is knowing the proper watering techniques.

If the plant is dehydrated and thirsty, put it in a bowl to collect the water that runs through the pot. After collecting the water, pour it back into the planter to make sure it has been watered thoroughly.

When the plant has recovered from either underwatering or overwatering, only water it when the top inch of soil is dry. Do not wait for all of the soil in the pot to dry out.

Inspect the plant

When you have given the plant the water that it needs, you need to do a thorough inspection. Look at all the stems of the plant and if there are dry and crunchy parts, it is best to just remove them. If a leaf is still soft, leave it on the stem.

Next, look at the soil in the pot. Hard, crunchy soil is very dry, so you may need to remove the top inch. If the soil under the first top inch is soft, then you only need to replace the top inch of soil. If the rest of the soil is just as crunchy and dry as the top inch, you will need to replace all of the soil.

Use the right kind of soil

When you repot your plant, the type of soil you use is imperative to the success of its recovery.

Christmas cacti like soil that has both organic and inorganic components. This makes the soil drain and dry out quickly.

The soil needs to have a pH of about 5.5 and should contain 25% perlite.

Repotting

As mentioned above, repotting is only really recommended when the soil is dry and crunchy all the way to the bottom of the pot. If the roots are not compacted, you can use the same pot and just replace the soil.

Using a small spade, remove the plant from the pot while leaving some soil around the roots. Take out all of the old, dry soil and replace it with fresh soil. Place the plant back into the pot.

Make sure the plant gets enough light

Place the plant near a window while it is recovering. They prefer bright, indirect sunlight because direct sunlight can cause sunburn. Too much sunlight can also stunt the plant’s growth when it is still trying to recover. Try not to keep the plant in a room with lots of artificial light, so do not place it in a room where you turn on a lot of lights at night.

Conclusion

Christmas cacti will exhibit signs of declining health when there is an environmental factor causing them stress.

This stress can be caused by underwatering, overwatering, too much light, or a buildup of mineral salts in the soil.

Figuring out the exact cause of the plant’s stress is the first step in correctly fixing the problem. Christmas cacti are more low-maintenance than many other plants, so as long as you provide their basic needs, it should not be too difficult to keep them thriving.

Image: istockphoto.com / nzfhatipoglu

How To Save A Dying Peace Lily Plant?

How To Save A Dying Peace Lily Plant?

The most common reasons for a peace lily dying are underwatering, overwatering, too much sun, low humidity, and poor drainage.

Solving the problem effectively starts with correctly identifying the cause of the plant’s declining health.

In this article, we will discuss the possible reasons your peace lily is dying, and how to save it.

Why is my peace lily dying?

Underwatering and low humidity

The most common reason for a peace lily to die is that it is not getting the amount of water it needs.

You can tell that your peace lily is suffering from drought stress if it is drooping and its leaves are curled up. The leaves will also turn yellow or brown.

Drought stress is caused by underwatering or low humidity. Peace lilies are tropical plants and are used to regular rainfall and environments with high humidity. When growing a peace lily in your home, you need to keep its soil consistently moist; it should never dry out for extended periods of time. The interiors of homes have much lower humidity than the plant’s natural habitat, and warm or cold air from vents around the house can also cause it to lose moisture, resulting in the plant drying out and wilting.

You can check whether drought stress is causing the drooping by pushing your finger an inch or two into the soil. If the soil feels dry, then drought stress is the cause.

Revive a drooping peace lily by simulating the moisture it gets in the wild as best as you can.

If the soil feels dry to the touch, place the plant in a basin of water for ten minutes. Sometimes just soaking the soil from the top might not be enough, especially if the soil is so dry that it repels water. When you put it in a basin of water, the roots can draw up water directly from the bottom.

You also need to water your peace lily more often than usual, although after soaking it in the basin you will not need to water it for a week. Check the soil every day to see how quickly it dries out. The ideal is when the surface is dry to the touch but the soil underneath is still moist.

Watering once a week with a generous soak is better for the plant than watering it with a little water every day. Giving it just a little water will not penetrate the soil enough to reach the roots at the bottom of the pot.

You can increase the humidity around the plant by misting the leaves with a spray bottle. Do this once a week in the spring and summer, but you may need to do it more often during dry winters.

Too much sun

When your peace lily is getting too much sunlight, it can get brown streaks on its leaves and the leaves may curl. The brown streaks are a result of sunburn, which happens more often to plants that have grown accustomed to being in the shade and are then moved to an area with a lot of sun.

In their natural habitat peace lilies grow in the rainforest, protected from the sun by the canopy, which means they do not get very much direct sunlight.

You can tell that the brown streaks are caused by sun damage if the streaks appear on the side of the plant that gets the most sun, while the other side that gets shade remains green.

Revive your sunburnt plant by first moving it to a shady area where it will only get indirect light. Do not remove the brown leaves just yet; first allow the plant to recover before removing the leaves, because this also causes the plant stress. It is best to wait for new foliage to grow before trimming off the sun-damaged leaves.

If the leaves of the peace lily are curled, water it once a week to keep the soil moist and spray with a mister to create a humid environment for the plant.

These plants are slow growers and may take some time to show that they have recovered, so you will have to be patient.

Overwatering

Another reason your peace lily could be dying is overwatering. You can tell the plant is overwatered if the leaves are turning yellow and drooping.

Even though peace lilies are tropical plants that grow in places with generous rainfall, they still cannot tolerate waterlogged soil. They only want their soil to be moist, rather than soggy. Too much water in the soil keeps oxygen away from the roots and eventually kills them. The dead roots will rot and become susceptible to attack by opportunistic pathogens such as fungi and bacteria.

Overwatering happens for several reasons: if you give the plant more water than it needs, if you water it more often than it needs, if you use poorly-draining soil, if you use a pot that has no drainage holes at the bottom, or if you use saucers or trays under the pot that prevent excess water from escaping.

You can check if the soil is waterlogged by pressing down on the top of the soil or through the drainage holes at the bottom of the pot. If the soil feels boggy and not just moist, then there is definitely excess water in the plant’s soil.

You can revive your overwatered peace lily by increasing the number of days between watering. Only water the plant when the soil is dry to the touch, to help reduce the chance of root rot.

Plant the peace lily in a pot that has sufficient drainage holes at the bottom, to ensure that any excess water can escape. If you think the water is draining too slowly, check whether the drainage holes are blocked by compacted soil or roots.

If you keep the plant indoors and place the pot on top of a tray or a saucer, make sure you empty it after the excess water has had time to drip out of the drainage holes.

Once you have reduced your watering and made sure there is proper drainage, the plant should be able to recover fully, but be prepared for the possibility that it might not make it, especially if there has been significant damage to the roots.

Conclusion

Your peace lily could be dying from underwatering, overwatering, low humidity, or too much sun. Being able to correctly diagnose the cause of your plant’s declining health is the first step in effective treatment.

Keep the plant’s soil moist but not soggy, keep it in the shade rather than under full sun, and do not overwater or underwater the plant. Make sure you use well-draining soil and a pot that has drainage holes at the bottom.

As long as you take diligent care of your peace lily, you should have a decent chance of reviving it.

Image: istockphoto.com / cadifor

How To Save A Dying Fig Tree?

How To Save A Dying Fig Tree?

Your fig tree may be dying due to one or more of several factors causing it stress and contributing to the general decline of the tree’s health.

Figuring out what exactly is causing the tree’s distress is key to handling the problem head-on and fixing it as soon as possible.

In this article, we will discuss what you need to do to save your dying fig tree, depending on the symptoms and the possible cause.

How do I save my dying fig tree?

Watering techniques

Good watering techniques can do wonders for your plants.

If you feel you might have been neglecting to water your fig tree lately, this might be why it is dying. Conversely, if you have been too enthusiastic about watering your tree, that can also cause problems. Finding the right balance of soil moisture is key to keeping your tree happy.

If your fig tree’s leaves are brown and dry and the soil in its pot is light and also dry, you might be underwatering the tree.

Save your underwatered fig tree by soaking it in a bucket full of water at room temperature for around 30 minutes. Remove it and let it drip into a tray or a saucer. Over the next two weeks, water the tree with a small amount every two days until you get back to your normal watering schedule. If you think the soil is still dry, you can repeat the 30-minute soak after a few days to increase the soil’s moisture.

Soaking can do a better job at reviving an underwatered fig tree than just pouring water into the soil and letting it flow immediately out of the drainage holes. Soaking ensures that all of the soil becomes properly moist.

Leaf maintenance

Caring for the tree’s roots is important, but so is looking after its leaves. When attempting to revive your plant, you should focus on the leaves almost as much as the roots.

Fig leaves are prone to dust buildup. Remove the dust by wiping down the leaves with a soft washcloth and warm, soapy water. Removing the dust clears the way for effective photosynthesis and makes the leaves look brighter. You only need to do this once a month to make sure the leaves do not look dull.

Removing old or dead leaves from the tree also lets the tree focus its resources on producing new foliage instead of keeping the old leaves alive. Cut off the old and dead leaves using a clean knife or pair of scissors. Refrain from pulling off the leaves with your hands as this might cause damage.

While pruning your tree, take the opportunity to inspect the plant for any pests or signs of disease.

Humidity

Keeping the humidity around your plant at a level that it likes can help it recover faster. The humidity in most homes is much lower than a fig tree would like. This is especially true during the winter when the indoor heating can cause the tree to droop.

You can increase the humidity around your plant by moving it to a room that is always humid, such as the kitchen or the bathroom. If your bathroom has good lighting, your fig tree will thrive there. Running hot water that creates steam and condensation is as close to a humid habitat as you can get while still being inside your home.

You can also use a spray bottle with water to mist the air around the plant a few times a week. This fix is temporary but it does the trick. You should be careful not to do it too often because perpetually moist foliage can encourage the growth of fungi.

Another technique you could use is a pebble tray. Place the plant on top of a tray lined with pebbles and filled with water. Over the course of the day, the water from the tray will evaporate and increase the humidity around the plant, but the pebbles prevent the plant from sitting in water and drowning the roots.

You could also increase the humidity by using a humidifier. This will keep the humidity around your plant consistently high. You can even set it on a timer to keep a schedule.

Lighting conditions and drafts

If a fig tree gets too much sun it can get sun damage, which will present as bleached spots on the leaves. Avoid sunburn by moving the plant further into the room and away from the windows.

If you keep the plant in an area that is too dark, however, this can cause it to become stunted. You need to find a spot where the light that reaches the plant is just right; neither too much nor too little.

In the winter, when light is limited, you can buy a grow lamp to supply the plant with the light that it needs.

Another factor you need to consider is ventilation. Do not place the plant in areas where air from heating vents or air conditioning flow through. The cold or hot air can dry out the plant and turn the leaves yellow or brown.

Pests

Another reason your fig tree might be dying is pests. As mentioned above, check the plant for pests while you are watering or pruning it. Catching a pest infestation in its early stages will make eradication much easier.

The most common pests that can be found on your fig tree are scale insects, spider mites and mealybugs. Do not worry if you see any of these pests, since they can be easily removed.

You can remove them by wiping down the leaves with a washcloth and warm,soapy water. You can also try to remove them by blasting them with water from a garden hose.

Apply neem oil on the leaves once a week for a month to kill all the insects.

Another step you can take is to replace the soil in the pot. Some insects live in the soil and you are better off discarding it and starting over with fresh soil.

Make sure you keep the infested plant away from your other healthy plants so the pests do not spread.

Conclusion

Your fig tree may be dying because you do not know how to water it properly, or it is getting too much or not enough sunlight, the humidity around the plant is too low, or it is suffering from a pest infestation.

It is important to correctly diagnose the reason your fig tree is dying to be able to save your plant.

As long as you find the right balance of soil moisture and the correct lighting conditions, wipe the dust from its leaves once a month, keep the area sufficiently humid, ensure that there are no cold or warm drafts passing the tree, and check regularly for pests, your fig tree will thrive.

Image: istockphoto.com / Aleksandra Pavlova

How To Save A Dying Arborvitae Tree?

How To Save A Dying Arborvitae Tree?

Your arborvitae tree is dying because there is an environmental factor that is stressing the tree and causing a general decline in its health. If you suspect there is something wrong with your tree, you need to figure out what is causing the problem to be able to treat it appropriately.

The most common reasons your arborvitae tree may be dying are disease, drought, winter injury and pests.

In this article, we will discuss the different causes of a dying arborvitae tree and how to save it.

Why is my arborvitae tree dying?

Disease

One of the most common diseases that affect conifers is needle cast. This disease can spread quickly to your other trees if you do not treat it immediately. Symptoms of needle cast include dieback, excessive needle drop and chlorosis. Chlorosis is the abnormal loss of the green color in the needles.

You can treat needle cast most effectively by applying fungicide to new foliage, and anywhere symptoms have not yet appeared. Remove any affected foliage and destroy it by burning. Remember not to add this debris to compost piles. Apply fungicide to the pruned tree to protect it from infection as it recovers. Water the tree deeply once a week to support it.

Rusts is another disease, caused by fungi, and manifests as raised blisters that break open to release orange or brown spores. The color of the spores is how the disease got its name. You can tell the tree has rust when you see rust-colored powder all over the foliage and brightly-colored swellings, or galls, on the branches and twigs.

As mentioned above, apply fungicide on new foliage and on foliage where symptoms have not yet appeared. Remove all affected parts as well as any fallen debris on the ground, and burn it all.

Cercospora leaf blight is another disease that affects arborvitae. Browning will start on the lower branches near the trunk and make its way upward. The top of the tree is usually left unaffected.

Phomopsis twig blight

This disease starts at the tip of the young branches. Yellow spots will become light green and then turn brown.

Pestalotiopsis tip blight

This disease affects the ends of the branches, causing dead blotches and spots. The more the infection goes on, the closer it will move towards the base of the needles. The affected area will then become dotted with black, pimple-like structures. This infection is typically observed alongside another pathogenic infection.

Kabatina twig light

This fungal disease kills the tips of relatively young branches. There will be black, pimple-like structures where the living tissue meets the dead wood.

Drought

Drought can cause death, or at least severe damage, to the roots of the arborvitae tree. The root hairs and the feeder roots will die and will no longer be able to supply the tree with water up to the very top. Drought also makes the tree susceptible to other secondary infections or infestations.

The tricky thing about drought is that the symptoms normally do not present themselves until after a long time, sometimes even up to two years. Symptoms include a thinning canopy, dieback, cracked bark, browned needle tips, yellowing, wilting, drooping and needle drop.

You can save your afflicted arborvitae tree by removing all affected and dead foliage in order to avoid any secondary infections or infestations. Water the tree deeply once a week so that the water reaches 12 to 15 inches into the ground. If you only do light watering, the roots will grow too close to the surface and this will affect the tree’s stability. Make sure you water the tree deeply before fall ends, so that it does not suffer drought during the winter. You can also place mulch near the base of the tree to help the soil retain more moisture.

Winter injury

Your arborvitae might have winter burn if it starts to turn brown during the winter or early spring. This happens as a result of a combination of lack of water, too much sun, winter winds and cold temperatures. These factors all result in the plant drying out. The symptoms will appear on the tips of the branches and will progress inwards toward the center of the trunk.

You can prevent winter burn by using canvas or burlap to create barriers to protect the plant from sun and dry winds. Place stakes outside the drip line around the perimeter of the tree and wrap the material around the stakes.

Place three inches of mulch around the tree’s base. Mulching protects the roots from the cold temperature and keeps water in the soil for longer.

Deep watering is encouraged during the growing season to create a deeper root system. When trees have deeper roots, they can access moisture that is deeper in the ground.

You can also use your house as a wind barrier by planting your tree on the east or northeast side of your property.

Try to only plant arborvitae trees in the spring so that the roots get enough time to establish themselves before winter comes along and the ground freezes over.

Do not fertilize the tree in the late summer or fall. Fertilizing at this time encourages growth and may inhibit the start of dormancy.

Pests

Leafminers attack your tree by boring into the needles and feeding on them, hollowing them out from the inside.

Spider mites suck sap from the underside of the arborvitae tree’s leaves and can be very destructive. The needles will lose color and turn brown. These insects can be red, brown or black, and are about the size of a pepper grain.

The spindle-shaped cocoons of bagworms are quite difficult to tell apart from the tree’s evergreen foliage. The cocoons use twigs and needles from the tree to protect the bagworm from insecticides.

You can prevent pest damage by inspecting your tree regularly. Grow plants around the tree that naturally repel pests and insects, and make sure you keep the mulch at least three inches away from the base of the tree. Make sure you do not overwater the tree, as this can attract even more insects.

Conclusion

If you think your arborvitae is dying, you need to be able to identify the cause of the problem as soon as possible so that you can commence treatment immediately. 

The most common causes of a dying arborvitae tree are disease, drought, winter injury and pests.

Arborvitae trees are relatively easy to care for and need very little maintenance. As long as you are able to provide their basic needs, they should have no problem thriving.

Image: istockphoto.com / Mkovalevskaya

Overwatered Jade Plant

Overwatered Jade Plant

Jade plants, or Crassula ovata, are also commonly called money plants, money trees or lucky plants. These plants are native to South Africa and Mozambique and are popular houseplants sometimes given as housewarming gifts for good luck. Being succulents, they are more susceptible than most plants to overwatering. This article discusses the symptoms of overwatering, and how to save your jade plant if you have overwatered it.

Symptoms of an overwatered jade plant

The leaves are turning yellow. 

An overwatered jade plant will have yellowing leaves. Older leaves that turn yellow and are replaced by new leaves are a normal occurrence; however, if you notice that large numbers of both old and new leaves are turning yellow, it could mean that you have a watering problem. 

The leaves are falling off. 

Plants that are overwatered will start to shed their leaves. This is an indication that the root system is struggling and can no longer support the leaves, and it is possible that root rot has set in. Falling leaves could also be due to the wrong soil, pests, underwatering, or insufficient light. 

Shedding of older leaves is usually part of the normal life cycle, but if the leaves are falling off in large numbers and the shedding extends to younger and smaller leaves, it should be a cause for concern. 

The leaves are soft. 

An overwatered jade plant has soft, mushy leaves. Succulents like jade plants are used to hot climates and desert areas and store water in their stems and leaves, giving them their plump appearance. They do not need constant watering and should only be watered when the soil has completely dried up. 

Overwatering causes the plant tissue to become over-filled with water, which is what causes the soft and mushy appearance of the leaves.

The leaves are drying up. 

An overwatered jade plant may also have leaves that are drying up. This happens when there is a problem in the roots. If the soil is soggy but the leaves are dry, it could mean that the roots are drowning in waterlogged soil and are therefore unable to absorb water and nutrients for the plant. 

The soil is wet and the roots are rotting.

Succulents like jade plants are susceptible to root rot if they are overwatered. If the roots are unable to take in oxygen and nutrients from the soil due to the constant bogginess, they will die and become susceptible to root rot, which is caused by bacteria and fungi that feed on the drowned roots. 

If the soil is heavy and soggy, it is most likely overwatered. You may need to remove the plants to check the roots; if they are wet, slimy and covered with black sludge, they have root rot. 

How to save an overwatered jade plant

You can still save your overwatered jade plant if the damage is not too severe. Carefully remove the affected plant from its container and remove the waterlogged soil from around the roots. Do this gently so as not to aggravate the roots, and inspect the roots to assess the extent of the damage.

Next, remove any rotten roots by cutting them away with a pair of sterile pruning shears. Cut back any that are black or brownish in color; healthy roots will have a white center. Once you are left with only the healthy roots, make another cut into each of these roots to encourage new growth and help the plants recover.

Once you have removed the rotten roots, repot the jade plant in fresh, nutrient-rich soil. You may have to use a smaller pot, since there are fewer roots. Succulents prefer containers that are just large enough to accommodate their root structure, and containers that are too big lead to overwatering.

Make sure that the soil is well-draining; ideally it should be a blend of organic and inorganic materials. Do not use conventional houseplant potting soil. The containers should have drainage holes so that excess water can flow out easily. Once you have repotted the plants, leave them for a few days and do not water until you are sure that the roots have completely dried out.

When you water the plants, do not overdo it. Tip any excess water from the pots and do not leave the plants soaking in water. The frequency of watering will depend on the environment and the area where you live. Most succulents are fine with a good soak once every three weeks, or when the soil has completely dried out. 

Conclusion 

Jade plants are popular houseplants also known as money plants or lucky plants. Being succulents, they are more prone than most to overwatering. You can easily tell that a jade plant is overwatered if you notice its leaves turning yellow, falling off, or becoming soft and mushy. You may also notice the roots starting to rot. Fortunately, it should not be too difficult to save your overwatered plant, as long as you act promptly.

Image: istockphoto.com / Nuarevik

How To Save A Dying Corn Plant?

How To Save A Dying Corn Plant?

If your corn plant is dying, it is due to an environmental factor that is causing it stress. In order to revive it, you need to be able to correctly diagnose the cause of the problem. The sooner you identify the cause, the better your chances of saving the plant.

The most common causes of dying corn plants are underwatering, overwatering, too much sunlight, humidity issues and fertilizer issues.

In this article, we will discuss the reasons your corn plant may be dying, and how to save it.

Why is my corn plant dying?

Underwatering

Your corn plant may be underwatered if its leaves are turning yellow and drooping. These are signs of dehydration.

When a plant loses moisture, it will save its remaining resources for its younger foliage and sacrifice the older leaves at the bottom of the plant. This is why the leaves turn brown, especially those closest to the base of the plant.

You can save an underwatered plant by soaking the soil with water until you see the excess water flowing out of the drainage holes at the bottom of the pot. This will ensure that all of the roots have received water.

You may be tempted to correct the underwatering by overwatering your plant. Do not do this. Only water the plant when the top of the soil in the pot is dry to the touch. If the soil is still damp, wait one or two days and then check the soil again.

After a few days, your plant should be back to its normal self.

Overwatering

Another reason your corn plant is dying may be overwatering. This can be due to watering the plant too often, giving it more water than necessary per watering, leaving it outside during the rainy season, using poorly-draining soil, or using a pot without drainage holes. All of these factors contribute to the plant’s roots becoming waterlogged.

If the plant’s roots are constantly standing in soggy soil, they will drown and die. The dead roots become susceptible to opportunistic pathogens, which then cause root rot. If the rot is not detected in its early stages, it can move up to the rest of the plant and kill it.

Suspect overwatering if the soil is always damp, the leaves are droopy, yellow and soft, or the roots have turned brown or black and smell like rotten vegetation.

Save an overwatered corn plant by removing it from the pot and shaking off all the soil from the roots. If there are brown and black parts on the roots, cut them off using a clean knife or a pair of scissors. Let the plant air-dry for 24 hours. Once the roots are dry, you can replant it. Choose a pot that is either clay or terracotta, because these materials are more breathable and allow the soil to dry faster and air to circulate better. Make sure you use soil that is well-draining, such as a peat-based soil.

Water the plant only when the top two inches of soil are dry. If they are still damp, wait one or two days and check the soil again.

You need to manage your expectations, especially if the plant’s roots are mostly rotten. There is a chance you can save it, but it might be very slim.

Too much sunlight

Another reason your corn plant may be dying is because it is getting too much sunlight. When you see brown spots on your plant’s leaves that have a yellow ring around them, this is probably sun damage. When the plant takes in too much light, it will break down the chloroplasts in its cells because they are no longer needed. The plant thinks that the strong light can make up for the limited number of chloroplasts to keep it alive. This is, of course, not healthy. 

Another symptom of too much sunlight is when the plant’s leaves start to grow inward. This is the plant’s way of protecting new foliage from sun damage.

Reduce the plant’s light exposure by moving it to a different location or by positioning a curtain to diffuse the light coming in.

Humidity issues

When the tips of the plant’s leaves are turning brown, there could be an issue with the humidity in your home. Air conditioning, humidifiers, or heating vents could also be causing drafts to flow through your home and affect the plant, causing these symptoms.

If the plant has been growing without any problem for a long time but is suddenly showing negative signs, you need to consider any environmental changes that might have occurred in your home.

Check for drafts by inspecting the vents in your home and whether they could possibly be blowing in the direction of your corn plant.

Corn plants like their humidity anywhere between 40% to 50%. In the dry winter months, humidity can be quite low, so adjust your watering schedule to make up for this. You can also mist your plant with a spray bottle.

Fertilizer use

Aside from sufficient water, corn plants also need nutrients to grow. Use a fertilizer once a month during the growing season, but not during the winter when the plant is dormant. Fertilizing the corn plant during the winter has no benefits.

How do you save a dying corn plant?

You can save the dying corn plant by cutting off the dead parts, such as the yellow and brown leaves and the rotten roots. Use clean gardening scissors and make sure you sterilize these after each cut in order not to spread the pathogens. Trim regularly until you see budding in the trimmed areas.

Do not remove the stumps of your dead corn plant. Even if you suspect a dying root system, never cut right down to it. Leave two to three inches of stump above the soil to help facilitate sprouting. This method is suggested because not all corn plants with brown leaves and stalks are beyond saving. Trimming the stalk could result in new growth, so give the plant some time to prove that it is still alive before you choose to get rid of it completely.

To avoid overwatering, water only when the soil is dry, but do not wait too long between watering as this can result in underwatering or drought.

The best way to get rid of disease and pests is to constantly inspect the plant for signs and symptoms. Catching an infestation early is key to effectively eradicating pests and disease.

Conclusion

If a corn plant is dying, there is an environmental factor causing the plant stress. You need to figure out the cause of the problem as soon as possible in order to fix it promptly.

The most common causes of dying corn plants are underwatering, overwatering, too much sunlight, humidity issues and fertilizer issues.

Image: istockphoto.com / dimid_86

How To Save A Dying Snake Plant?

How To Save A Dying Snake Plant?

Snake plants, with the scientific name Sansevieria trifasciata, are also commonly called mother-in-law’s tongue, bowstring hemp, or St. George’s sword. These hardy evergreen perennials have banded green leaves with a yellow border, and range from six inches to eight feet tall depending on the variety. They are easy to grow and can thrive anywhere, but they are still prone to diseases and could die if the cause of the problem is not promptly addressed. 

How to save a dying snake plant

If the snake plant has yellow or brown, drooping leaves:

  • Hold off on watering. 

If your dying snake plant has yellow or brown, drooping leaves, it is likely that you are overwatering it. These plants should ideally be watered only once every two to three weeks. Let the soil dry out completely if the leaves are turning brown or yellow. 

To determine how often you should water your snake plant, feel the soil at the bottom of the pot through the drainage hole. If the soil feels moist, hold off on watering for a few days; if it is dry, you can go ahead and water the plant. 

  • Replace the soil. 

Snake plants could turn yellow or brown if the soil is slow-draining and retaining too much moisture. Empty the pot and replace the soil with a potting mix formulated for succulents that replicates the soil characteristics of the plant’s natural habitat. 

  • Place the plant in a pot with drainage holes.

Water should be able to escape freely from the base of the pot so that the roots do not soak in damp soil for long periods. Furthermore, snake plants thrive in pots that are proportional to their size, rather than very large pots, as the latter hold more moisture and are slower to dry out. 

Your snake plant will have a chance of survival once the soil has been left to dry out completely and you have adjusted the frequency of watering. If the brown or yellow discoloration continues to spread,  cut back the badly affected leaves, especially at the base of the plant, to prevent any rot from spreading to other plant parts. 

If the snake plant’s leaves are curling:

  • Place the plant in a basin of water for a few minutes.

Submerge the root balls for a few minutes to allow them to draw up the water they need. 

  • Water the plants with a generous soak. 

A generous soak will ensure that the water moistens not only the top inch of soil, but the roots as well. Excess water should trickle out of the drainage holes; this is a good way to determine that you have watered the plants sufficiently.  

  • Replace the soil if it is not well-draining. 

Replace the soil with a fresh potting mix that is specifically formulated for succulents like snake plants. The succulent-friendly potting soil allows water to filter properly and does not clump or bake hard. 

  • Transfer the snake plant to a room or location where the temperature is warmer. 

Curling leaves could also be due to exposure to temperatures lower than 50 degrees Fahrenheit. If this is the case, transfer the plant to a room that is consistently warmer than 50 degrees Fahrenheit. 

If the snake plant has brown spots:

  • Place the plant in a shaded area to prevent sunburn. 

Snake plants thrive in places with hot weather, but they should not be exposed to too much full sun as they are likely to develop sunburn. This will result in brown spots on the leaves. If this happens, you should move the plants to a more shaded area. 

  • Cut the damaged leaf blades to encourage more growth of healthy leaves. 

Signs that your snake plant is dying

The leaves are turning brown

Causes:  pest infestation, overwatering 

The plants have white spots

Causes:  fungal or bacterial disease 

The leaves are curling 

Causes:  pests, environmental changes, overwatering

The leaves are droopy

Causes: stress, watering issues 

The leaves are dying

Causes:  pests, environmental changes, watering issues

The plants manifest leggy growth 

Causes:  low light, overfertilization 

The leaves are turning yellow 

Causes:  pests, underwatering, overfertilization 

Conclusion 

Snake plants are hardy evergreen perennials and popular indoor plants. Although they are drought-resistant, these plants are also prone to certain problems and diseases, and may wilt and die if the cause of the problem is not acted upon. Hold off on watering if the plants have yellow or drooping leaves, and place them in a shaded area if they have brown spots. Curling leaves could be due to insufficient water, so make sure you water the plants enough to keep them hydrated.

Image: istockphoto.com / DaisyLiang

How To Save A Dying Hibiscus?

How To Save A Dying Hibiscus?

If your hibiscus is dying, it usually means there is a factor within its environment that is causing it stress. Sometimes a slight change to the plant’s living conditions is enough to trigger unwanted symptoms.

These tropical plants like to live in places with high humidity, a warm climate, moist soil, lots of sun, and no drafts or strong winds.

The most common causes of a dying hibiscus are low humidity, drafts, underwatering, overwatering, cold weather, nutritional deficiency and insufficient sunlight.

In this article, we will discuss the various causes of a dying hibiscus, and how to save it.

Why is my hibiscus dying?

Low humidity

Hibiscus plants love high humidity conditions because that is what they are used to in their natural habitat. Your hibiscus may lose its leaves because of too much wind or due to low humidity. Both these factors dry out the leaves by depleting their moisture, and can lead to the plant dying from drought stress.

In the winter when the plant is brought indoors to protect it from the cold, the low humidity indoors, as well as drafts from vents or cracks in windows, can be enough to cause defoliation in hibiscus plants. Because it is losing a lot of moisture, the plant will drop its older leaves and prioritize its younger leaves to receive the limited available water.

Save your dying hibiscus by misting it with water from a spray bottle when it is kept indoors. This will make the area around the plant humid for a certain period. When the leaves are wet, the moisture loss due to drafts and low humidity is reduced.

If you keep your hibiscus outdoors, try to place it in an area where it will not be subjected to a lot of wind. Place it near a wall, or on your patio. If the plant is kept indoors, pick a spot where there will be no airflow from air conditioning or heating vents.

Keep the plant well-hydrated without oversaturating it. The soil should be moist, but not soggy.

Underwatering

Hibiscus plants want their soil to be moist, with a high content of organic matter. This is the soil they would enjoy in their natural habitat.

When the soil around the roots dries out, the plant’s leaves will turn yellow and become wilted. This is because the plant is not getting enough water through its roots to make up for all the water it is losing through transpiration. Eventually, the plant will lose most of its leaves to conserve what little is left of its moisture.

You are either not watering your hibiscus enough or watering only the top layer of the soil. You could also be using a pot that is way too small, making the soil dry out too quickly under the sun. The soil you are using could also be too fast-draining, and not giving the plant enough time to absorb the water that it needs. This can be the case if you use sandy soil that does not contain enough organic matter.

Save your underwatered hibiscus by making sure it is watered well, in conditions that make it able to retain sufficient moisture.

Water the plant as much as it needs, which is enough to make sure the soil is moist but not soggy. Take into account the local climate and weather to determine how often your plant needs watering. To know when to water, touch the top inch of the soil. If the soil is dry, water the plant, but if the soil is still moist, wait one or two days and check the soil again.

When watering, make sure you pour enough water on the soil that the excess water flows out of the drainage holes at the bottom of the pot. This means that all of the roots have water near them.

Place a lot of leaf mold, compost and rotten manure in the plant’s soil to give it the right moisture balance and plenty of nutrients.

If the plant is kept indoors, you can mist it with water from a spray bottle to keep the leaves slightly wet, to prevent the plant from drying out too quickly.

Nutrient deficiency

These plants like to feed a lot, so they need their soil to be full of their required minerals and nutrients. Sandy soil usually lacks nitrogen, causing the leaves to turn yellow from stress.

Yellowing hibiscus leaves are more commonly seen in potted plants, due to the limited nutrients present in the small volume of soil. If the plant has been in the same potted soil for years, the nutrients have most likely been depleted.

Save your dying hibiscus by repotting it in a bigger pot with fresh gardening soil.

If the plant is in the ground, you can add nutrients to the soil around it by adding mulch. Mulch adds nutrients, improves soil structure and conserves soil moisture. Apply the mulch in the spring and winter.

Cold temperatures

Because hibiscus are tropical plants, they do not do well in cold weather. They need to have a nighttime temperature of at least 60 degrees Fahrenheit. If the plant is exposed to temperatures lower than 60 degrees for extended periods, this can lead to leaf drop and death.

It is important to take the potted hibiscus indoors during the winter if you live in a place with four seasons. Even if the plant has discolored leaves due to frost, bringing it indoors should allow it to recover by the time spring rolls around.

Sudden changes in temperature can damage even the most resilient hibiscus varieties, but they can recover if the correct cultural practices are observed.

Overwatering

Yes, hibiscus plants like moist soil, but you should also never overwater the plant. If the plant is saturated in wet soil it becomes susceptible to fungal and bacterial diseases. These diseases keep both moisture and nutrients from reaching the leaves. The leaves will turn yellow, drop off and die.

Root rot can be caused by slow-draining soil because water collects around the roots of the plant and stops the plant from respiring. Giving the plant more water than it needs makes the soil boggy and keeps oxygen from reaching the roots. If the pot has no drainage holes at the bottom, this will also cause water to pool at the bottom of the pot.

Save your dying plant by checking their roots. If there are brown or black roots, remove them using sterile scissors to expose the healthy roots. Let the roots air-dry for 24 hours, and when they have dried out, replant the hibiscus in a new pot with drainage holes, using fresh, well-draining soil.

Insufficient sunlight

If your hibiscus does not get enough sunlight, it will not produce as many flowers as normal. The plant needs at least five hours of sunlight each day to remain healthy. If you place it in the shade or anywhere it gets dappled light, the plant will not grow well and will have fewer, discolored, flowers.

This issue plagues indoor plants more than outdoor plants for obvious reasons.

Fortunately, the solution to this is simple. Transfer the plant to an area that gets significantly more sunlight than the old spot.

If the plant is outdoors, check the plants and trees next to it and see if they are obstructing the plant’s access to light. Cut some branches off the obstructing tree or plant so that the hibiscus can get its fair share of sunlight.

Conclusion

If your hibiscus plant is dying, there is an environmental factor that is causing it stress and a decline in its overall health. The first and most important step in saving your dying hibiscus plant is to correctly identify the reason your plant is dying.

The most common causes of a dying hibiscus are low humidity, draughts, underwatering, overwatering, cold weather, nutritional deficiency and insufficient sunlight.

As long as you are able to provide your plant with its basic cultural needs, it should remain healthy and thrive.

Image: istockphoto.com / Theerawan Bangpran

How To Save A Dying Oregano Plant?

How To Save A Dying Oregano Plant?

Your oregano plant is dying because there is an environmental factor that is causing it stress.

Oregano is an herb native to the Mediterranean, which has a very specific climate that may be difficult to replicate. If the conditions where you live are too different from the plant’s ideal conditions, this could lead to it not thriving and having problems growing.

The most common reasons for an oregano plant to die are insufficient sunlight, incorrect pot size, high-nitrogen fertilizer, overwatering and disease.

To save your dying oregano, you need to be able to correctly identify the cause of the plant’s declining health so that treatment is fast and specific.

In this article, we will discuss the signs to look for when you suspect your oregano is dying, what has caused them, and how to remedy them.

What are the signs of a dying oregano plant?

The plant’s growth is stunted

The oregano plant will display stunted growth if it is not getting the amount of sunlight it needs. In the Mediterranean, oregano is used to growing under full sun.

If you place your oregano in a shady spot, or even partial shade, the plant will not have enough energy to grow normally. This will also affect the flavor on the herb’s leaves, which will not be as strong or aromatic.

Aside from stunted growth, the oregano can also become etiolated. Etiolation is when the plant starts to become spindly because it is trying to grow as fast as possible in the direction of the nearest light source. This is an act of desperation by the plant, in order to get sunlight by any means necessary. This causes it to become frail and makes it grow asymmetrically.

You can remedy this situation by moving the plant to a different spot where it can get at least six hours of sun a day. This is especially important during the winter, when the plant is dormant but still in need of sunlight.

If you plant the oregano in a pot with well-draining soil and place it in an area with good air circulation and plenty of sun, it will be able to recover well.

The plant turns brown or black

Overwatering, whether due to poorly-draining soil, rainfall or fungal disease, can result in root rot which causes the oregano’s leaves to wilt and droop, and to turn yellow, brown or black.

Oregano grows in dry, sandy soil in its natural habitat, and also does not get much rainfall in the Mediterranean. If the plant is grown in a place where the soil is constantly wet or gets a lot of rain, the plant will definitely suffer from getting too much moisture.

A combination of high humidity, poorly-draining soil and overwatering all contribute to the plant’s roots drowning in waterlogged soil and dying. The dead roots are then susceptible to fungal and bacterial pathogens which cause root rot.

The rot will make its way up the plant’s stem and leaves and, before you know it, the entire plant will have rotted and become brown or black. If the rot has already reached the stem or leaves, it will be close to impossible to save the plant and you are better off starting over with a new plant. This is why it is so important to spot the early signs of root rot.

Save your oregano plant by scaling back your watering and allowing the soil to dry out completely. This includes moving the plant to an area where it will not get drenched by rain.

Remove the plant from the pot and shake off as much soil as you can without damaging the roots. Inspect the roots and if any are brown or black, cut them off using a clean pair of scissors. Make sure you wipe the scissors with a disinfectant after each snip so that the disease does not spread to the healthy roots. 

If there are any yellow or brown leaves, prune them off and discard them properly. If you can burn them, even better. Never place the cuttings in your compost, especially if you use the compost to fertilize other plants. The fungus could lie dormant in the compost and awaken when placed in the soil of new plants.

Let the plant air-dry on a tray lined with a dry paper towel for a couple of hours. When it is dry, you can replant it in a new pot with drainage holes at the bottom, using fresh, well-draining soil. You can create your own version of Mediterranean soil by adding sand or grit to the gardening soil.

Do not water the plant for the next two weeks after repotting, and make sure you keep it sheltered from rainfall. The moisture in the new soil should be enough while you give the roots time to recover from the trauma of being uprooted.

Place the plant in a sunny location that is not too humid, that will allow the foliage to dry out. Make sure there is good air circulation by keeping the potted plants away from each other to discourage a humid microclimate.

If you are successful at saving your oregano plant, it should be fully recovered after three weeks.

The leaves turn yellow

The leaves on your oregano will turn yellow if the nitrogen content of the soil is too high, the soil is constantly damp, or the pot is too small. The plant will become leggy and the aroma and flavor of the herb will be greatly affected.

Oregano plants prefer soil that is not too rich in nutrients. If the soil is enriched with too much organic material or fertilizer, the leaves will turn yellow and become weak and droopy.

Overwatering can also cause the oregano’s leaves to turn yellow. You only really need to water the plant once a week at most, and leave it to dry out between watering.

You can remedy yellowing leaves on your oregano plant by replicating the living conditions of the Mediterranean as closely as possible.

As mentioned above, avoid overwatering the plant by using well-draining soil mixed with sand and grit. The added sand and grit will improve the soil’s drainage, which will help the plant thrive and grow.

If the yellowing is due to excess fertilizer which has also affected the aroma and taste of the herb, it is best to simply cut back the plant’s growth to about five inches from the soil. You do not need to worry too much about the plant, because this is a very resilient plant and can recover well from being drastically cut back. This practice will help stimulate the plant to produce more green growth that has better flavor.

If the plant’s pot is too small, this could make the plant nutrient-deficient, because the limited volume of soil will quickly become depleted. Repot the oregano in a larger pot with compost. Ideally, the pot should be 12 inches wide to have enough soil to contain the required nutrients.

Also make sure the pot has drainage holes at the bottom, and prune any yellow leaves to encourage new growth.

Conclusion

Your oregano plant is dying because there is an environmental factor that is causing it stress. To revive the plant effectively, you must correctly identify the cause of this stress. The most common causes of a dying oregano plant are insufficient sunlight, incorrect pot size, high-nitrogen fertilizer, overwatering and disease.

Oregano plants are native to the sandy and dry regions of the Mediterranean. They are quite hardy and very easy to grow. As long as you do not overwater, overfeed, or deprive it of sunlight, your oregano plant can live up to ten years.

Image: istockphoto.com / Rawf8

How To Save A Dying Spruce Tree?

How To Save A Dying Spruce Tree?

Spruce trees are native to the northern temperate and boreal regions of the Northern Hemisphere. They comprise the genus Picea, with roughly 40 species of evergreen and timber trees. Spruces are pyramidal trees with whorled branches and egg-shaped or cylindrical cones. Some species are ornamentals, and many are cultivated as Christmas trees. Like most plants, spruces can be prone to sickness and disease, and may die if not properly cared for. 

How to save a dying spruce tree

Determine what is ailing your tree. 

You cannot save your tree unless you have determined the cause of the problem. Note what type of damage or disease is affecting the plant, which parts are affected, and whether the tree needs treatment. Inspect to see if the needles have turned brown or purplish, check whether the damage is on one side only, and examine both lower and upper branches. 

Check that the tree is in the right location with the correct soil. 

Make sure you are watering the trees according to their needs, and only giving supplementary water when the top three inches of soil are dry to the touch. Protect your trees from winter burn by planting one or two rows of wind-blocking trees on the windward side. See to it that the trees are planted in a suitable location and that the soil is not waterlogged, or the roots could develop root rot. 

Check for and eradicate fungal diseases or pests. 

Fungal infections like Cytospora canker could attack spruce trees. This is characterized by browning needles on the lower branches. Control the disease by pruning back the affected branches to the next lateral branch, and about four inches from the affected area. Spray your pruning shears with disinfectant and allow them to dry between cuts. If left untreated, this fungal disease could kill branches and, while it does not kill the entire tree, it can make it very unsightly. 

Spruce needle rust is another fungal infection that appears on the needle tips of white spruce trees. During mid-summer, the needles turn yellow with orange or white projections. It is unlikely to kill the tree, but the affected needles will fall off during the fall season. 

Pests like white pine weevil also attack spruce trees, causing them to bend like a shepherd’s crook. The needles will also start to fall off. This is fatal for trees that are less than four feet tall. Exterminate the pests by pruning away all dead tissue and dispose of the pruned branches. Sterilize the pruning shears with a household disinfectant after every 10 cuts. 

Other pests that could attack spruce trees include sawflies and budworms. If they are left untreated, these pests can defoliate and kill the trees in a period of three to four years. To exterminate them, spray the affected areas with a solution of insecticidal soap and water. Repeat for at least a week until the infestation has been eliminated. You may have to hire tree professionals to treat the tree crown, especially for tall trees. 

Tips for reviving ailing spruce trees 

  • Prune away dead or affected areas to avoid further infestation or disease. 
  • Provide deep watering at least once a week; the water should reach down to at least 12 or 15 inches. For soil with a high clay content, the watering should be every two weeks. 
  • Avoid light watering, as this could encourage roots to grow too near to the surface. 
  • Give a final deep watering during the late fall, before the ground hardens or freezes. 
  • Mulch the area of the root spread to retain warmth during winter and retain moisture during hot weather. 
  • Check the soil pH and make any adjustments necessary for the trees’ needs. To raise the pH, use compounds containing limestone, and to lower it, use aluminum sulfate or sulfur. 
  • Fertilize only during spring and early summer. If you fertilize during late summer or fall, it could encourage new growth and put extra stress on the trees. 
  • Use fungicides to protect the trees from fungal diseases; apply only after pruning the affected areas. 
  • Provide burlap or tree wraps to protect the trees during the winter season. 
  • If you are uncertain as to why your trees are dying, contact a certified arborist to evaluate the problem. 

Conclusion 

Spruce trees are widely cultivated because their wood serves many purposes, such as for construction and furniture. These coniferous evergreens are prone to diseases just like other trees, but if treated promptly they can be brought back to full health. Be sure to identify the reason the trees are dying, and check the soil’s pH and drainage. Treat fungal diseases and pests promptly, and ensure that the trees are deep-watered at least once a week.

Image: istockphoto.com / Maria_Ermolova

Overwatered String of Pearls

Overwatered String of Pearls

An overwatered string of pearls will have soft, mushy, yellowing leaves. The leaves may also turn brown, and the plant could also develop edema and root rot.

A string of pearls can become overwatered for several reasons: if they are watered too often, if they are given more water than needed per watering, if their soil is not well-draining, or if their pot does not have drainage holes at the bottom. Any one of these factors, or a combination thereof, can result in your string of pearls becoming overwatered.

In this article, we will discuss the signs to look out for, and how to save an overwatered string of pearls.

What are the signs of an overwatered string of pearls?

Root rot

Root rot may not be the most obvious sign of overwatering, since it happens underground, but if you suspect overwatering and remove the plant from the pot to inspect the roots, this sign is the most definitive of them all.

A plant owner will be prompted to check the plant’s roots when they notice any of the other signs discussed in this article.

Root rot is a condition in which the roots of your plant get infected by opportunistic pathogens because they have died from lack of oxygen and thus become vulnerable. When a plant is overwatered, its roots are constantly in soggy soil. This leaves them unable to get access to oxygen, and they will drown. Once the roots have died, they will rot, and fungi, bacteria and pests will spread the rot from the roots up into the stem and leaves, until the entire plant is consumed.

The earlier you catch the infection, the easier it will be to salvage the plant.

Soft and mushy leaves

An overwatered string of pearls will also become soft and mushy. This is because the plant’s cells and tissue become filled with an excess of water, causing the leaves and stems to rupture. The bead-like leaves will feel soft and mushy to the touch and will burst, and the strings will feel limp and weak.

Yellowing leaves

Another indication that your string of pearls is overwatered is when the leaves turn yellow. This goes hand in hand with the leaves becoming soft and mushy because the cells in the leaves rupture due to all the excess water.

If the leaves have turned yellow it means the cells in the leaves are dead, so there is no saving any of the affected leaves. The more yellow the leaves become, the more serious the effects of overwatering.

Leaves turning brown

Leaves turn brown after they turn yellow. This is simply an indication that the rot has made its way up the string and to the leaves.

The leaves can also turn brown when a string of pearls is underwatered, but in this case they are dry and will shrink. Leaves on an overwatered string of pearls will feel slimy and mushy.

Edema

We know that the cells in the leaves will eventually rupture when they take in too much water. However, there is a point when the leaves have not yet ruptured, when the elastic cell wall stretches to accommodate all the excess water. The stretched cells will expand and will manifest as bumps on the leaves, resembling blisters. This condition is called edema, and it also causes the leaves to turn yellow and fall off.

How do you water a string of pearls?

The best way to avoid overwatering your plant is to know how to water it properly. The string of pearls is a succulent, which means it does not need to be watered as much as most plants, because it can store water in its body for use in times of drought.

Water the plant from the bottom

One way of watering your string of pearls is to stand the pot in a shallow dish of water for ten minutes. The plant will absorb the water from below. This is a good method to adopt since the roots get the water first and you will  not need to soak all of the soil in the pot every time you water it.

Water the plant from the top

Watering from the top is a classic method for good reason; it does a good enough job of keeping the plant hydrated.

If you do choose to water your plant from the top, just make sure you soak the soil deeply to reach all of the roots. You can use a watering can with a long spout to pour water directly onto the soil. Try not to get the leaves or the beads wet, as this encourages the growth of fungi.

Watering frequency

Keeping track on your calendar can help you remember when to water your plant. A string of pearls needs to be watered approximately once every two weeks.

Remember that this schedule is not set in stone; you can touch the soil in the pot to see if it needs to be watered. If the top inch of soil is dry, water your plant; if the soil is still a bit damp, wait one or two days and check the soil again.

How do I save my overwatered string of pearls?

Check the pot to see if there is any stagnant water. Get rid of any sitting water to avoid further damage to the roots. Simply tilt the pot to the side to allow the water to flow out.

You can help encourage faster evaporation and drying by placing the plant under a bright light for several hours. Place it under direct sunlight so that the increased temperature will increase the transpiration rate. The plant will start to lose water through its stomata, and this way the number of ruptured cells will be greatly decreased.

If you suspect that your string of pearls is overwatered, avoid watering the plant for some time. The soil is probably still soaked, so it will be fine without water for a while.

Try also to lengthen the time between waterings. If you used to water the plant every seven days, try to water it every ten days and see if the plant prefers that schedule.

Remove any beads that have been damaged and are yellow or brown. Check the roots and remove any parts that have turned brown or black. Doing this will help prevent further rotting, as well as encourage the growth of new strings and beads.

Repot the string of pearls in a pot that has drainage holes at the bottom, using well-draining soil.

Make sure to not water the plant immediately after repotting. Wait at least a week to give the roots enough time to recuperate from the transplant trauma.

Conclusion

If your string of pearls is overwatered, it can develop root rot and edema. The leaves will be soft and mushy, and either yellow or brown.

A string of pearls is a succulent and is therefore very easy to overwater. If the plant is in a pot with no drainage holes, or if it is planted in poorly-draining soil, overwatering becomes even easier.

You can salvage your overwatered plant by draining out any excess water, placing the plant under the sun, avoiding watering for some time, pruning any damaged leaves and roots, and repotting the plant.

The best way to avoid overwatering is by checking the soil before watering. If the soil is still damp, hold off on watering for one or two days.

Image: istockphoto.com / Tatyana Consaul

How To Save A Dying Honeysuckle Plant?

How To Save A Dying Honeysuckle Plant

If your honeysuckle plant is dying, it means that there is an environmental factor causing it stress. This could be underwatering, insufficient sunlight, lack of nutrients in the soil, or disease.

To save your dying honeysuckle, you need to correctly diagnose the cause of the symptoms so that you can solve the problem as soon as possible.

In this article, we will discuss the possible reasons your honeysuckle is dying, and how to save it.

Why is my honeysuckle plant dying?

Underwatering

If you notice that your honeysuckle’s leaves are turning yellow and also dropping a lot more than usual, it is most likely due to underwatering or drought. The soil in the plant’s pot has been dry for so long that the plant has lost most of its moisture.

The honeysuckle’s natural habitat is the rich soil of the woodlands. It is used in the soil that is moist and full of nutrients, which is why it is sensitive to a lack of water. In nature, the ground around the honeysuckle is full of decomposing leaves, which help to keep moisture in the soil and also ensure it is well-draining.

When the plant is in your garden, it can become underwatered for a number of reasons. One of these is that the base of the plant may be directly under the sun, which will result in the soil drying out too quickly. Another reason could be that your garden soil is too stony or sandy, making it a little too well-draining. If the soil does not retain moisture well enough, the plant cannot absorb water and nutrients fast enough to store them. Finally, another cause of underwatering is planting the honeysuckle too close to a fence or a wall. When the rain falls, the fence or wall may block the water from reaching the plant.

Save your underwatered honeysuckle by placing mulch around the base of the plant. By adding mulch, you simulate the ground in the plant’s natural habitat, which has plenty of environmental litter that conserves moisture around the plant’s base. An inch of mulch should be enough also to improve the soil’s structure and add nutrients.

Water the honeysuckle with a generous soak once a week during spring and summer, so that it does not become underwatered and to help the plant establish its roots better. Stronger and more established roots will be better at resisting drought.

Add mulch to the base of the plant every six months and your plant should thrive.

Insufficient sunlight

Honeysuckles need to be in an area where their vines get plenty of sunlight while the roots are kept mostly shaded. The sunlight is important to encourage blooming, while the shade on the base of the plant ensures the soil does not dry out too quickly after watering.

You shouldn’t need to worry too much about the plant getting sun, since its vines are able to grow in the direction of the sun.

However, if the plant is unable to get the sunlight it needs, this can lead to the yellowing of the leaves and leaf defoliation. This is especially apparent when the top part of the plant looks healthy while the lower half is yellowing, because only the upper half is able to reach the sun. The leaves in the lower half of the plant will eventually drop off.

If your honeysuckle’s sunlight is getting blocked by trees or other plants, you can cut some branches off the surrounding plants to give it more much-needed sunlight. Never allow the honeysuckle to stay in full shade, or it may not live for very long.

Lack of nutrients

As mentioned above, the honeysuckle’s natural habitat is woodlands, where the soil is rich in organic matter from the decomposing leaves and other nutrient-rich material.

When the plant is grown in a garden or a pot where the soil is poor, the plant will not flower, and its leaves will turn yellow and drop off.

Your soil may be lacking nutrients because they become depleted over time, especially in a container with a limited volume of soil. If you do not fertilize or mulch the soil every year, the soil cannot remain healthy and the plant will die back.

You can save undernourished honeysuckle by simulating the soil conditions of their natural habitat, by adding mulch to the base of the plant. Do this every year to replenish the nutrients in the soil and to keep the soil moist for longer.

Place one inch of leaf mold or compost on the base of the plant in the spring, and again in the summer.

Disease

The disease is another common reason your honeysuckle may be dying. If you see white or gray mold with black spots on the plant’s leaves, it may have powdery mildew.

This can be resolved, but the recovery time will depend on how early you are able to catch the disease and start treatment.

Risk factors for powdery mildew include poor soil, high humidity, insufficient sun, too much fertilizer, and underwatering.

Treat powdery mildew by removing the infected foliage using a sterile pair of scissors. You need to disinfect the blades of the scissors between each cut so that you do not transfer spores to the healthy foliage. If there is any debris, collect this and discard it properly so that it does not infect other healthy plants. You can also use neem oil or fungicide to get rid of powdery mildew on the leaves.

Conclusion

If your honeysuckle plant is dying, it means there is an environmental factor causing the plant stress. Saving the plant begins with correctly diagnosing the cause of the plant’s declining health.

The most common causes of a dying honeysuckle plant are underwatering, overwatering, insufficient sunlight, lack of nutrients in the soil, or disease.

Image: istockphoto.com / Liudmyla Liudmyla

How To Save A Dying Money Tree?

How To Save A Dying Money Tree

If your money tree is dying, it is because the plant is undergoing stress caused by a sudden change in its living conditions or because of an environmental factor out of its control.

Saving the plant starts with correctly identifying the reason it is dying in the first place. If you are able to narrow down the possible causes of its declining health, treatment will be much easier.

The most common causes of a dying money tree are underwatering, overwatering, disease, acclimatization, pests and drafts.

In this article, we will discuss the different causes of a dying money tree and how to save it.

Why is my money tree dying?

Underwatering

When a money tree is not given enough water, its leaves will dry out, turn brown, droop and curl up. This is because the plant is trying to conserve its limited water and would rather sacrifice the leaves than the other parts of the plant.

Fortunately, it is quite easy to save an underwatered money tree. Just give it a good, deep soak. Make sure you water the soil until the excess flows out of the drainage holes at the bottom of the pot. This will ensure that all of the roots have been reached by the water and they can all recover.

You can avoid underwatering your plant by knowing when it needs water. The best way to ascertain this is to touch the top inch of the soil. If the top inch of soil is dry, water the plant, but if the soil is still quite moist, wait one or two days before checking the soil again. 

There is no set time to wait between watering, because there are several factors that can affect the rate at which the soil in the plant’s pot dries out, such as the season, the weather and the humidity.

The plant will recover much more slowly if it has been underwatered for a longer period of time. If it has lost a lot of leaves, you cannot be sure of its recovery unless sufficient new foliage grows out.

Overwatering

If you overwater your money tree, its leaves will become limp, soft, mushy, and will eventually drop off. The soil becomes soggy from overwatering, which can cause the roots or the plant to die and rot. Because the plant’s roots are dead, they can no longer properly absorb the plant’s required nutrients and minerals. The plant will sacrifice its leaves, which is why they fall off. Plants need their soil to be sufficiently airy for oxygen to reach the roots. If the soil never dries out, the roots become oxygen-starved and will suffocate.

Overwatering is the most likely diagnosis if the leaves have become yellow and wilted. One cause of overwatering is poorly-draining soil. Another cause is a pot that is too small for the plant, in which case the roots may have compacted, and will not allow excess water to drain out fast enough. If the pot has no drainage holes at the bottom, the excess water will also be unable to escape. If there is a drip tray below the pot that is not being emptied regularly, this can also lead to overwatering.

You can save an overwatered plant by only watering it when the top inch of soil is dry to the touch. Do not water the plant if the soil is still quite moist.
If the plant gets enough light, this can help the soil dry out faster than if it is in the shade.

Make sure the soil you are using is well-draining, and the pot has sufficient drainage holes at the bottom. The pot should also be big enough to give the roots space to grow into.

If you are using a drip tray, empty it after letting the pot drip for a few minutes. Do not let the plant stand in a tray full of water.

Drafts

If you are taking good care of your plant and cannot figure out why it is drying out and drooping, it may be because of drafts. Both cold and hot drafts can have a negative effect on your money tree.

If your money plant is kept indoors, check if there is an air conditioning or heating vent near the plant. Also check for drafty doors or windows that may be letting cold air flow directly toward your plant.

Acclimatization

When you have just brought your new plant home from the store, chances are it will exhibit signs of stress such as yellowing and drooping. Do not panic; this is completely normal. Remember that store-bought plants are usually grown in nurseries where they are provided with near-perfect living conditions. When the plant is taken out of the nursery and brought to your home, almost all aspects of its living conditions change, including temperature, humidity, light and watering schedule.

The best thing you can do for the plant is to try to replicate the living conditions they might have in their natural habitat.

Over the next couple of weeks, the plant will adjust to the conditions in your home and it should recover nicely.

Pests

The most common insects that attack money trees are aphids, scale insects, spider mites, gnats and mealybugs. It can be tricky to catch an infestation in its early stages, so the best thing to avoid pests is to inspect the underside of the leaves each time you water the plant. Getting rid of these pests is imperative since they can do a lot of damage when they feed on the plant.

You can try to remove the bugs one by one manually, or spray the plant with a steady stream of water from your garden hose to knock them off. You can also wipe neem oil on the leaves to kill the insects.

Make sure you keep infested plants quarantined while treating them, to prevent the spread of the pests to your health plants.

Diseases

Most fungal and bacterial diseases in money trees are present because the plant is already compromised due to root rot.

Leaf spot disease is one of the most common diseases in money trees that grow in poorly-ventilated, humid and wet conditions. If you grow the plant in a place that is well-ventilated and do not overwater the plant, you can more easily avoid these diseases.

Bacterial leaf spot presents as brown or black, wet-looking spots on the plant’s foliage. Leaf spots caused by fungi are smaller but more plentiful.

Pruning off the affected leaves is the first step when the plant has leaf spot. Remove the foliage carefully, using sterile shears, and make sure to clean the shears after each cut so that the disease does not spread.

Conclusion

Your money tree is dying because an environmental factor is causing the plant stress. Identifying the cause of its declining health is the most important step, so that treatment can be specific and quick.

The most common causes of a dying money tree are underwatering, overwatering, disease, acclimatization, pests and drafts.

Image: istockphoto.com / Robi_J

How To Save A Dying Peperomia Plant?

How To Save A Dying Peperomia Plant

Your peperomia plant is dying because an environmental factor is causing it stress.

This plant is relatively easy to grow and does not have many requirements for care, but it is still susceptible to problems brought about by improper cultural care or pathogens.

The most common causes of a dying peperomia plant are overwatering, underwatering, insufficient light, diseases, aging, transplant stress, insufficient nutrients, incorrect temperature or humidity, and pests.

In this article, we will discuss the different reasons your peperomia plant may be dying and how to save it.

Why is my peperomia plant dying?

Overwatering

The most likely reason your peperomia is dying is overwatering. When a plant gets too much water in its soil, it can get root and stem rot, its leaves will turn yellow and fall off, and the entire plant will eventually die.

You will know your peperomia has root rot if the base of the stem starts to feel soft and is turning black. In severe cases, even the stem will rot. If the stem is involved, the peperomia is unlikely to recover and survive.

Another condition that can affect your peperomia is black leg. This is when the base of the stem has turned black because of a combination of fungal infection and overwatering. This infection also starts at the roots and moves up the stem. If you fail to catch the black leg in its early stages and continue to overwater it, your plant will die.

Another common sign of overwatering is when the leaves turn brown and fall off. This means necrosis has set in from overwatering, which causes brown patches on the leaves.

Save your overwatered peperomia plant by poking holes in the soil with a thin stick to help the soil dry out faster. Make sure you fill in the holes afterward, to avoid drying out the soil too much after the problem has been fixed. Add sand or perlite into the soil mix to improve drainage and reduce the likelihood of overwatering.

If the plant’s pot does not have drainage holes, transfer it to one that does, to give excess water a way out instead of pooling at the bottom of the pot and waterlogging the soil.

If you check the roots and they have begun to rot, stop watering the plant immediately. Rotted roots are more susceptible to diseases and pests, and the rot will soon move up towards the stem. Remove the rotten roots using sterile scissors before replanting in fresh soil.

Insufficient light

If your peperomia starts growing irregularly and one side is becoming leggy or spindly, this usually means that the plant is not getting enough light. The leggy growth is due to the plant growing toward the nearest source of light, as opposed to growing symmetrically. The plant needs light to produce food to survive, so this legginess, or etiolation, is an act of desperation.

You can fix this by transferring the plant to a spot where it can get equal light on all sides. You can also prune away the leggy parts to preserve its aesthetic.

Diseases

Fungal pathogens present as brown spots on the leaves of your peperomia leaves.

Rhizoctonia leaf spot causes dark brown and black spots, while Phyllosticta leaf spot causes brown rings to appear on the leaves. Cercospora leaf spot causes raised brown areas on the undersides of the leaves.

You can get rid of these diseases by using a copper fungicide foliar spray. Try to refrain from watering the plant from above so that you do not get the leaves wet. Wet foliage encourages the growth of fungal pathogens.

Normal aging

You may be worried if the leaves on your peperomia are falling off, but most of the time there is no need to panic. Often, falling peperomia leaves are simply due to the normal aging pattern of the plant’s foliage. This is most likely the reason if the leaves that are wilting and dropping off are the ones nearest the base of the plant.

There is really no need to intervene in this case; just wait for the leaves to drop off and you can remove the debris from the soil.

Transplant stress

If you have recently transferred your peperomia plant from an old pot into a new one, you might notice that the plant starts to droop. This is called transplant stress, which is a reaction of the plant to the trauma of being transplanted. The roots are affected the most, which is why you also need to hold off from watering for at least a week after transplanting. This allows the roots enough time to recover and establish themselves in the new soil.

You can help your plant transition to its new soil and pot by providing the best cultural care for the next couple of days until the plant has fully recovered.

Insufficient nutrients

Another reason your peperomia is dying may be a lack of nutrients. Sometimes, plant owners fail to consider nutrients as a part of a plant’s needs, and might think water and sunlight is enough to keep the plant happy. This is understandable, especially if the soil they used for the plant is rich and full of nutrients. However, if the plant is in a pot and has depleted the soil’s nutrients, you may start to see signs of a nutrient deficiency.

Fortunately, this problem is easily fixable. Simply fertilize the plant to provide the nutrients and minerals it needs. Do this once a month during its growing phase in the spring and summer.

Temperature and humidity

Peperomias’ natural habitat is the rainforest of Brazil, which means they like the tropical warmth and humidity of these places. Try to replicate these conditions as best you can when choosing where to position your plant. Bring it indoors during the winter; the heat inside the house should be sufficient. Place it in the kitchen or the bathroom, because these are two of the most humid places in any home.

Pests

The most common pests that attack peperomia plants are mealybugs, mites and fungus gnats.

Mealybugs look like white masses on the undersides of the leaves and roots. They usually appear alongside mold, and can stunt the plant’s growth. You can use neem oil or insecticidal soap to kill them.

Mites are very tiny insects, which makes them difficult to spot in the early stages of an infestation. They may have done plenty of damage by the time the signs of infestation appear. They also stunt the plant’s growth and cause the leaves to necrotize. Pesticidal spray and soap are both effective against these insects.

Fungus gnats look like tiny black flies and are most noticeable on the soil. The larvae of the fungus gnats are what do the actual damage to the plant. They feed on the roots of the peperomia, while the adults do not really do any actual damage.

Make sure you keep the infested plant far away from your other, healthy plants while treating it, to prevent the spread of infestation.

Conclusion

Your peperomia is dying because there is an environmental factor that is causing the plant stress. The first step in saving your dying plant is to correctly identify the cause of the problem.

The most common causes of a dying peperomia plant are overwatering, underwatering, insufficient light, diseases, aging, transplant stress, insufficient nutrients, incorrect temperature and humidity, and pests.

Peperomia plants are quite hardy and resilient, so as long as you provide the plant with its most basic cultural needs, you should have no problem growing it.

Image: istockphoto.com / Muhammad Mukrim Al Mabrur

How To Save A Dying Citronella Plant?

How To Save A Dying Citronella Plant

Citronella plants, with the scientific name Cymbopogon nardus, belong to the family Poaceae. These aromatic perennials are native to tropical Asia and are widely cultivated for their oil, the popular citronella oil. These plants can grow up to six feet high and four feet wide. Like most plants, they can also be prone to problems and diseases and may die unless they are treated promptly.

How to save a dying citronella plant

1. Assess whether there are still living parts of the plant.

Check your dying citronella plant closely, as there may be a chance that you can revive it. Any sign of green could mean you can still bring the plant back to life. Check the roots, too: if they still appear plump and white, there is a chance that the plant can recover. 

2. Check whether you have overwatered the plant. 

Your citronella could be dying because of too much water. Overwatered plants manifest brown or yellow, wilted leaves. The soil is also usually moist and the roots will develop root rot. To fix this, you need to reduce your watering and change the soil, especially if it has become soggy or waterlogged.  

3. Check whether you have watered your plants enough. 

Your citronella plants could also be dying due to lack of water. The common signs of dehydrated plants include dried-out leaves that turn brown at the tips. The soil will crack and pull away from the edges of the pot.  

Revive your thirsty plants by letting them soak in water for a few hours. Most plants are easily revived this way. Try to water more often, and see to it that the water reaches all the way to the roots.  You can monitor the soil’s moisture with a moisture meter to help point you in the right direction. 

4. Get rid of dead leaves. 

Snip off the dead and brown leaves using a pair of pruning shears or scissors. You can also pinch off the dead leaves with your fingertips.

5. Prune back the stems. 

Trim back any dead parts of the stems until only green tissue remains. You may also change the soil and the pot. However, do not expect instant changes; it could take a few weeks before you see any positive results from your efforts. 

6. Check the lighting. 

Your citronella plant could be dying because of insufficient light.  These plants like a few hours of direct sunlight daily. If they are not getting enough sunlight, you need to move them to a new spot so they can soak up more sun. 

7. Assess the humidity level.

Your citronella may also be dying due to low humidity. Common signs of this include wilting, browning and shriveling. These plants prefer moderate humidity. To increase the humidity, try misting the plants or grouping them together to raise the humidity level.   

8. Make sure your plant is getting its required nutrients. 

Your plant could be dying due to a nutrient deficiency in the soil. Malnourished plants manifest weak stems or discolored leaves, and you need to revive them with fertilizers. Repotting your dying plants could also be a lifesaver, since soil becomes depleted of nutrients over time. Repot the plants every few years to keep them properly nourished. 

9. Give it at least a month and monitor for positive results.

Having given your dying plants the required care and attention, wait at least a month. It takes quite some time to nurse a dying plant back to health, and it could be weeks or even a month before you see any improvement. 

If for any reason, you cannot revive your dying plant, you can still give it a final purpose. You can turn it into compost, which will be a natural fertilizer for your other plants. 

Indications that your citronella plant is dying

  • The plant has brown leaves, which could be an indication of insufficient light. 
  • The plant has yellow leaves, which could be due to inadequate light, overwatering or pests. 
  • The plant has spots or discoloration, which could be due to overwatering.

Reasons your citronella plant is dying 

Overwatering

Citronella plants need moisture, but they cannot tolerate too much water. Overwatering could lead to yellowing leaves that eventually drop off. Water only when the soil’s surface is dry to the touch. Waterlogged soil could also lead to the leaching of essential nutrients, resulting in underfed plants. 

Excessive sunlight 

Citronella plants become weak and sickly if exposed to direct sun for too many hours. Place them in a spot with a natural shade that still allows some sunlight for them to grow well. 

Soil quality 

The quality of the soil can contribute to the death of citronella plants. If they are planted in soil that does not drain well, it could lead to fungal diseases like root rot. The ideal soil should be rich with organic matter, and compost may be added to enrich it further.

Citronella should ideally be planted in pots that have large draining holes in the bottom, to prevent root rot. You may also need to transplant them into bigger pots if their roots are becoming crowded. 

Tips for a healthy citronella plant

  • Expose the plant to sunlight for around six hours daily. 
  • Water the plant only when the top inch of soil has dried out. 
  • Use pots with sufficiently large drainage holes. 
  • Maintain a temperature around the plant of around 60 to 70 degrees Fahrenheit.
  • Prune the plant at weekly intervals to avoid overcrowding.

Conclusion 

Citronella plants are widely cultivated for their citronella oil, which is a well-known insect repellant. Like most plants, they can also be prone to problems and diseases that could lead to weakness and death. You can try to save your dying citronella plant by assessing your watering schedule and using fertilizers to nourish the soil. Also prune off dead leaves and assess the humidity level around the plant.

Image: istockphoto.com / ThamKC


Overwatered Petunias

Overwatered Petunias

Petunias originated in South America and make up roughly 35 species of flowering plants of the nightshade family, Solanaceae. Common garden petunias are ornamental plants featuring trumpet-shaped flowers, and are mostly cultivated in window boxes and flower beds. They are hardy annuals that grow best in full sunlight. However, like most plants, they can also suffer if overwatered. 

Overwatered petunias: What are the symptoms?

The leaves are soggy and wilted. 

Overwatered petunias look droopy and the leaves are soggy, wilted and about to fall off the branches. 

The leaves are turning yellow and brown. 

The leaves of overwatered petunias have a damp texture and will turn yellow and brown before eventually dropping off.

There are signs of edema on the leaves. 

Edema develops in overwatered petunias when the plant’s water-filled cells start to break down and burst. This is most evident on the undersides of the leaves, and is characterized by watery blisters and lesions. 

The soil is unusually wet.

The soil of overwatered petunias is almost always waterlogged. 

The roots are rotting.

The roots will begin to rot if they are waterlogged, and will be unable to perform their main function of transporting vital nutrients throughout the plants. Rotting roots will turn brown and mushy. 

How to fix overwatered petunias

Get rid of excess water. 

You can help save your overwatered plants by tipping them out of their pots. This is to allow excess water to drain away and so that some air can return to the soil. 

You can also place the root ball on a sheet of paper and leave it there to dry out. This will take two to three days. During this time, the roots and stems are fragile, so ensure that the plant is out of direct sunlight while you dry it out. 

As the roots dry out, the root ball will begin to absorb some air and the soggy parts will return to being only slightly moist. Some plant owners squeeze the root ball to speed up the drying process, but this is not advisable as it could damage the roots. 

Prune the affected roots. 

Examine the roots for signs of rotting, since this usually follows if you have overwatered the plants. Sickly roots turn orange-brown and will start to rot. They will also lose texture and become soggy. Trim or prune the ailing roots to revive the plants. Sanitize any garden tools you used to prevent the spread of infection to other plants. 

Make sure the pots or planters have adequate drainage holes. 

See to it that the pots you use for your plants have sufficient drainage holes. A lack of drainage may be the reason the plants were always in wet soil. Make sure that there is at least one hole in the bottom of each pot. 

Repot your plants. 

Incorrect or poorly-draining potting soil could also lead to overwatered petunias. These plants are fussy when it comes to soil quality. Repot them in fresh potting mix; do not reuse the same soil as it could contain pathogens that may threaten the life of your weakened plants. 

Petunia plant care 

Petunia plants should be watered regularly and exposed to sunlight to promote great blooms. Most of these plants can grow in partially shaded areas, but more abundant blooms are produced in full sun. Ideally, the soil used for planting petunias should contain well-composted organic matter. 

These plants should also be fertilized at least weekly with a balanced, water-soluble fertilizer designed for blooming plants. If you provide them with the proper light, water and fertilization, you will ensure a long season of  beautiful blooms. Spent blooms should be removed, along with the seeds they produce. To deadhead petunias, remove the base of the flowers to include the seeds. 

Conclusion 

Petunias are hardy annuals popular for their dainty blooms. However, they are prone to overwatering, especially by over-enthusiastic plant owners. Common signs of overwatered petunias include soggy, wilted and brown or yellow leaves. There will also be signs of edema in the form of blisters and lesions, and the roots may start to rot.

Image: istockphoto.com / Pinrath Phanpradith

How To Save A Dying Rosemary Plant?

How To Save A Dying Rosemary Plant?

Your rosemary plant may be dying because of an environmental factor that is causing it stress and taking a toll on its overall health.

The most common causes of death in rosemary plants are too much water, lack of sunlight, high humidity and disease.

The first step in saving your dying rosemary plant is correctly identifying the stressor and dealing with it directly. The sooner you identify the cause, the higher the chance of the rosemary making a full recovery.

In this article, we will discuss the different reasons your rosemary plant may be dying and how to save it.

Why is my rosemary plant dying?

Overwatering

One of the most common reasons for rosemary plants to die is because of overwatering. The first signs most people notice are the leaves turning brown or black.

Rosemary is easily affected by overwatering, which is why it needs to be planted in soil that is well-draining and sandy, or even stony.

Being prone to overwatering is also the reason that rosemary is notoriously difficult to grow in pots. It may do fine in pots during the summer because the hot weather dries out the soil faster, but even slight overwatering can suffocate the plant in winter.

These plants like moderately moist conditions, but the key is to have soil that drains well. If you think your potted rosemary is overwatered, you can salvage it by transplanting it to a sunny garden with well-draining soil. If you do keep it in a pot, make sure the pot has sufficient drainage holes at the bottom to effectively get rid of any excess water. Water the plant less frequently than you would if it was in the ground.

Giving the plant time to dry out between waterings is another must. Only water it when the top one or two inches of soil are dry to the touch. When watering, try not to water from overhead, because this encourages the growth of mildew and other fungi.

Insufficient light

The rosemary plant is native to countries in the Mediterranean, which means it likes plenty of sunlight and warm weather. It needs six to eight hours of full sun a day, so it does best when planted outdoors. Make sure it does not get blocked by trees or other plants so that it can get all the sun it needs every day.

If you take your outdoor rosemary indoors for winter, it will end up only getting four to six hours of low light a day, and the plant will have a hard time surviving. The weak light is not enough to produce the energy it needs to stay alive.

The best way to acclimatize your outdoor rosemary to the indoors is by gradually getting it used to less and less light. Before taking it in for the winter, try moving the plant to a shadier outdoor spot for a few days. Eventually, you can move the plant indoors, but make sure the spot you choose is a south-facing window where the plant will still be able to get sufficient light.

Winter

As mentioned above, rosemary likes to be planted in a sunny location and does not do well in the cold.

It is imperative to bring the plant indoors for winter before the first frost. If it is left out in the winter cold, the plant will become pale, brittle and dry, and it will turn yellow or brown.

Light winter can kill several branches on the rosemary plant, but a severe winter will kill the entire plant and its roots.

To help your rosemary survive winters, plant it in a sheltered spot that gets plenty of sun. If there is frost damage, cut off the affected foliage. Do not do the cutting during the winter because the exposed areas will make the plant even more susceptible to frost damage. Do the pruning during the spring when the weather is warmer and conducive to new growth.

Disease

One of the most common fungal diseases that attacks rosemary plants is powdery mildew. Powdery mildew presents as powdery white spots on the entire plant. It grows on rosemary when the plant is in partial shade, because the mildew likes cooler conditions. In a severe powdery mildew infection the plant will shed its leaves.

Give the plant full sunlight and make sure to spray it with water to wash off the white spores and minimize the mildew.

You can control fungal infections by applying a mixture of water and baking soda to the plant. Refrain from using just any fungicide, because rosemary is a herb that is grown for consumption.

High humidity and root rot

High humidity combined with overwatering can result in the plant shedding its foliage and wilting. The plant will turn brown and become brittle. These symptoms are all because of root rot due to the poorly-draining soil and high humidity your plant may be subjected to.

If you notice these symptoms, stop watering your plant immediately and keep it away from rain. Letting the plant dry out is your top priority.

Rosemary prefers dry conditions. Being kept in a location where it can get full sun and good air circulation can also help keep pests away. If there is not a lot of wind where you are, letting a fan blow on the plant a few hours a day can also work. The full sun helps the water in the soil evaporate faster, thus reducing the chances of root rot and other diseases.

If you live in an area where humidity may tend to be a little high, the best way to work around this is simply to give the rosemary plenty of sun and air circulation.

Nutritional issues

Both an excess of, and a lack of, essential nutrients can cause a decline in the rosemary’s health.

In its natural habitat, rosemary grows in nutrient-poor, sandy soil. If you grow your rosemary in garden soil that is already nutrient-rich and add fertilizer on top of that, the high levels of nitrogen may do your plant more harm than good. The roots will burn and the leaves will turn yellow or brown. Too much nitrogen also causes the foliage to grow faster, which will affect the flowers.

If you suspect that you have been overfertilizing, you can try to wash out the nutrients by flushing the soil with water. Just make sure the soil is well-draining and aerated so that it can dry relatively quickly.

Even if rosemary does not need a lot of nutrients, it is still possible for it to need some fertilizer, though incrementally. If your plant is starting to look pale yellow, you might need to fertilize it.

Conclusion

A dying rosemary plant is stressed due to an environmental factor that you need to identify in order to save it from dying.

The most common causes of a dying rosemary plant are overwatering, insufficient light, winter weather, disease, high humidity and nutritional issues.

Save your dying rosemary plant by making sure it has well-draining soil and six to eight hours of sunlight a day. To avoid root rot and other diseases, do not overwater your plant and place it in a well-ventilated area. Bring the plant indoors during the winter as it cannot tolerate the cold.

Rosemary can live over ten years, as long as you provide it with good air circulation, good drainage and plenty of sun.

Image: istockphoto.com / BreakingTheWalls

Overwatered Cactus

Overwatered Cactus

Cacti survive the harsh desert climate through their ability to store water in their bodies for use during times of drought. Therefore, they do not need to be watered as often as most other plants. This also means that cacti can easily be overwatered, especially by newbie plant owners, who can be a little too enthusiastic when caring for their first cactus. Just remember that most cacti only need to be watered roughly every 10 days. They have enough water stored, and the soil also needs to dry out between watering.

In this article, we will discuss the causes and signs of an overwatered cactus, and what to do if you have overwatered your cactus.

What happens if you overwater your cactus?

Overwatering your cactus can kill it, so you should always be vigilant regarding your watering techniques.

The cactus loses its color

There are many different kinds of cacti and they come in a wide array of colors and hues. They range from lime green to a deep, dark green color.

When a cactus is overwatered, it will likely become dull and pale. You may not even notice the change in color, since it happens very slowly.

This color change is due to chlorosis, which is a loss of the chlorophyll that gives the plant its color. Chlorosis is caused by nutrient deficiencies and leads to poor flowering and stunted growth. If the roots of a cactus drown in soggy soil they will die, and will no longer effectively absorb nutrients from the soil and into the plant, and the cactus will therefore suffer from nutrient deficiency.

The cactus becomes droopy and soggy

If you overwater your cactus, the excess moisture it takes up will cause it to become soggy and droopy.

The stem of the cactus will feel soft and mushy, and this is a cause for immediate concern. The plant is mushy because its cells have filled with too much water. The water molecules are causing the cells to bulge outwards, increasing the pressure inside the plant tissue. When the pressure reaches a certain point, the cells will rupture, affecting the plant’s internal transport structure so that it can no longer effectively transport nutrients and water.

The longer the overwatering goes unnoticed, the more parts of the cactus will start to droop and fall off. Before you know it, the entire plant will have toppled over.

Root rot

When cactus roots die from a lack of oxygen after drowning in wet soil, they will decompose and become susceptible to opportunistic pathogens. This is called root rot. The rot will first attack the tips of the roots, and then make its way up the plant. It can be tricky to catch root rot in its early stages because the early damage is done underneath the soil. Often the root damage becomes so severe that the cactus can no longer be salvaged. Its growth becomes stunted and portions of the plant may fall off when you touch them. Eventually, the cactus will turn completely brown or black, and die.

What are the signs of an overwatered cactus?

As mentioned above, it can be tricky catching the signs of an overwatered cactus in the early stages. You need to develop an understanding of what a happy cactus looks like, to be able to tell it apart from one that is being overwatered.

What makes this distinction difficult initially are the similarities between a happy and healthy cactus and an overwatered one. The two look very much alike above the soil, while the real damage is being inflicted underground.

Although it is tricky, there are still early signs you can spot that will alert you to possible overwatering.

Leaf drop

In cacti such as the Christmas cactus, the leaves will drop off from overwatering, even if the cactus looks healthy.

Yellowing

If your cactus turns yellow gradually, this is an almost guaranteed sign of overwatering. Salvage your cactus as soon as you see discoloration; do not wait for the entire cactus to turn yellow before taking action.

Soft, mushy stems and spines

As previously mentioned, a cactus will become mushy because of the water molecules filling the plant’s cells and causing the tissue to rupture, thus impairing its ability to distribute water and nutrients throughout its body.

Edema

Edema in cacti presents as brown spots on the surface of the plant. These spots are another result of ruptured tissue due to overfilled cells.

Wilting

If the plant looks sad and droopy, it could point to overwatering.

Brown or black roots

The most telling and obvious sign of overwatering is if you see brown or black roots upon uprooting your cactus to check its roots. If the roots have a putrid smell like rotten vegetation, your cactus has root rot from overwatering.

If you see one or some of these signs, refrain from watering your cactus until you can inspect it and know for sure whether this is due to overwatering.

How do I save my overwatered cactus?

If you have inspected your cactus and are sure that it is overwatered, remove it from the pot and shake or wash off any old soil from the roots.

Check the roots and, using sterile scissors, cut off any brown or black roots. Leave behind all the white roots. Lay the cactus in a tray lined with dry paper towels to allow the roots to dry out. When the roots are dry, replant the cactus in a pot with drainage holes at the bottom, using a well-draining cactus soil mix. Do not water the cactus after replanting it, to give the roots enough time to heal and be able to absorb water effectively.

Make sure you remove any dead leaves and stems from the cactus. If there are stems that are droopy, cut them off. If a stem looks rotted but still has healthy-looking leaves on it, you are better off removing that stem anyway. This will cut off any infection and stop it from spreading any further.

Lastly, the best way to prevent your cactus from being overwatered is to know when and how much to water it. Touch the soil in the pot; if the top two inches of soil are dry, water the cactus. If the top two inches of soil are still damp, wait one or two days and check the soil again before watering.

Conclusion

Overwatering is one of the classic mistakes made by newbie plant owners when trying to grow a cactus. Overwatering a cactus can lead to root rot, where the plant’s roots die due to drowning in soil that is perpetually wet. The dead roots are infected by opportunistic pathogens and the disease travels up the plant and eventually kills it.

Signs of an overwatered cactus include leaf drop, yellowing, mushy stems, edema, wilting and brown or black roots.

Salvage your cactus by removing any dead roots, replanting it in well-draining soil using a pot with drainage holes, and only watering the cactus when the top two inches of soil are dry.

Image: istockphoto.com / Muanpare wanpen

How To Save A Dying Orchid Plant?

How To Save A Dying Orchid Plant?

If your orchid is dying, it means that there is an environmental factor causing the plant stress and affecting its overall health. In order to save your orchid, you need to be able to correctly identify the cause of its declining health so that treatment can be timely and specific.

The most common reasons for dying orchids are root rot, underwatering, crown rot, sun damage, too much fertilizer and temperature issues.

In this article, we will discuss the different reasons your orchid may be dying and how to save it.

Why is my orchid dying?

Root rot

Root rot is one of the most common problems experienced by orchid owners. Root rot usually occurs when the plant is being overwatered or if it is in an inappropriate container that allows the plant to stand in water for longer than it should. When the potting medium starts to decompose, it will become acidic and damage the orchid’s roots. If it is too compact, the roots can suffocate and die, which also leads to root rot.

You can check whether your orchid has root rot by taking the plant out of the container, removing the potting medium and examining the roots. If the roots have turned brown or black, or if they have become mushy and soft to the touch, they have root rot.

You can save your orchid by pruning the dead roots with sterile scissors. After the rotten roots have been removed, repot the orchid using fresh potting mix.

The best way to avoid root rot is to not overwater your orchid. The roots need to be able to dry out between waterings so that they have a chance to breathe.

Underwatering

If you do not give your orchids the water that they need, they will become dehydrated. Yes, the potting medium needs to be well-draining and allow the roots to dry out between watering, but that does not mean you can forget to water your orchids for extended periods of time.

During the warmer months, the potting medium will dry up faster, so you may need to water the plant more frequently than normal. Adjust your watering schedule depending on the current weather, the climate where you live, the potting medium you are using, and the type of orchid you have. For example, you may be watering the orchid once every three weeks during the winter, but that may not be enough for the plant during the summer.

It is also possible that you are watering the plant regularly but the amount you are giving is not enough. The roots will dry out too quickly and this will also lead to dehydration.

Signs of dehydration include dry potting medium and floppy, wrinkly leaves.

Save your dehydrated orchid by taking it out of the potting medium and letting the roots soak in water. Make sure only the roots are soaked, and not the entire plant. Running the roots under water also cleans them off and lets you get a better look at which ones are dead and which can still be saved.

Sterilize your scissors or your knife before cutting off dead roots. Then, spray the roots with 3% hydrogen peroxide. Let the plant air-dry for a few hours before repotting it in fresh potting medium.

Crown rot

When water gets into the crown of the orchid’s root system, it can lead to a severe problem called crown rot. In the plants’ natural habitat, they grow in the canopy of trees where their roots cannot collect water, making crown rot almost impossible.

In households, orchids are grown in an upright position, making it easy for water to pool in the crown of the plant.

If you accidentally get water into the crown of your orchid, you can use a paper towel to absorb the water until it is mostly gone.

You can tell if your orchid has crown rot when the leaves are falling off, the crown has turned black, and the remaining leaves have turned yellow near the crown.

You should moderate your expectations about the possibility of saving an orchid with crown rot. It is possible, but the chances are slim.

To do this, remove the plant from the medium, prune off any dead roots and spray them with 3% hydrogen peroxide. Let the plant air-dry and wipe off excess moisture with a paper towel if necessary. Repot the orchid in a clean container with new potting medium, making sure the roots are not too far in. Apply ground cinnamon in the crown of the orchid to prevent spread of the rot. After this, you can only wait and see whether your efforts were successful.

Sun damage

When your orchid gets too much sunlight or is exposed to hot temperatures, it can lead to sun damage. The plant’s leaves will turn yellow.

Save your sunburnt orchid by relocating it to a spot where it only gets bright but indirect light, like near a window.

In the winter, keep the plant near the window, but you may have to move it as the seasons get warmer.

You cannot save the sun-damaged leaves, so just leave them and they will fall off on their own. You can also prune them off for aesthetic reasons.

Too much fertilizer

Giving your orchid too much fertilizer can be harmful. The toxicity can cause root burn. You can correct overfertilization by soaking the roots in water. Repeat this at least once to make sure most of the fertilizer has been flushed out.

In cases where the root burn is particularly bad, you may need to repot the plant. Remove all the heavily affected roots and soak the remaining roots in water to flush out the fertilizer. Air-dry the orchid and repot using new medium.

Avoid this problem by giving your plant half the dosage recommended on the packaging.

Temperature changes

Changes in the temperature around the orchid can greatly affect it. Both extremes of temperature can cause the plant stress and lead to its death.

The plant wants to be in a spot where the temperature is neither too hot nor too cold. If there is any damaged foliage, just prune it off.

Conclusion

The key to saving your dying orchid is to know what exactly is causing the symptoms in the first place. If you are able to correctly identify the cause of the stress, it will make treatment that much easier and faster. 

The most common causes of a dying orchid plant are root rot, underwatering, crown rot, sun damage, too much fertilizer and temperature issues.

Orchids can be quite fickle and are more high-maintenance than most plants, but the reward of their beauty will be worth all your effort.

Image: istockphoto.com / RHJ

How To Save A Dying Evergreen?

How To Save A Dying Evergreen?

Evergreen plants have foliage that remains green and functional throughout the year. In Arctic areas, the name refers to coniferous shrubs and trees that have thicker, more leathery leaves. Although evergreens retain their foliage the whole year round, this does not mean they are exempt from illness and infection. These trees, like any others, can become weakened due to various causes and may die unless promptly treated. 

How to save a dying evergreen

Whether you will be able to revive your dying tree will depend on the cause and the severity of the problem. For the best chance at restoring its overall health, ensure that you are providing optimal care and living conditions to reduce stress on the plant and bolster its resistance to possible diseases and pests.

Prune the affected or dead areas. 

Prune or trim back any dead or affected parts to prevent further spread of infection or disease. Nearby trees may also need to have some branches removed or could require extensive pruning. Tree professionals should be consulted to evaluate the extent of the damage. 

Provide one deep watering each week. 

Water the trees deeply once a week, and ensure that the soil is well-draining. This enables the water to reach at least 15 inches into the soil. If the trees are planted in soil with a high clay content, you should only water every two weeks. 

Avoid light waterings.

Multiple light waterings could stimulate the roots to grow too near to the surface. 

Provide a final deep watering in the late fall. 

Make sure to give the trees a final deep watering during late fall, just before the ground freezes. 

Spread mulch over the root area to retain moisture.

Mulching can be a great help in retaining soil moisture and warmth, especially during the long winter months. 

Check the soil pH and content. 

Ideally, you should be aware of the soil’s pH level and content so that you can adjust as necessary to suit the trees’ needs. To increase the pH, use compounds containing lime or limestone; to lower it, use organic materials, sulfur or aluminum sulfate. 

Do not fertilize in late summer or fall. 

Make sure to fertilize only during spring and very early summer. If you fertilize during late summer or fall, it could bring about new growth and cause unnecessary stress for the trees. 

Apply fungicides to protect the trees from diseases. 

Be sure to use fungicides to prevent diseases from returning. Do this after pruning the affected parts of the trees. 

Protect the trees from freezing temperatures during winter.

Use burlap or tree wraps to protect the trees, to give them a chance to recover more quickly.

Reasons your evergreen trees may be dying

It could be due to evergreen tree diseases.  

Evergreen tree diseases common in conifers include needle cast. Symptoms are browning needles or an abnormal loss of the green color in the needles, severe needle drop, and dieback. To treat it, apply fungicide and prune away dead branches, twigs and other affected areas. Dispose of fallen foliage and do not add it to compost piles. Deep-water the trees once weekly so they can recover from stress. 

It could be due to fungal infections like rust. 

These pathogenic fungi are specialized plant pathogens that cause raised blisters on the trees. These blisters reveal bright orange to rusty-brown spores; hence the name. The symptoms include rust-colored powder that spreads over the foliage, and brightly colored swellings, or galls, on the branches and twigs. To treat the disease, prune away dead twigs, stems and branches and dispose of debris by burning it, rather than adding it to compost piles. Apply fungicide and deep-water the affected trees once weekly. 

It could be due to environmental factors like drought. 

Drought causes damage and death to tree roots, creating an ideal environment for secondary diseases. It also causes a water deficit in the trees since water is no longer supplied to the treetops. Symptoms include heavy leaf or needle drop, needles that are brownish at the tips, drooping or yellowing leaves, dieback, cracks in the bark, and a thinning canopy.   

Prune away the affected branches and leaves, and provide deep watering once a week. The water should reach at least 15 inches into the soil. Give a final deep watering in late fall and mulch the area of the root spread to help retain moisture. 

It could be due to winter injury. 

Winter injury occurs when there are sudden temperature changes during the fall, winter and spring seasons. A freeze in late spring or abnormally cold winters can cause great damage to evergreens. Symptoms include dieback, discoloration, splitting bark, heavy loss of foliage, and needles browning at the tips. 

Such weather conditions cannot be controlled, but the condition can be managed by pruning back dead or affected parts and providing deep watering once a week. Give a last deep watering in late fall before the ground freezes, and use burlap wraps to provide physical protection from severe winter weather. 

Conclusion 

Evergreen trees keep their foliage all year round, and the foliage remains functional and green for more than one season. However, evergreens are also prone to problems and diseases that could lead to damage or even death. Help keep your trees resistant to the stress of these conditions by pruning away dead or affected parts, providing deep watering once a week. and applying fungicides to protect them from diseases.

Image: istockphoto.com / Marina Denisenko

Overwatered African Violet

Overwatered African Violet

Overwatering an African violet is one of the most common mistakes you can make with this plant. African violets like their soil to be moist, but not soggy. If their roots are constantly sitting in wet soil, they will be in danger of developing root rot.

You can avoid overwatering your African violet by using well-draining soil and a pot that has drainage holes in the bottom. Only water the plant when the top two inches of soil are dry to the touch.

In this article, we will discuss the factors that cause overwatering in African violet plants and how to save an overwatered plant.

How can I tell if my African Violet is overwatered?

Curled-up leaves

If the leaves on your African violet are curling, your plant might be overwatered, but it could also be a sign that the temperature of the water you are using is stressing the plant. Do not use cold water on your plant; rather use water at room temperature.

Wrinkled leaves

Another sign of an overwatered African violet is wrinkled leaves. This indicates that the plant is unable to effectively bring the water up from the roots and into the rest of the plant’s tissue.

Examine the plant’s roots; they should be white and plump. If the roots are mushy and brown, remove them because they are rotten. If there are still plenty of viable roots left you may be able to salvage the plant, but if all of the roots look rotten, it is best to simply dispose of the plant properly and try again with a new African violet.

Yellow leaves

Another sign that your plant is overwatered is the yellowing of its leaves. This is also a sign of possible root rot.

Wilting leaves

When an African violet is wilting, it can be due to pests, underwatering, or overwatering. Checking the soil is the most important step in figuring out which of these is the actual cause of the wilted leaves.

If the soil is damp or wet when you touch it and the leaves are wilted, it may be overwatered. The excess water drowns the roots, leaving them unable to absorb oxygen.

Shriveled, mushy stems

If your African violet’s stem feels mushy and the plant is shriveled, you are probably overwatering it. A healthy plant will have strong, firm stems. If the stem gives when you squeeze it, there is an issue.

Mushy stems in African violet plants can mean there is a fungal infection, which was made possible by the plant getting too much water.

A shriveled plant could be a sign that the African violet has rotted.

Moldy soil

Mold in the soil is a sign that your African violet is being overwatered. The mold will look like white dots on the top layer of the soil.

Fortunately, this mold does not harm your plant, but it is still important that you remove it as soon as you see it. You can remove the mold by scraping it off the soil. A diluted hydrogen peroxide solution can also kill the mold. One part hydrogen peroxide to five parts water should do the trick. If you check and see that the mold extends beyond the top layer, it is time to repot your plant.

Root rot

If you have been overwatering your plant for some time, it is likely that root rot will have developed. When the roots drown in soggy soil they will die, and the dead root tissue becomes susceptible to opportunistic pathogens such as fungi and bacteria. This infection will cause root rot.

You can clear out the rot by removing the plant from its pot and cutting away the roots that are black or brown. Leave the plant on a paper towel on a tray to allow the roots to dry. When the roots have dried, you can replant it in a pot with drainage holes, using well-draining soil.

It may be difficult to catch the early stages of root rot, and you might not be able to save the plant once the symptoms are visible in the leaves and stem.

Crown rot

Crown rot is a result of root rot making its way to the crown of the plant’s root system. In essence, it is a more serious case of root rot.

You can treat crown rot the same way you do root rot. Remove the rotten roots and spray fungicide on what is left of the root system.

Be warned that if crown rot has become too serious, it may be too late to salvage the plant.

Brown spots on leaves

If you see brown spots on the leaves of your African violet, you should be worried as this is never a good sign. It is most commonly associated with overwatering and, as mentioned above, overwatering prevents your plants from getting the oxygen they need to survive.

Overwatered African violets are prone to edema, and brown spots are a sign of this, especially at the base of the plant.

Remove the leaves that have brown spots, because they are no longer viable. Removing them will help encourage new growth.

How to save an overwatered African Violet

If you suspect that your African violet is being overwatered, you need to correct the problem as soon as possible. If you are able to determine what is causing the overwatering, fixing the problem will become much easier.

Often it is just a case of giving the plant too much water, but it can also be due to the size of the pot, the pot not having drainage holes, or the soil not draining sufficiently.

Once the plant has been salvaged, avoid overwatering by only watering it when the soil is dry to the touch.

Conclusion

Overwatering is one of the most common mistakes made by African violet owners. It can result in a host of problems for your plant, such as curling, wilting, or yellowing leaves, shriveled stems, root rot, crown rot and brown spots on the leaves.

These problems could arise from a pot that does not have drainage holes, poorly-draining soil, or a pot that is too big for the plant and holds more water than the plant actually needs.

Check the plant’s roots and remove any rotten parts, let the plant dry out , and replant it in a pot with drainage holes and well-draining soil.

Water the plant only when the soil feels dry to the touch. If the soil is still damp, wait one or two days before checking it again.

Image: istockphoto.com / Roxiller

Overwatered Pepper Plant

Overwatered Pepper Plant

Pepper plants, of the genus Capsicum, belong to the nightshade family Solanaceae. Some of these species are cultivated for their pungent, edible fruits, while other varieties are grown as ornamentals. These plants are native to tropical America, particularly South and Central America. They are considered drought-resistant plants and can be prone to overwatering. 

Signs of an overwatered pepper plant 

One of the most evident signs of an overwatered pepper plant is leaves that are turning yellow. The leaves will also appear limp, and this is an indication that root rot is likely to set in. Lack of oxygen in the soil affects the roots’ absorption of nutrients, and root rot will develop if the roots are deprived of air for too long. Indoor pepper plants are at a higher risk of developing root rot. 

Another sign of overwatered plants is the appearance of a light gray film on top of the plants. If this happens, scrape off the mold with a toothpick and run a small fan in the direction of the plants for better air circulation.

Aside from yellowing leaves, the leaves may wilt, turn brown or fall off, and the plants may experience stunted growth. 

 Here are some other signs of overwatered pepper plants:

  • Wilting 
  • Puffy stems and leaves
  • Brown spots on leaves and leaf tips 
  • Leaf edema or blisters on the leaves
  • Powdery mildew 
  • Presence of soil gnats and other pests

How to save overwatered pepper plants 

  • Hold off watering your plants temporarily, and improve the soil drainage.
  • Check for, identify and treat root rot immediately.
  • Change the pot and the soil to promote better drainage, and for the soil to dry faster. 
  • Increase the ventilation and temperature, but provide lower humidity.

When is the best time to water pepper plants?

The best time to water pepper plants is during the morning hours. At this time, the sun or the heat from grow lights will evaporate some of the excess water. Do not water pepper plants in the evening, since wet plants sitting overnight are more prone to fungi and disease. Keep the soil moist, but not waterlogged. 

If you intend to add fertilizers, add them during the evening so that the nutrients can trickle into the soil. If fertilizers are added in the morning, the water may evaporate and leave the salty nutrients behind, which could damage the plants. 

How often should you water pepper plants in pots?

You should only water pepper plants in pots if the soil is already dry to the touch. The frequency of watering will depend on current weather conditions and the size of the pots. You can feel the soil to ascertain whether it is dry enough to water. Stick a finger into the soil and check whether the top two inches are dry. If it is dry enough, you can water your plants;  if not, wait a few days and check it again. 

What are the causes of overwatering?

  • Watering the plants too often
  • Poorly-draining soil
  • Watering too much for the type of plant 
  • Watering too much for the current temperature
  • Incorrect container size
  • Insufficient drainage holes in the container
  • Watering too much during the plant’s dormant period
  • Humidity 

How to treat root rot

  • Wash or wipe off any moldy soil from the roots, taking extra care not to break the healthy roots.
  • Prune away any decaying brown or black roots and leave only the healthy white portions. Trim away yellowing or damaged leaves. 
  • Trim or cut off the top growth in proportion to the number of roots that were removed, since the remaining roots will not be able to service the whole plant. 
  • Sterilize the cutting tools before and after use, as well as the containers previously used for the plants. 
  • Rinse the infected soil off the roots and transfer or repot the plants in a new, sterilized container with fresh and dry soil. 
  • Water and drain well to remove excess moisture.

Conclusion

Pepper plants are widely cultivated in containers for their edible fruits that are used as spices. These drought-resistant plants are also often grown indoors and may be prone to overwatering. Common signs of an overwatered pepper plant include yellowing leaves and puffy stems and leaves. Other common symptoms include brown spots on the leaves, leaf edema, root rot and the presence of pests.

Image: istockphoto.com / Kwangmoozaa

How To Save A Dying Ash Tree?

How To Save A Dying Ash Tree?

The cause of a dying ash tree is usually either pests or infection by pathogens.

The most common of these are the emerald ash borer, banded ash clearwing, ash flower gall, ash plant bug, ash aphids, scale insects, Verticillium wilt, ash anthracnose, ash yellows and ash rust.

Correctly identifying the cause of the tree’s declining health is the first step in saving it.

In this article, we will discuss the different causes of dying ash trees, and how to save them.

Why is my ash tree dying?

Emerald ash borer

This insect is a beetle with a jewel-green color, hence the name, that is native to the Asian continent but found its way to North America.

The larval stage is when this insect is at its most destructive. They feed on the inner bark of the tree, which affects the transfer of nutrients and water within it.

When the larvae eventually turn into adults, they will leave through the holes they created in the bark. This makes the tree susceptible to bacterial and fungal diseases. Aside from the holes left behind by the borers, woodpeckers will also do damage when they feed on the larvae. If the bark is split and removed from the tree, you can see the tracks left by burrowing borer larvae. The tree will start to die back from the crown, and eventually die completely, albeit slowly.

The tree’s chances of survival if you try to save it will depend on whether it is still healthy. If the tree has lost several branches, its chances of survival are thin. If you are able to catch the infestation in its early stages, however, treatment may be more effective. If the tree is not valuable to you, you are better off cutting it down to keep the insects from spreading.

If you choose to proceed with treatment, you will need the skills of a professional to apply insecticide injections into the trunk.

Banded ash clearwing

The banded ash clearwing is a wasp-like moth. These insects tend to attack the greener ash trees, and damage their tissue enough to disrupt the flow of the tree’s food and water. The tree’s bark will eventually become rough and damaged. The branches will weaken, and eventually the entire tree will die.

You can get rid of these insects by applying pesticides at the end of summer, since this is when they appear.

Ash flower gall

Ash flower gall is a disease caused by the Eriophyid mite. The insects form the galls that are characteristic of the disease. A gall is an abnormal growth in the plant that looks like brown or green clusters on the branches.

When the mites attack, the male flowers will turn into small, green structures, which become galls. If you see galls forming, it usually means it is too late to cure the disease. They may not be fatal, but they can ruin the aesthetic of the tree.

You can treat ash flower gall by applying insecticide even before the first blossom to avoid the growth of galls. Exposing the tree to more sunlight than shade can also help keep these insects at bay.

Ash plant bug

Adult plant bugs and nymphs both feed on the ash tree’s leaflets that appear in the spring. You will know that your ash tree has plant bugs if parts of the leaves are turning brown and wilting. When the infestation is severe, the tree will suffer from leaf drop.

When treating your ash tree for plant bugs, make sure you maintain the tree’s health by watering and mulching it. Insecticides are effective against plant bugs, but you need to know exactly when they are going to attack. Check the tree for plant bugs in the early spring, just as the leaf buds are starting to open.

Ash aphids

These small, green insects are covered in a waxy substance that looks like thread. The ash leaves will curl and deform when the aphids feed on the sap on the underside of the leaves. 

You can get rid of these aphids by blasting the tree with water from your garden hose and by using insecticidal soap. Insecticides may not be very effective in this situation.

Scale insects

These insects appear from late May to early June, and feed on the bark of the ash tree. They can cause the bark to crack, and if the infestation is severe, the branches may weaken to the point that they fall off.

You need to cut off any affected branches and apply insecticidal soap to the remaining branches and the rest of the tree, every seven days until the infestation has been handled.

Verticillium wilt

This disease is caused by a fungus that releases a toxin that blocks the vessels that carry water throughout the plant. As a result, the leaves wilt and there will be branch dieback. The leaves will turn yellow and have a burned appearance around the edges.

There is no known cure for Verticillium wilt once it infects an ash tree. It is so resilient that even if you cut down and remove the entire tree, the disease still remains in the soil. The best you can do is prevent infection from other opportunistic fungi by pruning off damaged and dead branches.

Ash anthracnose

This disease, caused by a fungus, can result in major leaf loss. The fungus thrives during the rainy season and its symptoms include brown and purple blotches on the older leaves that appear during the start of spring. The leaves will start to look wrinkled and twisted, and leaves will fall prematurely from the lower branches of the tree. 

You can prevent this disease by keeping the garden sterile in the summer. If there are parts of the tree that are decaying, prune them off. Apply mulch on the soil, about six inches away from the base of the tree.

Ash yellows

This disease is caused by Phytoplasma and affects mostly green and white ash trees. It spreads through the soil and results in the yellowing of the leaves and quick death of the tree. Early detection is key if you want to save your tree, as vulnerable trees can die as soon as one to three years after initial infection.

Control the disease in its early stages by pruning any affected foliage. Use a fungicide on the affected areas. Fertilize the soil bed around the tree to boost the tree’s health and prevent outbreaks of the disease.

Ash rust

This disease is caused by the Puccinia sparganioides fungus. It affects mostly green and white ash trees. Symptoms include yellow or orange spots on the leaves’ surface, and the leaves will eventually wilt and die. Repeated ash rust infections can greatly weaken the tree.

Spray the tree with fungicide three times every two weeks when the buds break open, and prune the tree in early spring when it is in its growth phase.

Conclusion

If an ash tree is dying, it is most likely due to pests or disease.

The most common causes of dying ash trees are emerald ash borer, banded ash clearwing, ash flower gall, ash plant bug, ash aphids, scale insects, Verticillium wilt, ash anthracnose, ash yellows and ash rust.

Knowing the proper cultural techniques for growing ash trees can help avoid most of these problems, so remember to do your research before growing them.

Image: istockphoto.com / seven75

Overwatered Pothos

Overwatered Pothos

Your pothos may end up overwatered for several reasons: you are giving it more water than it needs, you are watering it more often than it needs, the pot it is in has no drainage holes, the soil has poor drainage, or the weather has changed and you have not adjusted your watering schedule.

Signs of an overwatered pothos include brown spots on the leaves, root rot, mold, the plant becoming soft and mushy, yellow and wrinkled leaves, and wilting and curled leaves.

In this article, we will discuss what to look out for if you suspect overwatering, and how to effectively salvage an overwatered pothos.

What are the signs of an overwatered pothos?

Leaves have brown spots

The most common reason for brown spots on the leaves of your pothos is overwatering, although this can be attributed to other problems with your plant as well. Brown spots form on the leaf’s surface due to the excess water filling the plant tissue. When the cells fill with water, they swell and cause blisters to form. When these blisters eventually rupture, the brown spots will form.

Root rot

Even though roots are buried underground, they still need to be able to breathe to keep the plant alive. Oxygen passes through the soil to reach the roots. When a pothos is overwatered, the roots of the plant are constantly in soggy soil, and are thus unable to take in oxygen. Eventually, the roots will drown and die.

These dead roots will start to rot, aided by opportunistic pathogens such as fungi and bacteria that can be found in the surrounding soil. The rot can travel up the roots and into the rest of the plant, until the entire plant becomes rotten and dies.

Mold

Another sign of an overwatered pothos is the presence of a white, powdery mold on the surface of the soil surrounding the plant. Mold only grows in consistently damp conditions, so mold on your plant’s soil means that the soil is not getting enough time to dry out between waterings.

Mold does not really cause your plant any damage, but it is indicative of an overwatering problem that you need to address. You can simply scrape off the mold from the soil’s surface to get rid of it.

Soft and mushy plant

When a pothos is overwatered, it will feel soft and mushy to the touch. This is probably because the plant has begun to rot. The infection from the roots has made its way to the stems and the leaves. If the plant starts to smell of rotten vegetation, it is almost certain that it has been overwatered for some time already.

Leaves turning yellow

The more mature leaves of a pothos are at the base of the plant. If these leaves have started to turn yellow, your plant might be overwatered. The leaves closest to the base are the first to be affected, because the root rot making its way up the plant reaches those leaves first.

The rotten roots are no longer effectively transporting nutrients and water to the plant, which leads to chlorosis, or the yellowing of the plant’s leaves.

Wrinkled and wilting leaves

When the leaves on the plant have blisters on the surface and those blisters rupture, this damages the leaves and causes them to wrinkle.

Another sign that your pothos is near the end of its life is when it starts to wilt. It usually means that the damage to the roots is extensive and has reached the point of no return. The plant will no longer be able to keep itself alive due to the extent of the root damage.

Curled leaves

Not all curled pothos leaves point to overwatering, but it is definitely one of the most common causes.

Curling happens when the plant is unable to transport water to its leaves. This can be traced back to the roots’ inability to distribute water because of root rot. The plant will choose to sacrifice its leaves because of its limited resources. The surface area of the leaves allows water to transpire faster, so getting rid of them helps the plant adapt to the stress it is experiencing.

How do I save an overwatered pothos?

First, inspect the plant and assess the level of damage to the roots, stem and leaves. You can save a pothos plant if the damage is minimal, but if most of the plant has been affected, the chances of success become smaller.

Next, check whether the pot’s drainage holes are big enough and are working properly. Try poking the holes with a stick to release any stagnant water that may have pooled. Tip the pot to one side to get rid of any excess water on the surface of the soil.

Try to avoid giving the plant any water for a few days, up to one or two weeks. Place the plant in a location where it can get a good amount of light to help it dry out even faster.

You can help aerate the soil, thus hastening the drying process. Exposing the wet soil at the bottom of the pot will help it dry much faster. Turning the soil over also allows more air and oxygen to get into the spaces in the soil and help the roots breathe.

Prune off any leaves that have turned yellow or brown. You cannot save these leaves and they are not going to turn green again, no matter what measures you take. Keep all the healthy green leaves and watch to see if they respond to your attempts at preservation.

If none of the previous steps seem to have worked, you might need to repot your pothos. Remove the plant from its pot and shake off as much soil as you can. Inspect the roots for any parts that have turned brown or black. Brown or black roots are rotten and will need to be removed. Use a sterile pair of scissors to cut off the rotten roots until you expose healthy, white roots. Spray the remaining roots with fungicide.

Place the plant on a tray and cover it with a paper towel. Let the roots dry out for a few days.

When the roots are dry, you can replant the pothos in a pot that has sufficient drainage holes at the bottom. You can reuse the old pot, but make sure you wash and sterilize it first to avoid another infection. Use well-draining soil that will help facilitate the flow of excess water down to the bottom of the pot.

Lastly, know the correct way to water your pothos. There is no clear schedule that should be followed; instead, touch the top two inches of soil to check whether it is dry. If the soil is dry, water the plant; if the soil is still damp, wait one or two days and check the soil again.

Conclusion

Your pothos can become overwatered because you are giving it more water that it needs more often than it needs, the pot has no drainage holes, the soil is poorly draining, or you have not adjusted your watering schedule after a change in the weather.

The most common signs of an overwatered pothos are brown spots on the leaves, root rot, mold, the plant becoming soft and mushy, leaves turning yellow and wrinkled, and wilting and curled leaves.

Save your overwatered pothos by removing excess water, holding off watering temporarily, turning the soil over, pruning dead roots and foliage, and repotting the plant.

Image: istockphoto.com / Robi_J