Most plant owners go to great lengths to take good care of their plants, but too much enthusiasm could be harmful. Overwatered plants are at greater risk of root rot, a fungal disease that can attack roots that are weakened from standing too long in wet soil. From the roots, the rot can spread to the rest of the plant, and if not addressed in time, your plant will die. This article discusses the signs of root rot, as well as what you should do to remedy this condition.
Can a plant recover from root rot?
Yes, a plant can recover from root rot if some healthy, white, and firm roots still remain. However, if the entire root system has already become mushy, rotten, and has an unpleasant smell, it may be too late to save your plant from root rot.
What are the common signs of root rot?
The common signs of root rot include leaves turning yellow or brown, stagnant or standing water in the container, and a decaying root system. Roots that are dark brown, spongy, soft or moldy are an indication of root rot. Although this is the first sign, it often goes unnoticed as it takes place underground.
It is natural for older leaves to change colors and drop off, but if the discoloration includes younger or newer leaves, it could indicate root rot.
Other signs include the following:
Dying or wilted leaves
Stunted growth
Die-back of foliage and shoots
How to save your plant from root rot
Allow the plant’s soil to dry out properly.
If the soil around the plant is moist, allow it to dry out for a period of three to five days. This can work for plants that are not yet showing evident damage. Once the soil dries out. the plant’s roots will be able to absorb oxygen again and return to efficient functioning.
Remove the dead or discolored leaves.
Remove all the discolored and dying leaves, separating them from the plant as close to the base as possible.
Dispose of the old soil.
Your plants will need to be removed from their current soil and repotted. Gently brush away the excess soil from around the roots, taking care not to disturb the root system too much while doing so.
Trim off the dead and decaying roots.
Cut off all the rotting roots, but save as many of the white, firm, healthy ones as possible.
Repot the plant using new soil.
Repot the plant using a sterile potting mix that is compatible with the plant type. The new soil will be free of bacteria and fungi, and will also supply the plant with nutrients that may have been depleted in the old soil. This will help the plant recover faster.
Do not water the repotted plant for at least a few days, and do not apply fertilizer at this time as it will only stress the plant.
How to prevent root rot?
Use pots that have drainage holes at the bottom.
Use well-draining soil and remember to check it occasionally to make sure it is still draining water properly.
Check the soil’s moisture by doing a finger test: Push your finger a couple of inches into the soil and assess the moisture level. If the top layer of soil is dry, you can water the plant again.
Water the plants according to the season and the weather. Plants require less water during winter and more during the hot summer months.
Monitor your plants regularly for signs of decay or leaf discoloration.
Conclusion
Plants need favorable growing conditions to thrive, and their basic needs include water, space, nutrition, and optimal temperatures. Without these conditions, they can become prone to diseases such as root rot, which is often caused by overwatering or poor drainage. To save your plants from root rot, remove all the affected foliage and cut off the decaying roots. Repot the plants in a new pot using a fresh potting mix, and wait a few days before watering them again.
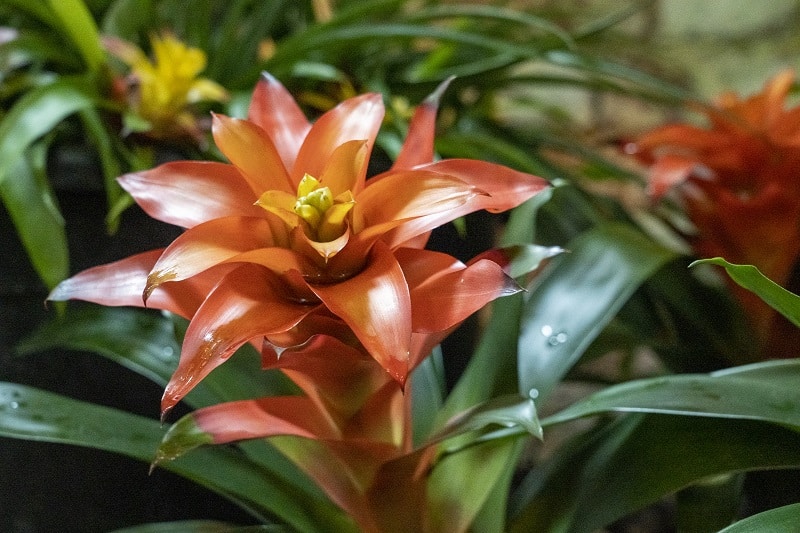
Bromeliads are commonly cultivated for their colorful foliage that comes in red, green, orange, yellow or purple. With the scientific name Bromeliaceae genera, these monocot flowering perennials have more than 3000 known species and are native to the tropical and subtropical Americas. These plants are drought-tolerant and fairly hardy, but they are as susceptible to root rot like any other plant. Read on to learn how to identify and remedy root rot in your bromeliads.
Bromeliad root rot: Signs and symptoms
The signs of bromeliad root rot are hard to spot before it is already too late, because the rot starts underground where you will not see it. As it progresses, the leaves become soggy and turn brown at the base of the plant, and the outer leaves fall off easily when slightly pulled or touched. If the leaves are intact and do not come apart when tugged, there is still a chance you can save the affected plants.
The root systems of healthy plants are firm and white. If you notice soft, brown roots, this is an indication of root rot. The rot begins when fungal spores multiply and the fungus spreads inward from the extremities of the roots. As the infection becomes more severe, the healthy roots turn brown and mushy, and slowly die.
The plants then lose the capacity to absorb nutrients, and the leaves begin to wilt, turn yellow, and eventually fall off. Blooming is delayed and growth becomes stunted. When conditions are ideal for the rapid spread of the fungus, the plant can die in as little as 10 days.
What are the common causes of bromeliad root rot?
One of the most common causes of bromeliad root rot is overwatering. These plants do not like to be watered too much, and are more easily killed by overwatering than by underwatering. Too much water results in waterlogged soil, which encourages the growth of fungal diseases like root rot. Poor soil drainage is another cause of root rot, because if water cannot drain quickly enough from the soil, the result will be the same waterlogged situation as is caused by overwatering.
Soil fungus is another leading cause of root rot, and weakened roots are even more susceptible to fungal infections. The fungus may have been dormant in the soil for a long time, and when the soil becomes waterlogged and the roots are compromised, the spores will come to life and attack the roots, causing them to rot and die. Common species of fungus that cause root rot include Pythium, Phytophthora, Fusarium and Rhizoctonia.
The size of your plants’ pots could also contribute to root rot, and should be on your list of possible causes. Do not place your plants in very large pots; this can be detrimental to root growth because they hold too much water. Meanwhile, pots that are too small could also damage the root system of your plants as they become overcrowded in the soil and restrict air circulation.
How to fix and prevent bromeliad root rot
1. Avoid overwatering your plants.
Bromeliads should be watered on a regular schedule and according to their needs. Check whether the soil has dried out before you water the plants again, and pay attention to conditions such as the weather and amount of sunlight received.
2. Make sure that there is good soil drainage.
The soil should not be too heavy or absorb too much water but should be well-draining so that water does not stay stagnant in the pot. Commercial potting soil is fine, as long as the drainage is good. The coarser the soil the better for these plants, and the more perlite in the mix, the better the drainage will be.
Most plant growers add perlite to their commercial soil mix to improve the drainage. Add at least an inch or two of pea gravel or lava rock to enhance drainage and add to the stability of your potted plants.
3. Choose the right pot or container.
Be sure to choose the right pots for your bromeliads. They should be small enough to allow the potting soil to dry quickly, but large enough to hold the plants upright and prevent them from tipping over.
4. Replace used soil when replanting.
Replace the soil with new soil if you are replacing a previously rotten plant with a new plant. This will avoid the spread of any disease and ensure that the new plant will grow healthy and root-rot-free.
5. Choose plants with healthy root systems.
If you are buying your plants from a local nursery or garden centre, be sure to select bromeliads with healthy root systems. Inspect the roots by carefully sliding out the root ball from the grow pot. Make sure that the roots are green or white, and that the soil does not smell rotten.
6. Plant at the right depth.
Keep the bottom leaves out of the potting medium when potting the plants, to allow the water to drain quickly. However, also make sure that the plants are secure and not loose in the potting mix.
If your bromeliad is affected by root rot, you can still save it if there are any healthy roots remaining. Remove the plant from the pot and dip it in a fungicide, or you can use a rooting hormone that contains a fungicide. Place it in a well-draining potting medium so it can recover and develop healthy roots.
Conclusion
Bromeliads are drought-tolerant perennials and, like most plants, are susceptible to diseases like root rot if their soil conditions are not ideal. The common causes of root rot include overwatering, poor drainage, fungal infection, and incorrect pot size. To prevent root rot, avoid overwatering your plants, ensure adequate soil drainage, and choose the right pot size for your plants.
When your orchid is finished blooming, it is best to prune it in order to promote further flowering. Pruning the old, dead stems and roots of your orchid helps improve the overall health of the plant, and regular pruning will encourage the plant to bloom and thrive for years to come.
In this article, we will discuss the proper way to prune an orchid, so you will know exactly where to cut when pruning.
Why do you need to cut an orchid?
When you leave an orchid stem intact after blooming, it will eventually dry out naturally. However, an orchid can also dry out for other reasons that may be more concerning. Below are some common reasons your orchid stem may be drying out.
Normal post-bloom drying
In the plant’s natural cycle, the orchid stem will dry out when the bloom is done. This is completely normal and should not be a cause for concern. In this case, you simply need to cut the stem off and wait for the plant to grow a new stem.
Overfeeding
If you give your orchid too much fertilizer, the plant can get root burn and this will appear as brown areas on the plant’s leaves and stems. Eventually, these brown areas will turn black and the plant will die.
Avoid fertilizer burn by using a balanced fertilizer, and dilute it to weaken it. It is also better to apply the fertilizer on the growing medium instead of spraying it directly on the roots. Mineral salts from the fertilizer can accumulate in the potting medium, so make sure you flush out any build-up with running water every couple of weeks.
Pests
Mealybugs and spider mites can attack your orchid and feed on the sap in its leaves and stems. A small number of insects may not do that much damage, but the longer you allow the insects to remain, the more they will grow in number. Soon, there will be enough to cause irreparable damage and your plant will wilt and die.
Avoid pests by maintaining a humid environment and using insecticidal soap on the plant.
Bud blast
A bud blast is when the leaves and buds of the orchid fall off prematurely. The orchid stem dries up as an after-effect of bud blast, but the bud blast itself is caused by environmental factors, such as changes in humidity and temperature. To prevent these changes, make sure the orchid is kept in an area with a stable temperature and humidity.
Can an orchid regrow its stems after pruning or trimming?
Yes. Whether you cut the stem off completely to the base or just partially above a node, orchids will grow new stems as long as they are healthy.
If a flower spike is not pruned or trimmed every year, it will produce fewer and fewer flowers and will eventually dry out.
When you cut back the stems of your orchid, whether partially or completely, the plant is stimulated to develop new growth and this will result in a much more resilient, healthier plant. The blooms will also become more impressive in the next cycle.
How long will it take the stem to regrow?
If the stem was cut down completely to the base, it can take the plant a few months to produce a new one, but if it was cut just above a node eye, the flower spike will grow out in about two to three months.
While waiting for the new stem to grow, all your plant needs are good cultural care so that it can concentrate on developing the stem and bloom.
How and where to cut an orchid?
Before we discuss where exactly on the stem you should cut your orchid, make sure you sterilize the pruning shears you are about to use. To do this, dip the shears in a cup of rubbing alcohol for 30 seconds. Make sure you open and close the shears a couple of times so that the alcohol gets all over the blades. After 30 seconds, remove the shears from the alcohol and let them air dry on a paper towel for a couple of minutes.
Ideally, you must wait for all of the flowers to fall off the stem before you cut it. If there are still healthy flowers left on the stem, do not cut it off yet; wait until the very last bloom falls.
If the orchid stem has turned brown and is shriveled, it is best to just cut it down to the base. This stem will no longer produce any more flowers so cutting it halfway is not advisable. Cut the stem down as close to the root as possible. Removing these dead and dying stems will ensure the growth of new stems.
If there are any soft, brown roots protruding from the potting medium, trim them off as well. You may need to pull all of the roots out of the pot to check them properly. Dead roots will look brown and feel soft, while live roots will look white and feel firm to the touch.
Trimming off the dead roots can save the plant from root rot
If you are trimming the orchid to encourage flowering, make sure the plant is healthy enough to prune by checking if the leaves are firm and glossy. If the leaves are limp, yellow or brown, you might need to hold off on pruning until the plant regains its vigor.
Check the stem for eyes on the nodes. The nodes are the parts of the stem that form a ring all the way around it, and the node eye will look like a thin layer of beige or brown plant matter on the node. These eyes are what will become new stems or flower spikes, so make sure you do not cut below a node with an eye. Instead, cut the plant half an inch above this node.
If there are no nodes, another way to determine where to cut is by identifying the second node below where the flowers bloomed. Cut the stem half an inch above that node. Make sure you follow the half-inch measurement correctly because cutting too close or too far from the node can have negative effects on the eventual growth of the stem and its ability to produce flowers.
After approximately two to three months, the orchid will flower again if the conditions are ideal. If the orchid is not flowering beyond three months, try lowering the temperature where your orchid is kept by eight degrees Fahrenheit; this should be enough to stimulate new growth.
Conclusion
There are several reasons your orchid’s stem may have dried out and will require cutting. This could be due to normal growth patterns, overfeeding, pests or bud blasts. However, gardeners typically cut the stems of an orchid when they want to encourage flowering.
If the stem is brown and shriveled, cut it off as close to the root as possible since the stem is dying and new growth will simply take its place.
If the stem is healthy and you just want to encourage flowering, make sure you cut the stem half an inch above the node with an eye or half an inch above the second node from where the lowest flower was. Remember that the half-inch is important because this could affect the growth of the new stem and flowers.
Hydroponics is a system of growing plants without soil, using a nutrient solution instead. Environmental control is still required, just as it is when plants are grown conventionally. This growing method is becoming increasingly popular for its convenience and ease of monitoring. However, it does have its challenges, and hydroponically-grown plants are not immune to diseases like root rot.
What is hydroponic root rot?
Root rot is a disease that causes the death and decay of plants’ roots and is caused by overexposure to wet conditions, disease-bearing pathogens, or a combination of the two. Fungi, bacteria and mold can infect the roots, especially in wet conditions, and infected plants struggle to absorb nutrients and water. Poor air circulation will exacerbate the condition, as the roots will not be exposed to sufficient oxygen. In hydroponics, where water is the growing medium, the roots of your plants still need sufficient exposure to air and oxygen, and/or well-aerated water, to prevent the development of diseases like root rot.
What causes root rot in hydroponics?
A common cause of root rot in hydroponics is poor circulation and insufficient water movement. This reduces the oxygen level in the hydroponics system and could lead to the plants’ death. Other causes of root rot in hydroponics are insufficient exposure of the roots to air, contaminated nutrient solutions or equipment, pests, and infected transplants.
How to prevent hydroponic root rot
Maintaining a clean system.
Keep your system decontaminated and sterilize the equipment, so that it does not become a breeding ground for harmful bacteria. Also ensure that there is no way for the nutrient solution to be contaminated with toxic substances.
Cut the roots regularly.
Your plants’ roots should be cut regularly to allow the nutrient solution and oxygen to pass through the system easily. Large roots could block essential movement and have a detrimental effect on the crop.
Maintain the correct temperature for your hydroponics system.
Keep the temperature below 75 degrees Fahrenheit. If the right temperature is not maintained, it could encourage the growth of bacteria that reproduce quickly in warmer conditions. Provide adequate ventilation if you are in a warmer region, and place your reservoir in a shaded area if your setup is outdoors.
Choose the appropriate pump.
Promote aeration by using a reliable pump and adding air stones. Aeration is vital to a hydroponics system, since it increases the level of oxygen, which is essential to the roots.
Use thick materials for the grow bed.
Use thick, dark materials for the grow bed to protect the roots from light-loving bacteria. These materials can minimize the amount of light that reaches the roots.
Maximize beneficial bacteria to keep the plants healthy.
Add beneficial bacteria to the hydroponics system to boost your plants’ health. This makes the plants less vulnerable to diseases, just as humans build a better immune system by taking vitamins and supplements.
How to cure root rot in hydroponics
To cure root rot in your hydroponic system, switch off the system at once. Removing the infected plants without stopping the source is futile, since the culprit could be contaminated water and other healthy crops could also be infected. Pause the system for the time being while you manage the problem.
Clean the roots by washing them thoroughly with water to remove foreign substances. You should also gently cut away any infected roots from the plants. You will need to clean the entire hydroponics system and drain all the nutrient solution from the reservoir. Check and clean the grow bed and ensure that no dead plants are left behind that could contribute to further root rot.
Monitor your plants for pests like fungus gnats, since these are vectors for pathogens that cause root rot. Make sure that the vents are filtered to keep out such pests. Also ensure you use only healthy transplants, since these can also introduce diseases and pests to your hydroponic system.
It is not always necessary to dispose of plants infected with root rot. First check whether the crops are still worth saving. If only a small portion of the roots is infected, you can trim these off and have a good chance at saving your plants. Simply follow the previously-mentioned steps and set up your system again.
Conclusion
Hydroponics is a popular method of growing plants, especially in urban areas, since it does not require the use of soil. However, some challenges accompany the management of such systems, and these include the threat of root rot. This is usually caused by poor circulation, overwatering, insufficient water movement or contaminated solutions and transplants.
To prevent root rot in your hydroponics system, always keep a clean system, trim the roots regularly and maintain the right temperature, which is under 75 degrees Fahrenheit. Also, choose the appropriate pump, and maximize beneficial bacteria to keep your plants healthy.
Many of the most popular orchids are tropical plants that, in their natural habitats, attach themselves to the surface or bark of other plants. They grow high in the trees and are used to getting plenty of light and good air circulation. Some varieties are difficult to propagate, while others are fairly low-maintenance. You can grow your collection of orchids by cultivating them in coconut husk.
How to plant orchids in coconut husks
Prepare the coconut husks.
Rinse the coconut husks at least a day before you plan to use them. These materials have a salt residue that could damage the orchids’ roots, so be sure to rinse them thoroughly.
Combine the husks with other materials.
Mix two parts coconut husk, one part charcoal and one part perlite. You can also add other items to the orchid potting mix, although this mixture is considered a general-purpose one. Soak the mixture for at least 24 hours for the water to be properly absorbed.
Sanitize your planting tools.
Add one-half cup of bleach to a gallon of water and wash down all the surfaces and gardening tools you will be using when you plant the orchids. Allow them to dry for a few minutes before using the tools.
Plant the orchids.
Remove the orchids from their current pots and cut off any unhealthy roots. Rinse the roots gently with room-temperature water and place them in their new pots, with the roots about an inch from the top.
Add the coconut husks to the pot.
Squeeze out any excess water from the coconut husk mixture and place the husks to fill in the spaces around the orchids’ roots. Once the pot is full, water the plants thoroughly.
Coconut husks or coconut husk chips are a renewable resource with long fibers that absorb moisture but also drain quickly. These qualities make them popular for use as growing media or additives to potting mixes. They allow orchid roots to have access to moisture without the risk of soggy growing conditions. They decompose slowly and provide maximum air circulation for the plants’ roots.
Other commonly-used orchid potting materials
1. Tree fern
These comprise the rigid, dark-brown roots of Central American tree fern. Tree fern roots stay fresh for three years and their drainage properties are similar to those of orchid bark. This type of potting material is commonly used in the US.
2. Orchid bark
This is the bark of Douglas fir or redwood trees, and it has great drainage capacities. It deteriorates slowly and only requires repotting every two years.
3. Sphagnum moss
This is also commonly called peat moss, and is made up of dead and decayed plant matter from sphagnum moss. It is often paired with orchid bark as it retains water and prevents moisture from draining away before the roots have absorbed it. This moss is believed to prevent fungus, and should ideally be replaced annually.
4. Osmunda fiber
This fern is also known as orchid peat. Its fiber is broken up for use as a rooting medium, but unfortunately it is pricey and has limited availability.
5. Brick chunks and cobblestone
Brick chunks provide stability for heavy orchid pots, but the chunks must be sufficiently small in size. They are also water retentive and provide humidity for the plants.
Cobblestones act as anchors in the bottom of pots, enabling the orchids to stay upright. They do not retain water as brick chunks do, so you may need to modify the drainage of your potting mix to allow the roots more time to absorb water.
6. Cork
This has watertight qualities that are ideal for potting mix materials. Mix water-shedding cork with water-absorbing sphagnum moss or shredded bark. Larger cork chips have crevices that allow orchid roots to spread and explore.
7. Lava rock
Orchids that are native to Hawaii usually use this inorganic growing medium. It does not break down and is ideal for orchids that do not want their roots disturbed. It retains water and increases the humidity around the plants.
8. Perlite
This is the product of volcanic glass that has been exposed to extreme heat. It does not provide any nutritional value for the plants but has excellent water retention and aeration. It is also very accessible, since most garden centers keep it in stock.
9. Pumice
This volcanic rock is lightweight and an ideal growing medium for many orchids. It is highly porous and retains at least 50% of its weight in water, so it won’t weigh the plants down.
10. Rock wool
This is made up of the cotton-like fibers of chalk and basalt, and is commonly used in potting mixes because it does not break down. However, you need to balance its alkalinity with ingredients like bark or peat moss.
11. Shredded bark
This is the shredded bark of trees like cedar, cypress and fir. It is among the most common orchid potting mix materials. The bark will acidify the orchid mix as it breaks down, and is favored for its pleasant fragrance.
12. Styrofoam
This type of orchid potting material is favored for orchid varieties that prefer periods of dryness. Special styrofoam pellets like Aerolite are produced specifically for orchids.
13. Vermiculite
This hydrous phyllosilicate mineral expands when heated and is formed by the weathering or hydrothermal alteration of biotite. It is a common potting material that is widely available in garden stores and comes in gravel-sized particles. The light brown material provides good water and nutrient retention and helps aerate the potting mix.
Conclusion
If you wish to propagate your orchids, you will need to use an appropriate potting medium. One of the most popular of these is coconut husks or coconut husk chips. These make an ideal potting mix because they absorb moisture but also drain quickly. They also provide good air circulation for your orchids’ roots.
Orchids comprise more than 22,000 species and are popular across the world for their unique, colorful flowers. These tropical plants can tolerate drought, but they may wilt and start to die if not watered at least once a week, although this will vary according to species. In this article, we will get to know the reasons your orchid may be dying, and what you can do to save them.
Why is my orchid dying?
Overwatering
Overwatering your orchids could endanger or even kill them. Symptoms of overwatered orchids include stems and leaves that turn yellow and become droopy. These plants thrive in a well-draining potting medium, and if it is always damp these symptoms might begin to appear. The roots may also die from root rot, which is caused by damp conditions. The roots will appear gray, thin and papery, as opposed to healthy roots that are green or light gray.
Sunburn
Orchids prefer bright, indirect sunlight and filtered morning light, rather than full sun. When they are exposed to direct sunlight for a long time, it could endanger their health. Symptoms of sunburn include leaves that are turning yellow or brown and have a scorched appearance. The leaves and flowers may also fall off due to stress.
Underwatering
Orchids that are not watered sufficiently could suffer from drought stress. The leaves may turn yellow and the flowers will start to drop off or droop. The roots will appear shriveled and die back, and the stems will turn brown and eventually die. Other contributing factors include excess heat and/or low humidity.
If the roots become shriveled and die, they cannot transport nutrients and water to the rest of the plant. This is why the leaves turn yellow and the flowers and leaves wilt and drop off. Orchids should be watered once every week or so, but this will also depend on the climate and the species.
Over-fertilization
There are specific fertilizers that are formulated for the needs of orchids, and regular fertilizers are too strong for them. If you over-fertilize your plants it could burn their roots. The roots will then turn black or brown and the leaves may turn yellow and droop. Over-fertilizing could also alter the blooming season of your plants.
How to revive your dying orchids
1. If your orchids were dying due to overwatering:
Hold off from watering the plants and allow the soil to dry out. The plants should only be watered once a week, and you should always check that the top inch of potting mix feels dry before watering again. This could vary according to your local climate, the size of the pot and the type of potting soil.
Make sure the potting mix is formulated for orchids. Ideally, a pine bark-based mix works best for these plants. Avoid potting soil, which retains too much moisture.
Check the roots for signs of disease; they should look green to light gray, and be plump and firm. Unhealthy roots are brown or black and have an unpleasant smell. Trim off any unhealthy roots with a pair of sterilized pruners or scissors. If there are healthy roots remaining, it means your plant can probably be saved.
Yellow stems should be cut back to healthy growth near the base of the plants. This way, the spread of rot can be prevented and you will help stimulate new growth. If there are yellow leaves still attached to the plant, let them be and do not pull them off.
It is best to replant the orchids in a new potting mix and a new container. Give the plants a good soak after replanting, to mitigate transplant shock. Place them in an area with indirect sunlight and a temperature of at least 55 degrees Fahrenheit at night and 75 degrees Fahrenheit during the day. Be sure to mist the leaves with water every three days to maintain humidity and reduce water loss, or transpiration.
2. If your orchids were dying due to sunburn:
Place the plants in an area with bright but indirect light to reduce the stress and avoid more damage. If there are damaged leaves, allow them to dry up and fall off on their own. Repot the plants in clear plastic pots so the roots can have access to light. New leaves will start to grow and with the right care the plants will be revived.
3. If your orchids were dying due to drought:
Place the plants in a water basin for at least 10 minutes and submerge the roots. Give them a good soak and allow any excess water to drain out freely. The potting mix should be thoroughly soaked. Increase the frequency of watering your plants, keeping in mind that orchids require less watering than most house plants. These plants only need to be watered about once a week, depending on the species and your local climate.
Water the plants only when the top inch of potting medium has dried out. Mist the leaves and roots regularly. The plants should be kept in temperatures of around 55 to 80 degrees Fahrenheit.
4. If your orchids were dying due to burned roots caused by over-fertilizing:
Stop using fertilizers and place the plants in a basin of water for about 10 minutes to rinse off the roots. This will help minimize the salts that have accumulated in the potting medium from all the fertilizer. Check the roots for any rot or burn. Brown or black roots should be trimmed off near the base of the plants. Repot the orchids in a new potting mix. Yellowing leaves should not be removed from the plants by force. Give your plants loving care and new leaves will begin to sprout in a matter of months.
Conclusion
Orchids are popular house plants because of their unique, attractive flowers. Like most plants, they may droop, wilt or turn yellow if not given the proper care, and this is an indication that they may be dying. This could be due to overwatering, underwatering, over-fertilizing or too much sun exposure. If you act quickly to rectify the situation, you may be able to save your plants.
Ponytail palms, with the scientific name Beaucamea recurvata, are more semi-succulents than typical palm trees. They are also called elephant foot, bottle palm, and ponytail plants, and are native to the states of eastern Mexico and Veracruz. Their leaves are long, narrow, and dark green, curving downward at the ends. These palms are drought-tolerant and easy to care for, but they are also prone to infections like root rot if not provided with the correct soil conditions.
Symptoms of ponytail palm root rot
If you notice that your ponytail palms have drooping fronds, it is most likely an indication of root rot. This can affect both the older and newer fronds, and excessive drooping is an indication that the infection may be severe. The roots may also appear brown or black and exude an unpleasant, musty smell.
Causes of ponytail palm root rot
Fungal infection is the most common cause of root rot, and these organisms thrive where there is excessive moisture. These pathogens can be dormant in the soil for long periods and will return to life if the soil is waterlogged. They attack the roots of plants, resulting in rotting and then death. Common species of fungi that thrive in moist conditions include Pythium, Rhizoctonia, Fusarium, and Phytophthora.
Overwatered soil is another cause of root rot in palm plants. The soggy conditions caused by overwatering prevent the roots from absorbing the oxygen they need to survive. Once the oxygen-starved roots have died and decayed, the rot can spread to healthier roots even if the soggy soil conditions have been resolved.
How to treat ponytail palm root rot
1. Remove the palm tree from the pot.
Remove your plant from its pot and push the soil away from the roots carefully using a trowel. Place the plant on a flat surface so you can check the roots thoroughly. Dispose of the infected potting soil in a trash bag and seal it tightly.
2. Check the roots for any signs of disease.
Check the roots thoroughly to confirm the root rot. Infected roots are dark, soft, and have an unpleasant smell, while healthy roots are white and firm.
3. Remove the rotten roots.
Trim away the infected roots using a pair of pruning shears. Cut as close to the root ball as possible, and discard the infected roots in a plastic garbage bag. Do not use them for compost, as this risks spreading the infection.
4. Sterilize your gardening tools.
Sterilize your tools, such as pruning shears, to remove all traces of fungus and prevent the spread of disease. To sterilize, mix one-part household bleach with nine parts water and soak the gardening tools for at least 90 minutes. Rinse with clean water and allow the tools to dry off well.
5. Sterilize the new container or pot.
Place new, sterile potting soil in new containers or pots, but first wash the containers with a solution of one part bleach and nine parts water. Soak them for at least 30 minutes and rinse with clean water before you add the potting soil. Check the size of the pot against the palm’s roots and be sure there is more room in the pot than the diameter of the roots. Do not opt for too-large pots, as too much space in the pots encourages pooling water and therefore root rot.
6. Apply fungicide to the roots.
Make a hole in the center of the new potting soil and place the palm inside. Apply fungicide over the roots by adding one teaspoon to a gallon of water to create the drench. Cover the roots with soil.
Water the plants regularly to keep the soil moist and encourage new growth. However, do not water until the top inch of soil feels dry to the touch, as this could lead to overwatering that encourages root rot.
Move outdoor palms to a new location after replanting them, to keep them away from infected soil. Treat both the old and the new area with fungicide. Do not plant anything in the old area until there are no more signs of fungal disease.
7. Repeat the fungicide treatment.
Repeat the fungicide treatment by pouring a fungicide drench over the soil at least every two weeks for two months. This is to control any remaining root rot fungus. Uncover the roots with a trowel now and then to check for signs of root rot. If the infection continues to spread, dispose of the plant in a plastic bag to prevent the fungus from infecting nearby plants.
To prevent another infection, you need to keep an eye on the soil conditions. Do not plant your ponytail palms too deep, and see to it that the soil is well-draining. If your potting soil holds moisture too well, add sand and rework the soil. For potted palms, the potting soil mixture should at least be 50 percent sand. Also provide the right fertilizer to ensure the health of your plants.
Conclusion
Ponytail palms are semi-succulent plants that are native to the states of eastern Mexico and Veracruz. They are drought-tolerant and easy to grow, but could become prone to root rot due to overwatering or fungi such as Fusarium and Phytophthora.
To treat root rot, you need to remove all the rotten roots and transfer the plant to a new container with fresh potting mix. You should also apply fungicide to eliminate the fungus, repeating this treatment every two weeks for at least two months.
Adenium plants belong to the family Apocynaceae, and are slow-growing with thick, succulent stems and deep pink flowers. These ornamentals are native to Africa, Madagascar, the Middle East and the Arabian Peninsula. They are also called desert rose, sabi star, mock azalea and impala lily, and, like most plants, are prone to root rot if grown in poor conditions. Read on to learn about how to identify and remedy this disease.
Signs of adenium root rot
If you notice the appearance of pimple-like spots, it is a sign that there is too much water inside the stem and the root, or the caudex and axis. The spots are the plant’s way of creating exits to eliminate excess water, and indicate that the roots below are in trouble and rotting. You will also notice that the caudex is swelling up to an unusual size.
Another indication of root rot is yellowing leaves. If you press the leaves a couple of times and they do not fall off, the plant is likely suffering from a root disease like root rot. When you prune back the branches, the new leaves will develop slowly and will be very small, and there will be few, if any, blooms. This means the plant’s growth is stunted and is another indication that the plant may be suffering from root rot.
Causes of adenium root rot
The most common cause of root rot among adeniums – and all plants – is poorly-draining or overwatered soil. The soggy condition of the soil prevents the roots from absorbing the oxygen they need to survive, and the rot will spread to healthier roots once the oxygen-starved roots die and decay.
Soil fungus is another cause of root rot, and weakened roots are more susceptible to this. Certain species of fungi, such as Pythium, Rhizoctonia and Fusarium, thrive in moist soil conditions and cause root rot. Armillaria, a notorious fungus also known as shoestring rot, is also a culprit of root rot in certain plants.
Ways of dealing with adenium root rot
Remove the rotten plant parts.
Cut or trim back the rotten plant parts using a sharp knife, scissors of shears. Cut away a large part of the caudex if necessary, to ensure you remove the entire affected area. Sterilise your tools between cuts to avoid spreading the infection. When you are done cutting, apply garden lime powder or cinnamon to the fresh cuts to help protect them from bacteria and facilitate wound healing.
You can also use a high-pressure garden hose to blast off any rotten parts of the roots. This allows you to save more of the unaffected parts and you will not need to sterilize your tools.
Another option, if you want a gentler approach, is to remove the rotted part of the caudex with a spoon. This is a simple and effective method, but takes a little more time than the other methods.
You can soak the plants in a fungicide solution after checking the roots. The solution will kill harmful bacteria. You may also opt for gentler solutions, like lime or a ginger-garlic-chili solution.
Allow the plants to dry out in the sun.
Lay the plants’ bare roots under the sun so they can heal after you have cut off the rotten parts. Once the roots have dried out and become harder, you can plant them in the soil again.
Replant the adeniums in the new soil.
After the plants have healed, you can plant them back in the soil. Rooting hormones are often used to promote the formation of new roots. Do not water the plants too soon after replanting them; once you see little strings coming emerging from the roots, you may start watering the plants lightly. As the plants grow stronger, you can increase the water and add fertilizer as well.
Conclusion
Adenium plants are slow-growing ornamentals that are native to Africa, Madagascar and the Middle East. Like most plants, they are susceptible to root rot, and the most common causes are overwatering and soil fungus such as Fusarium. To handle adenium root rot, trim off the rotten plant parts and soak the plants in a fungicide solution. Allow the plants to dry out in the sun and replant them using fresh potting soil.
Plumeria root rot happens when the roots of the tree are constantly submerged in waterlogged soil. When the soggy soil surrounds the roots, it creates an anaerobic environment that starves the roots of oxygen and encourages opportunistic pathogens to attack. The roots will rot and the decay will move up to the stem, which results in the much more debilitating stem rot.
In this article, we will discuss the causes of plumeria root rot and how to save your affected tree.
What is plumeria root rot?
If you give your tree more water than it needs, the excess water will pool around the roots and suffocate them. When the roots suffocate, they will become clogged and die. The fine hair rootlets, once dead, will rot, and this rot will travel up to the main root system. This is root rot.
If the plant is in a pot that does not have drainage holes at the bottom, the excess water will not have a way out and will pool in the soil near the bottom of the pot, resulting in the same symptoms as overwatering, above.
Likewise, if the soil in the pot is poorly-draining, or if the soil is heavy and compact, it will hold onto moisture too well and the roots will not be able to breathe or dry out fast enough.
Overwatering can also happen if you water the tree just as much in the winter as you do in the summer. In low winter temperatures, the soil will not dry out as quickly as it does in the summer, so unless you adjust your watering schedule, you will end up with soggy soil.
Root rot is exacerbated and spread even more quickly by fungi. The most common fungi species that cause root rot are Fusarium, Pythium and Rhizoctonia. The spores of these fungi may have been lying dormant in the soil for years, just waiting for the perfect opportunity to attack a nearby tree with rotting roots.
The fungal disease moves up from the roots to the stem, where it inflicts even more damage. The stem will literally hollow out and rot from decay. Stem rot is a death sentence for the tree because the nutrients and water will no longer be able to pass through the damaged stem to the rest of the tree.
Root rot disease caused by pathogens is spread through unsterilized tools and contaminated soil or water.
If you have a plant that has died of root rot, and if you were not able to remove all of the diseased roots from the soil, the dormant spores can infect the next plant you place in that same spot.
How to avoid root and stem rot in plumeria
You can avoid root and stem rot by practicing good hygiene when you handle your plants. Make sure the area around the tree is free of debris that can be a breeding ground for fungi.
If you plan on removing cuttings to propagate, make sure you apply some fungicide on them before planting them in potting medium.
Plant your cuttings in several small pots instead of one large tray. This is because the chances of spreading the disease are higher when the plants are right next to each other.
Avoid using livestock manure as fertilizer on the plumeria.
Choose soil that is well-draining. If you cannot find commercially available potting mix, you can make your own by simply adding one part perlite/coarse sand to one part potting soil. The perlite or coarse sand will make the potting soil porous and airy. This way, the plant’s roots will be able to breathe and will dry out much faster between waterings.
Refrain from overwatering your tree. Do not stick to a strict schedule, as the need for watering will depend on the weather and the climate. A more accurate way of knowing whether the tree needs to be watered is by touching the soil around the base of the tree. If the soil is dry, water the plant, but if the soil is still damp, wait a few days and check it again.
Remember that you need to adjust your watering schedule in the winter. You are going to have to water the tree significantly less when the weather is cold, because the soil will not dry as quickly and there is less light to warm it and help it dry.
Plumerias can tolerate low light, but that does not mean you can completely deprive the plant of light. If you keep the plant indoors, do not transfer it from low light to full sunlight immediately. You need to give the tree an adjustment period for it to get used to more and more light exposure so that it does not get sun damaged.
You can help the tree out by buying a grow light to provide the plant with the light it needs during the winter.
If you notice the first signs of root or stem rot, you can try applying fungicide to catch the disease in its early stages.
However, if the stem rot has become too severe and the tree cannot be salvaged, take a cutting and try to root it so you can grow yourself a new plumeria tree.
Conclusion
Plumeria trees can get root rot if their roots are left to stand in waterlogged soil for extended periods of time. This can come about if you overwater your plant, if the pot does not have drainage holes, if the soil you use is not well-draining, or if there are fungal pathogens in the soil or in the tools you use. These opportunistic fungi will attack the vulnerable roots of the tree and cause root and stem rot. When the stem is severely damaged, nutrients and water can no longer travel to the other parts of the tree, which will most likely lead to its death.
Save your plumeria by removing damaged roots and treating the remaining roots with fungicide before replanting it in a pot with sufficient drainage holes and well-draining soil.
Bird of paradise plants, with the scientific name Strelitzia, are tropical herbaceous perennials native to South Africa. Their name is derived from the resemblance of their crane-like flowers to actual birds of paradise, although some plant growers call them banana trees, since they also look like banana plants. These regal plants are resilient and pest-resistant, but they can be prone to infections and fungal diseases such as root rot. To learn more about this potentially fatal condition, keep reading.
Bird of paradise root rot: Signs and symptoms
The roots are soft and brown.
If your plants look sickly, distressed or lifeless, check their roots. Root rot is hard to detect in its early stages, since it starts underground and the roots are the first victims. If the roots are dark brown and fall off when shaken, they have become rotten. They will also become soft and mushy with an unpleasant smell, unlike healthy roots which are succulent and white.
The stems are swollen and mushy.
Be concerned if the stems of your bird of paradise plants are swollen and feel mushy. Check the roots for any rot and be aware that the signs often start at the base of the stem and progress from there. The stems also tend to look curled, smaller than normal, or twisted. Their color may change and their bases will begin to smell unpleasant due to the rot.
The plant’s growth is stunted.
If you notice that there is no new growth or your plants have stunted growth, it could be a sign of root rot. The new leaves will be smaller than usual, and turn yellow and wilted. Plants affected with root rot are also unlikely to bloom despite correct fertilization, watering and light conditions.
Nevertheless, you need to rule out other potential causes of stunted growth, such as nutrient deficiencies, poor soil pH, low light, temperature stress, salt buildup and poor watering habits.
The leaves are discolored.
If you notice that the leaves of your plants are turning yellow, they could have root rot. Most often, plants with root rot suffer from yellowing of at least 60% of their foliage. The leaves turn yellow, wilt and eventually drop off, with this yellowing usually starting at the base of the plants. The edges of the leaves could also turn brown and eventually become wilted and drop off or die.
Root rot aside, a plant’s leaves may also turn yellow because of nutrient deficiencies, sunburn, pest infestation, soil toxicity and edema.
The plants are wilting.
If you notice the foliage wilting on the lower part of your bird of paradise plants, it could be an indication of root rot. This is due to insufficient water absorption by the roots, and is the plant’s way of protecting itself from becoming dehydrated. Other reasons your plants might wilt include over- or underwatering, cold drafts, pests, and temperature stress.
The shoots are dying back.
If the shoots of your plants are dying back, it is most likely due to root rot. The fungal disease destroys the roots, leaving the plants unable to absorb nutrients for the growth of new shoots. However, shoot dieback could also be due to a lack of humidity, chemical buildup, overwatering, pests, and too much or too little sunlight.
Causes of bird of paradise root rot
1. Overwatering
When the plants are overwatered, the soil becomes waterlogged and the roots struggle to breathe. Roots need oxygen to survive and waterlogging chokes off the oxygen supply, killing the roots and making them susceptible to diseases and pathogens. Overwatering can also cause brown or yellow leaves.
2. Poor drainage
Your plants’ potting mix or soil may retain water too well due to poor drainage capacity, in which case it will become soggy. When soil is waterlogged it hardens like cement, making it difficult for oxygen to reach the roots, and thus leaving the roots susceptible to root rot. To correct this, add more mulch, perlite, sand or compost to amend the drainage capacity. Also see to it that the pot has draining holes on the bottom.
3. Fungal infections
Root rot can be caused by several species of fungi, although it is often hard to distinguish exactly which is affecting your plants. Fungi thrive in old, damp containers, soil or infected tools, and may use these as vectors to move from one plant to another. Some common root-rot causing fungi include Phytophthora, Pythium and Fusarium solani.
4. Incorrect pot size
Oversized pots hold more soil and thus more moisture than necessary, and could create waterlogged areas that lead to root rot. If the container is too small, on the other hand, the plant could become rootbound and the tangled roots could prevent drainage and air flow through the soil. To correct this, place your plants in containers that are neither too large nor too small for them. When transplanting, the new pots should be a half-inch larger than the current pots.
5. Low temperature
Another cause of root rot is low temperature. This fungal infection thrives in wet conditions and temperatures of 70 to 86 degrees Fahrenheit. The plants also tend to absorb less water during cold weather, allowing the soil to remain wet for longer periods.
6. Watering during the dormant period
Birds of paradise plants are tropical to semi-tropical plants, so when temperatures drop to around 50 degrees Fahrenheit, they will become dormant. In this state, they will not absorb as much water as during their growing season, so if you do not adjust your watering routine, their soil will remain moist for far too long. To fix this remove the plants and let the soil dry out before replanting them. Remove any dead leaves, roots or other plant parts and wait until the soil has dried out before watering them again.
How to treat bird of paradise root rot
These are the steps for treating and preventing root rot:
Stop watering the plants until they have had a chance to dry out.
Remove infected leaves and other plant parts.
Remove the plants from their pots, trim off the affected roots and allow the remaining roots to dry out.
Repot the plants using new soil and new pots.
Bird of paradise root rot can be treated with chemical or organic treatments. The most common are commercial copper-based and sulfur-based fungicides. There are also homemade treatments, including charcoal, cinnamon and chamomile.
Conclusion
Bird of paradise plants are tropical herbaceous plants that are native to South Africa. They have crane-like flowers that resemble birds of paradise, and are popular as indoor and ornamental plants. These are relatively hardy plants; however, they are still prone to diseases such as root rot, which can be caused by overwatering, poor drainage, fungal infections or low temperatures. To save a plant with root rot, you will need to remove it from the pot, prune away the infected roots, apply fungicide on the healthy roots, and repot the plant in a new pot, using fresh soil.
Pothos plants are low-maintenance, easy-to-care-for plants. With the scientific name Epipremnum aureum, these plants have pointed, heart-shaped leaves and some varieties are variegated with yellow, white or pale green striations. They are popular indoor plants, but they can also be prone to diseases like root rot if they are not provided with the correct growing conditions.
How to identify pothos root rot
The common signs of root rot in pothos include the following:
1. The roots become soft and brown.
Check the roots and examine their color and texture. If they are black and mushy, they likely have root rot. Saggy roots also indicate root rot, and these might break off and get left in the soil when you try to uproot the plant. You may also notice an unpleasant smell coming from the roots.
2. The leaves turn yellow.
If the leaves of your pothos are turning yellow, it could be due to root rot. They may also wilt, which is an indication that they are not receiving sufficient nutrients from the soil. This is because the roots have already been damaged by this fungal disease. If it is just the older leaves that are yellowing, it may be due to the natural aging process; however, if the younger leaves are also affected, root rot may be the cause.
3. The soil is damp.
Another indication that root rot may be thriving under the soil is if the soil is constantly damp. To check the dampness, push your finger into the soil, or use a moisture meter for a more accurate reading. Do this at least three days after you last watered the plant. If the top one or two inches of soil is damp, there may be too much water in it.
4. There is mold or fungal growth on the soil.
Another sign of root rot in pothos plants is any kind of fungal growth on top of the soil due to excess water. This fungal growth results in root rot, which can spread to infect other parts of the plant.
5. The plant’s growth is stunted.
Delayed or stunted growth is another indication that your plants are unhealthy and could have root rot. Aside from stunted growth, the plants will have smaller, curling leaves, shorter stems and a thinner appearance. All of these symptoms indicate that root rot is preventing the roots from being able to function as they should.
Causes of pothos root rot
Overwatering
Pothos plants do not require very much water, unless it is used as their growing medium. Too much water in the soil limits oxygen supply to the roots, resulting in suffocation and plant stress.
Poor soil drainage
Another possible cause of root rot is poor soil drainage. If excess water does not drain out of the pot fast enough and pools around the roots, it stresses the roots just as overwatering does. The roots will not have access to oxygen and will suffocate, resulting in the perfect conditions for the development of root rot. Over time, this could lead to the death of your plants.
Insufficient drainage holes in pots
If your plants are showing signs of root rot despite having well-draining soil and not being overwatered, the pots could be the culprit. Make sure there are enough drainage holes so that water can pass through freely. Without these, the soil will remain wet for a longer time than necessary and this will encourage the growth of root rot.
Incorrect pot size
Your plants could also be dying from root rot because they are in pots that are too big or too small. Larger-than-necessary pots accommodate more soil which can hold more water, which could be harmful for the roots since it will remain wetter for longer. Meanwhile, too-small pots allow the roots to bind together, clogging the containers and making it more difficult to drain excess water.
Pathogens
Various types of pathogens could infect your plants’ roots. These pathogens can live in the soil or the water, or could be spread through infected gardening tools.
You can save your plants from root rot by trimming off all the infected roots. Clean the remaining roots and treat them with a fungicide to disinfect and protect them. You will need to repot the plants in new pots, using a fresh soil mix. If the root rot has become severe, you may have to start over with new plants.
Conclusion
Pothos plants have heart-shaped, variegated leaves that make them popular as indoor plants. However, these easy-to-care-for plants could become susceptible to root rot if they are overwatered, have poor soil drainage, or become infected by fungi or bacteria. To treat root rot, trim off all the infected roots, apply fungicide to the healthy roots and replant the pothos in a fresh potting mix. If the infection is severe, it may be too late to save the plant.
Dracaena is a succulent shrub, of which there are roughly 120 species. These plants are native to Africa, Southern Asia, Northern Australia and Central America. They are low maintenance and are popular for their attractive foliage. These plants can also purify the air, removing benzene, carbon dioxide and formaldehyde. However, like most plants, they are also prone to diseases such as root rot.
What are the causes of dracaena root rot?
Dracaena root rot is caused by constantly wet soil and exacerbated by fungi that lie dormant in the soil and enter the plant through its roots, slowing and stunting its growth. This is unlikely to happen when the roots are healthy, but damaged roots become compromised and vulnerable to these pathogens.
Constantly wet conditions prevent oxygen uptake by the roots, causing them to drown. They will start rotting, and the rot can then be exacerbated by fungal infection. The waterlogged soil can be due to overwatering, badly-draining or compact soil, or a lack of drainage holes in the plant’s container. All these factors contribute to the damp, oxygen-deprived conditions that are ideal for fungi to multiply and attack the weakened roots.
Over-fertilizing could also be a cause, as it impacts soil quality. Overfertilized plants take up more nitrogen than they need, disrupting the balance of nutrients in the plant tissue. Excess salts from fertilizers could also diminish the plants’ ability to take up water.
If you are guilty of overwatering your plant, you will need to transfer it to a new pot with fresh soil. Adjust your watering schedule to avoid overwatering again; a good rule is to wait until the top layer of soil is dry before watering.
Use rainwater to water these plants, because they are sensitive to the fluorides found in tap water. Opt for clay pots with drainage holes so the soil does not stay waterlogged, and add some pebbles at the bottom to improve the drainage. Plants in gardens can be placed in raised beds for improved drainage.
How to treat Dracaena root rot
Remove the affected plant from the soil.
If you suspect that your plant has root rot, remove it gently from the soil with all of its roots, and rinse the roots in room-temperature water. Rotten roots look black, mushy and weak, and some may even fall off. Healthy roots are firm and white.
Use sterile shears to cut off the rotten roots.
Remove the rotten roots with sterile shears or scissors to prevent the spread of the root rot. Clean your gardening tools well and sterilize them with a bleach solution. Make sure you prune off all the damaged and rotten roots, being careful to save the healthy ones.
You may also need to cut back some of the leaves if the infection is severe. This gives the plants a better chance of survival, since the roots have fewer leaves to care for. Cut off at least one-third to one-half of the leaves, depending on how many roots were cut off.
Empty and clean the pot.
The pot must be emptied and all the soil discarded once affected with root rot. If the plants are in a garden, remove all the surrounding soil. You should also check the roots of surrounding plants, as the infection could have spread to nearby plants.
Use a fungicide solution.
Fungicides are effective treatments for fungal diseases. Simply dip the healthy roots into the solution to protect them from the fungus. Since these solutions are toxic chemicals, they should be kept in closed containers and gloves should be worn when handling them.
Replant the plants in fresh soil.
Once you are done with the previous steps, you can repot the plants using fresh, clean soil. Opt for tall planters that are self-watering or have overflow protection. If you are using the same pot, sterilize it first. Clay pots and clay pebbles are also good options to manage the drainage.
Do not use fertilizers right away, to give the roots time to adjust. Consider doing a soil test to ascertain what nutrients are lacking before using fertilizers. Improper fertilizing could stress the plants, stunt their growth and make them more sensitive to diseases.
Conclusion
Dracaena plants are succulents native to Africa, Southern Asia, Northern Australia and Central America. They are easy to care for, thrive in warm temperatures, and have attractive foliage that can purify the air of toxins, including formaldehyde.
However, like most plants, they are susceptible to root rot caused by overwatering, poor drainage and over-fertilizing. To treat root rot, trim off the affected roots, treat the healthy roots with fungicide, and replant the plants in a new pot with fresh potting mix.
Orchid plants, with the scientific name Orchidaceae, are flowering plants with over 25,000 species distributed around the world. These perennials are popular indoor plants with flowers that come in a variety of colors, including white, purple, yellow, pink and green. They are terrestrial or epiphytic, depending on the species, and like most plants, may be prone to root rot if their growing conditions are not ideal.
What are the signs of root rot in orchids?
Your orchid plants are probably developing root rot if the flower buds are dropping from the spike for no apparent reason. The plants may not be producing new blooms, and the leaves may be soft, limp and floppy, instead of tough and firm. The exposed roots will look withered and dark brown or black, rather than firm and green or white in color. They may be soft to the touch and feel mushy if you squeeze them between your fingers. The first visible signs of root rot will be those in the roots.
What are the causes of orchid root rot?
Orchid root rot usually develops if water remains stagnant in the potting medium for a long period. This happens if you use pots with no proper drainage holes, or if you overwater your plants. The roots will likely start to rot if the potting medium does not dry out between waterings or if it is packed too tightly around the roots. Air circulation and oxygen supply become restricted if there are no air spaces in the potting medium, and the root system suffocates.
Potting medium that is packed tightly in the pot could also lead to a decreased ability to drain water. The resultant exposure of the roots to moisture for extended periods could destroy their delicate velamen covering. The roots will then be unable to absorb nutrients and water, and may eventually die.
Root rot can also be caused by pathogens, including bacteria, mold and fungi. These pathogens need a moist environment to thrive and multiply, and once they do, they can infect roots that have already been weakened by waterlogging. Once inside the roots, they will either promote root rot or exacerbate an existing infection. These pathogens may also attack the plant through damaged stems, which is known as crown rot.
How to treat orchid root rot
You can treat orchid root rot by removing the plant from its pot and inspecting the roots. Gently pull the plant out of the pot and brush off any growing medium stuck between the roots. Rinse and clean the roots gently in lukewarm water.
Look for any dark brown or black roots and check for mushy tissue. Cut off the dead roots one at a time with a pair of sterilized gardening scissors or shears. For extra safety, sterilize the scissors after each cut to prevent the spread of pathogens.
To make a sterilizing solution, mix one part bleach with nine parts water to make a 10% bleach solution. Spray the cutting tools after each cut and allow the tools to dry so the solution does not get onto your plants. After the infected roots have been removed, repot the orchid in a new pot with fresh potting medium. If you prefer to reuse the old pot, soak it first in sterilizing solution for an hour and allow it to dry before planting the orchid.
How to prevent orchid root rot
To prevent root rot in orchids, use well-draining pots for your plants. These pots should have holes or slits cut in the sides. The holes allow good airflow and circulation as well as proper drainage. Water the plants only when the potting medium is dry and see to it that the pots never sit in water for long periods.
Keep your orchids in a well ventilated environment, since air movement is essential for these plants. Open the windows or turn on the fan to promote good air circulation. You could also take the plants outside during warm weather, but make sure that you place them in a protected spot with no direct sunlight.
Do not mix different-sized potting medium components. Smaller components will fill the gaps between the bigger materials, and this will reduce the number and size of air spaces inside the pots and between the roots. Loosely place the potting medium in the pots and around the roots when repotting the plants, to provide ample space for drainage and circulation.
Repot the orchids at least every one to two years. Terrestrial orchids should be repotted at least every three years. While doing this, you can inspect the roots that you would not otherwise see.
Repotting also allows you to refresh the potting medium. Organic potting media eventually mature and decompose over time, and this creates a dense environment more akin to potting soil.
Conclusion
Orchids are popular flowering plants that are widely propagated around the world. These perennial epiphytic herbs can be susceptible to root rot because of overwatering, poor drainage, and pathogens like bacteria, mold and fungi. You can save your affected plant by removing it from the pot, cutting off the infected roots, and repotting the plants in new pots with fresh potting medium.
Jade plants, with the scientific name Crassula ovata, are succulent houseplants with fleshy, oval-shaped leaves. These plants are native to Mozambique and South Africa, can grow three to six feet tall, and are also referred to as lucky plants, money plants or money trees. They are drought-tolerant plants that are easy to care for, but as with most plants, improper growing conditions can cause them to develop root rot.
Jade Plant Root Rot: Symptoms
The leaves become soft and start to drop off.
The leaves become wrinkled, turn yellow, and feel squidgy when squeezed.
The stems become wrinkled and may begin to sag, especially if the infection is severe.
If your jade plants are manifesting any of these symptoms, you should inspect their root ball sooner rather than later. This will determine whether it is indeed root rot that is causing the symptoms. Remove the plant from the pot and examine the root ball thoroughly. Healthy roots are firm and white, while rotting roots are brown with a slimy coating and a musty smell. This is a true indication that root rot is the cause of the plant’s declining health.
Causes of Jade Plant Root Rot
Overwatering
Some plant owners water their jade plants a bit too excessively, and this is detrimental for the plants. The roots will become waterlogged and will be unable to absorb oxygen, causing them to die and start rotting. Because the roots are no longer performing their function, the plants will then suffocate and starve.
To fix this, allow the soil to dry out completely between watering. Check whether the soil is dry by poking your finger into the potting soil to a depth of about two inches. If the soil is dry to that depth, it means it is time to water the plants. Soak the soil well and allow the water to drain through the soil completely.
Poor drainage
Another cause of root rot is poor drainage in pots or containers. To avoid stagnant or waterlogged soil, the pots should have sufficient drainage holes in their bases. These holes should be large enough that you can insert your finger, and for larger plants there should be several holes.
Poorly-draining soil
Some potting mixes are designed to retain water, which makes them ideal for certain houseplants. However, it could be detrimental for succulents like jade plants that require free-draining soil. To fix this, use a potting mix designed for succulents. You can also make this yourself by mixing three parts ordinary potting soil, two parts coarse sand or grit, and one part perlite.
Pathogenic infection
Pathogens can lie dormant in the soil and infect your plants’ roots when they become weak or compromised, causing root rot and other diseases. To prevent this, practice good garden hygiene. Avoid reusing potting soil from other pots or plants; rather use new, sterile potting soil. Also sterilize your gardening tools. Roots that are weakened by overwatering are more susceptible to infection by pathogens, which is another reason to avoid overwatering.
Pot size
Placing your jade plants in pots of the wrong size could lead to root rot. Pots that are too big could absorb too much water, which will not drain quickly enough and thus encourage root rot.
Meanwhile, if you use pots that are too small, the roots may become compacted and there will be insufficient space for air circulation. The compacted roots will not be able to supply the plant with nutrients, and symptoms of root rot will appear as an effect of starvation.
To fix this, you need to repot your jade plants when they become pot-bound. Tip the plant out and see if the roots are circling the edges of the pot. If so, transfer it to a pot that is one size bigger, and use a fresh potting mix.
Low temperatures
Another cause for the growth of root rot is low temperatures. During the cooler months, evaporation takes longer. The soil therefore remains moist for longer than during the summer months. To make sure that your plants do not develop root rot, water them less often during the winter months.
Jade plants are succulents and they can withstand long periods without water, so see to it that the potting soil dries out between waterings. These plants should not be exposed to temperatures below 55 degrees Fahrenheit during winter, and an appropriate summer temperature is around 75 degrees Fahrenheit.
Insufficient light or sudden changes in lighting conditions
Jade plants can also develop root rot if they do not get enough sunlight. These plants thrive in bright and direct light for certain periods, and sudden changes in lighting conditions are detrimental to them, as is insufficient light. Jade plants can tolerate various lighting conditions, but be sure to introduce changes slowly.
To save your plants from root rot, apply a copper fungicide. Trim off the rotten parts and repot the plants in a new pot with fresh soil mix. Make sure that the soil is well-draining and water the plants only when the top two inches of soil have dried out.
Conclusion
Jade plants are drought-resistant plants that are easy to care for and maintain. They are also referred to as money plants and lucky plants. Like most plants, however, they are prone to root rot if their growing conditions are inappropriate. Common causes of root rot include overwatering, poorly-draining soil, and pathogenic infections. To treat root rot, apply a copper fungicide, trim off the affected parts, and repot the plants in a new pot with fresh soil.
African violets get root root when their roots are sitting in constantly waterlogged soil. The roots will suffocate and die in this anaerobic environment, and they will then begin to rot. The rot may be exacerbated by opportunistic pathogens that attack the weak and damaged roots and cause the rot to spread faster into the rest of the plant.
In this article, we will discuss the causes of root rot in African violet plants and how to manage them.
What is root rot?
Root rot happens when the fine hair rootlets at the ends of the roots become so overwhelmed with the amount of water in the soil that they get clogged and eventually die. Because these fine hair rootlets are dead, they will start to rot.
The rot from the rootlets will spread to the upper root hairs and continue until it reaches the crown of the root.
Infected roots will look brown or black, and will feel soft and mushy to the touch.
What are the causes of African Violet root rot?
The most probable reason your African violet has root rot is that you are overwatering it.
It could also be that the soil you are using is too heavy and compact, in which case it can become too dense and will retain water too well. This will lead to the roots clogging up and the excess water not draining out easily. These plants like their soil to be airy and porous.
Believe it or not, heat can also lead to root rot in plants. If the plant is placed in an area where the soil gets very hot during the day and then very cold during the night, this extreme shift in temperature can affect the roots of the plant.
If you have the habit of watering the plants at night, this can also lead to root rot, because the soil will not dry as quickly without sunlight.
The plant can also become stressed if the conditions of the soil keep changing, like when you are inconsistent with your watering habits. You may neglect the plant for weeks and it dries out, and then overcompensate and give it more water than it needs without allowing it to dry out between waterings. This cycle can lead to root rot because the roots will become weak from the stress.
If the pot you are using for the plant does not have drainage holes so that excess water can escape, this also leads to root rot.
How can you tell if your African Violet has root rot?
Externally, the plant’s leaves will start to discolor and become yellow or brown. The leaves will start to droop and lose their firmness, and the stems will feel soft and mushy.
Internally, or beneath the soil, the soil will be quite soggy. Remove some of the soil at the base of the plant and you will see that the roots look brown or black and feel mushy. That means that the rot has reached the primary root system.
When a root section is rotten, can it be saved?
No, rotten roots that are brown or black and already feel soft are dead and decaying.
If you are able to catch the rot in its early stages and only the fine hair rootlets have rotted, you may still be able to save the major roots.
You can check the root by cutting off a portion to expose a stub. If the inside of the stub is still green, it is still alive and can be saved.
Cut off any dead portions of the roots with a clean pair of scissors so that they do not spread the infection.
How do I save a dying African Violet from root rot?
The chances of a full recovery from root rot will depend on the extent of the infection.
To ascertain the severity of the rot, you may have to uproot the plant to inspect the roots more closely.
Remove the plant from the soil gently, because the roots are probably weak and damaged and will break easily.
Shake and wash off as much soil as you can and look for roots that have turned brown or black.
As mentioned above, if only the fine hair rootlets have rotted, you can simply remove them with a clean pair of scissors. If there are larger portions of roots that are rotten, cut those off as well.
Make sure you remove every single rotten root, because even one small portion of an infected root can restart an infection.
Spray the remaining roots with fungicide so that they are protected from infection. Let the plant air-dry overnight on a tray lined with a paper towel.
If you want to reuse the old pot, you can, but make sure you wash it with a water and bleach solution so that any fungi and bacteria are killed. If there are no holes at the bottom of the pot, drill some and make sure they are large enough to let the excess water flow through easily.
When the plant’s roots have dried, you can replant it in fresh soil.
Do not water the plant immediately, because the roots will need at least a week to recover from the trauma of being replanted.
Conclusion
African violets get root rot when their roots stand constantly in waterlogged soil. This may come about because you are overwatering the plant, being inconsistent with your watering technique, watering the plant at night, using a pot without drainage holes, or using soil that is poorly-draining.
The telltale signs of an African violet with root rot are yellowing or browning leaves, drooping and wilting foliage, a distinct rotten smell emanating from the roots, and brown or black mushy roots.
You can save your plant by removing it from the pot and inspecting the roots to see the extent of the infection. Remove the rotten roots and spray the remaining roots with fungicide. Let the plant air-dry and then replant it in a pot with sufficient drainage holes, using fresh, well-draining soil.
Like most houseplants, the peace lily is susceptible to root rot if its roots have been damaged and left vulnerable to opportunistic pathogens. The root damage can be due to any circumstance that causes the plant’s roots to be soaked in waterlogged soil for extended periods of time.
It is possible to salvage your peace lily if it has root rot, but only if there are some healthy roots still remaining.
In this article, we will discuss the symptoms and causes of root rot in peace lilies, and how to manage a peace lily with root rot.
What are the signs and symptoms of a peace lily with root rot?
Yellow, wilted, drooping leaves
If the root rot infection in your peace lily has been going on for long enough that it is affecting other parts of the plant, the leaves will start to turn yellow and the entire plant will look wilted and droopy.
Peace lilies need their roots to function properly for the plant to get water and nutrients from the soil. Because the flow of these essential requirements is disrupted, the whole plant will start to die slowly, which is why the foliage is discolored and wilting.
Slow growth
When the growth of your peace lily seems stunted, it may be because most of the plant’s roots are damaged and only a small percent remain functional. No new leaves or foliage will appear on your plant, and this should be a cause for concern.
Foul odor
A peace lily with root rot will emanate a particular, foul smell akin to rotten vegetation. Sniff the soil at the base of the plant and if you detect this rotten odor, then root rot is very likely. Because the roots are actively decaying due to overwatering or fungal infection, the base of the plant will start to smell.
If you notice the smell before the plant has displayed any other symptoms of root rot, it means the infection is in its early stages and you just might be able to save the plant and have a higher chance of it recovering fully.
What are the causes of root rot in peace lilies?
Overwatering
The main cause of root rot in peace lilies is overwatering. When the plant’s roots are consistently standing in waterlogged soil, the roots cannot absorb oxygen because of the anaerobic environment, and this results in the roots rotting and dying.
You can avoid overwatering your peace lily by knowing how to water it properly. Following a set watering schedule may seem like the easy thing to do, but the schedule should be subject to change according to the weather and the climate. During the summer, you may need to water the plant more frequently because the soil dries up faster, while you should probably reduce the frequency in the winter when the soil takes longer to dry out.
The best way to know whether to water the plant is by touching the top two inches of the soil to see if they are dry. If the soil is dry, water the plant, but if the soil is still damp, wait one or two days and check it again.
Poor drainage
Your choice of pot can also be the reason your peace lily has root rot. If the pot does not have drainage holes at the bottom, or if the holes are too small or have become clogged, the excess water will not be able to escape and will remain in the soil and suffocate the plant’s roots.
You can remedy this easily by making sure the pot has drainage holes and that those holes are large enough and are not clogged up with pebbles or soil.
Choose a clay or terracotta pot and avoid plastic or steel pots. Clay and terracotta are more breathable and allow water to seep through, while steel and plastic are not porous at all.
Poorly-draining soil
If the soil you are using in your pot does not drain well, the water will not drain as quickly as the plant would like, and this can also cause the roots to suffocate as air will have a hard time reaching the roots.
Heavy and compact soil, like clay, holds onto water and moisture a little too well, doing more harm than good to your plant.
Remedy this by changing the soil. You can make your own potting mix by adding perlite or sand to the potting soil to make it more porous and airy.
Pathogens
As mentioned above, root rot can come about because of overwatering, but the presence of opportunistic pathogens can hasten the spread of the rot to the rest of the plant.
The most common species of fungi that cause root rot in peace lilies are Fusarium, Pythium and Rhizoctonia.
These fungi are probably already present in the soil around your peace lily, but are dormant and waiting for the perfect opportunity to attack. When they sense that the roots of your plant are vulnerable and damaged, they will infect it and cause the rot to spread even faster.
These fungi can also come from contaminated gardening tools such as shears and spades, so make sure you always sterilize the tools you use on any of your plants.
You can prevent fungal infections by avoiding overwatering the plant. Fungi love moist environments and allowing the soil to dry out between waterings will help keep them at bay.
Try not to reuse any soil, in case it is contaminated with fungi. You are better off discarding any old soil and just using fresh soil, even when repotting.
How can I save my peace lily that is suffering from root rot?
Before anything, you need to stop watering the plant immediately.
Remove the plant from the pot carefully, because the roots are weak and will break easily.
Shake and wash off as much of the soil as you can from the roots, so you can inspect them properly. If there are any brown or black parts of the roots, those are rotten and will need to be removed. Use a sterile pair of scissors to cut off the infected roots while leaving the white, healthy roots alone. You need to remove all the rotten roots, because if even the smallest infected root is left behind, it can start a reinfection.
If you end up cutting off a large portion of the roots, you might need to remove some leaves as well, because the remaining roots might not be able to sustain the whole plant. Removing some of the leaves will alleviate some stress as the plant recovers.
Spray the remaining roots with an antifungal solution to protect them, and let the plant air-dry on a paper towel.
You can reuse the old pot, but you need to wash and disinfect it with a bleach and water solution. This is important, so that there are no fungi left in the pot to contaminate the fresh soil. Make sure the pot has drainage holes at the bottom.
Once the plant has dried out, fill the pot with well-draining soil and place the root ball in the soil.
Tap the soil around the base of the plant to help settle the soil.
Do not water the plant immediately; wait at least one week so that the roots can recover from the trauma of being repotted.
Conclusion
Peace lilies can get root rot, just like most houseplants. This is caused by overwatering, poor drainage, poorly-draining soil or fungal pathogens. Basically, all the factors that lead to root rot stem from the peace lily’s roots sitting in soil that is waterlogged and boggy.
Save your peace lily with root rot by inspecting the roots and removing any rotten parts, while leaving the healthy ones intact. Spray the healthy roots with fungicide and let the plant air-dry. Replant the peace lily in a pot with drainage holes and make sure you use soil that drains well.
Root rot in monstera plants is caused by a fungal infection, which is usually due to overwatering the plant. When the roots of the plant become waterlogged, it creates an oxygen-deprived environment that effectively suffocates and damages the roots. The damaged roots then become susceptible to opportunistic pathogens that worsen the rot.
There are a lot of factors that can contribute to root rot, but it all boils down to the presence of too much water in the soil and around the roots of the plant.
In this article, we will discuss the different causes of root rot and how to save an affected monstera plant.
What are the signs of root rot in a monstera plant?
1. Black spots
If your monstera has black spots on its leaves, it might have root rot. This sign means the infection from the pathogens has traveled up into the rest of the plant and is now affecting the stem and leaves. These black spots usually have a yellow halo around them.
2. Rotten smell
Because the roots are decaying, it is no surprise that there will be a distinct foul smell emanating from them. It is a good thing if you can smell this odor while the rest of the plant looks healthy, because that means you have caught the rot before it has made its way to the rest of the plant. This way, you can treat the infection before it becomes fatal.
3. Leaves turning yellow or brown, and wilting
The leaves of a monstera suffering from root rot will turn yellow or brown, because the roots are damaged and are unable to absorb water and nutrients effectively from the soil. The overall health of the plant is thus affected, which is why the leaves will start dying off the longer the rot is left untreated.
The leaves will also be wilt, due to the lack of nutrients.
4. Brown or black, mushy roots
This sign can only be spotted if you remove the plant from the soil. Some people discover root rot by accident when they are repotting their plants.
The roots turn brown or black and become soft and mushy because they are actively decaying, due to being waterlogged and infected with fungi. The roots will also break off easily when you separate them from the soil.
5. Slow growth
Every growth season, your monstera will shoot new leaves. If you notice that your plant has not had any new foliage in the past few months, its growth may have stunted and this could very well be due to root rot.
What causes root rot in monstera plants?
Overwatering
The most common reason monstera plants get root rot is overwatering, and there are several factors that can contribute to this.
Although monsteras like their soil to be slightly moist, it should never be waterlogged or soggy.
Your plant becomes overwatered if you are give it more water than it needs, or if you water it more frequently than it needs. If the pot you are using does not have drainage holes or if the soil in the pot is too heavy or compact, excess water and moisture will be retained around the roots and end up suffocating them. If the pot is too big for the plant, the soil will also hold more water than the plant needs, thereby also overwatering it.
Underwatering
It might seem strange for a plant to get root rot if it is underwatered, but this can happen when the roots have been underwatered for extended periods of time. The roots are so used to a drought-like situation that they become compact and will shrink in size. Because the roots have shrunk, there will be sections of soil that have no roots. When you finally water the plant, the soil will not dry out for quite some time and this could result in root rot.
Fungal infection
An overwatered or underwatered monstera will get root rot because its roots have been compromised, and the situation is then worsened by the presence of opportunistic fungi that cause the rot to spread faster to the rest of the plant, and possibly kill it.
The most common species of fungus that cause root rot in monstera plants are the Fusarium, Pythium and Rhizoctonia species.
Often these fungi are already lying dormant in the soil around your plant’s roots, just waiting for the perfect opportunity to strike.
The spores of these fungi can be spread by insects and small animals, or through contaminated gardening tools. Make sure the tools you use to prune or dig up your plants are always sterilized.
Cold temperatures
Monstera plants normally slow their growth during the winter, and they will need less water than they would during their growth period in the spring and summer.
If you forget to adjust your watering schedule, you might end up overwatering your plant.
The cold temperature and lack of light in the winter also keeps the soil from drying out as quickly as it should, leading to overwatering and root rot.
Can all monstera plants with root rot be saved?
No, unfortunately, there are situations where the plant may be too damaged by root rot, and you are better off disposing of it and starting over with a new plant.
If all of the roots on the plant are dead, you are too late. You need at least some healthy roots to have a chance at salvaging it, because these roots will aid the recovery of the entire plant.
If the plant’s stem has turned brown or black and is soft and mushy, that means the rot has moved up from the roots all the way to the main stem. The stem is no longer able to transport water and nutrients from the roots to the rest of the plant. Sadly, the plant will die in this case.
How do I save a monstera plant with root rot?
Remove the plant from the old pot
Before anything, once you suspect root rot, stop watering your monstera plant immediately.
You need to take the roots out of the waterlogged soil as soon as you can.
Make sure you take the plant out of the old pot slowly, so that you can remove as much of the root system as possible.
Shake and wash off the excess soil from the roots so that you can inspect the roots clearly. If there are parts of the roots that are brown or black, cut them off using clean scissors. Save all of the white, healthy roots.
Spray the remaining roots with fungicide and let the plant air-dry on a dry paper towel on top of a tray.
If you want to reuse the old pot, you can do so, but you should wash and disinfect it properly so that it does not reinfect your plant. Make sure the drainage holes at the bottom of the pot are big enough, and use fresh, well-draining potting soil. You can add perlite or coarse sand to the potting soil to make it more porous and airy.
Once the plant’s roots are dry, you can replant it. Do not water it yet; you want to give the plant’s roots at least a week to recover before watering.
Place the plant in a spot where it can get bright, indirect light for about six hours a day.
It will need a good source of light so that it can photosynthesize effectively and recover faster.
Conclusion
Monstera plants get root rot because of various factors that cause their roots to soak in soggy soil. This can be due to overwatering, underwatering, or cold temperatures. When the plant’s roots are damaged, opportunistic fungi are quick to attack and worsen the rot until it consumes the entire plant.
If there are still some healthy roots, you can save your plant by removing the infected roots, spraying the remaining roots with fungicide, letting the plant air dry and replanting them in fresh soil, in a pot that has drainage holes.
The money tree is a low-maintenance indoor houseplant that is popular among novice plant owners.
One of the most common mistakes people make when growing money trees is overwatering them. Overwatering the plant makes it vulnerable to pathogens that can cause root rot and possibly kill the plant.
In this article, we will discuss what exactly causes root rot in money trees, and how to treat and avoid it.
How do I know if my money tree has root rot?
The leaves are discolored
One of the reasons homeowners love money trees is because of the beautiful dark green color of their leaves. So, if you notice that the leaves on your plant have started to look pale, yellow or brown, the plant is probably overwatered. Of course, this sign is not unique to overwatered plants, but it is indicative of a problem that needs addressing nevertheless.
The leaves are wilting
When a plant’s roots are damaged and compromised, they are no longer able to properly absorb water and nutrients from the soil, and this affects the plant’s overall health. The plant may start to lose its vigor and look undernourished, including the wilting of its leaves.
The growth is stunted or slow
Because the roots are damaged, the plant’s nutrient stores will become depleted and it will no longer be able to grow properly. If you notice that your money tree has not grown in the past couple of weeks or months, it may be because of root rot and you may need to look at its roots to confirm the diagnosis.
Remember that slowed growth in the winter does not always mean root rot, because the plants’ growth phase is during the spring and summer. Slowed growth in winter is completely normal and should be no cause for concern.
There is a foul odor
Because the roots of the plant are literally decaying and rotting, the infected plant will exude the distinct smell of rotten vegetation.
Every once in a while, smell the area around the base of the plant and note any smells akin to rotten compost.
This is one of the earliest signs of root rot, so an acute sense of smell may just mean the difference between catching the disease in its early stages and not being able to salvage your tree money tree.
Brown or black, mushy roots
The only way to be sure that your money plant has root rot is by inspecting its roots. Take the plant out of the soil and shake or wash off as much soil as you can from the roots. Examine all of the roots closely, looking out for roots that are either brown or black in color and soft and mushy to the touch.
If there are rotten roots, that means the money tree has root rot. If there are still portions of the roots that are white and healthy, the plant can possibly still be salvaged.
What are the causes of root rot?
1. Overwatering
The most probable cause of root rot is overwatering. This is because when water in the soil pools around the roots of the plant, they suffocate. The compromised roots become easy targets for the pathogens that cause root rot.
Money trees are not heavy drinkers, so they do not need to be watered frequently. At most, water the plant once a week, but there is no set time for when you should water it. The most important thing to note is whether the soil in the pot is dry to the touch.
Touch the top two inches of soil. If they are dry, water the plant; if the soil is still damp, wait one or two days and check it again. This is a better indication of when to water your plant, because the frequency is subject to change depending on the climate, weather, season and the plant’s overall living conditions.
2. The pot has no drainage holes
Another cause of root rot is poor drainage around your plant’s roots. This is affected by factors such as the amount of water you give the plant and the pot you are using.
If the pot you are using does not have drainage holes, or if it does but you neglect to empty the water tray under the pot, the excess water will pool at the bottom of the pot and result in the same damage dealt by overwatering.
To remedy this, make sure your pot has drainage holes at the bottom, and if you have a water tray to catch dripping water, empty the tray daily. You can also try adding activated charcoal to the bottom of the pot to help absorb any excess moisture.
3. Poorly-draining soil
If the soil in your plant’s pot is compact, like clay, it will retain moisture too well and will not dry out fast enough. Compact soil also affects the flow of nutrients and water from the soil to the roots of the plant.
If the soil you are using drains poorly, you may need to change it. Choose a potting mix that includes coarse sand or perlite, because those components will make the soil more porous and aerated.
4. Pathogens
There are several species of fungi and bacteria that can attack your plant’s weakened roots and cause root rot. They may have been dormant in the soil waiting for a chance to strike, or they may have been introduced to the plant through contaminated gardening tools or soil.
Make sure all of your pots, soil and gardening tools are clean and free of pathogens that might cause root rot before using them on your plants. If you have just bought a new plant, make sure it does not have root rot before using your own tools on it, or you may risk infecting all of your healthy plants.
5. Cold temperatures
When the weather is cold, the soil will take longer to dry out between waterings. Thus, you might unknowingly be overwatering your plant in the winter. There is also significantly less sunlight in the winter, further lengthening the time it takes for the soil to dry out.
Make sure to adjust your watering schedule during the winter because your plant will not need as much water as it does in the summer.
Can I save my money tree if it has root rot?
Yes, it is possible to save a money tree with root rot. Take the plant out of the soil and wash off any old soil. Using a sterile pair of scissors, cut off any roots that are brown or black and leave the white roots, because those are still healthy.
Spray the healthy roots with a fungicide and let the plant air-dry for a day. When the roots are completely dry, replant the money tree in a pot with drainage holes, making sure you use fresh soil. Do not water the plant after replanting, to give the roots time to recover and reestablish.
Conclusion
Money trees can get root rot when overwatered, when planted in a pot with no drainage holes, when planted in poorly-draining soil, if exposed to contaminated tools or soil, or if kept in colder-than-ideal temperatures.
To save your plant from root rot, stop watering it immediately, cut off the infected roots, spray the healthy roots with fungicide, let the plant air-dry, and replant it in a pot with drainage holes, using fresh soil.
Spider plants are low-maintenance, which makes them good starter plants for novice gardeners. One of the most common conditions to affect spider plants is root rot, and the most common cause of this is overwatering. When there is too much moisture in the soil around the plant’s roots, the roots will suffocate and start to die. Once dead, they become susceptible to opportunistic pathogens that cause root rot.
In this article, we will discuss the most common causes of root rot in spider plants and how you can remedy it.
How do I know if my spider plant has root rot?
Rotten smell
One of the first signs you will notice if your spider plant has root rot is a foul odor emanating from the plant’s roots. The smell is similar to that of rotting vegetation.
This is due to the rotten roots, which have been affected by bacteria for some time already.
If you notice this distinct smell, you should suspect root rot and take the proper steps to diagnose the condition and start treatment.
Mushy, brown or black roots
The most telling sign of root rot is when the roots have turned brown or black and are soft and mushy.
The roots are the first parts of the plant to be affected by the fungus, but unless you are repotting your plants, you cannot really tell whether roots are damaged.
If other symptoms have led you to suspect root rot, you may have to uproot your plant to check the roots and confirm your suspicions.
Stunted growth
Another sign your spider plant has root rot is if its growth has been stunted for weeks, or even months.
Effects on the plant’s foliage may not appear immediately, but when the plant no longer grows new leaves, it may be due to root rot.
Wilted leaves
Wilted leaves are not a sign specific to root rot, but it is a sign that the plant is experiencing some type of stress that needs addressing.
When the plant’s roots are damaged, they are unable to absorb water and nutrients properly, and this will have an effect on the plant as a whole, including its leaves.
Black spots
The presence of black spots on the plant means that the rot has moved upward significantly and is now affecting more than just the roots. The pathogens that are causing the rot are aggressively taking over the entire plant and it might be too late to salvage it.
What causes root rot in spider plants?
1. Overwatering
The most common cause of root rot is simply giving the plant more water than it needs. It may be because you are giving the plant too much water each time, or you could be giving it the correct amount too frequently.
Both scenarios can cause the soil to become waterlogged and soggy for long periods, and the roots will not be able to dry out between waterings.
You will also notice the plant’s leaves turning yellow or brown and becoming droopy if you have been overwatering it.
Because there is always water present in the soil, the roots will be unable to breathe, and that will affect the flow of nutrients and water from the soil to the plant.
To know when you should water your plant, touch the soil to feel if it is dry. If it is dry, water the plant, but if the soil is still damp, wait a few days before checking it again.
2. Poorly-draining soil
Another reason your spider plant may have root rot is if the soil in its pot does not drain well.
These plants need well-draining soil so that it can be properly aerated. The soil should allow both water and air to flow through freely.
When the soil you use is heavy and compacted, such as clay, it holds onto moisture too well and does not dry out fast enough.
Even if you have good watering techniques, if the soil is poorly-draining your plant will still be at risk of root rot.
3. Cold temperatures
When the temperatures around your plant go below 50 degrees Fahrenheit, this can also lead to root rot.
Low temperatures mean that the soil around the plant’s roots will not be able to dry out as quickly as in normal temperatures.
This is especially true for plants that are kept in places that do not get much light. Sunlight can help regulate the temperature around the plant which helps the soil to dry out, so in the absence of sunlight, the plant can also show symptoms of overwatering.
4. The pot has no drainage holes
If the pot you use for your spider plant does not have drainage holes at the bottom, this keeps water trapped in the soil and around the roots.
You can use a pot without drainage holes, but that requires you to make no mistakes when it comes to watering your plant; the amount of water you give should be exactly right.
Even if the pot has drainage holes, they can become clogged with soil or pebbles, so make sure you check these holes regularly.
5. Overfeeding
Spider plants are light feeders so there is no need to fertilize them that often, if at all. The nutrients found in rich potting soil are usually enough for them to stay healthy.
If you overfeed your spider plant, it can lead to a mineral buildup that is not good for the plant, and the roots will become weak and vulnerable to root rot.
6. Pathogens
The most common species of fungi that cause root rot in spider plants are the Pythium, Phytophthora and Rhizoctonia species. They all attack vulnerable roots, usually brought about by overwatering.
These pathogens are spread through contaminated soil or contaminated gardening tools such as shears and spades. Make sure you do not reuse soil from a contaminated plant; you are better off discarding it and using fresh soil.
Can a spider plant with root rot be salvaged?
Yes, if the root rot has only affected some of the roots and the majority are still white and healthy, the plant is salvageable.
Cut off the brown or black roots using sterile scissors and spray some fungicide on the healthy roots. Let the plant air-dry for a day before replanting it in a pot with drainage holes, using fresh potting soil.
Conclusion
Spider plant root rot most commonly occurs when the plant is being overwatered or overfed. When the plant is given too much water or fertilizer, the roots will weaken and become vulnerable to opportunistic pathogens which then cause root rot.
The rot will travel up the plant until it affects it entirely, and it will eventually die.
Prevent root rot by making sure you do not overwater or overfeed the plant, and use well-draining soil and a pot with drainage holes. Use sterile tools when handling the plant to avoid infecting other plants.
Mushroom root rot is a disease that affects a wide range of trees, including hickories and oaks, as well as other conifers and hardwoods. It is caused by the Armillaria species of fungus. It is also called shoestring root rot, and it attacks the plant by preventing it from properly absorbing water.
This fungus infects the roots of trees and shrubs, and they will weaken, decay, and eventually die.
In this article, we will discuss the signs and symptoms of mushroom root rot and what you need to do if your tree is affected.
How do I identify mushroom root rot?
You should suspect mushroom root rot if your tree has been growing poorly for some time. The leaves will have started becoming smaller and turning yellow. If you have an evergreen tree, the needles will have turned brown. Trees with mushroom rot also have dead or dying branches in their upper canopy.
One of the most telling signs of mushroom root rot is the presence of honey-colored mushrooms growing at the base of the tree in the autumn. If you peel off the bark near the base of the tree, you will probably see a white layer of fungal growth.
Fungal strands that look like black shoestrings will grow in a net-like pattern on the tree and on the soil around the base of the tree.
For evergreen trees, the base of the tree may be encrusted in resin just below the surface of the soil.
The wood of the infected tree may become soft and white. This indicates decay, which may spread upwards from the base to around five feet into the trunk of the tree.
Trees that are severely affected become very weak and will easily be broken by strong winds and storms.
Where does mushroom root rot disease come from?
This disease results from an infection by the Armillaria species of fungus. This fungus can survive for years in wood debris, such as old stumps and roots. The fungus produces rhizomorphs, which are cord-like strands that grow from the decaying roots and stumps and into the soil. When a new tree is planted near where an infected tree once stood, the rhizomorphs will penetrate its healthy roots. These rhizomorphs can grow up to 10 feet long, so they can easily infect neighboring trees and shrubs.
Once the rhizomorphs have penetrated the healthy tree, the fungus will colonize the roots and the base of the trunk and slowly cause the wood to decay. If the newly infected tree is healthy and vigorous, it can usually slow the spread of the fungus, but if its health is already compromised, the disease will ravage it quickly.
A tree with mushroom root rot will die if the infection girdles the base of the trunk. The tree will fall over due to the weakened roots and its trunk will break.
Mushroom root rot management
It should be noted that neither wide spacing, fertilization, stump-top chemical treatment or fire are effective treatments for mushroom root rot. so do not try to incorporate any of these methods when attempting to treat your tree.
You can reduce the chances of mushroom root rot by increasing the tree’s vigor. If the tree is stressed, it will be more susceptible to the disease. Protect your tree from pests and use good planting practices.
You can also choose to plant resistant species to avoid mushroom root rot. If you continue planting resistant species in soil that is harboring the fungus, the pathogen will simply die out. Once you are sure that the pathogen has died, you can go back to planting susceptible species of trees on the same land without worrying about infection.
You can do inoculum reduction by mechanically removing the stump of the infected tree using an excavator. You might not be able to clear all of the smaller roots from the soil, but the pathogen will not be able to survive for very long if all it has to survive on are the small roots. Unfortunately, renting an excavator is quite pricey, so this option is not for everyone.
You can also try fumigation, but be warned that this method is still experimental and does not guarantee the best results. This is done by drilling a hole into the tree’s infected stump and placing chemicals inside the hole. The chemicals will weaken the fungus enough that other fungi can kill it, or it could simply die from the chemicals themselves.
Conclusion
Mushroom root rot is a disease that affects a large variety of trees and shrubs. It can spread from tree to tree through rhizomorphs that grow out from infected stumps and roots and penetrate the healthy roots of neighboring trees.
This disease can be fatal to trees that are already weak, so keeping your trees healthy and vigorous will help them fight off the infection for longer.
You can try to manage the disease by uprooting the stump of the infected tree to stop the spread to other trees, or you can fumigate the stump.
Oak tree root rot can be caused either by the Armillaria fungus or the Phytophthora fungus. Both of these damage the roots of the tree and slowly kill it by spreading the rot to the rest of the tree.
If the disease is not discovered in its early stages, it may be almost impossible to salvage the tree.
In this article, we will discuss the most common causes of oak tree root rot, as well as some other common diseases of oak trees.
What causes oak tree root rot?
Armillaria root rot
Armillaria root rot is one of the most common oak tree diseases, and is also called the oak tree root fungus. It is spread through the rhizomorphs on the roots of the infected plant. When these rhizomorphs touch the roots of a healthy plant, it will also become infected. Moist conditions are ideal for the fungus, so they will target the roots of an overwatered tree that are constantly sitting in soggy soil.
You may not be able to catch the fungus in its early stages because it progresses slowly, meaning the visible symptoms will appear quite some time after the tree was initially infected.
It may take years for the tree to start looking weakened and affected by the disease. Other times, the tree may look completely healthy one day and suddenly ill after a couple of weeks.
One of the symptoms you need to watch out for is the presence of yellowish, fan-shaped mycelium between the bark and the wood. There could also be brown or black structures resembling strings on the surface of the roots. If there are large, honey-colored mushrooms at the base of the tree in the fall or winter, they could also be a sign that your oak tree has Armillaria root rot.
To confirm your suspicions, look for the crown of the tree’s root system and scrape off some bark from that area. If you can see the signature tissue between the bark and the wood, the tree probably has oak tree root fungus. Remember that the absence of mycelium tissue does not mean the tree does not have root fungus; you may just be checking the roots a little too early in the infection when it has not yet reached the crown of the root system.
Unfortunately, there is no known effective treatment for Armillaria root rot in living trees. The fungus can also lay dormant in the soil around the dead tree’s roots. You can try to control it by digging up as much of the old tree’s roots as you can.
As mentioned above, the fungus likes moist conditions, so avoid overwatering; also avoid pouring too much water over empty areas with no plants to water. Air-dry the soil as much as you can, and use physical barriers such as root collars to contain the centers of infection. Try not to plant any new trees in the same area and keep the roots of nearby healthy plants from reaching that soil if you do not want them to become infected.
Phytophthora root rot
This disease is also caused by a soil-borne pathogen. Like most fungi, it thrives and reproduces in warm, moist soil.
If the roots of an oak tree are overwatered or if it has been raining for several weeks, they could drown and die, making them vulnerable to these opportunistic fungi. Once the roots are infected, they will start to rot and produce bleeding symptoms on the tree’s trunks.
Another reason your oak tree may have root rot is if you planted a lawn around its base. The base of the tree should be allowed to dry out, especially during the summer, and the lawn will retain the soil’s moisture for longer than necessary, creating ideal conditions for root root.
If you place too much mulch near the base of the tree, the same thing happens. Make sure that, if you mulch the soil around the tree, you start a few feet away from the base so that the roots are able to breathe.
Infected oak trees will have yellowing, sickly leaves, and you will notice the branches dying, until eventually the entire tree is compromised and will die.
If you suspect Phytophthora root rot, you may need to consult a professional and task them with applying the proper treatment if they believe they are still able to save the tree.
What are some other common oak tree diseases?
Oak wilt
This is a disease that can affect all types of oak trees, but the rate at which the disease affects the tree can depend on the type. It is also caused by a fungus, which travels through the tree’s vascular system. Red oak trees tend to be worst affected by oak wilt.
Insects can cause the spread of the fungus when they carry it to entry holes on the tree, such as wounds on the tree’s surface. One of the earliest signs of the disease is brown necrosis in the tree’s veins. The leaves may also start to fall off at an accelerated pace, despite still looking green and vibrant.
The disease starts on one limb and makes its way toward the rest of the tree. Spore mats will develop under the bark, and spores will be carried to nearby trees by insects and the wind.
Unfortunately, this disease is difficult to treat and you will need to consult a professional regarding your course of action. Often the only thing you can do is destroy and dispose of the tree so that it does not spread the infection to other trees.
Bacterial wetwood
This disease, also called slime flux, is not as damaging to oak trees as the other aforementioned diseases.
The pathogen is an anaerobic bacterium that disrupts the tree’s membranes, filling the microspaces with water and causing leakage of substances and increased concentration of certain elements. They usually infect wounds and tree or root stubs.
The infection is not usually treated; it is best to simply leave it alone.
Conclusion
Oak tree root rot is exacerbated by overwatering, or when the soil is constantly wet for one reason or another. When the tree’s roots are left to stand in soggy soil for extended periods, they can drown and die and will then become susceptible to pathogens that cause root rot.
The two most common causes of root rot in oak trees are the Armillaria and Phytophthora species of fungus.
If you suspect an infection, consult a professional in case there is a chance of saving the tree, but usually if the tree has been infected for some time, it may be better to destroy it and dispose of it properly in order to avoid the spread to healthy plants.
Hydroponics is a type of gardening in which soil is not used; instead, a different material supports the plant’s roots, allowing it to grow directly in water.
There are multiple approaches to hydroponics, and in this article we will discuss each one’s advantages and disadvantages.
If you are thinking of adopting a hydroponics system for your home garden, keep reading to learn more.
What are the different types of hydroponics?
1. Aeroponics
Image: istockphoto.com / surabky
Although aeroponics may sound like the most futuristic of all hydroponic methods, it has actually been around for some time.
This method came about in an attempt to figure out a way to effectively aerate a plant’s roots.
In this technique, pipes are used to send a pressurized nutrient solution to the plants. When the nutrient solution passes through the nozzles, it is sprayed in droplet form onto the plant’s roots. This allows the roots to receive nutrients and water while still being able to breathe.
You can buy an aeroponics kit ready for set-up, but if you want to build one yourself, you will need a reservoir, a pressure water pump, a timer to help you set the irrigation cycles, hoses and pipes with sprayers or nozzles, and an aeroponics chamber.
An aeroponics chamber can be made from any waterproof and rot-resistant material, but it is most often made of plastic. Iron may not be a good choice because it gets too hot in the summer and too cold in the winter. Choose a matte material and avoid translucent ones because they promote algae growth.
With this method, you irrigate for very short periods, but frequently. The time of each irrigation cycle will depend on the climate and the type of plant you are growing.
The pressure system you use will also be a factor in the duration of irrigation cycles. If you have a high pressure system, or HPA, a cycle can be as short as five seconds, at five minute intervals.
When choosing your water pump, you need to consider the capacity of the pump as well as its pressure power.
Do not use a growing medium when using aeroponics. Since you are spraying the roots directly, having a growing medium in the way of the nozzles would not make sense.
The advantages of aeroponics include reduced use of nutrient solution, less water use, and great aeration. This system can be built in many ways, making it very feasible for vertical gardens. It gives higher yields than other hydroponic methods and can be used on a variety of plants. The nutrient solution can also be recycled.
The downsides of aeroponics include the challenge of keeping the climate conditions stable inside the aeroponics chamber. Doing this in a greenhouse may be easier, but doing so in small chambers is tricky. This is because air changes temperatures faster than water does, while also not being able to hold humidity very well. This is also why this system will not do well in outdoor gardens. This method is also more expensive to set up and maintain than other hydroponic methods, and consumes more electricity because the pump is constantly at work.
The aeroponics chamber consumes a lot of space in a low garden, which is why it is more convenient to do this vertically.
In short, aeroponics is great in that it uses fewer nutrients and less water while providing a high yield, but it can only truly work indoors or in a greenhouse, and also uses a lot of electricity.
2. Drip system
Image: istockphoto.com / phanasitti
The drip method of hydroponics does a great job in addressing aeration. It effectively waters and provides the plant with nutrition, using hoses and pipes as the delivery system.
Drip hydroponics is very similar to drip irrigation, where hoses and pipes are used to irrigate crops, thus preventing evaporation and lowering watering costs.
The hoses and pipes procure the nutrient solution from a reservoir before sending nutrient-rich water to each plant. The water is sprinkled or dripped onto the growing medium, which will release it to the roots slowly.
If you want to build your own drip system, you will need a reservoir where you will mix the nutrient solution, hoses and pipes, a water pump to attach to the hoses and pipes, a growing medium, an air pump and a timer.
Choose your growing medium wisely, because it can affect how frequently you will need to irrigate your plants. How long the medium can hold onto the nutrients is also something to consider.
You can opt for continuous irrigation and drip moderate quantities of nutrient solution onto the plants uninterrupted for long cycles. If you are using clay as a growing medium, for example, continuous irrigation is recommended. A medium like rock wool will only need irrigation every three to five hours.
The drip system is suitable for a lot of fruit trees and a large variety of crops. It provides close-to-perfect aeration while giving you full control over how much nutrient solution you give the plants. It also uses low quantities of nutrient solution and can be used for vertical gardens. You can modify the shape of the setup to fit into odd spaces and corners of your home garden.
This system ensures that the roots of the plants do not stand in stagnant water, which lowers the risk of bacterial infection and rot, and because each plant is irrigated individually, it prevents the spread of infection.
Disadvantages of the drip system include the possibility of leakage due to the number of hoses and pipes required. Because the pump is quiet, you might not realize if it has stopped working, and your plants may go for days without nutrient solution.
The drip system is inexpensive, easy to manage and flexible. It gives you full control over the irrigation of each plant, while providing great aeration.
3. Nutrient film technique
Image: istockphoto.com / interstid
This method is called the nutrient film technique because you are providing a thin layer of nutrient solution at the bottom of a tank. The lower parts of the roots will receive water and nutrition, while the upper parts of the roots will be able to breathe.
Researchers observed that plants grew their roots out long enough to reach the nutrient film at the bottom of the tank, and then proceeded to spread horizontally.
A nutrient film technique setup includes a grow tank that is slightly inclined, a reservoir to provide the nutrient solution and recycle it after irrigation, a water pump to bring the nutrients to the grow tank, and an air pump and pipe to carry the water to the grow tank and back to the reservoir.
The only tricky aspect of this technique is keeping the tank inclined. The ideal inclination is 1:100, or one inch of inclination for every 100 inches of tank length.
Most gardeners who use hydroponics do not use a growing medium when using the nutrient film technique. The medium may obstruct the flow of nutrient solution, and this setup does not need the aeration provided by a growing medium because a large part of the roots is already in the air.
You will not need to keep feeding or watering the roots, because the nutrient film is continuous.
The great thing about this technique is that it uses minimal nutrient mix and water, because the nutrient solution is recycled. Because of this, you can size down your reservoir.
The absence of a growing medium allows you to inspect the plant’s roots easily; you can just take them out of the grow tank and not have to remove any growing medium. This also means you can spot and treat root problems faster.
Some drawbacks of this method are the inability to use it for larger crops, since there is no growing medium to support the roots. Also, once the roots of the plant become too large and thick, the flow of the nutrient film may stop.
This technique will not work for turnips or carrots and the like, because the tuberous roots of these plants are big, while the roots at the bottom are small and will be unable to feed the rest of the plant.
Furthermore, if you do not pay close attention and the system stops, your plants will not receive nutrition and water, and your crop will be ruined.
In summary, the nutrient film technique ensures that your plants are well-aerated and allows you to be constantly aware of the roots’ health, but it does have disadvantages and limitations that can be hard to overlook.
4. Ebb and flow technique
Image: istockphoto.com / peangdao
With the ebb and flow technique, the roots are irrigated regularly for short periods. The roots will be able to breathe and dry up completely, because they will not be continuously in the water.
If you want to try the ebb and flow technique, you will need a grow tank, a reservoir, a reversible water pump to send water in two directions, an air pump to help aerate the solution, pipes, and a timer so that you do not need to keep switching the pump on and off.
You can use a growing medium with this technique, but it is also completely doable without one.
You will use the reservoir to mix in the ingredients, and then the timer will tell the pump when to send the nutrient solution into the grow tank and when to drain the grow tank. Because the tank drains out, the roots are able to dry out for some time and become aerated. Usually, the timer is set up to allow around 12 minutes per irrigation phase, every two hours.
Irrigation cycles will need to be switched off when there is no daylight or when grow lights have been switched off. Plants do not need as much water or nutrients when they are unable to photosynthesize. Thus, on average, there are around 12 cycles every day.
While the system is normally shut off overnight, you may need to keep it on when the weather or climate is dry and hot.
If you are using a growing medium, the nutrient solution distributes much more slowly and irritation is less likely to occur. However, you may need to lengthen the irrigation cycle by a minute so that the growing medium is properly soaked with the solution.
Great aeration may be the best advantage provided by this technique. The nutrient solution also does not stagnate around the roots, making infection by pathogens less likely.
You will be able to control the watering and feeding of your plants and modify it to your local climate and weather.
This method can be used for many types of crops – even root crops that are trickier to grow.
However, it could be a bit much to handle for beginners and those who do not have a background in hydroponics. Setting it up is complicated, and it is also complex to run. This is one of the least simplistic of all the methods.
The ebb and flow system depends on the proper functioning of the pump. If the pump gets stuck and misses an irrigation cycle, you might not realize it immediately.
The pump can also become easily clogged due to the amount of work it has to do, and broken roots may end up inside the pump. The pipes can also become clogged and prone to leakage because of the amount of water involved.
The pump in this system is also quite noisy, so keeping it inside your house may be annoying. You may have to keep it outside or in a greenhouse.
This method is one that might be better off left to the professionals. The complicated system is not very cheap and has several drawbacks.
5. Wick system
Image: istockphoto.com / Evelien Doosje
This method is simple but effective. It may not be the best hydroponic system, but it is inexpensive and solves a lot of the problems of deep water culture by using a wick.
If you want to give this method a try, you will need a grow tank, a reservoir, wicks made from rope or other spongy material, and a growing medium such as expanded clay or coconut coir.
This method works by simply dipping the wicks in the reservoir where the nutrient solution is and putting the other end of the wick in the grow tank. Fill the tank with growing medium and you can plant your crops right into it.
Due to capillary action, the nutrient solution will move up the wick from the place where there is more solution to the place where there is less solution. Thus, as the roots of the plant absorb the solution from the wick, the wick absorbs solution from the reservoir, making a continuous flow.
This method is a good choice because it is inexpensive, not overly complicated, and operates without the need for electricity. It also recycles the nutrient solution.
Using the wick system, the amount of nutrient solution absorbed by the plant is autoregulated.
This method also provides the plant with good aeration.
The downsides of this method include not being suitable for vertical gardens or towers.
Because of the wick, the plants also do not have a chance to dry out, because the moisture climbs up the wick continuously. This system also still has to deal with fungi, bacteria and algae due to the grow tank being humid all the time.
This method is also not suitable for bigger plants, because they have a faster nutrient absorption rate than a wick may be able to sustain. The wick can only really provide the plants with a limited amount of nutrient solution. Furthermore, for the wick to be effective, it cannot be too long.
6. Deep water culture
Image: istockphoto.com / yokaew
Deep water culture is the most classic of all the hydroponic methods.
It also uses a grow tank with a nutrient solution and an air pump that provides the plant’s roots with oxygen. The air pump helps more plants grow in a single tank.
You will need a grow tank into which the plants can dip their roots, an air pump, a reservoir for your nutrient solution, and a water pump.
The advantages of deep water culture are its simplicity and inexpensiveness. There are few elements and factors to consider, which means there are fewer parts to possibly break down and ruin the system. It also allows you to top up the nutrient solution and provides great aeration to the roots.
On the downside, in this method the nutrient solution is pretty much stagnant, which makes it a favorite place for pathogens to use as a breeding ground.
A simple air pump may not be enough to provide adequate aeration for the plants, because the plants nearest the air stone will absorb most of the air provided while the plants on the other end may end up receiving little to no air. You can try to remedy this by placing the air stone in the middle, but the plants on the outer edges are still going to end up with less air.
This method is not appropriate for vertical gardens and may occupy a lot of space in your home or indoor garden.
You can only really thoroughly clean the tank if you remove everything inside it, so you cannot clean it while it is functioning. This means you can only clean it when you plan to change crops.
Do not use this method for plants that cannot tolerate having their roots wet all the time, because with this system their roots will never be able to dry out.
You can use this method if you have a larger garden for the control it affords you over the aeration and feeding of your plants. However, it does have a lot of shortcomings that have made professional gardeners use it less and less over time.
Conclusion
There are many different hydroponic methods, and choosing which one to use in your garden will depend on your budget, available space, and the type of plants you plan to grow in your hydroponic garden.
You do not need to choose one method and stick to it forever. For now, look at the different options, choose the method that will cater to the needs of your planned crop, and start from there. You can always try a different method next season.
Prayer plants, with the scientific name Maranta leuconeura, are common houseplants in the world’s more temperate regions. They are also referred to as praying hands, and are native to the New World tropics.These plants are native to the tropical forests of Brazil. They have wide, oval-shaped, dark green leaves with veins running through the leaves which can be several shades of red.
Common methods of propagating prayer plants
Water propagation
You will need a prayer plant, scissors, a glass jar, water, and a clear bag.
Locate the node on the stem and cut just below it. You only need one node to propagate a prayer plant in water. Nodes are easy to spot: they are small bumps from where new growth will develop. Leave about half an inch of stem below the node and make sure that the tools you use are clean and sharp.
Place your plant cutting in plant-friendly water that is room temperature. If you use tap water, leave it to sit for at least 24 hours before you use it. See to it that the node is submerged under the water, but do not allow the leaves to get below the surface. Trim a few leaves off if there are too many, so that the plant can focus on producing roots.
To keep conditions optimal, place a clear bag over the plant to provide humidity. Blow in some air to stop the bag sagging onto the plant. Place your propagation station in a bright area with no direct sunlight.
Change the water as needed. Some plant growers change it every two days, while others only change it as needed. If there is no sign of algae or impurities and the water is clear, it means the water is fine and does not need to be changed.
In one week’s time, the roots should start to sprout, and after two weeks they will have grown longer. If you notice that growth has slowed down, the water may need changing. Remember to use room temperature water. By the third week, there should already be new leaves.
By the fourth week, the roots should have grown to an inch and a half long and are then ready to be moved from the water into the soil.
Prepare fresh potting soil and a pot of the correct size, that has enough room for the plant’s roots to grow well. Add a bottom layer of soil into the pot and position the rooted plant. Fill the pot further with soil. Water the newly-planted prayer plant and place a clear bag over it for a few days.
Soil propagation
Propagating in soil is a good option if you want to make the mother plant look fuller by planting the cuttings in the same pot. Just like the previous method, cut below the node, and leave sufficient stem below it. Next, dip the end of the cutting in water and rooting hormone. Prune off some leaves if there are too many.
Plant the cutting into the soil, either in a separate pot or in the same pot with the mother plant. Water the cutting and keep the soil on the moist side until the roots develop. Place a clear bag over the plant to maintain high humidity. This method is somewhat more demanding than the previous method.
Seed propagation
Propagating prayer plants through seeds is also a viable method, but it requires more patience and attention than the previous methods. You need to collect and select the most suitable seeds and sow them in a moist medium. Keep them in a warm place; you can also place them in a clear bag to help them along. In a couple of weeks, you should see roots beginning to sprout.
Root or slip division
This method is viable if the mother plant is big enough and there are many stems emerging from the soil. You will need to remove the plant from its pot and clean off the roots, and then untangle and tease the roots apart gently with your fingers. This will allow you to separate the different stems and, once separated, you can plant them in fresh potting soil.
Conclusion
Prayer plants are evergreen perennials native to the New World tropics. They are easy to care for and are popular among plant growers for their unique foliage. There are various options when it comes to propagating these beauties: you can use water or soil propagation, or opt to use seeds or root division.
The most common reason for oak trees to die is disease. Oak wilt and oak leaf blisters are the two most widely observed fungal infections in oak trees.
There are various signs and symptoms to look out for if you suspect that an oak tree is dying. These are seen on the tree’s leaves, branches and trunk. If there are lesions or cracks that look out of the ordinary, you will need to narrow down the possible causes in order to properly treat and save your tree.
In this article, we will discuss the signs to look out for if you suspect that your oak tree is dying, and what you need to do in this situation.
Why is my oak tree dying?
Oak wilt
This is one of the most serious tree diseases to damage oak trees. The fungus can infect any type of oak tree, but it infects water oaks and red oaks the most, and it affects the plant’s ability to retain water. Live oaks are less likely to get oak wilt, but if they do get infected, they suffer more damage because of the interconnectedness of their root systems.
Infected trees will have yellow veins in their leaves that become brown over time. The leaves will also fall off prematurely. The young leaves on infected red oaks’ will wilt faster than normal and fall off sooner, too. Older leaves will turn pale green or even a shiny brown in some cases.
Fungal mats can also form underneath the bark of the tree. The spores in the fungal mats give off an odor that smells pleasant to insects, and these insects will help the mats expand further across the trees.
It is quite easy for oak wilt to spread to other trees, so it needs to be treated as soon as possible. It is best to hire a professional to confirm the diagnosis and to save the tree with the appropriate treatment.
Oak leaf blisters
Oak leaf blisters have been observed in various species of oak, and are caused by the Taphrina caerulescens fungus. Although they have been observed in different types of oak, the red oak seems to be the most susceptible to the fungus. This disease causes raised, circular blisters on the upper surfaces of the leaves. The lesions can either be yellow or green, but they will all turn brown over time. The more lesions there are on the leaf, the more the leaf will curl.
This disease may not threaten the overall health of a mature oak tree, but it does affect the aesthetic of the tree and causes its leaves to fall off prematurely.
You can get rid of the fungus by spraying the tree with fungicide in the early spring before the tree’s buds begin to swell. The fungicide may not be as effective if applied after the buds have broken.
How can I tell when an oak tree is dying?
Leaning
An oak tree that is healthy will stand as straight and tall as it can. An unhealthy tree will start to lean to one side, usually due to the roots becoming shallow and weak. The leaning could be due to strong rain and winds, but it could also be attributed to improper pruning techniques.
Dead bark
Dead bark, or cankers, form when bacteria and fungi make their way into the tree’s tissue via a cut branch or an open wound on the bark. The pathogens infect the tree and cause it stress, leading to the formation of cankers. You can ask a professional to remove the cankers and they will gladly seal them off so that they do not worsen.
Try not to do your pruning during the spring and fall, because this is when the bacteria that cause the canker are most active.
Decay
If you notice parts of the oak tree starting to decay, you need to address it immediately; otherwise it can easily destroy the tree from the inside out.
It can be tricky to spot decay in its early stages because it often starts in the middle of the tree and will only display noticeable signs like stunted growth, mushroom-like growths and dead branches when the decay is serious.
Branches that break easily
If the tree’s branches become dry and easy to break, it might mean that your once-healthy tree has deadwood. This happens when a fungal infection has become so bad that the tree has essentially been hollowed out from the inside. This can also happen when trees suffer through drought or a strong storm that causes the bark to decay.
How do I save a dying oak tree?
Prune off sick branches
If there are any dead or dying branches, cut them off to help save the tree. You can take care of issues such as weak joints, deadwood and poor structure when you do this. If the disease is only on a specific branch, it makes sense that the best way to get rid of it is simply to cut it off.
Make sure you use appropriate pruning methods and sterilize the equipment after pruning.
Do not use too much mulch
You could actively suffocate the roots of the oak tree if you apply too mulch on the base of the tree. If the roots are unable to breathe, the tree trunk and roots will rot and become susceptible to opportunistic pathogens and pests.
Clear away excess mulch from the base of the tree, leaving just enough.
Correct your watering techniques
Try not to overwater your tree as this can be fatal, especially in younger trees. If the roots of the tree are left to stand in constantly waterlogged soil, they can decay and develop root rot.
Make sure the soil is well-draining and gets a lot of direct sunlight to help it dry out faster, so that the tree does not have to deal with soggy soil all the time.
Spray fungicide
If your tree has fungal disease in its leaves, branches and trunk, pruning alone may not be enough to control the spread. Spray the tree with fungicidal spray to help clear the disease.
Conclusion
The most probable reason your oak tree is dying is a disease, such as oak wilt or oak leaf blisters. Overwatering and placing too much mulch around the base of the tree can also cause the roots to rot and decay, making the tree more vulnerable to secondary infections.
If you want to save your oak tree, you have to correctly identify the cause of the problem so that you can treat it accordingly and save the tree.
Yes, using coffee grounds on your houseplants can have plenty of benefits. Coffee grounds have plenty of organic material that provides plants with micronutrients and nitrogen. It also helps the plants retain water better.
In this article, we will discuss the reasons coffee grounds are good for your houseplants, the correct use of coffee grounds on your plants, and the possible downsides of using coffee grounds on your houseplants.
Why do people use coffee grounds on their plants?
Coffee grounds are rich in nutrients
Coffee grounds contain phosphorus and nitrogen, both of which are essential elements for plants’ survival. In fact, they are so rich in nitrogen that it comprises two percent of their volume.
There are also micronutrients present in coffee grounds that help plants grow better, such as iron, magnesium and calcium.
Coffee grounds cost next to nothing
If you are a fan of coffee and have a mound of coffee grounds each morning after preparing your cup of joe, you can collect these in a container and use them in your garden.
Gardening can be an expensive hobby if you want your garden to really thrive, and saving a few cents on your garden’s maintenance is always welcome. Coffee grounds are essentially waste, so instead of throwing them in the trash, reuse them on your plants.
Coffee grounds are eco-friendly
Reusing coffee grounds that would otherwise be thrown away will allow you to help the environment in your own little way. Because they do not contain the chemicals found in most commercial fertilizers, the use of coffee grounds is safe not only for your plants, but for you and your family as well.
Coffee grounds are readily available
If you do not drink coffee, chances are there are at least one or two people in your household that do, so there will always be coffee grounds to hand. No need for a special trip to the garden shop to spend money you could use for something else.
How can I use coffee on my houseplants?
Liquid coffee fertilizer
This does not mean you can use freshly brewed coffee on your plants; instead, use the coffee grounds to make sort of a coffee-ground tea by mixing the grounds with water.
Add the grounds to a container with water and let it soak or steep for up to two weeks, stirring the mixture once in a while.
Letting the coffee soak allows the grounds to release their nutrients, while also making the soil more attractive to good bacteria. Strain the mixture through a cheesecloth after two weeks, and use it to water your plants.
Make compost with the coffee grounds
This is the easiest way to use coffee grounds on your plants. Place the coffee grounds in your compost pile and use the compost whenever it is ready.
Because a lot of the more popular houseplants come from jungles and places with tropical climates, it is important to simulate that kind of environment in your home. Compost with coffee grounds will help replicate this and provide plenty of nutrients to your plants.
You can either use the compost when you are repotting your plants, or add a thin layer of the homemade compost on top of the soil.
You might have a problem with the idea of compost because you think it might cause a bad smell to linger in the room, but you do not need to worry – the smell will dissipate quickly. If you are still worried about the smell, you can cover the layer of compost with another thin layer of soil to keep the smell contained.
Remember not to put too much compost on the plant’s soil because this acts like a fertilizer and may cause your plant’s foliage to burn. Add only up to an inch of compost and no more.
Compost also retains water well, so you may need to adjust your watering schedule and water it less frequently, or you could end up overwatering the plant.
Add the coffee grounds to the potting soil
You can also use coffee grounds as a slow-release fertilizer by mixing them directly into the potting soil when you repot your plant.
The nutrients in the coffee grounds will be released little by little as it decomposes in the soil.
This method can supply your plant with nutrients for as long as six months.
The level of success here will depend on the type of plant you are growing. There are plants that need more potassium and phosphorus than nitrogen, in which case the coffee grounds may not be able to provide the plant’s specific needs.
What are the disadvantages of using coffee grounds on houseplants?
They attract fungi
This happens most often when the coffee grounds are added on top of the soil’s surface. Fungi like the environment created by coffee grounds on top of the soil, which can unfortunately lead to the proliferation of fungi on your plant and in the soil. You can try to avoid this by incorporating the coffee grounds into the soil instead of simply sprinkling them on top.
They might retain moisture too well
Unfortunately, coffee grounds soak up moisture much like a sponge, which means they will keep the soil around the plant damp and moist for longer than normal. This leads to increased risk of overwatering, even when you water the plant as you normally do.
You can reduce the risk of overwatering by adding perlite or coarse sand to the soil to make it more porous and allow the excess water to flow out of the soil more easily. This will allow the soil to dry out faster and significantly reduce the risk of root rot. Make sure the pot you are using also has large enough drainage holes at the bottom to let the excess water flow out.
There are better alternatives to coffee grounds
Yes, we discussed many advantages to using coffee grounds on houseplants, but that does not mean they are the best choice for fertilizing your plants. There are plenty of safe natural or synthetic fertilizers available commercially that better address the needs of your houseplants. In fact, you are better off using your coffee grounds on your outdoor plants.
Conclusion
Yes, coffee grounds can be good for your houseplants if you do prefer not to spend the money on commercial fertilizers. Just remember that there are also drawbacks to this practice, and you are better off using the coffee grounds on your outdoor, rather than indoor plants. However, if you wish to use them on your indoor plants, make a coffee-ground tea or mix them with your compost before using them on the plants.
Corn, or maize, with the scientific name Zea mays, is a popular food source for people and livestock. This tall, annual cereal grass was first domesticated by the indigenous people of Southern Mexico. It has many benefits, being gluten-free, high-fiber and a good source of antioxidants. Corn is easy to propagate, and you can grow it in your backyard or in containers. Keep reading to learn about growing corn in a pot.
Can you grow corn in a pot?
Yes, you can easily grow corn in a pot, given the right resources. Below are the steps for doing so.
Select your corn variety.
There are several varieties of corn that you can cultivate, and they differ in texture, taste, height and kernel structure.
The varieties include:
Sweet corn
This type is tender and juicy and considered the perfect side dish. It is typically yellow but it can also come in other colors like brown and red.
Popcorn
This type of corn has kennels that are hard and brittle. The popcorn most of us know is yellow-orange, but it may also come in blue.
Flint corn
This corn has a hard outer layer with a glassy appearance and a gummy-like texture. It pops when heated, just like popcorn, but this variety is usually used as hominy for tortillas.
Flour corn
This type is often cultivated in the southwest part of the United States. It is starchy but soft, and can be made into finer cornmeal. It has a sweet taste and if you steam or grill it you can eat it off of the cob.
Dent corn
Many farmers grow this variety for use as animal feed and processed food. Also called field corn, it is considered the most commonly raised corn in the US. This type dries up and its soft center shrinks, making the kernel appear dented; thus the name. It can be dried to make hominy, and can also be used for cornmeal.
Know the right time or season for planting.
Corn is a warm-weather or tropical crop and it should be planted after the final frost. Be sure to wait at least one to two weeks after the last frost date to be certain that frost will not affect or kill your new plants.
Choose the right pots for your corn.
The ideal container should measure at least 12 inches deep and 12 inches wide. This is considered the minimum size for corn to thrive. Common pots include clay and plastic containers, but you can also use barrels, wooden crates, laundry baskets or garbage cans.
You may need several pots or containers, depending on how many corn plants you want to cultivate and the size of pots that you select. See to it that there are enough drainage holes in the bottom of the pots. These plants need moisture, but do not like standing in water. Make holes in the bottom of the pots if there are no existing drainage holes.
Find the right spot.
Be sure to place your corn plants in an area where they can get at least eight hours of sunlight daily. Corn is a warm-weather crop and needs plenty of sunlight to thrive. These plants can also be used as privacy walls, since the stalks grow tall quickly. Container-grown corn can reach up to eight feet tall, while those grown in gardens can reach 15 feet.
Prepare the soil for planting.
Corn prefers soil that retains moisture and does not dry out too quickly, but make sure the soil is well-draining so that it does not become soggy or waterlogged. An ideal type of soil is peat-based potting soil.
You may opt to add compost, well-composted chicken manure, fish emulsion or an all-purpose fertilizer to the soil before planting the corn. This will enrich the soil with nutrients that the plants will need during their first few weeks of growth. Corn is a heavy feeder that uses a lot of nutrients, so the soil will need to be replenished.
Plant the corn seeds in the pot.
Plant four to six corn seeds per pot. The seeds should be planted at least one inch deep and covered gently with soil. It is okay to plant the seeds relatively close to one another, since sowing seeds closely helps with pollination, resulting in more fruit.
Plant the seeds about six inches apart along the outer circle of the pot, at least three to four inches from the container’s edge. Make sure that the seeds are watered well once planted, and let the sun do the rest of the work.
It takes around 10 to 14 days for corn seeds to germinate in temperatures of 55 to 60 degrees Fahrenheit. It will only take about six days if the temperature is 65 degrees Fahrenheit and above.
Conclusion
Corn is commonly propagated the world over because of its many uses as a food source for people and livestock. There are many varieties of corn and it is easy to grow, either in your garden or in a container. If you plan to grow corn in a pot, simply follow the steps discussed above.
Hops, with the scientific name Humulus lupulus, are non-woody annual or perennial vines native to Eurasia, South America and North America. They belong to the hemp family Cannabaceae, and are propagated for use as flavoring, bittering and stability agents in beer. These herbaceous climbers can be successfully cultivated in containers by following the instructions laid out in this article.
Growing hops in containers: What are the steps?
Choose a good location.
Hops thrive in sunny areas with ample space to climb. They should get at least six to eight hours of direct sunlight daily, without which your harvest will be very minimal.
You should have at least eight feet of clearance to build a trellis for the hops to climb. This is possible even on apartment balconies, as long as they face south and there is enough direct sunlight.
Use a large container.
Choose containers with a diameter of at least 20 inches. Hops have tough root systems and a maximum of two rhizomes can be planted per container of this size. See to it that your container has enough drainage holes to facilitate healthy growth.
Provide the correct soil conditions.
Hops prefer well-draining soil, and the ideal potting mix is four parts fresh potting soil to one part perlite. Do not compact the soil as doing so will limit its drainage ability, and add some more soil after the initial watering. The soil pH for these plants should be slightly acidic. Check the soil pH using a pH testing kit to ascertain whether any amendment is necessary.
To lower the pH naturally, add used green tea leaves or used coffee grounds. Sulfur and aluminum sulfate can also decrease the soil’s pH.
Construct a sturdy trellis.
Hops can climb up to 20 feet, so they need a sturdy trellis to support them. These plants have an impressive growth rate, averaging as much as 12 inches in a day. All you need to make a trellis for your hops are some screws, two eight-foot stakes, and some strong twine.
Push the stakes deep into the soil, about five inches apart, and insert a small screw at the top of each stake. Next, tie a very long piece of twine to each screw and wind the twine in a criss-cross fashion between the two stakes. Finally, cut the twine at the bottom and tie the ends together. The hops will grow at an angle because of the crisscrossing, and this allows for 20 feet of climbing surface.
Secure the rhizomes you will use for planting.
Rhizomes are small pieces of root cut from the root system of the mother plant. Once they are replanted, fully functioning female plants will sprout, that are genetic twins of the mother plant. Try to acquire the rhizomes from a trusted source, since genetic diseases in the mother plant could affect the new plants as well.
Hops are a dioecious species, wherein the male and female reproductive structures are on separate plants. The female plants are the only ones that produce beautiful flowers, known as cones. Seeds cannot guarantee a cone harvest, which is why rhizomes are preferred for propagating hops.
Plant the rhizomes in the containers.
To plant the rhizomes, dig a two-to-three-inch hole at the base of each stake. Plant one rhizome vertically in each hole, making sure that the buds are facing upwards. Cover the rhizomes with potting soil and water well. It is safe to plant the rhizomes once the last frost has passed; the right time to plant them will also depend on your location.
Be sure to water the rhizomes when the top two inches of soil feel dry to the touch. In a matter of two to three weeks, you will notice new sprouts appearing. Increase watering when they emerge, and water deeply, making sure that water drains from the drainage holes. Allow the top three inches of soil to dry out before watering again.
How to care for your hops
Hops are considered high-maintenance plants and they require regular watering and feeding to thrive. Water them daily when the temperature is hot, and water enough that excess water flows from the container’s drainage holes. Feed the plants with a liquid soluble fertilizer diluted to a quarter strength, since too much could burn the plants. Keep their growing area clean and free of weeds.
Prune the plants once they are tall enough to overgrow the trellis and remove the tips periodically by snipping just after the nodes. This promotes branching from the main stem and provides more opportunities for the cones to grow. Be sure your pruning shears are clean and sharp. Defoliate the bottom one foot of the vines to increase air circulation.
To protect the plants from frost during the winter months, bring them indoors or into a basement or garage. If the plants are on a balcony, place them against the building so they will be exposed to ambient heat. Cover the soil’s surface with mulch or straw to protect the roots until spring.
The plants will focus on establishing a strong root system in the first year, and in the second year you should start seeing a few cones. The first harvest usually happens during the third year, although there are instances when earlier harvests are possible.
Conclusion
Hops are non-woody perennial vines that are widely propagated as flavoring and stability agents for beer. These plants are native to South and North America as well as Eurasia, and can be successfully grown in containers. You will need to choose a good location, an adequately-sized container and the correct soil type. These plants also require a sturdy trellis, as they can climb up to 20 feet.
Bird’s nest ferns, with the scientific name Asplenium nidus, are stunning, bright green ferns of the family Aspleniaceae. They are epiphytes, meaning that they grow on other trees, and are native to the tropical regions of Hawaii, Polynesia, India, Eastern Africa, Eastern Australia and Southeast Asia. These striking ferns have upright, undivided fronds that grow in a rosette formation with a funnel-like center over a mat of fibrous roots. They can grow up to four feet in diameter and five feet high, and are popular as landscaping accents as well as houseplants.
Bird’s Nest Fern Care
Bird’s nest ferns do not need very much bright light to thrive; they prefer filtered or indirect light. An example of filtered light in a household environment would be sunlight lightly filtered by a sheer curtain before it reaches your plant. These plants are therefore great low-light options for your home.
When it comes to their watering requirements, it is important to get the balance right. Bird’s nest ferns prefer moist but not soggy soil. The latter encourages the growth or foot rot, which is a fungal disease that can kill your plant. Water the plant when the top inch of the soil is dry, but do not allow the soil to dry out completely. Ensure that the soil is well-draining so that it does not become waterlogged.
Do not water at the center of the plant, since this is where new leaves unfurl from. If you do this, it could cause the center to rot. These plants love humidity, so remember to mist them a few times weekly, but do not leave them soaking wet.
Because these plants are epiphytes, they do not need to be packed into a potting mix. Just a mix of peat moss, perlite or orchid bark is enough for the plants to thrive. Repot them every two years in pots that are one size up from their current pots, and make sure the pots have drainage holes. Schedule your repotting for the growing seasons of spring and summer.
These plants do not like too much fertilizer, so dilute your balanced houseplant fertilizer to half-strength. Fertilize only a few times during the growing season in spring and summer.
Avoid pruning your ferns; only do so to remove the old, outermost leaves if they start to turn yellow and wilt. Remove these leaves with clean, sharp scissors or pruning shears. You can also gently pull off the old leaves.
Bird’s Nest Fern Propagation
Ferns have spores, rather than seeds, so to propagate your bird’s nest fern you will need to use the spores on the underside of its fronds. To gather them, remove the mature fronds and place them in a paper bag. After a few days, the spores should fall off the fronds and into the bag.
Next, prepare a pot of moistened sphagnum moss and arrange the spores on top. Water from the bottom to maintain the moisture of the moss. Place the pot in a dish of water and allow it to soak up through the drainage holes, rather than watering the top of the moss. Allow the pot to soak until the top of the moss is damp, so that the spores always remain moist.
Do not expose the spores to direct light; they should only get low or filtered light. Place a clear plastic bag or plastic wrap around the top of the pot to lock in moisture, but remove it from time to time to let the air in. Mist the spores regularly. New plants should start to develop in a few weeks to months, and it may take a year for the ferns to fully develop.
How To Mount A Bird’s Nest Fern
Take an amount of sphagnum moss enough to provide a base for the plant, and place it on a piece of wood.
Take the fern out of the pot and remove the excess soil.
Put the fern’s root ball on top of the moss and the wood.
Add more sphagnum moss around the root ball to cradle it.
Wrap sheet moss around the outside of the sphagnum moss for a neater appearance. This is optional.
Secure the fern and moss to the wood using fishing line.
All that remains is to find a good spot to hang your mounted fern.
Ferns are usually mounted on pieces of driftwood or preserved wood. To water your mounted ferns, take them down from the wall and submerge them in a large bucket, sink or tub for 15 to 30 minutes.
Conclusion
Bird’s nest ferns are popular houseplants because of their aesthetic value and spectacular foliage. These epiphytes can be mounted on walls and are native to the tropical areas of Eastern Australia and Southeastern Asia. They prefer filtered and indirect light and thrive well in moist soil. These plants can be propagated by using the spores and keeping them moist until new growth starts to develop.
Heart leaf philodendron, with the scientific name Philodendron hederaceum, are evergreen perennial vines that are very easy to cultivate. They are native to tropical America and popular for their heart-shaped leaves and trailing vines. They are also sought-after indoor plants because they can filter gaseous toxins from the air. This article will teach you a bit more about these plants, including how to successfully care for and propagate them.
Heart leaf philodendron: Care and propagation
Heart leaf philodendron care
Heart leaf philodendrons do best in areas with indirect sunlight, but will also be just fine in more or less any lighting conditions. They can also adjust to low-light areas, although their foliage will not be as glossy or vibrant. However, keep them away from direct sunlight to avoid sunburn. These plants can also thrive in most environments, but be sure that the soil is not left waterlogged.
Before watering, check that the top half-inch of soil is dry, especially during cold weather. Mist the leaves and wipe them down with a cloth to remove dust and prevent pest infestations. These plants will do well in any quality of potting soil, as long as it is well-draining. You can also mix perlite, sterilized garden loam or coarse sand, and peat moss to come up with an ideal potting mix.
You will need to repot your plants in larger pots if they become rootbound or outgrow their pots. Water them thoroughly the day before repotting them to reduce stress and ensure an easier transition. Prune any stunted growth and trim the plant to a desired length and size. Check the root ball for any signs of rotting, and gently separate overgrown roots to stimulate new growth.
Heart leaf philodendrons tend to turn yellow and droop when overwatered; this could be due to you giving too much water at one time, or from waterlogged soil caused by poor drainage. If you notice that the plants are wilting, however, this is most likely due to underwatering. Black stems are usually due to rot or root disease, which is caused by fungi. Overwatering is also a great contributor to root rot.
If the vines become leggy, this is usually due to insufficient light. In this case, prune off the affected vines by snipping them off above a node, and move the plant to a location that gets more light. Pests like fungus gnats, spider mites, mealybugs and scale insects may also attack your plants, and can be treated using insecticidal soap or neem oil.
Heart leaf philodendron propagation
Common methods of propagating heart leaf philodendron:
1. Water propagation
Cut about a quarter-inch below a node on a section of a vine that includes a few leaves, using sharp, sterile scissors. Be sure to include the node in the cutting, since new roots will sprout from there. Place the cutting in a clear jar of room-temperature water with the node below the water’s surface. Remove any leaves that are under the water.
Next, place the cutting in an area with medium to bright, indirect light. Add more water to the jar when the level drops, and change the water if it starts getting murky. Roots will start to sprout within a matter of days, but it will take weeks before you can transfer the cutting to the soil.
Once the roots are about three inches long, you can transfer the cutting into a permanent pot. Give it a good watering and allow it to adjust to its new environment.
2. Soil propagation
Follow the same procedure as for water propagation, by cutting about a quarter-inch below a node on a section of vine that has a few leaves. However, instead of placing the cutting in water, plant it directly in a pot with well-draining soil. You can also stick it back into the same pot with the mother plant if you prefer. At least one node should be under the soil, so that roots can sprout from it.
Place the pot with the cutting in an area with medium to bright, indirect light. Keep the soil moist as the roots develop, but make sure it is not totally wet. You can place a clear plastic bag over the top of the pot to lock in more humidity, but open it for a while each day to let in some fresh air.
It will take a few weeks before a new root system develops. Test for roots by gently tugging on the cutting. If there is resistance, it means that a root system has developed.
There is another soil propagation method, by which you simply place the entire vine cutting so that it is laying on top of the surface of the soil. The nodes should be facing downward, into the soil. If necessary, you can temporarily fasten the vine to the soil with paper clips. Keep the soil moist but not wet, and place the pot in bright, indirect light. Place a clear plastic bag over the top to lock in vital humidity, but open it a little each day to let in the fresh air.
Conclusion
Heart leaf philodendrons are evergreen perennial vines native to tropical America. They are easy to cultivate and also pull pollutants from the air. They thrive in bright, indirect light, and are happy in any quality of potting soil as long as it is well-draining. These plants are easy to propagate, and you can do this either by water or soil propagation.
Njoy pothos plants have heart-shaped leaves whose intense green color is variegated with cream or yellow. They have smaller leaves than most pothos plants, grow up to nine inches tall, and trail or climb up to 10 feet. Their botanical name is Epipremnum aureum njoy, and the intensity of their variegation depends on how much light they get. Bright conditions produce prominent variegation, while plants in darker conditions will have straight green foliage.
Njoy plant care and propagation
Njoy plant care
Njoy thrives in areas with bright, indirect light or partial shade. Do not expose them to direct sunlight, as this could damage their leaves. Low light, on the other hand, causes the variegation to fade. These plants can also survive under only fluorescent light, which makes them a good choice for offices.
These plants require little water to survive. Water them when the soil is dry to around one inch deep, and reduce watering during winter. Do not overwater, as this could encourage the development of root rot. Ideally, mist the plants or place them in areas with higher humidity.
Do not allow the plants to sit in water for extended periods. Discard excess water that accumulates at the bottom of your pots to avoid root rot.
Njoy plants like well-draining potting mix and thrive in soil that has equal parts peat and perlite. Repot them if they become rootbound, taking care not to damage the root ball. The pots you use must have drainage holes at the bottom to allow excess water to run out. If you plan to move your plants to a new potting medium, it is best to do it while the roots are still small, to give them time to adapt.
These are low-maintenance plants; only prune them when they become leggy or to maintain a desired size. Wipe the leaves with neem oil or rubbing alcohol monthly to remove dust and reduce pest infestation. Njoy plants rarely bloom, and are better known for their foliage.
Fertilize your Njoy to provide the necessary nutrients. However, when growth slows during wintertime, stop fertilizing the plants.
Njoy plant propagation
These are the common methods of propagating Njoy plants:
1. Water propagation
First, you need to identify a section of vine with some nodes, which is where the leaves and roots grow out of the stem. Cut about a quarter-inch below a node using a pair of clean scissors. Include the node on the cutting, as that is where the roots will sprout from.
Put the cutting in a jar of room-temperature water, with at least one node under the water’s surface. If there are leaves under the surface, remove them from the cutting. Put the jar in a location that has bright, indirect light, and top up the water when the level gets low. Replace it completely after a week to keep the water clean.
Tiny roots should develop in the first to second week, but it will take a few more weeks before the roots are long enough to transfer the cutting into fresh potting mix. Once the cutting has been transferred, you can water it and care for it as you would any other plant.
2. Propagating in potting mix
Take your cutting in as described above, by identifying a section of vine with a few leaves and nodes. Cut about a quarter-inch below the node, which should be included in the cutting so that new roots can grow from it. Plant the cutting in a small container filled with moistened potting mix, making sure that at least one node is buried. Do not bury the leaves; remove them from the buried node if necessary.
Put the cutting in an area that gets bright, indirect light. Place a clear plastic bag over the top to seal in humidity, but remove it daily to let in some fresh air. The potting mix should be kept moist but not wet; you can do this by misting it.
It will take a few weeks before a new root system develops. You can test this by giving the cutting a gentle tug, and if there is resistance it means a root system has developed. If there is no resistance, continue caring for the cutting and be patient; the roots will eventually come out.
Conclusion
Njoy plants are pothos cultivars famous for their green and white leaf variegation. These climbing vines are low-maintenance plants native to East Asia, and thrive in bright, indirect light or partial shade. As with most plants, overwatering could lead to root rot. If you intend to propagate these plants, you can do so either in water or in potting mix.
Lemon lime philodendrons are tropical plants native to the rainforests of South America. Their botanical name is Philodendron hederaceum, and they are widely popular for their strikingly vibrant, greenish-yellow, heart-shaped leaves. The leaves grow to about eight inches long, while the stems reach almost 12 inches. If grown outdoors, they could grow even larger. In this article, you will learn more about the lemon lime philodendron and its care and propagation.
Lemon Lime Philodendron Care
When watering these plants, wait for the top half of the soil to dry out first, and be sure to water sufficiently. If the leaves are turning brown or wilting, it is an indication that the plants are under-watered. In this case, increase your watering until the plants have recovered, but avoid over-drenching them. If the plants experience drought too often they may not survive, so make sure their location is suitable.
Yellowing leaves are an indication of overwatering, but you may not spot this easily because the natural color of these plants might mask the yellowing somewhat. You will need to pay close attention to your plants’ soil to assess the level of moisture and know when to water them.
These plants prefer well-draining, moist and loose soil. Ideal types include traditional potting mix, or those mixed with peat. The soil must be loose enough that the roots can grow easily; avoid sandy soil since it is not sufficiently loose. The plants can be repotted at the end of winter and the beginning of spring. Although they are tolerant of being rootbound, it is advisable to repot them to avoid stunted growth.
Lemon lime philodendrons like temperatures of 65 to 80 degrees Fahrenheit during the daytime and 55 degrees Fahrenheit at night. Keep them away from drafts, especially during winter, since cold temperatures could cause stunted growth.
Despite being tropical plants, they can survive the humidity levels in an average household. If the humidity is increased, the leaves will grow larger and the overall growth will increase. Misting the plants occasionally can improve the ambient humidity level.
Fertilize the plants monthly during the growing seasons of spring and summer, and every other month during the other seasons. Use standard fertilizers, but only at half- or quarter-strength.
Trim off dead, damaged and discolored leaves using scissors or shears. Do not rip or twist the stems and leaves, as this could scar the plants. When pruning the plants to reduce volume, trim only above the leaf nodes to stimulate growth. Make small cuts near the leaf nodes if the plants are not growing many leaves.
Use a clean, damp cloth to wipe away the dust that collects on the plants, so the leaves can breathe through clean pores and to avoid the presence of pests. These plants are toxic when ingested, so keep them away from pets and small children.
Lemon Lime Philodendron Propagation
Propagate your plants during spring or summer, as this is the time they are most active. Cut the stems with sharp scissors to avoid scarring the plants. Place the stems in water or moist soil and they should begin to root easily. If propagating in water, once the roots grow you can transfer the plants into moist soil. The stems should develop new growth in a matter of three to four months.
Common propagation methods
Stem cuttings
First, cut the upper part of the stem of a healthy plant using sharp scissors, including at least three aerial roots or nodes. Remove the leaves from the lower four inches of the stem cutting, keeping at least three leaves on the upper side. Plant the stem cutting in a potting mix or moist soil.
Place the pot in a warm area with indirect light. New shoots will grow within three months. You can also grow the cuttings in a jar of water and transfer them into the soil once the root system develops, but this may take two to three months.
Air layering
In this method, the leaves are removed from a section of stem that has nodes. The nodes are placed in a bag of soil and the bag is tied, but the stem remains attached to the plant and the soil is kept moisturized. The shoots start to grow from the layered stem and this piece of stem may then be separated from the mother plant and transferred to another pot. Use gloves and wash your hands after handling the plant to avoid any toxic effects.
Conclusion
Lemon lime philodendrons are popular among plant growers because of their striking heart-shaped leaves. They are tropical plants native to the South American rainforests, and need sufficient watering and bright, indirect light. They are easy to propagate, either through stem cuttings or by air layering.
Many plant enthusiasts get confused between pothos and philodendron plants. This is understandable as the two are similar in appearance and both belong to the same family, Araceae. However, these plants belong to different genera: pothos belong to the Epipremnum genus, while philodendron plants belong to the Philodendron genus. In this article, we will discuss the features of, and differences between, pothos and philodendrons, and how best to distinguish between the two.
Pothos
Scientific/botanical name: Epipremnum aureum
Common names: Pothos, devil’s vine, golden pothos, devil’s ivy, hunter’s robe, taro vine, money plant, silver vine
Native areas: Southeast Asia, China, Australia, New Guinea, the Indian Subcontinent, various islands of the Pacific and Indian Oceans
Plant type: Vine
Mature size: 20 to 40 feet long; three to six feet wide
Soil type: Moist and well-draining
Soil pH: Neutral to acidic
Bloom time: Does not flower
Hardiness zone: 10-12 USDA
Toxicity: Toxic to pets and humans
Pothos plants are also often called devil’s ivy because it is so hard to exterminate them. They can survive in almost all conditions, including dry soil and low light. These plants can tolerate a certain amount of direct sunlight without burning, but if exposed the entire day, their foliage could suffer from sunburn. They prefer bright, indirect sunlight and like to be watered regularly. The more sunlight they receive, the more variegated their foliage will become.
Pros and cons
Pros
Pothos plants are easy to propagate.
They are low-maintenance.
They purify the air, removing pollutants such as benzene, formaldehyde, carbon monoxide and xylene.
They increase ambient humidity.
Cons
Pothos plants are toxic and mildly harmful to animals and people. In humans, they can cause skin irritation, diarrhea and swelling of the lips, tongue and throat.
They can be expensive, especially the rare varieties like silver/satin pothos, Cebu blue pothos, and jessenia pothos.
Mature size: Eight to 20 feet tall; one to six feet wide
Soil type: Loose and well-draining
Soil pH: 5.0 to 6.0
Bloom time: May to July, upon maturity at 15-16 years
Hardiness zone: 9-11 USDA
Toxicity: Toxic to pets and humans
There are two types of philodendron plants: the climbing type and the upright type. The climbing varieties have heart-shaped leaves with a deep green color, and can be trained to grow around windows, poles or down the sides of containers. The upright types usually have larger leaves with a more compact habit. This type is also slower growing, but can become huge if given the right care.
The upright philodendron is more tolerant of light than the climbing type. The latter prefers dappled light similar to that in their natural habitat, the tropical rainforests. Colored-leaf varieties prefer bright light for their best colors to appear, and when in too much shade their colors tend more toward dull green. Surprisingly, there are about 450 species of philodendron, most of which start as vines and eventually transform into epiphytes, or plants that live on other plants.
Pros and cons
Pros
Philodendrons add humidity to the air.
They are good at absorbing toxins.
They improve air quality.
They have large, waxy leaves that make good dust trappers.
Cons
These plants are poisonous to humans and pets. Ingesting them could cause burning and swelling of the lips, tongue and throat, as well as vomiting and diarrhea.
They are expensive, particularly the rare varieties such as variegated philodendron minima.
Philodendron varieties
Lacy tree philodendron
Heartleaf philodendron
Red leaf philodendron
Hope selloum philodendron
Imperial green and red philodendron
Prince of orange philodendron
Pink princess philodendron
Philodendron brasil
Philodendron micans
Burle marx philodendron
Xanadu philodendron
Philodendron brandtianum
Philodendron birkin
Rhaphidophora tetrasperma philodendron
Pothos vs Philodendron
Below are some differences between a pothos and a philodendron:
The overall shape of the leaves
The leaves of a heart-shaped philodendron have a more pronounced heart shape at the top. They also have a longer, skinnier, spout-like tip. Meanwhile, pothos leaves have shorter and less pointed tips, and they are less uniform in shape. Pothos leaves have a deep, well-defined ridge at their center because of the thick and ridged petiole, which philodendrons do not have.
The texture of the leaves
Pothos leaves are shiny with a wax-like finish that creates a subtle waxy glow when they reflect sunlight. The leaves are also thicker, and their tops are slightly bumpy and more textured than the undersides. Meanwhile, philodendron leaves have a softer texture with a smooth matte finish, allowing them to absorb light effectively.
Growth habits and new foliage
New pothos leaves will uncurl themselves from the current last leaf on the vine. Meanwhile, philodendron leaves extend from the part of the vine protected by a cataphyll, which is a small modified leaf that acts as a thin and waxy protective layer over the delicate new leaf. This is a unique philodendron trait, so if you cannot identify the plant by its leaf shape, this is what you should look for next.
New philodendron leaves display a pink or brownish tint, darkening to their true color as they mature. Pothos plants, on the other hand, do not have such fancy new foliage, and their new leaves will reveal a slightly lighter green color than older ones, quickly changing color to match them upon maturity. However, they will not be a completely different color like those of philodendrons.
Aerial roots and stems
Both pothos and philodendrons develop aerial roots that absorb moisture and nutrients while supporting the plants as they climb. These roots grow from the nodes and act as energy powerhouses, pulling moisture and nutrients out of the air to feed new growth.
Philodendrons’ aerial roots occur in clusters and are thinner and stringier than those of the pothos. They also resemble an above-ground root system.
The two plants also have differences in their stems, in that pothos stems are thicker than those of philodendrons. Pothos stems are the same color as the leaves, while philodendron stems are more dainty and have a brownish-orange tinge.
The petiole
Petioles are short stems that attach the leaves to the main vine of the plant. Pothos plants have thicker petioles than philodendrons, and they are the same color or slightly lighter green than the rest of the foliage. These petioles lead to the deeply grooved ridge that runs parallel with the leaf stem. Meanwhile, philodendron petioles are rounder and smoother down the entire length and into the leaf, and appear a more brownish color than the leaves.
Conclusion
If you are a first-timer plant grower and you cannot decide between pothos or philodendron, consider the following:
Choose pothos plants if:
You prefer growing plants that are easy to maintain.
You want your indoor plants to purify the air and get rid of pollutants.
You like plants that have aesthetic appeal.
Choose philodendrons if:
If you intend to have a large collection, since philodendrons come in many varieties.
You would like to propagate both vines and self-heading plants.
Basil plants, with the scientific name Ocimum basilicum, are culinary herbs native to the tropical regions of Central Africa and Southeast Asia. These tender plants are extremely widely cultivated, being major ingredients in cuisines across the globe. They belong to the family Lamiaceae, and common types include sweet basil, lemon basil, purple basil and Thai basil. If you want to propagate Basil yourself, read on and familiarize yourself with the steps for successful Basil propagation from seed.
How to grow basil from seed
Materials you will need:
Basil seeds
Newspaper
Plastic dome
Seed starting mix
Plastic tub
Starter pots with drainage holes
Sink sprayer
Sunny window
Variable height light source
Timer
Fan
Process:
First, gather all the materials into your working area.
Fill the plastic container with dry soil, add some water and mix until the soil is moist enough that you can hold it in your hands. Add a little water at a time and be sure to mix well.
Fill the starter pot with moistened soil to a half to one inch below the top.
Plant some seeds in each cell. Plant extra seeds as a precaution in case some seeds do not sprout.
Cover the seeds with dry soil to the depth of about twice the size of the seeds.
Mist the seeds or spray lightly with the sink sprayer to ensure that the seeds have good contact with the soil.
Put a dome over the seeds to lock in moisture. If this is kept in place, there is no need to water the seeds again after they start to sprout.
Place the seeds in a warm area with a temperature of about 70 degrees Fahrenheit and monitor them every day. Basil germinates easily, and within five days you should already be able to see sprouts. It may be earlier or later, however, depending on the environment.
Remove the dome when you see sprouts and add supplemental lighting to promote growth so that the seedlings do not become leggy.
Ideal seed growing pots
Plastic seed starting trays
These trays are easy to clean and are reusable; you may also opt for individual small plastic pots.
Cowpots
These starter pots are made of cow manure and will decompose faster than peat pots, which do not always decompose. These pots provide young plants with organic fertilizer as they decompose.
Recycled paperboard pots
These eco-friendly pots will tear away before planting and lessen any root disturbance, easing the transition into the garden.
Caring for basil seedlings
Water the plants properly.
Ideally you should water the seedlings twice a week, but this may depend on the environment and humidity levels. Water them if the top of the soil looks dry. You should water from the bottom to benefit the roots; if the top of the soil is too wet it could encourage mold growth.
Put the pot into a bowl of water and let it draw up moisture until the top of the soil is wet. Then, remove the pot and place it back into its saucer. If the saucer is big enough, you could fill the saucer and when the top of the soil is wet just pour out any extra water from the saucer. Once the seedlings are older, you can use a soil moisture meter to check whether your plants need to be watered.
Provide enough light.
The new plants should get at least six hours of sunlight through the window, because basil plants enjoy the sun’s warmth. Indoor basil plants may need grow lights; an ordinary light bulb may also do the trick. If using artificial light, 12-16 hours is the recommended exposure time.
Position the plants about three inches below the grow lights and as the seedlings grow you can raise the lights. Put the lamps on a timer so that they turn on automatically. If the seedlings are away from windows, set the timer to a full 16 hours.
Provide air circulation.
For good air circulation, direct a small fan on the lightest setting toward the seedlings, so they flutter slightly. Put this on the same timer as the light, or turn it on for just a few hours daily.
If you do not have a fan, make sure you leave ample space between the seedlings. A space of at least six inches between the pots is ideal, and you should rotate the pots regularly. Gently brushing your hands over the tops of the seedlings will simulate the movement caused by wind, and will help the seedlings to stay strong.
The right time to plant basil is around two weeks after the last frost, when the soil is between 50 and 70 degrees Fahrenheit. It can also be planted during summer. Plant basil in areas that get at least six to eight hours of sunlight daily. Basil seeds start to germinate seven to 10 days after planting, and should be ready for harvest within three to four weeks.
Conclusion
Basil plants are popular across the world, thanks to their culinary uses. Some common varieties of this fragrant herb include sweet basil, purple basil, lemon basil, cinnamon basil and Thai basil. You can successfully propagate basil plants from seed by following the steps laid out above. It usually takes seven to 10 days for the seeds to germinate, and the plants will be ready for harvest in a matter of weeks.
The Philodendron Imperial Green is a non-vining plant that can catch anyone’s attention with its glossy, green leaves, which grow directly from its main stem. It is quite popular because it is not very expensive and is easy to grow and care for.
In this article, we will discuss the cultural care requirements of this plant and how to propagate it.
So, if you are thinking about adding the Philodendron Imperial Green to your plant collection, keep reading.
Philodendron Imperial Green Care Requirements
Water
One of the most important aspects of caring for Philodendron Imperial Green is good watering techniques. It may seem easy enough to simply water the plant to keep it alive, but it is in fact quite tricky to find the correct balance between keeping the plant hydrated and not overwatering it.
It is best, for this plant, not simply to follow a set watering schedule, but rather to take the local climate and weather into account. Test the soil by touching the top two inches finger. If the top two inches of soil are dry, water the plant. If the soil is still moist or damp, wait a few more days and check the soil again before watering it.
Remember that the plant is better off underwatered than overwatered. An underwatered plant is easier to revive than an overwatered one, especially if the roots have already become compromised and are dying or rotten.
When you do need to water the plant, make sure you soak all of the soil with water so that all the plant’s roots get wet. Continue watering until you see the excess water flowing from the drainage holes at the bottom of the pot. This means that even the deepest roots are getting water. The drainage holes at the bottom of the pot need to be large enough to help the soil drain properly.
The plant’s leaves are not sensitive to impurities in tap water, so it should be completely fine to use that. However, look out for browning on the tips and edges of the leaves, as these are signs that the plant does not like the water you are giving it. In this case, try giving it distilled or rain water.
Light
This plant prefers bright, indirect light, such as near an east- or west-facing window. If all you have available is a south-facing window, you can diffuse the light using a sheer curtain. This will ensure that the light that reaches the plant is not as harsh as before. Refrain from exposing the plant to direct sunlight, as this can cause sun damage.
It is important to make sure your plant gets the right amount of light, because a lack of light results in stunted growth and increases the possibility of overwatering, because the soil does not dry up fast enough.
One tell-tale sign of a plant that is not getting enough light is when the plant has not developed new leaves for a couple of months.
If the plant is situated near a window, rotate it every few days so that all sides of the plant get their fair share of sunlight.
Soil
Philodendron Imperial Green wants its soil to be well-draining. If the soil is compact and heavy, it retains moisture a little too well, and you do not want that for your plant because the roots will end up standing in soggy soil.
Make sure the soil is airy and porous so that excess water simply passes through it. You can buy commercially available aroid mix, or you can make your own mix by combining one part potting soil and one part perlite/coarse sand, or one part orchid mix with one part peat and one part perlite/coarse sand.
Nevertheless, soil can become compacted over time, especially if you allow it to become too dry between waterings. In that case, you may need to change the soil.
Humidity
This plant needs humidity between 50 and 60%, but it is one of the few plants that can tolerate humidity as low as 40%.
Do not let the humidity become lower than 40%, as this can lead to the leaves curling and turning brown. You can raise the humidity in the room by placing your plants close to one another so they create a microclimate. You can also use a water tray by placing some pebbles and water in a tray and standing the pot on top of it. The water will evaporate and increase the humidity around the plant. You can also just place the plant in the kitchen or the bathroom, which are the most humid rooms in any house.
Temperature
Philodendron Imperial Green survives best in temperatures between 60 and 85 degrees Fahrenheit. If the temperature is too low, the plant will stop growing and suffer from cold damage. Drafts are especially damaging to plants, be they hot drafts from heating vents or cold drafts from air conditioning. If the plant is placed where a draft hits it constantly, its leaves will turn yellow or brown due to drying out.
Pruning
This plant does not require pruning at all, unless you wish to remove any dying leaves before they simply drop off the plant themselves.
Toxicity
This plant can be mildly toxic when ingested by humans or pets. Ingestion can cause gastrointestinal upset. Contact with the skin can also trigger a localized reaction in some people, so if you are one of those people you may want to handle the plant with gloves.
Philodendron Imperial Green Propagation
The best and most effective way of propagating this plant is by stem cuttings. When cutting off a stem to propagate, make sure there is at least one node included. Use sterile scissors to avoid contaminating it with bacteria or fungi.
You can choose to plant the cutting directly in a pot with soil, or you can root it in water for a few weeks before planting it in soil.
Though both methods can be used, water propagation is usually more successful due to the presence of new roots before the cutting is planted.
How big can the Philodendron Imperial Green get?
This plant can grow several feet in height and can spread out about three feet horizontally. It can be an indoor plant, but it does take up quite a lot of space.
Conclusion
The Philodendron Imperial Green is a beautiful plant that is relatively low-maintenance. It is quite popular for its large leaves that fan out from its central stem.
This plant needs moderate humidity, well-draining soil and bright, indirect light to remain happy. You only need to water it when the top two inches of soil are dry to the touch. Keep the room temperature between 60 and 85 degrees Fahrenheit, and make sure there are no hot or cold drafts near the plant.
The Peperomia Rana Verde is a hybrid semi-succulent that is a tropical, perennial native of South America.
“Rana verde” literally translates to “green frog” in English, which probably pertains to the fact that the plant’s small, round leaves resemble little green frogs.
The plant has small orange flowers that do not really stand out as much as its pretty, deep green leaves.
This plant is relatively easy to grow and care for, making it a great choice as an indoor plant for novice gardeners.
In this article, we will discuss more about the Peperomia Rana Verde, so if you are thinking of adding this plant to your collection, keep reading.
Features of the Peperomia Rana Verde
Height and weight
The Peperomia Rana Verde only grows to be four to six inches tall, with roughly the same spread. Being quite small, it can easily be moved from one spot to another; it only weighs around one pound when fully grown.
Foliage
The plant’s leaves stay the same deep green color all year round, provided you give it the proper care. If you notice a change in color, such as yellowing, there is something wrong with your plant that you may need to address.
The plant’s main is round and smooth to the touch, and will branch out up to 12 times. There can be up to 14 leaves on one branch, and the leaves are broad, oval and usually flat. The top side of the leaves is glossy, while the underside is matte. There is also a unique venation pattern on the leaves.
Flowers
As mentioned above, the flowers of this plant are fairly inconspicuous. The best time to see them is in the summer, when they present as orange spikes that are less than an inch long. They do not have any particular scent.
Temperature tolerance
Because this plant is from South America, it is more at home in tropical climates, but that does not mean you can just leave it out under direct sunlight for long periods. It will dry out and the leaves will become dull. Neither extreme of temperature is appreciated by the plant.
Drought resistance
The Peperomia Rana Verde is a semi-succulent, which means that it can tolerate drought better than most other plants, but it is not as drought-resistant as a full succulent such as a cactus. The plant can store water in its stem and leaves, which allows it to stay well-hydrated if you forget to water it for a few days.
Growth
This plant is quite small relative to other plants, so do not expect it to undergo too many physical changes within a year. It needs a patient caretaker who understands that its growth depends a lot on its genetics, age and environment.
Toxicity
Another reason this plant is a good choice to keep indoors is the fact that it is non-toxic, which is important especially if you have pets or young children. Still, it is imperative that you keep the plant out of the reach of pets and children, just to be safe.
Peperomia Rana Verde Care Requirements
Light
This plant may come from the warm countries of South America, but it does not actually like being under the sun for very long. In fact, it prefers bright, indirect light in order to thrive. Exposing it to morning sunlight for a couple of hours is sufficient.
If keeping the plant indoors, keep it near an east- or west-facing window. If a south-facing window is all that is available, you can try to diffuse the light using a sheer curtain.
Make sure you turn the plant every couple of days so that all sides of the plant get their fair share of light.
Water
This plant is semi-succulent, which means it can go without water for longer than most plants. Nevertheless, try not to forget to water it when you should.
The best way to know when your plant needs to be watered is to touch the soil in the pot. If the top inch of soil is dry, water the plant, but if the top inch of soil is still damp, wait one or two days before checking it again.
Usually, once-weekly watering is good for the summer, while every two weeks is all it needs during the winter.
You need to be diligent about how you water, because overwatering this plant does way more harm than underwatering. If you let the plant’s root stand in soggy soil for long periods, it can lead to root rot and death.
Soil
This plant needs well-draining, airy and porous soil. This is so that the soil does not retain too much moisture and lets excess water flow easily out. The soil should also allow air to flow through and reach the roots. Both these factors are important to avoid root rot.
There are commercially available succulent soil mixes, but you can also make your own mix by combining two parts peat to one part of either sand or perlite. Make sure the soil pH is somewhere between 6.0 and 7.3.
Pot requirements
Avoid using plastic, steel or glazed pots. Choose unglazed terracotta or clay, because these are porous materials that will allow air and water to penetrate more easily.
Make sure the pot has drainage holes at the bottom so that any excess water from watering will simply flow out and reduce the risk of overwatering.
Temperature
As mentioned above, even though this plant is native to South America, it does not do well in constantly hot temperatures. It prefers temperatures between 65 and 75 degrees Fahrenheit. Never let the plant stay in an environment that is below 50 degrees Fahrenheit.
Humidity
Try to keep the plant in medium humidity environments. Never let it dry out, but also do not let the humidity get too high. High humidity can make the environment a little too conducive to fungi.
If you need to increase the humidity level, try using a pebble-water tray under the plant’s pot.
Fertilizer
This plant prefers a moderate liquid fertilizer once a month during its growth season in the spring and summer. Refrain from fertilizing in the fall or winter. Try not to get any fertilizer on the plant’s leaves, as it can burn the leaves on direct contact.
Pruning
This plant grows slowly and does not require constant pruning, but you can remove some of its lower branches during the growth season in the spring and summer.
Peperomia Rana Verde Propagation
Propagation using leaves
First, prepare a tray or pot with your soil mix and make sure the gardening tools you are about to use have been sanitized.
Cut off a leaf from the plant using sterile scissors.
You can choose to use the whole leaf or cut the leaf into two. Make a hole in the soil a half-inch deep and put the leaf inside it. Cover the hole with a little soil.
Place the pot or tray in a spot where it can get its ideal temperature and light requirements.
Water as needed and, if you have done everything correctly, it should start sprouting quite soon.
Propagation using stems
This method is easier and has a slightly better success rate than leaf propagation.
Cut off the tip of a stem that is around three inches long. Make sure the stem has some leaves on it.
Have a pot filled with soil mix ready, plant the cutting in a hole in the soil and cover the base with more soil.
Place the pot in a spot that provides the plant’s ideal growing conditions, water as needed, and wait for roots to sprout.
Conclusion
The Peperomia Rana Verde is a small, semi-succulent plant that is low-maintenance, which makes it a good choice for beginner gardeners.
It has beautiful deep green, oval-shaped leaves on short stems.
All this plant needs is well-draining and airy soil, bright indirect light, water when the top inch of soil gets dry, average humidity, temperatures between 65 and 75 degrees Fahrenheit, and a porous pot with sufficient draining holes.
Provided you are able to give the plant these basic needs, you will be rewarded with a gorgeous houseplant that adds sophistication to any space.
Alocasia odora variegata is a popular indoor plant due to its striking, variegated foliage. Some of its common names include Alocasia odora ‘Okinawa Silver’ and dwarf Alocasia odora variegata. These beautiful cultivars of the Alocasia odora plant are native to the tropical and subtropical areas of Asia and Eastern Australia. Get to know more about these low-maintenance beauties in this article, including how to care for and propagate them.
Alocasia Odora Variegata Features
These plants have large, heart-shaped leaves with white patches on a smooth, green surface. They have different patterns and ratios of white to green, which makes each one unique. The leaves grow in a single arrangement on succulent stems, and under the correct care in the right environment, can reach up to eight feet high and four feet wide. These evergreen plants maintain their good structure throughout the four seasons.
Alocasia Odora Variegata Plant Care
Since these plants have tropical origins, they are not tolerant of colder environments, especially if the temperature drops below 60 degrees Fahrenheit. They do best in warm, summery climates.
Alocasia odora variegata is a moisture-loving plant that prefers some extra humidity in the air. However, if you mist them, make sure you do not leave stagnant water on the surface of the leaves, as this could attract pests and diseases.
These evergreens like to be kept moist, but make sure you do not water them until the top two inches of soil are dry to the touch. Check the moisture level by pushing your finger into the soil, or use a moisture meter. Aim for moist but not soggy soil, since waterlogged soil could encourage root rot.
They prefer indirect light, although they can tolerate a few hours of direct sunlight in the early morning and late afternoon. However, too much direct sunlight can damage the foliage, so be sure not to over-expose the plants to unfiltered sunlight. If you keep the plants outdoors, you can use a shade cloth to shield them from the harsh rays of the sun.
These plants, although more popular for their foliage, can bloom during the spring and summer, given the right care and conditions. The flowers have a pale peach spathe and spadix.
They are not disease-resistant, and are prone to fungal infections like crown, stem and root rot, as well as fungal leaf spot. These fungal diseases result in pale, unhealthy plants with yellow or brown spots.
The roots could also be affected and may turn brown to black as they die. If this happens, isolate the plant, remove it from the soil and prune off all the diseased or dying parts, including leaves, stem and roots. Transfer the plant to a new pot with fresh soil and apply a fungicide. Keep the plant at a safe distance from your other plants until it has completely recovered.
These plants are also susceptible to pests like mealybugs and spider mites. Use insecticidal soap or neem oil to eradicate them, or opt for a commercial pesticide if there is a severe infestation.
Alocasia odora variegata is easy to maintain and does not come with any special instructions, which makes it a constant favorite among plant enthusiasts. However, be sure to keep it away from pets and children because the leaves are poisonous. Ingesting the leaves could cause a swollen tongue, stomach ache and skin inflammation.
You may opt to repot your plants each year, moving them to larger pots with fresh, well-draining soil. The pots should have drainage holes and preferably be made of clay. Trim or prune the plants around spring or summer and remove dried or dead leaves from the bottom. Be sure to wipe them with water or oil to keep the foliage clean and healthy and stimulate new growth.
Alocasia Odora Variegata Propagation
These plants are propagated by dividing their rhizomes and planting each separately. Ideally, propagation should be done during the spring or summer after the dormancy phase.
These are the steps for propagating this plant:
First, remove the mature plant from its pot and dust off the excess soil.
Divide the plant by its rhizomes, after which you can put the parent plant back into the pot or replant it in a new one.
Next, plant the divided rhizomes into separate pots filled with moist, well-draining soil with a pH of 5.6 to 7.5 (acidic to neutral).
Make sure that you plant the rhizomes upright. Press the soil around them so they do not move or fall to the side.
Water them as needed and apply fertilizer around the base, at least six inches away from the stems.
Finally, provide them with moderate temperatures and sunlight for fast and steady growth.
By the third to fifth week, roots will start growing on the rhizomes. Check their development by pulling gently at the plant; if there is resistance, it means the roots are developing well. Continue watering and feeding the plants and be sure to protect them from diseases and pests for optimal health and growth.
Conclusion
Alocasia odora variegata is a beautiful cultivar of the alocasia plant, native to the tropical areas of Asia and Eastern Australia. These variegated plants prefer bright, indirect sunlight and do not do well in dry conditions. They prefer high humidity, and you should ensure that they are adequately watered, groomed and fertilized for optimal health and growth.
Philodendron pedatum is a perennial vine that has oak-shaped leaves with multiple lobes. These tropical plants are native to Venezuela, Brazil, Bolivia, Ecuador, Guiana and Colombia, and are often confused with other philodendrons when in juvenile form. They are hardy climbers and are easy to care for. You can also propagate them using various methods, which will be discussed later in this article.
Philodendron Pedatum Features
These plants are good climbers, as mentioned above, and they thrive indoors. As they mature, the leaves become bigger and more beautiful. Being climbers, these plants produce aerial roots from their stems so they can attach themselves to their host, or moss pole. There are also non-climbing varieties that produce large, lobed leaves well-suited for interior landscaping.
These plants are called aroids because they belong to the Araceae family, and are distinguished by their unique flower structure. They are low-light plants since rainforests are their natural habitat. Their multi-lobed leaves measure around nine inches in length and are usually dark-green with a tinge of brown or maroon.
Philodendron Pedatum Care
Water the plants regularly to keep the soil consistently and evenly moist during the spring and summer. These plants can tolerate soggy soil, but it is not encouraged as it could cause root rot. Watering should be little but often for these climbers, which means you should water frequently with small amounts instead of sporadic, heavy watering. During late fall and winter, wait until the soil has almost completely dried before watering again.
If you notice that the leaves are yellowing, you may be overwatering your plant, while brown and dry leaves indicate that the plant is getting insufficient water.
Expose your philodendron pedatum to at least six to 10 hours per day of bright, indirect light. These plants can tolerate lower light, but are likely to experience stunted growth. Avoid placing the plants under direct sunlight so that the leaves do not get sunburn.
These plants thrive in high humidity environments with an ambient level of 60 percent or more. However, they can also tolerate drier conditions, which makes them easier to maintain than some other species. Add moisture to their environment with the use of humidity trays. You can also mist the leaves regularly with purified water to keep them healthy and hydrated.
Temperature is an essential factor when caring for your plants, and you should ensure that it remains above 60 degrees Fahrenheit. Do not place them near single-pane windows during cold weather, and keep them away from heaters or vents.
Philodendron pedatum prefers fast-draining soil to accommodate frequent watering. The ideal soil mix for them is a blend of peat moss, pumice, worm castings and coir that provides good airflow and moisture retention, as well as fertilizing the plants with organic compounds. Avoid using soil that contains bark, since this can suffocate the roots. For a soilless potting medium, mix equal parts peat and sphagnum moss for optimal aeration and water retention.
Make sure that the planters you use for your plants have drainage holes. Without these, water may become stagnant which can result in root rot. If you use metal planters with no drainage holes, leave the plants in a nursery pot that fits inside the chosen metal one. You can then easily remove the plants for watering and this will allow proper drainage.
These plants need to be fertilized regularly, since they are fast growers. Liquid fertilizers derived from organic materials are safer and a more natural alternative. See to it that the fertilizer you use has a balanced nitrogen-phosphorus-potassium ratio, such as 10-10-10 or 20-20-20. You could also opt for DIY fertilizers such as coffee grounds.
Philodendron pedatum can be prone to pests like mealybugs, which can be kept at bay using insecticidal soap or neem oil.
These plants contain crystal raphides and calcium oxalate crystals that form fibers similar to asbestos. This means they are toxic, so be sure to keep them away from pets and children.
Philodendron Pedatum Propagation
These plants can be propagated using the stem cutting method. For successful propagation, take your cuttings below a root node or aerial root. Let the cuttings dry out for two days or become callused before you place them in clean water. Keep the water level just above the root nodes and replace the water weekly to avoid stagnation. You can use a rooting hormone for faster growth.
When the new roots are a few inches long, place a handful of soil into the water and stir gently until the soil sinks to the bottom. Repeat the process until the water is murky; this helps the roots transition from water to soil.
These plants can also be propagated by dividing the plant at the roots. When repotting, pull the base of the plant gently until the sections separate naturally. Untangle stuck roots carefully, and if certain roots are damaged, trim them down so that the remaining roots can still provide the necessary nutrients.
Conclusion
Philodendron pedatum is a tropical plant with attractive, multi-lobed leaves. These perennial climbers are native to South America and are fast-growing and easy to care for. They thrive in bright, indirect light but can also tolerate low-light environments, since rainforests are their natural habitat. They also love high humidity environments, and should be fertilized regularly. Provide your plant with these growing conditions and it will add a great aesthetic to your home.
Lemon-lime philodendron plants are popular houseplants native to the rainforests of South America. Their scientific name is Philodendron hederaceum lemon-lime, and they are also referred to as sweetheart vine, lemon-lime heartleaf philodendron, areum, philodendron scandens lemon lime, golden Brazil, philodendron cordatum lemon-lime, and philodendron domesticum lemon-lime. These tropical plants have vibrant, greenish-yellow, heart-shaped leaves and can grow about eight to 12 inches tall. For tips on how to care for or propagate this vibrant vine, keep reading.
Lemon-lime Philodendron Features
As mentioned above, these vines can grow up to a foot tall, and even larger if planted in free and open spaces. Their stems trail downwards in large numbers, while newer plants have more leaves growing from the base that give them a more compact, healthier appearance. The leaves are thin and heart-shaped, and are initially a solid bright pinkish-yellow, but as they mature the plants turn neon and lime green. These large vines are prolific and grow fast if rigid support is provided.
Although considered medium-sized plants, these philodendrons have stems that can grow as long as 12 inches or more. They may need to be trimmed to an appropriate length if you want the plant to maintain a particular size and shape.
Lemon-lime Philodendron Plant Care
Lemon-lime philodendrons thrive in bright, indirect light, although they can also cope with low light conditions. Avoid placing them in areas with direct sunlight as it will burn the foliage.
Provide water when the top 50 to 70 percent of the soil is dry. Water until you see the excess flowing out of the drainage holes of the pots, to ensure that the plants have been properly soaked. Discard any stagnant water that may accumulate in the pots. Keep the plants well-hydrated but never waterlogged, and do not expose them to harsh conditions.
Lemon-lime philodendrons are fine with regular household humidity, but they thrive best when the humidity is higher, and this encourages larger leaves. Mist the plants occasionally to increase the humidity around them.
These vines like temperatures between 65 and 80 degrees Fahrenheit during the day and around 55 degrees Fahrenheit at night. Keep them away from drafts, especially during the cold winter months.
Fertilize the plants monthly during spring and summer with a liquid fertilizer for indoor plants.
Keep these plants away from kids and pets, as the leaves are toxic. If ingested, they could cause swelling of the tongue and lips as well as stomach irritation and vomiting.
Prune off any dead, damaged, discolored or unhealthy leaves and stems using clean, sharp scissors. Trim stems just above the leaf nodes. Wash the leaves often to prevent dust and so that the leaves’ pores will not clog up.
For propagation purposes, take stem cuttings during spring or early summer and place the cuttings in water or moist soil.
The vines of these plants cascade downward, and their growth may slow when the plants are stressed due to undesirable growing conditions.
Lemon-lime philodendrons are rarely susceptible to pests and diseases, especially if kept indoors. However, they could still be invaded by spider mites, maggots and mealybugs. Check the leaves weekly for the presence of any pests. If you see them, eradicate them as soon as possible with pesticide sprays or insecticidal soap. Trim off any discolored, damaged and dead leaves using sharp scissors.
These plants grow quickly, especially in favorable growing conditions. Their speed of growth will depend on soil type, water, temperature and humidity.
Lemon-lime Philodendron Propagation
You can easily propagate these plants at home. Be sure to sterilize all the equipment that you use to prevent contamination and infection. Wear gloves to avoid injury and see to it that you propagate during the spring and summer seasons only.
First, cut the upper part of a stem with sharp scissors. Place it in potting mix or moist soil, and put the pot in a warm environment away from direct sunlight. You should notice new shoots and growth developing within three to four months.
Alternatively, the rooting can be done in water before transplanting the cutting to soil later.
Conclusion
Lemon-lime philodendrons are popular indoor plants also known as sweetheart vine and golden Brazil, among other names. These tropical vines feature heart-shaped leaves that turn neon and lime green as they mature. They thrive in bright, indirect light and need decent hydration and average to high humidity levels. Just make sure to keep them at a safe distance from pets and kids, because these plants are toxic.
String of hearts plants, with the botanical name Ceropegia woodii, are eye-catching hanging plants native to Zimbabwe, Eswatini and South Africa. These variegated plants only grow up to three inches tall, but their reach can be nine feet long! They are loved for their dark green leaves with variegated silver markings, and may also come in cream, pink and green patterned heart-shaped leaves. You can add to your string of hearts collection by applying any of the propagation methods discussed in this article.
Below are the common methods used to propagate string of hearts:
How To Propagate String of Hearts?
Water propagation
Water propagation is seamless and fun, because you can check on the progress of the roots and monitor their speed of growth. First, cut a couple of vines from the mother plant. Since the roots will grow from the same nodes where leaves grow from, you should have at least one node submerged in the water. Clip off the leaves from the nodes that will be submerged.
Next, pour room-temperature water into a propagation tube. Pop the tubes in water and place them in a warm spot where there is bright, indirect light. Check often and you will start to see roots developing in approximately two weeks, although it could also take longer, depending on the growing conditions and the time of year.
Change the water every two weeks, or when it becomes murky. Once the roots start growing, they will grow fast and there will be daily improvements. You can plant the string of hearts in soil once the roots are about half an inch long. Fill a pot with moist planting soil, make a hole, pop in the string of hearts and cover the base with soil.
Place a clear plastic bag over the newly-potted plants for about a week to keep the humidity high. This will help the plants transition from water to soil.
Soil propagation
Cut the strand, remove the leaves and prepare the cutting just as you would for water propagation, above. Prepare fresh potting soil (ideally succulent or cactus mix), moisten the soil and place the strands in it. The node without leaves should be under the soil, but do not bury it too deep. Dipping the strands in rooting hormone before planting them is optional, but useful.
Place the pot in an enclosure or clear bag to maintain high humidity, and check the soil regularly to ensure that it is constantly moist but not wet or waterlogged. The roots should emerge in a couple of weeks. As long as the stems are healthy, there is nothing to worry about, even if some roots take longer to sprout.
Laying cuttings on soil
With this method, it is important to make sure that the nodes are always touching the soil; you may have to secure them with paper clips. The soil should always be moist, so mist it regularly to maintain moisture levels. After a few weeks, you will notice the growth of roots at every node.
Propagation in sphagnum moss
Soak your sphagnum moss with water and place it in a clear container, or any container that you can place in a clear bag and cover with clear film. Take your cuttings – you can use whole strands or small cuttings. Cut a little bit from the node on both sides, but spare the leaves on the node. For whole strands, you do not have to cut off the leaves.
Next, place the strand or cutting on the soaked moss and tuck it in a little so that the nodes touch the moss. Close the container and place it in a warm area with bright, indirect light. Open the container occasionally to provide fresh air and check on the roots.
You should see some growth after one week. Once the roots are half an inch in length, you can transfer the plants to soil. This method is easy and fast with a high success rate. It is the middle way between water and soil propagation, and combines the benefits of both methods.
Looping the vines back into the soil
First, ensure that the soil is moist by watering the mother plant. Take a strand and loop it back into and across the soil, but do not cut the strand. Secure the strand so that the nodes are properly in contact with the soil and the leaves are facing up. Use bobby pins or paper clips to keep the strands in place.
Keep the soil’s top layer constantly moist until the plant has roots and becomes anchored. You can do this by misting with a spray bottle. Do not keep the soil wet for longer than necessary, as it could affect the mother plant.
This method is ideal if you want to fill out the mother plant by adding to it. It takes more time than the other methods and you need to be more hands-on, but the results are ideal.
Propagating from tubers
Aerial tubers that form along the strands can be planted in soil to produce new vines. Keep the tubers attached to the vines and press them into the moist soil. In a few weeks, the tubers should start to have roots and you can cut the vine from the mother plant.
Propagating from seeds
You can also propagate these plants using the seeds produced by their flowers, which look like flamingo heads. First, collect the seeds and plant them in moist soil. Keep them in a warm and bright space and ensure that the soil is moist but not damp. After a couple of weeks, you should see new root growth.
Propagating from a single leaf
Place the leaf directly into the soil, water or sphagnum moss. Maintain moisture but ensure that the leaf remains dry; it will rot if it is wet for long. The leaf you will use should be a healthy one.
New roots should appear in a couple of weeks, but the leaf should also be able to produce a tuber. This could take a few months. This method does not have a high success rate, and although a single leaf could produce roots, it may not go beyond that and you might end up with an unhealthy single-leaf plant.
When is the best time to propagate a string of hearts?
The best time to propagate a string of hearts is during the growing season, which is spring. This will ensure that you will get the most out of your newly propagated plants, although you can propagate them year-round.
Conclusion
String of hearts vines are sought-after indoor plants with attractive, variegated leaves. They can be grown near windows where there is bright, indirect light, and thrive in hanging baskets. These beauties, native to Africa, can be propagated using various methods, such as soil, water, or sphagnum moss. Their tubers, seeds and leaves may all be used for propagation.
Cissus discolor plants, commonly named rex begonia vines, belong to the family Vitaceae. Also known as tapestry vines, these plants are native to Southeast Asian countries including Vietnam, Thailand and Indonesia. These herbaceous vines have dark green leaves with mottled white markings, and dark red, angled stems. They are popular indoor plants but are quite difficult to care for, so be sure to pay attention to their requirements for optimum health.
Cissus Discolor Plant Care
Cissus discolor prefers bright, indirect light or filtered light. It thrives in warm temperatures, and does well when placed in an east- or west-facing window with temperatures around 70 to 80 degrees Fahrenheit. During the winter, its ideal temperature is around 65 to 70 degrees Fahrenheit.
These plants do not like sitting in dry soil; if they do, they will quickly wither. See to it that the soil does not dry out completely between watering. To check if it is time to water them, stick your finger at least an inch into the soil. It is time to water if the soil feels dry and the pot starts to feel light, but make sure that excess water can drain out.
Water your plants sparingly during winter and wait for the soil to dry out between watering, but do not fertilize. Misting will help them stay healthy by increasing their humidity. Mist at least daily, especially in dry periods and in winter. You could also use a humidity tray or a humidifier, or place the plants with other humidity-loving plants, since grouping them together can increase humidity.
Cissus discolor plants require well-draining, nutrient-rich soil. The ideal soil mix for them is about 50 percent regular potting mix, 10 percent peat moss and 40 percent perlite or pumice for extra drainage. Fertilize at least every three to four weeks during spring, summer and fall, and transfer the plants to new pots at least every two years.
These climbing vines should be trimmed to help shape them as they grow on a pole, trellis or in a hanging basket.
Cissus Discolor Propagation
Cuttings are the best way to propagate these plants. You can take the cuttings when grooming your plants during early spring or late autumn. When choosing the cuttings to propagate, select those stems that are partially woody, and avoid those that are still deep red or completely tan in color.
Steps for propagating with cuttings
First, dip the cuttings in root hormone powder and plant them in porous soil. Use regular potting soil mixed with peat and sand.
Next, water the cuttings and cover them with a clear plastic bag. Be sure to poke several holes for ventilation.
Place the pots near a heat source and monitor them daily to make sure the soil does not dry out. In about four weeks you will begin to notice the growth of roots.
When new growth appears, remove the plastic bag. A month after removing the plastic, the young plants should be ready for transplanting to new pots. Three to six plants may grow together in a large pot.
Cissus discolor plant features
Height and spread – Average height is three to six feet, but these plants can reach up to 10 feet. The spread is about six to 20 inches.
Leaves – Each mature leaf is about three to five inches long and two to four inches wide.
Flowers – The plants have small, yellow-to-off-white flowers that bloom on warm days.
Toxicity – These plants are non-toxic, but ingesting them could have adverse effects so keep the kids and pets away from them.
Conclusion
Cissus discolor plants, or rex begonia vines, are sought-after among plant growers because of their dark green, shiny leaves that have pearlescent silver markings and red undersides. These plants can grow up to six feet, but can be difficult to care for, so utmost attention should be given for them to flourish. Most important for these herbaceous vines is high humidity and well-draining soil.
The Silver bay aglaonema is a low-maintenance plant that can survive relatively long periods of time without being watered. It also has no problem being kept in the shade or a dimly lit room. It has been observed to help with air purification, clearing out gases like formaldehyde and benzene.
This plant only needs to be watered once every two weeks, and likes temperatures between 65 and 85 degrees Fahrenheit. It likes medium to high humidity levels, and can be propagated through cuttings, seeds and tissue culture.
To learn more about the silver bay aglaonema, keep reading.
Introduction to Silver Bay Aglaonemas
These plants come in all sizes, which makes them very flexible in terms of where you can place them inside your home. They can be small enough to sit on tables or shelves, but they can also grow up to four feet tall and should then be placed on the floor.
These plants are native to the tropics of Asia, and although they grow faster when they get a lot of light, they can also do fine in low light.
The leaves of this plant can be either green or silver, with variegations. Larger aglaonemas can have leaves up to a foot long. The leaves nearest the base of the plant are the most mature, and will turn yellow and wilt due to the plant’s natural maturing process. This should not be cause for concern.
If you want the plant to bloom you may need to expose it to the outdoors, because indoor living conditions may be too restrictive to encourage blooming.
Silver Bay Aglaonema Care Requirements
Watering
This plant is native to the tropics, but that does not mean its soil should be wet all the time. Watering should be done thoroughly to wet all of the soil, to allow all of the roots to be reached by the moisture. Between waterings, allow the soil to dry out for the roots to have an opportunity to take in oxygen. This is important for the plant’s survival.
Do not let the plant stand in soggy soil for long periods of time, because this can lead to root rot which is detrimental to the plant’s overall health.
Water the plant by pouring water directly on the soil, rather than from above the plant. Getting the leaves wet makes the plant susceptible to fungal infections, which is something you want to avoid. If there is a saucer or tray under the pot that catches the overflow, make sure you empty it to avoid stagnant water affecting the roots.
Water the plant at least once every two weeks, and adjust depending on your local climate and weather.
Light
Aglaonema plants like bright, indirect light. If the plant is grown indoors, an east or west facing window should work. The light that enters these windows will not be so harsh that it burns the plant, but should be bright enough to keep the plant happy. If you just have south facing windows, you can position a curtain to diffuse the light. Be sure to turn your plant every couple of days so that all sides of the plant get their fair share of time in the sun.
Soil
As mentioned above, this plant appreciates moist but not soggy soil, so make sure the soil you are using is well-draining. You can make your own mix by adding orchid bark or perlite to normal gardening soil to enhance the drainage.
Temperature and humidity
Aim to keep the temperature around your aglaonema between 65 and 85 degrees Fahrenheit, and never let it drop below 50 degrees, if possible.
Although the plant can survive in low humidity, try to provide it with higher humidity; you might even consider purchasing a humidifier for your plants.
Pot
Choose a pot made of either clay or terracotta, because these materials allow air and water to flow through them better than plastic or steel containers.
When repotting, make sure the new pot is at least one inch wider in diameter than the old one. If the new pot is too big, it might retain too much water and you may end up overwatering the plant.
Fertilization
This plant is not too fussy about fertilization and does not need it very regularly. Normally, the minerals and nutrients present in the soil will suffice. If you do want to fertilize it, use a houseplant fertilizer once a month during spring and summer.
Remember not to overfeed the plant, because this can burn the roots. If you accidentally overfeed it, you can flush out the built-up minerals with water.
Silver Bay Aglaonema Propagation
Propagation using cuttings
This is the most commonly used technique for propagating aglaonema.
Using a sterile pair of scissors, take a stem cutting at least a few inches long. Grab a container, fill it with water, and place the cutting in the water. Leave the container for a couple of weeks in a spot that is warm enough and has bright, indirect light. This will allow the cutting to grow new roots.
Change the water as needed, and when the plant has grown a strong enough root system, you can transfer it to a small pot.
This method of propagation is best done during warmer weather.
Propagation using seeds
You can use fresh aglaonema seeds to add more of the same plant to your collection. The seeds can be found at the base of the plant’s mature flowers. Be sure to wash the seeds in acidic water before planting them.
Use a coco-peat soil mix, which is perfect for seed germination. Spread the seeds evenly on the top of the soil blend; you can then cover them lightly with more soil mix. The container with the planted seeds should get indirect light and be kept at room temperature.
After 50 to 60 days, if you have done everything correctly, the seeds should germinate.
Propagation using tissue culture
This method is also called division, because you are taking the new plant from the mother plant, dividing them so that one plant becomes two.
This method is the most successful but many people find it tricky. However, the more you do it, the easier it will become.
Once you have separated the new plant from the mother plant, plant it in its own container and give it partial sunlight. In five to ten days, it should be well-established.
Conclusion
The silver bay aglaonema is a low maintenance plant that is very easy to propagate and should be included in any novice gardener’s collection. Its leaves are beautifully variegated and they can be displayed either on tabletops or on the floor.
As long as you give the plant the right amount and frequency of water, medium to high humidity and bright, indirect light, it will happily brighten your space for many years to come.
Hoya kerrii plants are also called sweetheart hoya, Valentine hoya, heart-shaped hoya, lucky hearts, wax hearts, love hearts and hoya hearts. These succulent tropical vines, of the family Apocynaceae, are native to South China, Vietnam, Thailand, Laos, Cambodia and Indonesia. They are drought-tolerant and are easy to cultivate when given the right care and attention. This article provides some tips for the basic care of these plants, as well as how to propagate them.
Hoya Kerrii Plant Care
Hoya kerrii is flexible when it comes to light, but prefers to be placed near windows. These plants thrive in bright, indirect light, and may also survive with medium-light, although it could affect their growth. Do not expose them to direct light, as this could burn their leaves, and do not place them in a room with very low light, either. Surprisingly, the variegated varieties require bright light to maintain the variegation of their foliage.
Hoya kerrii plants are hardy and low-maintenance, with the ability to store water for some time between waterings. It is best to wait until the soil has dried out before you water them. Do not overdo the watering because their soil should never be waterlogged or boggy; this could lead to root rot. The pots should also have drainage holes at the bottom, so that any excess water does not stay stagnant in the soil.
If anything, it is better to underwater than overwater these plants. See to it that you use fast-draining soil that includes plenty of perlite and sand. As they do not like wet soil, water them only once a week during summer and every two to three weeks during winter.
Hoya kerrii plants like humidity, but they are also okay with just average levels. You can opt to have a humidifier at home, or you can place the plants in your bathroom. Mist them regularly, and you could also place them in a humidity tray filled with pebbles and water.
Hoya Kerrii Propagation
There are three ways to propagate Hoya kerrii:
The Ziploc or plastic bag method
This is the common method of propagating hoyas. First, fill a Ziploc bag to at least a third with indoor potting soil. Sterilize the soil first with hot water and allow it to cool down. Make sure the soil is moist but not saturated before placing it inside the bag.
Next, stick the plant’s cuttings into the soil and see to it that the stem and bottom third of the leaf are covered in soil. Once they are secured, spray the inside of the bag with water and seal it. This enhances humidity and creates a greenhouse effect to encourage growth.
Add water if the soil looks dry, but it is unlikely that you will need to, since the bag is sealed. Place the Ziploc bag near a bright light source or under a grow light.
Sphagnum moss
First, soak the sphagnum moss for a few minutes in hot water to make sure there are no insects or pathogens. Allow it to cool and squeeze off the excess water. Next, wrap the moist but not saturated sphagnum moss around the nodes of the cutting and pot it in a clear container. Bury up to the bottom third of the cutting to provide the plant with a proper anchor as the roots grow.
Spray the sphagnum moss with water if the top gets dry. Use a container with drainage holes, or you can also use clear glass containers.
This method yields good results as the roots tend to develop faster and it is easier to transition the propagation to regular potting soil. Since the moss is an inert material, there are fewer chances that it is harboring microbial pathogens.
Passive hydroponics with perlite
First, fill the potting container or a clear container with perlite. Pot the propagation just like with regular plants, burying the bottom third of the leaf to provide a proper anchor. Next, fill the container with water up to a third of the way up. Perlite is light and will float, so pour the water gradually to avoid overwatering.
Spray water on the perlite when it feels dry to the touch and add more water if the water level drops. Put the propagation near a bright source of light, just as you would with the earlier two methods. Substantial roots should grow within the first two weeks and you will need to add some nutrients if you intend to continue growing it using passive hydroponics.
Perlite is lighter and finer than vermiculite, and it mimics the texture of regular potting soil. It is also inert and there is less chance that it contains pathogens and fertilizers which could harm the new roots. It also does not hold moisture, so there is less chance that the roots will drown in too much water.
Conclusion
Hoya kerrii plants are popular indoor plants and are particularly sought-after on Valentine’s Day because of their heart-shaped foliage. These drought-tolerant plants are native to several Asian countries. They can be propagated using one of three methods, namely the Ziploc bag method, the use of sphagnum moss, or through passive hydroponics using perlite.
Philodendron pink princess plants, with the scientific name Philodendron erubescens, are commonly cultivated for their stunning dark green, waxy leaves and bright pink variegation. These trailing plants, of the family Araceae, can grow up to two feet tall and are native to Ecuador and Colombia. They are easy to cultivate and you can propagate them using one of the methods discussed later in this article.
Philodendron Pink Princess Plant Care
When it comes to watering your pink princess, only do so when the top one to two inches of soil have dried out. To test the moisture content, push your finger one or two inches into the soil. If there is no moisture, water the plant; if it is still damp, hold off from watering for another couple of days. This also helps avoid pest infestation, because pests like fungus gnats love damp conditions.
Water the soil until you see excess water draining from the pot to ensure that all the roots get sufficient nourishment. For these plants, thorough watering is better than shallow watering.
Philodendron pink princess plants thrive in areas with high humidity. If you are growing them indoors, it is ideal to have a humidifier to provide the required humidity level.
When it comes to potting mix, these plants prefer well-draining soil mixed with a few handfuls of perlite to enhance the drainage. Feed the plants with a liquid fertilizer once a month during the spring and summer, but make sure not to over-fertilize as it could damage or kill them.
Repot your plants at least every one to two years, especially if they are not growing well in their containers. If you notice that the roots are coming out of the drainage holes or are coiled on the surface of the soil, it is definitely time for repotting. Water the plants one day before you repot them, and water again after the process. Use new pots that are one size bigger and make sure they have good drainage.
These plants can be pruned to control their size and shape, but make sure you use sharp, sanitized scissors or shears. Cut above a node, where leaves and roots grow out from the stem. This will encourage the plant to produce new growth. Pruning also encourages the growth of new variegated leaves, if your plant is becoming too pink or too green.
Philodendrons have aerial roots that allow them to climb, and these trailing plants do best when provided with a moss pole.
Philodendron Pink Princess Propagation
Water propagation
First, take a cutting, including at least one leaf, using a pair of sharp, clean scissors. Cut just below a node, but make sure you do not cut through the node. Next, place the cutting in a jar of room-temperature water. The node, but not the leaves, should be under the surface of the water. Put the jar in place with bright but indirect light, and refill the water as needed.
After a few weeks, the roots should have grown to at least three inches long. Plant the cutting in a pot of the appropriate size, and care for it as you would with your other plants.
Propagation using potting mix
There are two methods of propagating using potting mix. The first is similar to water propagation, in which you take a cutting below a node, which is where leaves and roots grow out from the stem. Then, plant the cutting in an appropriately-sized pot filled with the moistened potting mix. Make sure that only the node, and not the leaves, are buried.
Place the pot in bright, indirect light and keep the potting mix moist to allow the roots to develop. However, make sure the soil is not too wet. Lock in beneficial humidity by placing a clear plastic bag over the cutting, but open it daily to let in some fresh air. Finally, check on the progress by gently tugging at the cutting. If there is resistance, it means a root system has developed and you can start treating the cutting as you would your other plants.
The second method is by propagating a stem with a node, but with no leaves. Cut a section of stem, including a node, and place it in an appropriately sized pot with moistened potting mix. Allow the cutting to lay flat on the mix and place the pot in bright, indirect light. Keep the potting mix moist but not very wet while the roots develop from the node.
Use a clear plastic bag over the top of the pot to seal in humidity, but open the bag at least every other day to let in some fresh air. You can transfer the cutting to a more permanent pot once little leaves have started to grow from the node, and care for it as you would your other plants.
Conclusion
Philodendron pink princess plants are widely popular for their waxy green foliage and bright pink variegation. These trailing plants are easy to care for, and if you follow the right measures to cultivate them they will grow healthily. Water them thoroughly to provide the roots with ample moisture, but make sure the soil is never waterlogged. These plants thrive in high humidity, and need to be pruned and repotted at least every one to two years.
Philodendron Florida ghost plants, with the scientific name Philodendron pedatum, belong to the family Araceae. Their stems are longer than other Philodendron varieties, and the leaves, said to be shaped like ghosts, start out white before eventually becoming yellow-green and dark green. These evergreen hybrid climbers are native to Colombia, the Caribbean, West Indies, Australia, Africa and Asia. They are easy to care for and can be propagated using methods such as air layering, soil propagation and water propagation.
Philodendron Florida Ghost Care and Propagation
Philodendron Florida Ghost Plant Care
Like most philodendron varieties, the Florida ghost has medium water requirements. Create a preplanned watering schedule and let the soil dry out between watering. Water the plants at least thrice weekly during summer and once weekly during fall and winter.
Avoid overwatering these plants, as stagnant water could lead to root rot disease. Droopy leaves also indicate incorrect watering techniques.
These plants prefer bright, indirect sunlight and thrive if placed indoors near a window. This way they will have access to sunlight but not be directly exposed to it, since too much sun could burn the foliage. Yellowing leaves could indicate overexposure to sunlight, while leggy stems suggest the plants are getting insufficient light.
Philodendron Florida ghost plants like temperatures of 50 to 95 degrees Fahrenheit. They are not winter-hardy, so make sure you move them to a warmer spot during cold weather. They also do not do well in dry, desert conditions, so always keep them hydrated.
Philodendrons are aroids, meaning they like a well-draining, airy potting mix. A suitable mix would be an indoor potting mix combined with peat, bark and charcoal, or you can purchase an aroid potting mix.
Feed the plants with fertilizer at least monthly in spring and summer. It is not necessary to fertilize on colder days, since winter weather reduces the plants’ nutritional requirements.
Prune yellowing and unhealthy leaves from the lower sides of the plants during spring and summer. This will ensure that both the plants’ appearance and their health are well-maintained.
Philodendron Florida Ghost Propagation
Propagation in potting mix
First, use clean and sharp scissors to cut below a node, which is where leaves and roots grow out of a stem. Choose a section with a healthy-looking leaf, or a few sections if possible. Stick the cutting into moistened potting mix or sphagnum moss and see to it that at least one node, without leaves, is buried. This is where the new roots will sprout from. Make sure it stays moist as the roots develop.
Next, place the cutting in bright but indirect light and provide some humidity. You can do this with a humidifier, or by placing a clear plastic bag over the top of the container. Remove the bag every few days to allow the cutting to get some fresh air.
Finally, gently tug at the cutting after a few weeks to test if roots have developed. If there is resistance, it means a root system is growing. Place the cutting into a permanent pot and start caring for the plant as you normally would with all your plants.
Propagation in water
For this method, the first thing to do is cut below a node, just like in the previous method. However, instead of placing the cutting into a potting mix, place it in a jar of room-temperature water. Make sure that at least one node with no leaves is under the surface.
Next, place the cutting in bright, indirect light and change the water whenever it starts to look grimy. Top up the water level when needed. After a few weeks, the roots should start to develop.
Finally, once the roots are two to three inches long, transfer the cutting to a permanent pot and care for it as you normally would.
Plant growers also recommend air layering and herbaceous stem cutting methods of propagation. Air layering is a tricky process often used to create hybrids, and is more suitable for experienced growers.
Conclusion
Philodendron Florida ghost plants are rare aroids with multi-lobed leaves that have a glossy white color when they are younger. As they mature, the plants start to develop shades of yellow and green until the foliage becomes dark green. These plants are neither winter-hardy nor drought-tolerant, so be sure that they are watered once the soil has dried out in between waterings. Transfer them to a warmer spot during cold weather, and prune off unhealthy leaves during spring and summer.
There are various signs to watch out for that may indicate that your prayer plant is dying. The leaves could be turning yellow or brown, they could be dropping off at an alarming rate, or the plant may no longer curl at night like it used to.
These symptoms could be due to overwatering, underwatering, excess sunlight, low temperatures, pests or low humidity. In order to save the plant, you need to correctly diagnose the problem so that your treatment can be fast and specific.
In this article, we will discuss the different reasons your prayer plant may be dying, and how to save it.
Why is my prayer plant dying?
Overwatering
Giving a prayer plant more water than it needs is one of the most common mistakes made by plant owners. The soil is the first thing you need to check if your prayer plant is ailing. If the soil is damp and waterlogged, you are probably watering too much or too often. It could also be that the soil you are using is not well-draining, or the container or pot you are using does not have drainage holes at the bottom. All these factors increase the probability of the plant’s roots sitting in soggy soil for prolonged periods.
If the roots of a plant are constantly soaking in wet soil, they will drown and rot. This leads to root rot, when opportunistic pathogens attack the rotten roots. Once the root system is affected, the rest of the plant will be compromised as well. The leaves will become soft and droopy and start to drop off.
You can save the plant by removing it from the soil and checking the roots. If any are brown or black, that means they have rotted and you should cut them off using sterile scissors. Let the plant air-dry on a tray lined with a paper towel. Once the roots have dried out, you can replant your plant in a pot with drainage holes, using a well-draining soil mix. Do not water the plant immediately after replanting; wait at least one week to give the roots enough time to recover and establish themselves.
When the plant has recovered, correct your watering techniques so that it does not get overwatered again. To know when to water, touch the soil in the pot. If the soil is dry, you can water the plant, but if it is still damp, wait one or two more days and check the soil again.
Underwatering
Another mistake plant owners tend to make is not giving the plant enough water and leaving the soil to dry out completely. The leaves will turn brown and crisp, and before you know it the whole plant will have shriveled.
If you think that underwatering might be the reason your prayer plant is dying, check the moisture level of the soil. If the soil is dry to the touch and feels hard, lift the pot up to feel whether it is much lighter than normal. Soil that is completely dry is much lighter than moist soil.
Fortunately, all you need to do to help an underwatered plant is give it water. For the initial watering, soak all of the soil until you can see the excess water flowing out of the drainage holes at the bottom of the pot. If the soil has become too dry, you may need to water the soil several times over the next couple of days to soften it.
When the plant has recovered, adjust your old watering schedule to one that is more favorable for your plant. If you used to water once every ten days, try watering every eight days and see if the plant likes that better.
Make sure you do not overcompensate and end up overwatering, because then you will face an entirely new problem.
Too much light
Another reason your prayer plant may be dying is if you are letting it get more sunlight than it needs.
Yes, plants need sunlight to nourish themselves and survive, but there is such a thing as too much sunlight when it comes to plants. This is most apparent in plants that are left in direct sunlight. A plant left out in the open under the heat of the full sun can get sun-damaged, and its leaves can get burned and develop yellow or brown patches.
There is nothing you can do about the burnt leaves, but you can cut them off to preserve the aesthetic of your prayer plant.
Transfer the plant to a different spot where it will only get indirect light for most of the day. Do not place it somewhere that is too dark, however, because this is also not good for the plant.
Low temperatures
Prayer plants are not big fans of cold weather. They tend to stop growing in these conditions, and their foliage and roots can freeze up in the cold. You also need to be careful about how much water you give your plant during the winter, because the wet soil combined with low temperatures can cause the roots to decay. It is advisable to water the soil when there is a good source of light so that it does not stay wet for too long. Keep the plant in the room with the highest temperature during the winter, and only water it in the morning – never at night when the temperatures drop too low.
Pests
The most common pests that attack prayer plants are mealybugs and spider mites. It is unlikely that a prayer plant will actually die due to pest infestations, but it is still definitely possible.
These insects feed on the juices of the plant, depleting its nutrients and leaving damage as they go. If the infestation is large enough, the leaves can fall off due to damage.
Check your plant every time you water it so you are always aware of the presence of any insects. If you need to use a magnifying glass for a better look, do so. Check the underside of the leaves, since this is where they often hide.
You can get rid of these pests by spraying them with water from your garden hose. The water should be enough to knock them off the foliage. You can also wipe neem oil on the leaves to kill them.
Low humidity
When the air in your home is too dry, the prayer plant will have a hard time thriving, especially during the dry winter. The plant’s leaves will dry out and turn brown. Do not place the plant in a spot where it will be hit by drafts from heating vents.
To save the plant, mist the leaves with water a few times a week, use a pebble tray, transfer the plant to the humid bathroom, or use a humidifier.
Conclusion
Your prayer plant is dying because there is an environmental factor that is causing it stress. To treat it properly and save it, you need to identify the exact cause of the problem.
The most common reasons your prayer plant may be dying are overwatering, underwatering, excess sunlight, low temperatures, pests and low humidity.
Cypress trees are evergreen conifers of the family Cupressaceae. There are about 12 species of these trees, and they are cultivated in the warm-temperate and subtropical regions of Europe, Asia and North America. They are pyramidal in shape, and can grow up to 80 feet tall. Like most trees, they are also susceptible to certain problems and diseases, some of which could threaten their survival without timely intervention.
How to save a dying cypress tree
Check the soil quality.
Declining health in a cypress tree could be caused by poor soil drainage. These trees thrive in well-draining soil, and if they are planted in poorly-draining soil, it could affect their overall health. Waterlogged soil also encourages certain cypress diseases.
If the affected trees are still young, transfer them to fresh, well-draining soil. If they are already mature and the soil is porous, you can add organic matter to enrich the soil; this will also prevent the growth of weeds. Raised mulch beds are also a great way of improving the soil structure and conserving moisture. Compost manure may be added to fertilize the soil.
Move the trees to an area where there is full sunlight.
Cypress trees love the sun and need at least eight hours of sunlight daily. If they are planted in shady spots they may struggle to grow and could eventually die. If you suspect lighting issues are affecting your tree, transfer it to an open, sunny spot. If the sunlight is blocked by the branches of surrounding trees, prune them back. Potted cypress trees should be placed outdoors where they can get plenty of sunlight and good air circulation.
Make sure you are watering your tree adequately.
Cypress trees require water to survive, just like any living thing. If you think your cypress may be underwatered, water it deeply enough to stabilize and revive it. The first sign of underwatering is browning leaves. However, also make sure you are not overwatering the tree, because too much water could result in root rot.
Inspect the soil to make sure it is neither too dry nor too wet. Proper drainage is vital, especially when transplanting trees. If you notice signs of drought stress in your tree, apply a layer of mulch over the soil to help retain moisture.
Water young cypress trees to at least three inches deep, at least three times a week. Reduce the watering frequency as the roots become established, usually after about three weeks.
Inspect the tree for diseases and pests, and treat these accordingly.
Cypress trees can die from diseases or pest infestation. Weakened trees, such as those that are overwatered, underwatered or have poor air circulation, are more vulnerable to pathogens that attack the trees and make way for damaging diseases.
Common diseases among cypress trees include the following:
Canker
Also called Seridium canker, this fungus attacks the tree’s bark and the leaves eventually turn yellow. It is easily detected, since it thrives in the cracks of the bark. To treat this, get rid of the infected branches and dispose of them properly to prevent the spread of disease.
Phytophthora root and crown disease
The disease is caused by soilborne fungal pathogens and can be detected by the discolored, wilted leaves that it causes. The leaves may turn red or yellow. You can save your tree from this disease by removing the infected bark and using a fungicide.
Needle blight
This nonparasitic disease turns leaves brown and occurs due to incorrect watering habits. It kills the tree’s feeder roots and also affects the leaves. Revive your tree by providing it with just enough water, and use an antifungal spray to eradicate the disease.
Pests can also invade cypress trees, and common ones include spider mites and bagworms. Bagworms can lay up to 1000 eggs and can cause a heavy infestation. Spider mites suck the sap of plant tissue and thus weaken the plants. The leaves may also turn brown.
Use a high-pressure hose and insecticidal soap to treat these pests; you can also use neem oil and pesticides.
Conclusion
Cypress trees are evergreen conifers that can grow up to 80 feet tall. They are also prone to various problems and diseases, and may eventually die if you do not address a problem in time. You can save your dying cypress tree by checking the soil drainage and quality, and ensuring your tree is getting full sunlight. Also, check your watering schedule, and examine the tree for diseases and pests, which should be treated promptly.
Boxwood shrubs, with the scientific name Buxus sempervirens, are dense, evergreen shrubs popular for landscaping. They are cultivated for their foliage and are often used to create formal hedges or borders. These plants can grow up to 20 feet tall and can tolerate full sun or light shade. However, they are also prone to diseases and problems to which they may succumb unless treated promptly. If you suspect your boxwood is dying, try following the steps below to revive it.
How to save a dying boxwood bush
1. Transfer your dying boxwood bush to a more suitable location.
Boxwood shrubs prefer partial shade and need to be protected from high winds. Thus, you should place them in areas where they are not exposed to harsh elements. Transfer your dying plant to a spot where it will be protected from strong winds and avoid full sunlight while it is recuperating.
2. Water your plant regularly so the soil remains moist.
Boxwood plants prefer moist soil, but to avoid root rot you need to make sure the soil is not waterlogged. Mulch is also beneficial to promote growth and provide essential nutrients.
Clear the surrounding area of fallen leaves and other debris, as this can promote the growth of fungal diseases.
3. Prune the plant after the winter season.
Boxwood plants tend to turn brown during winter, but this is a normal occurrence. They may get frost-damaged during this season, and can also lose moisture. The stems and branches may crack, which could look ugly come springtime.
Prune the brown and cracked branches in the spring to encourage new growth and to help revive your plant. You can even cut the whole plant back to the stem.
4. Trim the inside of the branches.
You can also revive your dying plant by pruning the middle section, as this is an ideal location for diseases and fungi to multiply. The canopy inside becomes humid when the branches are crowded. Trim the inside area during early spring to ensure new growth and to allow air to circulate throughout all the plant’s branches.
5. Check for diseases and pests, and treat accordingly.
Boxwood plants can be susceptible to fungal diseases, which could lead to plant stress and death. Volutella fungi could cause orange-colored leaves and decay, while blight and other fungal diseases like Phytophthora root rot could also infect the plants. Pests such as spider mites and box caterpillars can also ravage your plants.
Sanitize your pruning tools with a mild bleach solution to prevent the spread of diseases. Avoid overwatering, which could also encourage the growth of fungal diseases. Before you provide any treatment, make sure to do your research or, better yet, consult a plant expert. Common treatments may include fungicide for fungal infections and pesticide or neem oil for pests.
Reasons your boxwood bush is dying
It is due to diseases caused by fungi.
Root rot is caused by a fungal infection, and the common signs include loss of foliage, poor growth and bark separation. The plant may also be dying in the middle. Avoid using compacted soil where water can collect or become stagnant, as this exacerbates the problem.
Blight is another fungal disease, characterized by leaf spots, browning leaves and leaf drop. It usually starts when the plants are still growing in the nursery, and can spread from plant to plant through unsanitized tools. To avoid the spread of the disease, clean up the clippings after pruning and disinfect all your pruning equipment.
It is due to pests.
Another reason boxwood plants can wither and die is the presence of pests. These include spider mites, leafminers and psyllids. Plants that are under stress become easily affected if there is a pest infestation.
Boxwood leaf miners can damage plants as they dig into the leaves and create blister-like structures. Severe infestations could ravage the plants and lead to death. Spider mites, meanwhile, feed on leaf surfaces and cause yellowing leaves. Psyllids can cause cupping of the leaves, although most plants can withstand this damage.
It is due to winter burn.
Winter burn occurs when the roots are in frozen soil and are unable to replenish the plant’s water. This usually happens during extremely cold weather. Apply anti-desiccant spray to act as a protective coating and to reduce water loss.
Boxwood plants are low-maintenance and rarely need to be fertilized, but if the leaves are turning yellow they may be iron-deficient. Provide mulch to ensure the right pH balance and to regain the healthy green color of the leaves. Minimal pruning is sufficient; too much pruning could lead to too-thick bushes and can reduce air circulation.
Conclusion
Boxwood shrubs are low-maintenance plants that are cultivated for their foliage. These evergreen shrubs are prone to certain diseases and pests, but you should be able to revive them by providing their optimal living conditions. This includes an ideal location where they are protected from harsh elements, regular watering to ensure that their soil remains moist, pruning after the winter season, and treating pests and diseases at the earliest signs to avoid severe infestations.
Cycads, with the scientific name Cycadophyta, constitute the order Cycadales. They are prehistoric plants with woody trunks and a crown of hard, stiff, evergreen leaves. These slow-growing gymnosperms are also referred to as sago palms, sago cycads, king sago, and Japanese sago. Like all plants, your cycad may suffer from problems and diseases, and without prompt intervention, you may not be able to save it. If you suspect your cycad is dying, try following the steps below.
How to save a dying cycad
Make sure the growing conditions are suitable.
To save a dying cycad, see to it that you are providing the correct growing conditions. These plants need well-draining, moist soil to grow healthily. When grown outdoors they prefer sandy soil, but if you are growing yours indoors, try mixing sand with peat to improve drainage. Soil alone retains too much water, which causes problems like root rot.
These plants should get at least four to six hours of filtered sunlight per day. Outdoor cycads require full sun to partial shade. Since these plants only grow three to 10 feet tall, larger trees may block the sunlight and may need to be pruned back.
Cycads thrive in warm temperatures, and may develop freeze damage with yellowing or brown fronds if temperatures drop too low for them. Remove dead and damaged fronds so that the plants can redirect their energy to the new growth in spring.
Resolve nutritional deficiencies by fertilizing the plants.
To revive your dying cycads, feed them with a slow-release, balanced fertilizer.
Nutritional deficiencies can lead to dying fronds, and potassium or magnesium-deficient plants tend to have yellowing fronds. Spray the foliage with a chelated iron spray so that the new growth will be green, but do not expect the discolored leaves to return to their healthy color.
Manganese-deficient cycads may have yellow fronds that turn brown, also called frizzle top. To fix this, add manganese sulfate, as indicated on the package instructions, to the soil around the plants. Water lightly after applying the fertilizer. Remove fully dead fronds, but do not prune any with green growth, as this can stress the plant.
Cut away rotten root tissue.
Overwatered cycads are prone to root rot, wherein the roots die and turn dark brown or black with rot. Root rot could damage and kill the entire plant, but if it is not too severe the plant can still be saved. Prune away the rotten root tissue and dust the roots with a root stimulant.
Seal the wounds with agricultural tar before repotting the plants, and choose a potting medium that will not retain too much moisture.
Check for pests and eradicate them.
Pests like cycad scale insects could attack and damage your plants. These pests can cause yellowing fronds and plant dieback. Treat and eradicate these critters by applying horticultural oil or fish emulsion.
Cycad plant care
1. Make sure to grow the right cycads for your location.
Some varieties of cycad prefer tropical climates, while others want a dry, humid location. Certain species, like the Zamia cycads, cannot thrive without a greenhouse if you live in a temperate or cold area. Do some research first on the right species or varieties to grow for your specific area.
2. Always maintain good drainage.
Make sure that the soil has good drainage and is never waterlogged. Use sand, gravel or pumice to promote drainage and avoid very fine sand. You may also amend the soil to provide good drainage and repot plants that are grown in containers. A succulent mix is a good option for your cycads.
3. Provide adequate sunlight.
Cycads thrive when there is adequate sunlight. If you do not provide enough sunlight for these plants, they may end up withering and dying.
4. Use the proper fertilizer.
The right fertilizer for cycads is a slow-release NPK fertilizer, or nitrogen, phosphorus and potassium, at a ratio of 3-1-2 or 3-1-3. Fertilize every three to four months depending on the formula and release rate.
5. Water the plants according to their needs.
Water the plants adequately but do not let the soil stay too damp. Allow the surface to dry out first, before watering the plants again. The watering frequency for plants in temperate climates should be once or twice a week.
Water every other week during the winter, and for plants in desert-like locations adjust the frequency according to the soil’s moisture content. Mounding is recommended, especially in tropical areas. Ideally, you should use water systems with timers as opposed to overhead sprinklers.
6. Provide proper ventilation.
Cycads in greenhouses should have proper ventilation to avoid mold and rot. Oscillating fans or exhaust fans could help achieve a well-ventilated setting.
Conclusion
Cycads, or sago palms, are popular prehistoric plants that are said to have existed way back during the time of the dinosaurs. They are drought-tolerant plants, but can succumb to diseases or pests if not treated promptly. You can help revive your dying cycad by providing optimal growing conditions and resolving any nutritional deficiencies. Also prune away rotten and damaged plant parts to encourage healthy new growth.
Bromeliads comprise around 3590 known species of the family Bromeliaceae. These monocot flowering plants are native to the tropical Americas, and some species are also found in the American subtropics and tropical west Africa. They have thick foliage that forms a natural rosette of sword-shaped leaves. Like any plant, bromeliads are susceptible to certain problems and diseases, and may succumb and die without prompt intervention.
How to save a dying bromeliad
Examine the plant thoroughly.
Check the soil moisture around the dying plant. Bromeliads acquire moisture through their center cup as well as their roots, and like the soil moist but not wet. If the soil is too wet and the roots sit in stagnant water, the plants may start to wither. Poke your finger into the soil to check the moisture: it should not be dry more than about a half-inch below the surface. If the soil is dry, increase your watering; if it is wet, hold off on watering for a few days.
Switch to distilled water.
Remove all the water from the plant’s center cup and refill it with distilled water. If your bromeliad fails to thrive despite having water in its center cup, remove the water and flush the cup. This will reduce the chances of fungal infection and will clear away any organic debris.
Adjust the light level.
See to it that you monitor the light your plant receives. Plant experts note that when plants are not receiving enough light, they will often have leggier stalks and will lose the bright color in their leaves. Inversely, plants with brown spots and dull leaf colors may be getting too much light. Move your plant to another location if necessary to adjust the level of light it receives.
Misting your plant.
Mist your plant by spritzing the leaves with water at least every two to three days. This will increase the humidity level around the plant. You can also raise the humidity by placing river rocks on a large plate and pouring water over the rocks. Place this humidity tray under the bromeliad’s pot and the evaporating water will provide humidity.
Ensure that the plant stays warm.
Position the plant in a sufficiently warm spot, away from heating and air conditioning vents where temperatures might fluctuate. Keep outdoor plants away from external dryer vents and other sources of hot or cold air. Bromeliads thrive in temperatures of 70 degrees Fahrenheit during the day and 55 to 60 degrees Fahrenheit overnight.
Prune the plant.
Cut the bromeliad’s blooms when they start to turn brown. With a pair of shears or scissors, prune the part where the blooms join the center of the plant’s cup. Most plants will only bloom once, and cutting off the blooms will allow them to redirect their energy to live longer and grow more pups.
Tips to care for bromeliads
1. Provide them with bright, indirect sunlight.
Bromeliads thrive in areas where they can receive bright light. Ideally, they should have indirect light so as not to develop sunburn. Place the plants near a window but away from direct sunlight if you are keeping them indoors. If you intend to put them outdoors, position them in a spot where they can get indirect sunlight.
2. Bromeliads should only be grown outdoors if you are in a tropical climate.
If you live in a tropical country, these plants will thrive outdoors. However, if you live in an area with a colder climate, they are best grown indoors if you want them to thrive and produce pups.
3. Water the plants when the top two inches of soil are dry.
Bromeliads are drought-resistant and can get by with minimal water. Make sure that the top two inches of soil are dry before you water them, as too much water could lead to root rot and leaf discoloration. Make sure that the soil drains well and the pots have drainage holes.
4. Ensure correct humidity levels.
Bromeliads are tropical plants and need to be kept in a humid environment. The humidity level should ideally be around 60% to maintain healthy plants. Humidity trays can help maintain these levels, or you may also opt for the misting method.
5. Use water-soluble fertilizer for your plants.
Bromeliads are slow-growing plants and a water-soluble fertilizer can help boost or stimulate faster growth. Just make sure that you do not over-fertilize the plants, as this could damage them.
Conclusion
Bromeliads are popular for their vibrant colors and unique, sword-shaped leaves. Like most plants, they are susceptible to certain problems and diseases and may become sickly or even die if not given proper care and attention. You can help revive your dying bromeliad by providing it with optimal living conditions, including the correct level of light and the right type of water. Prune your plant to encourage healthy growth and increase its humidity levels by misting it.
Elephant ear plants, with the scientific name Colocasia esculenta, are widely cultivated in tropical and subtropical regions. These fast-growing tropical perennials belong to the family Araceae, and are native to southeastern Asia and the Indian subcontinent. They are also known as taro, and have huge, heart-shaped leaves. Like most plants, they are also prone to problems and diseases which could damage them or threaten their survival if not promptly addressed.
How to save a dying elephant ear plant
Ensure that your plant is getting the correct level of sunlight.
Leaf scorch is often the culprit if your elephant ear is looking worse for wear. The leaves get burnt along the edges, which can affect the appearance of the foliage even if it does not necessarily kill the plant. Provide ample light, but make sure to shield the plant from very high temperatures or when the sun is at its hottest. Provide a shade, such as a garden umbrella, to shield it from the sun’s rays, or transfer the plant to a shadier part of the garden.
Water and feed your plant to help revive it.
Your elephant ear could be dying because it is dehydrated or nutrient-deficient. If you notice dry, crinkly leaves, provide a deep watering to remedy this, but do not let excess water sit stagnant in the pot.
Plants that are starved of nutrients could also wither and die. Remember to feed your plant with a high-nitrogen plant food during springtime and mid-season to ensure healthy foliage.
In cold weather, bring your Colocasia plant indoors. If its leaves wither or die, clip them off and unearth the tubers. Wrap these sphagnum moss and re-pot them in early spring.
Check for pests and diseases, and treat the plant accordingly.
Pests like aphids and mealybugs could ravage and weaken your plant. These pests suck sap from the plant’s tissue and may kill it if left unchecked. Eradicate them by washing or spraying the leaves with horticultural soap.
Fungal diseases can also affect your plant, especially if it has developed root rot due to waterlogged soil. Treat this with a fungicide and transplant the affected plant using fresh soil mixed with one-third peat moss.
To know whether the plant is on the brink of death or can still be saved, look for signs of green in the stems and roots. If all of the roots or stems appear rotten and mushy, it is unlikely that the plant can be saved.
If there are still green stems and roots, trim back the dead parts to encourage new growth, taking care to leave parts of the stems intact. If the plant’s roots are still alive, do not trim the stems down to the roots.
Determine the reason the plants are dying, so that you can remedy it properly. Common reasons include pests, diseases or watering issues.
Reasons your elephant ear is dying
1. You are growing the plant in the wrong area or hardiness zone.
Elephant ears thrive in tropical or near-tropical climates. They like humidity and warmth, so if you live in a country with cold weather, it is not ideal for this type of plant and they may not survive. Likewise, elephant ears in very dry areas will crave humidity and their leaves may dry out or droop.
Here are some ways to increase the humidity level in the air:
Mist the plants regularly using a spray bottle.
Use a humidifier to maintain humidity if the plants are indoors.
Place a water source near the plants, such as a pebble tray or a bowl of water.
Keep indoor plants in a room where there is more humidity, like the kitchen or the bathroom.
It could be due to too little or too much sun.
If the plants are exposed to too much sun, the leaves may turn brown and the plants may eventually die. Similarly, plants that are exposed to too little sun may turn yellow and also wither. Provide indirect light and partial shade for the plants to regain their healthy luster.
2. It could be due to water issues.
Elephant ear plants thrive in moist soil, but they do not like waterlogged soil. Push your finger into the soil to check that it is damp but not soggy. Water your plant if the soil feels dry, but just enough to soak the plant and hydrate it. Soil with standing water is not good for plants with tubers, such as taro plants, as this can encourage rot and fungus.
3. It could be due to nutrient deficiency.
Elephant ear plants prefer nutrient-rich soil and, in its absence, they could slowly die. Replenish the soil with nutrients by adding fertilizer at least every month, although the frequency will vary depending on the soil type and plant variety. Indoor taro plants need to be fertilized more frequently.
4. It could be due to transplant shock.
Elephant ears that are transferred to a new environment are likely to suffer from transplant shock. They need time to adjust, especially if you have brought them from the outdoors to the indoors, or vice versa. Try for a gradual transition; do not subject the plants to sudden changes that could harm their health.
5. The planters are too small for the plants.
Elephant ear plants may also die due to cramped planters. These plants can grow really big, and the volume of soil in small pots may not hold the level of nutrients they need. Large plants should be placed in planters at least 17 inches in width and depth, and 36 inches in diameter. You can increase the pot sizes as the plants grow.
Conclusion
Elephant ear plants are tropical perennials native to southeastern Asia and the Indian subcontinent. These plants are also referred to as taro plants, and like most plants are prone to problems and illnesses that could threaten their survival if not given prompt attention. You can help revive your dying elephant ear by providing optimal growing conditions, including correct levels of light and adequate water. Also feed them with high-nitrogen plant food, and eradicate diseases and pests using pesticides and fungicides.